How to Configure DHCP When Using VLANs in OPNsense


Table of Contents
When you are new to creating VLANs on your network, you may wonder about the necessary steps in order to create a properly functioning VLAN. If you set up OPNsense with one WAN and one LAN interface, it is kind enough to set up a basic configuration for the LAN interface with DHCP enabled and a single firewall rule that allows access to the Internet. You can consider this configuration to be a “flat” network, which means that every device is on the same network and can communicate. This is how all consumer routers are configured by default to make it easier for non-technical users to connect all of their devices.
I briefly touched on configuring DHCP in a previous how-to on how to create VLANs in OPNsense, but I want to focus on DHCP in more detail especially since everything needs to be configured from scratch when creating a new VLAN.
Configuring the VLAN Interface
In order to configure DHCP for a VLAN, you must first enable IPv4 or IPv6 on the VLAN interface. Until you do this, you will not be able to enable DHCP. There will be no VLANs to select in the “Services > DHCPv4” or “Services > DHCPv6” menus (except for maybe the default LAN interface depending on how you initially set up your OPNsense router).
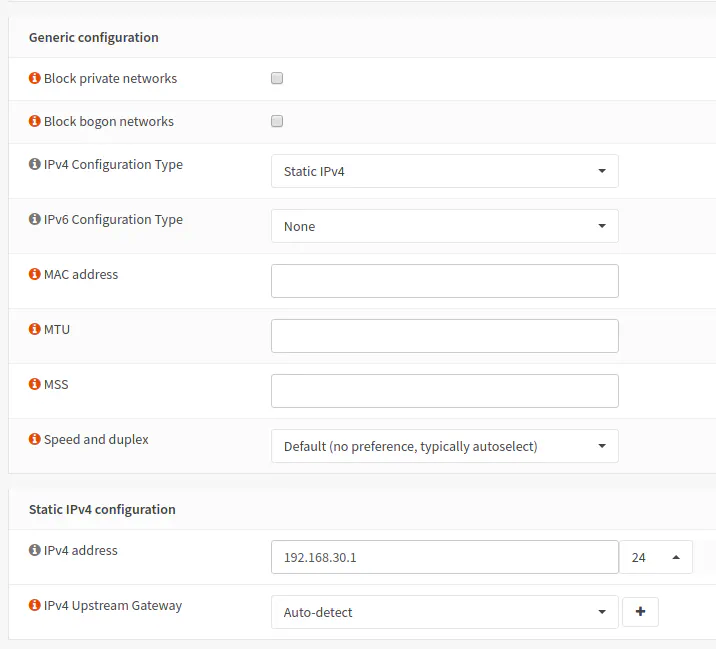
Go to the “Interfaces > [VLAN]” page where “VLAN” is the name of your VLAN. Ensure you have static IPv4 selected if you are using IPv4. Note that setting this to “Static IPv4” does not mean you have to statically assign IPs to all your devices. The static IPv4 assignment is used for the VLAN itself. You are simply defining the IP range used by the VLAN and the VLAN interface IP.
In the “Static IPv4 Configuration” section, enter the IP address of the VLAN interface and also the CIDR prefix. The interface IP address usually ends in “.1”. This will be the gateway IP address used by devices on your VLAN. As for the CIDR prefix, “/24” means use the range 192.168.30.0-192.168.30.255. Only the last octet of the IP address is used by the VLAN, which allows for a total of 256 addresses in the network with 254 addresses that are usable by clients on the network.
I did not configure IPv6 in this example but for the IPv6 settings, you may want to use “Track Interface” instead of “Static IPv6” since your ISP can dynamically assign IPv6 addresses to your VLAN interfaces (at least the first portion of the address – your OPNsense router will assign the second half within your network). I discuss this in more detail when I experimented with IPv6 with Comcast Xfinity.
Enabling the DHCP Service
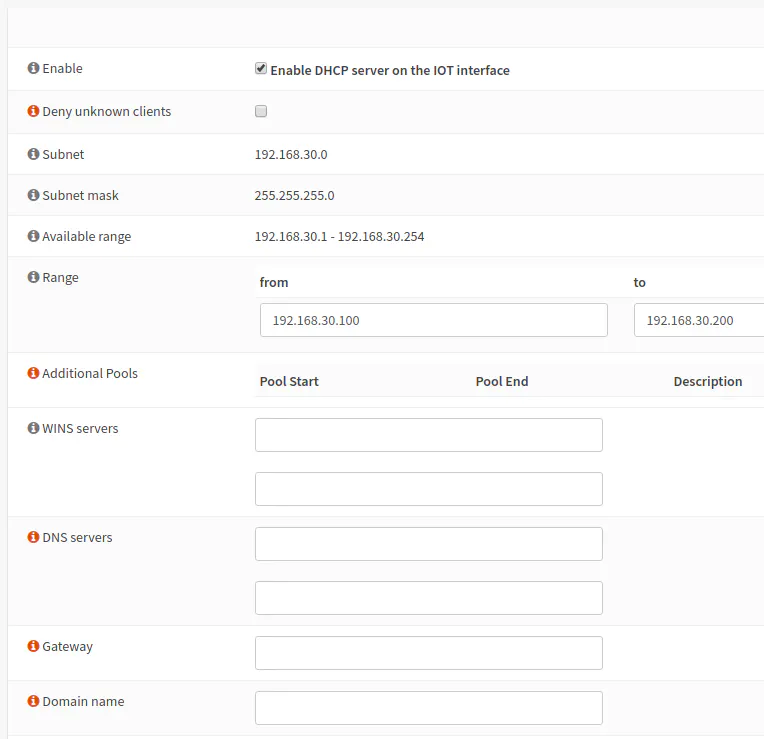
Now that the VLAN interfaces are configured properly, go to the “Services > DHCPv4 > [VLAN]” page where “VLAN” is the desired VLAN to configure. Click the “Enable the DHCP server” checkbox to enable DHCP for the VLAN. Notice that the available IP address range is 192.168.30.1-192.168.30.254, which is defined by the “/24” CIDR prefix. In the range boxes, you may enter any range you like within the available range (except for the interface IP of 192.168.30.1). I used 192.168.30.100-192.168.30.200 in my example. If you define any static DHCP entries (as will be discussed below), you need to make sure it is outside the range so you might not want to make the range the entire usable address space.
Clicking the enable box and setting the IP address range is the minimum you need to enter for the DHCP settings for each VLAN. Other settings you may want to enter is the DNS servers, gateway, and domain name. Alternate DNS servers may be useful if you want to apply DNS filtering only to specific VLANs or you could bypass filtering if you do not want to use the default DNS servers. Using an alternate gateway may be useful for having some VLANs use a secondary WAN interface or to use a gateway connected to an external VPN service. Setting a domain name for a VLAN allows you to use a domain name for devices on that VLAN that is different than the system default. That setting may be useful for public facing portions of your network that are (hopefully)isolated from your internal network(s).
(Optional) Creating Static DHCP Entries
While enabling DHCP is convenient for having devices automatically receive IP address information, you may also use the DHCP service to create static entries. If you are hosting various services in your network or perhaps if you are restricting access to a particular device, it may be a good idea to use static DHCP mappings especially if you need to refer to the IP addresses instead of the hostnames. If you are only using hostnames, you may not really need to care about static IP addresses as much. Keep in mind your firewall configuration when deciding to use static DHCP mappings. Reporting and log files may be easier to interpret with fixed IPs if the IP address is the only device address which shows up in the logs.
Another advantage of creating static DHCP settings is that it allows you to override certain settings per device. If you want a device to bypass DNS filtering, for instance, you can set a different DHCP for that device. In addition, using static DHCP mappings removes the need to go to each device to manually configure each IP address. You have a centralized location to manage all static IP addresses.
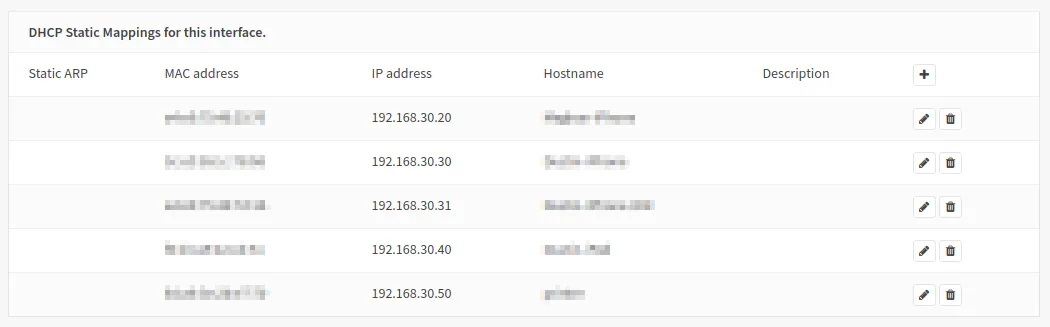
At the bottom of the DHCP configuration page for each VLAN (“Services > DHCPv4 > [VLAN]”), you can see a list of static DHCP mappings. You can add a new mapping by clicking the “+” icon.
When you open the page to create a new static DHCP page, you will need to fill out a few basic settings. The MAC address, IP address, and hostname are the most important info to enter. If you enter a hostname, it will override the default hostname that is set up in the network device. So static DHCP mappings could be useful if you are OCD and like having consistent, pretty hostnames (since some devices cannot be changed or easily changed). Whatever hostname you enter in the static mapping is the hostname you can use to access the device on the network (see the “Considerations” section below).

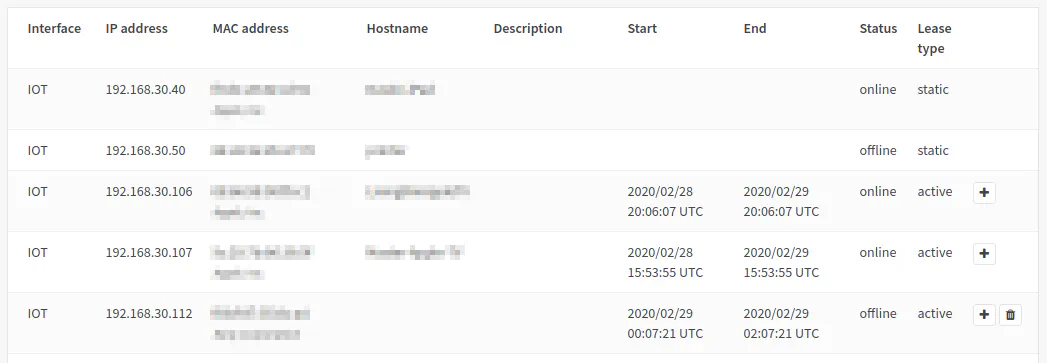
An alternate way to add static DHCP mappings is to go to the “Services > DHCPv4 > Leases” page and click the “+” icon beside the desired device. The hover text will say “add a static mapping for this MAC address”. This is my preferred way to add a new static DHCP mapping because it prepopulates the MAC address field. I would have to go back to the “Leases” page anyway to find the MAC address so I might as well go there first. It is convenient to get it from the “Leases” page rather than trying to go to the device itself and writing down the MAC address.
Considerations
When using DHCP, make sure you are only using one DHCP server on a network at a time. Otherwise you may run into issues with IP addressing. It is ok to run more than one DHCP server if they are on separate VLANs/networks.
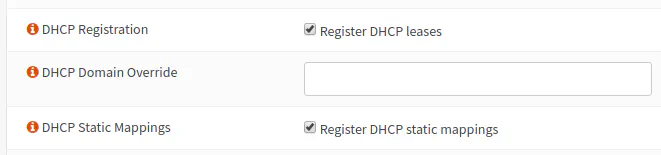
If you want to be able to refer to the hostnames of devices on your network that are set up to use DHCP (devices that are set to automatically receive an IP address) and you are using the default Unbound DNS, you need to enable the “DHCP Registration” option on the “Services > Unbound DNS > General” page. If you want your hostnames of your statically assigned devices to be resolved, enable the “DHCP Static Mappings” option. Without these options, you will not be able to refer to your devices by their hostnames on the network.