Segment Your Wireless Networks Using VLANs
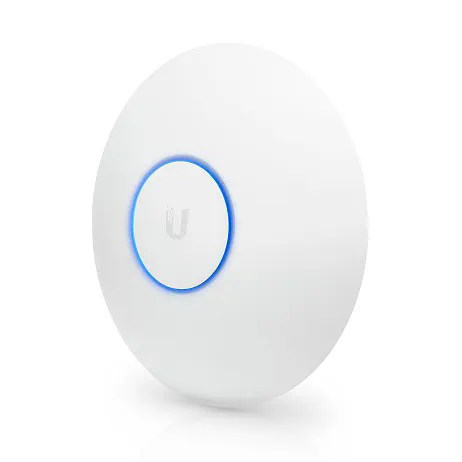
Table of Contents
One great feature of enterprise ready wireless access points is VLAN support. This feature allows greater control over the flow of data on your wireless network as with wired networks. Quality of service controls may be applied, the broadcast domain of the wireless network may be reduced, and traffic on the network may be isolated. VLAN support on your wireless access point also allows you to extend your wired VLAN networks to your wireless VLAN networks. You may find it very useful in your home network to combine some of your wired and wireless devices into the same network.
One example would be a guest network where you may have wired laptops or PCs and wireless mobile devices from your visitors. If you make use of port isolation on your network switch for wired devices and guest network isolation on your access point for wireless devices, you can provide even greater security since you can effectively prevent (or greatly reduce) the likelihood of devices within your guest network from communicating with one another. This is a great way of providing Internet access to each device in your guest network without also allowing access to other parts of your network or other devices on the guest network.
For my home network, I purchased the Ubiquiti UAP-AC-LR as my main wireless access point. I thought for home use it would work well for mobile phones and tablets due to its advertised special antenna design. It seems to work great in my ~2,800 sq. ft. home as I am able to get a 5GHz signal in most of my house, but I am not always able to get a 5GHz signal in the basement. Until we have the basement finished, we are not in the basement enough to require maximum bandwidth on our mobile devices (I may need to add another one for the finished basement in the future when we are spending more time there). Also, I am able to get a decent WiFi signal anywhere on our 0.27 acre property.
The only place I had trouble receiving a good signal with my phones/tablets (but not my laptop because it has a better antenna) is in my storage room that is under the garage. It has a thick corrugated metal ceiling which is below the concrete garage floor. The metal ceiling plus concrete kills the WiFi signal, so I bought the Ubiquiti UAP-AC-Lite to put in the storage room. One nice thing about having more than one access point is that my devices can roam seamlessly between the two access points. I can stream my baby monitor video on my iPad in the basement, and it will continue to stream in the storage room without interruption, which is fantastic.
UniFi Controller Software
Configuring VLANs per SSID is pretty simple to do using the UniFi Controller software. The controller software may be installed on a PC, server, or other devices such as the Raspberry Pi or you may purchase the UniFi Cloud Key. When I first set up the UniFi controller, I used a Raspberry Pi to save a little bit of money, but I also like that I can install additional software or repurpose the Pi later should I choose to do so (RetroPie, anyone?).
Once I switched from Ubuntu to Proxmox on my server, I decided to move the UniFi controller to a LXC container. The benefits of hosting it on my Proxmox server is that I do not have to worry about the microSD card failing (they are not designed to be as durable as hard disks for running operating systems), running WiFi speed tests perform better especially when using the Raspberry Pi 3 due to limitations of the Ethernet controller, and backups of my UniFi controller are easier on Proxmox.
VLAN Configuration
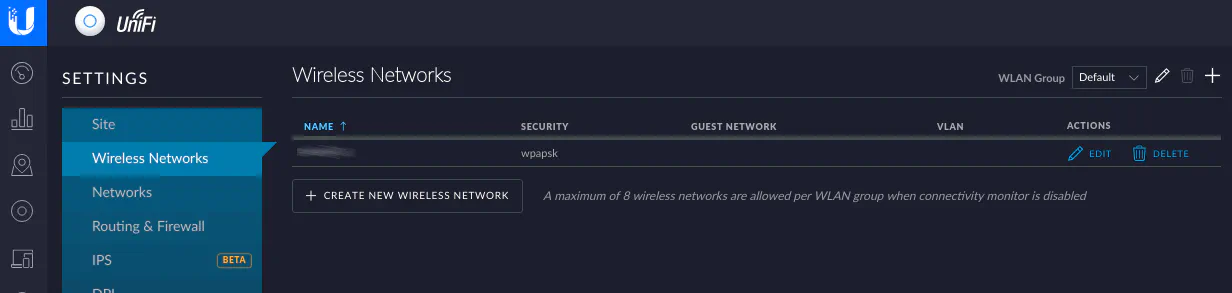
Go to the Settings page in your UniFi Controller and click “Wireless Networks”. This is where you may have already configured your wireless networks when you first set up your network. If so, click “Edit” otherwise click “Create New Wireless Network”.
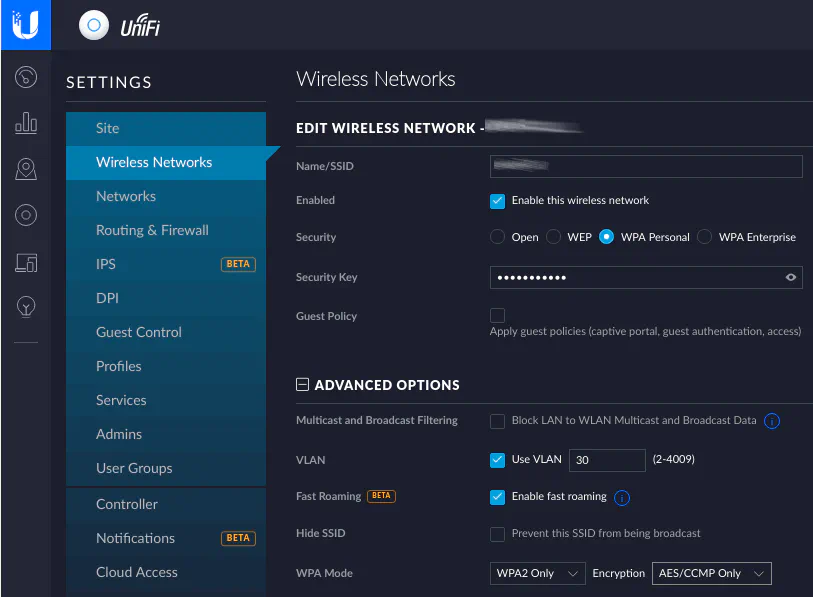
Once in your Wireless Network settings, expand the “Advanced Options” and enter the VLAN ID of your choice. In this example, “30” is the VLAN ID.
That’s all you need to do to set the VLAN for your wireless networks!
There may be some other options for you to consider in the advanced section such as “Fast Roaming” (only if all your devices support it according to the description/warning displayed). Some recommend against enabling fast roaming since it can cause issues, but I have not noticed any issues with it enabled. However, it should be noted that I do not roam often between my two access points since one is located in my storage room in the basement.
One other thing that I came across in my research that might be useful especially if you have iOS devices (and possibly Android) is to set the “DTIM 2G/5G Period” values to “3” instead of the default value of “1”. This should in theory (and hopefully in reality) help increase battery life on iOS devices connected to the access point.
