How to Create a VLAN Only Interface in OPNsense

Photo by TheDigitalArtist from Pixabay
Table of Contents
I was recently assigned a laptop to use for work so I wanted to create a new VLAN only for my work laptop to keep it segregated from my own network. On my OPNsense box, I have extra unused interfaces. I decided to take the opportunity to utilize one of those extra interfaces instead of adding yet another VLAN to my main LAN interface. There are two ways I could utilize the unused interface: use the physical interface with no VLAN tagging or assign a VLAN to the physical interface.
I thought about using the first approach, but since I already use the physical LAN interface for untagged network traffic on my switches, I did not think that adding another untagged interface would go well with my existing setup especially since I want to isolate it from my other networks (however, if I used a separate network switch, that would certainly work). Therefore, I decided to use the second approach since I am already utilizing VLANs on my switches. One question I had was, ‘Do I need to create a new interface for the physical interface and also assign a VLAN to that physical parent interface since VLANs have to be associated to a physical interface?’ It turns out that the answer is no! You can create a VLAN interface and leave the physical parent interface unassigned.
Create a new VLAN
Go to the “Interface > Other Types > VLAN” page. Click the “+” button to open the create VLAN page.
You will see a number of options. For the “Parent interface” that is the physical interface in which you want to add a VLAN. You will notice in the highlighted screen below that the unused interfaces will not have the interface name beside the interface (such as “[WAN]” or “[LAN]”).
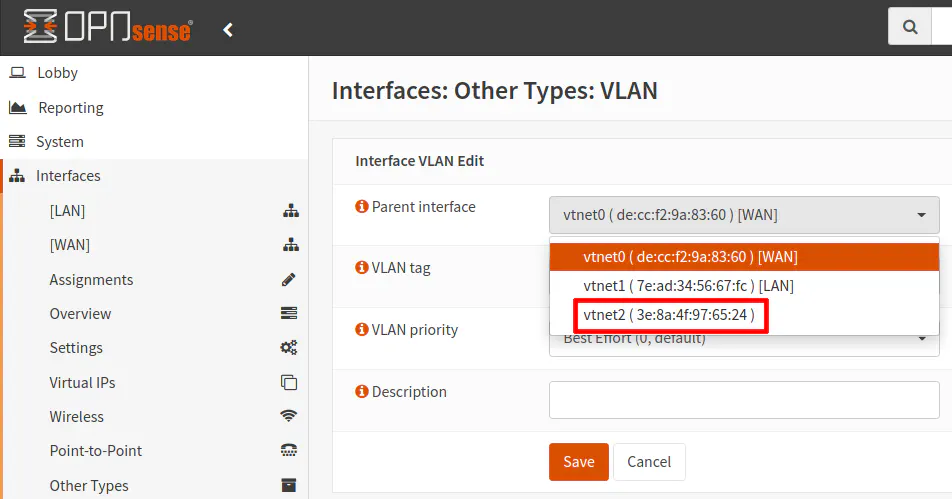
Enter the “VLAN tag” which is a number between 1 and 4094. This will be the same number you use on your network switch(es). You may leave the “VLAN priority” at the default unless you perhaps want to set it to a higher/lower priority. I am not sure how much this affects network performance. Finally, add a “Description” fore the interface. This description will be what is shown in the side menu as well as other pages which list the interface name(s). I like to use short interface names and tend to uppercase them to make them stand out in the menus, but of course naming conventions are a matter of preference.

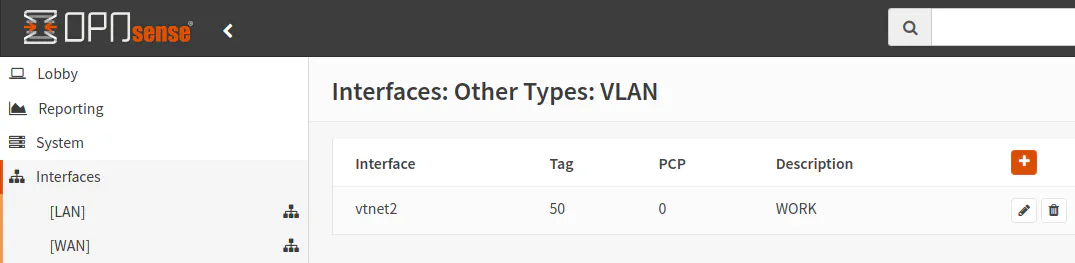
Once you have finished entering the information on the VLAN page and clicked “Save”, you will see it in the list of VLANs.
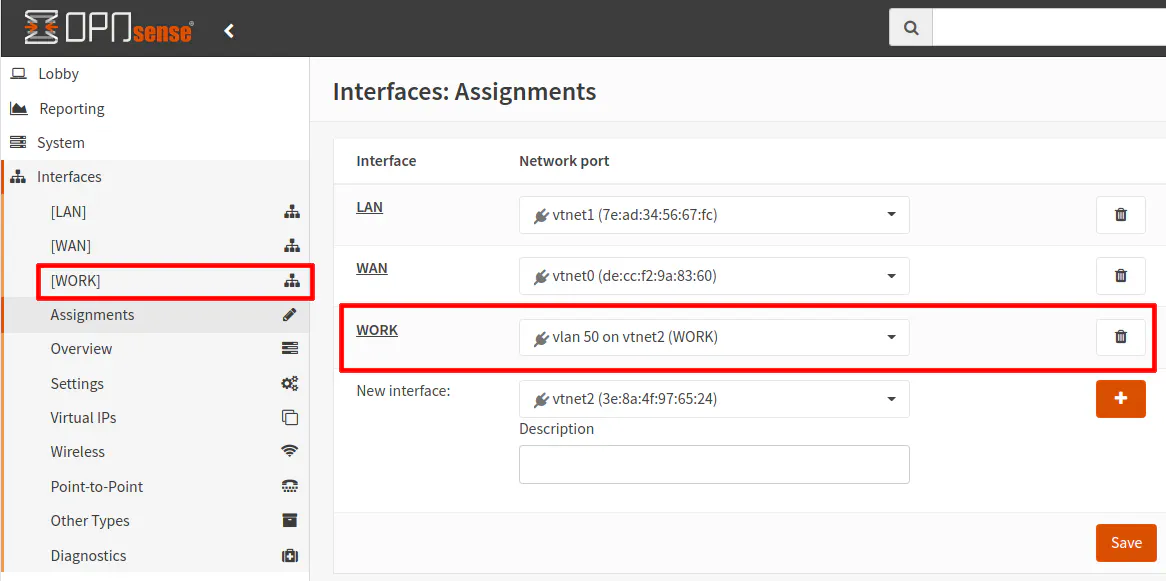
Assign the VLAN to a New Interface
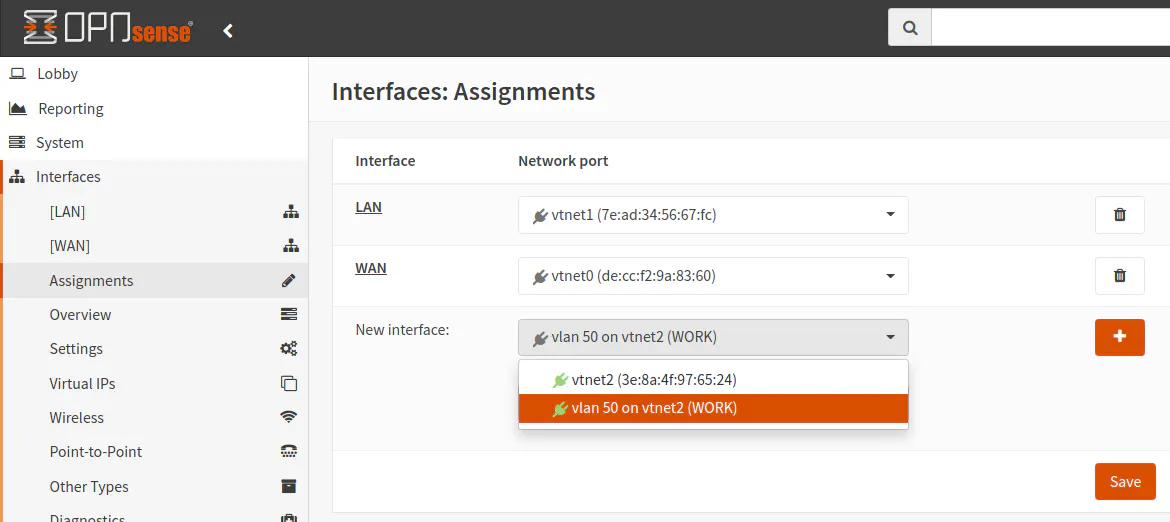
Now that the VLAN has been created, you will need to create an interface for it. This is exactly the same step you would you take if you are assigning the physical interface without using VLANs. When you use VLANs, you have an extra step of defining the VLANs before you can start assigning interfaces to them. On the “Interfaces > Assignments” page, you will see a section called “New interface” (Note: if you do not have any unused interfaces, you will not see the “New interface” section).
In the dropdown menu, you will see a list of all unused interfaces. In this example, the physical interface is “vtnet2” and the VLAN is “vlan 50 on vtnet2” so it is very clear which one is the VLAN. Make sure you select the VLAN and not the physical interface. Once you have selected the VLAN, click on the “+” button. Do not click on the “Save” button first.
After clicking the “Save” button, the new interface will show up in the list of interface assignments. You will also see the new interface in the side menu.
At this point, you can treat that interface the same as any other physical or VLAN interface you have created already. Although this how-to is not extremely difficult, it may be helpful to new users of OPNsense by providing a quick explanation that physical interfaces do not have to be assigned to an interface if you wish to only use VLANs on that interface. While VLANs must be associated to a physical parent interface, you do not have to create an interface for the parent interface. This approach should work well when you want to use multiple interfaces on your router/firewall box and utilize VLANs on your network.