How to Run OPNsense in a Proxmox Virtual Machine for Evaluation Purposes

Photo by ColossusCloud from Pixabay

Table of Contents
Have you wanted to take a look at OPNsense without installing it to a dedicated machine and/or deploying it as your primary home router/firewall? The easiest way to evaluate OPNsense without installing it on separate hardware is to virtualize it. I wrote about running OPNsense in VirtualBox. Now that I run Proxmox on my server instead of Ubuntu (I still use Ubuntu for many of my LXCs/VMs on Proxmox), I wanted to run OPNsense on Proxmox so I may use when writing content for this site. I need to take screenshots of the web interface as well as the ability to change settings without impacting my home network.
You may have various reasons for wanting to virtualize OPNsense. I hope this how-to will help get you started if you are planning to use Proxmox. However, I am writing this how-to more from an evaluation point of view so it will not likely work well for you if you wish to deploy a virtualized OPNsense as your primary router/firewall. You will likely need to tweak the interfaces and other options in order to make this set up function well as your primary router. Also, there may be some options you may need to set to gain the most performance from the virtualized router such as setting the multiqueue option for your virtualized NICs. For purposes of this how-to, I am more concerned about creating a functioning OPNsense VM than absolute performance.
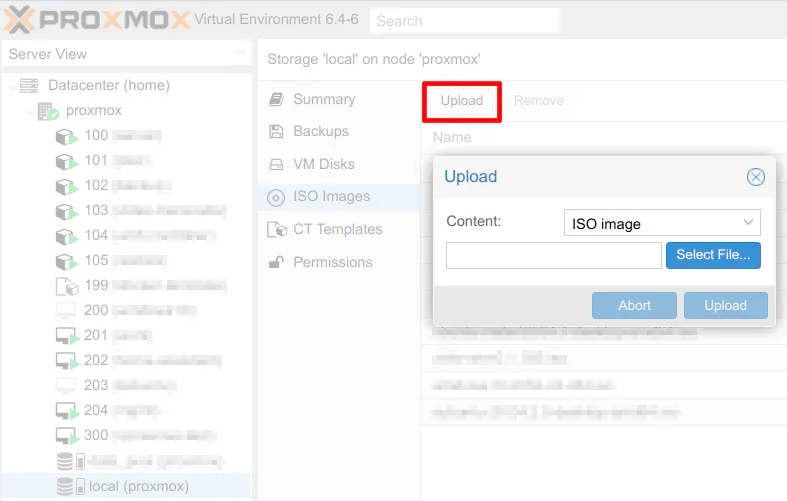
Upload the OPNsense ISO Image to Proxmox Server
Before setting up the VM, you must download the DVD ISO version of OPNsense so it can be uploaded to your Proxmox server. Proxmox only seems to support ISO images for creating virtual machines via the web interface. By default, Proxmox allows ISO images to be uploaded to the “local” datastore.
Create a New VM in Proxmox
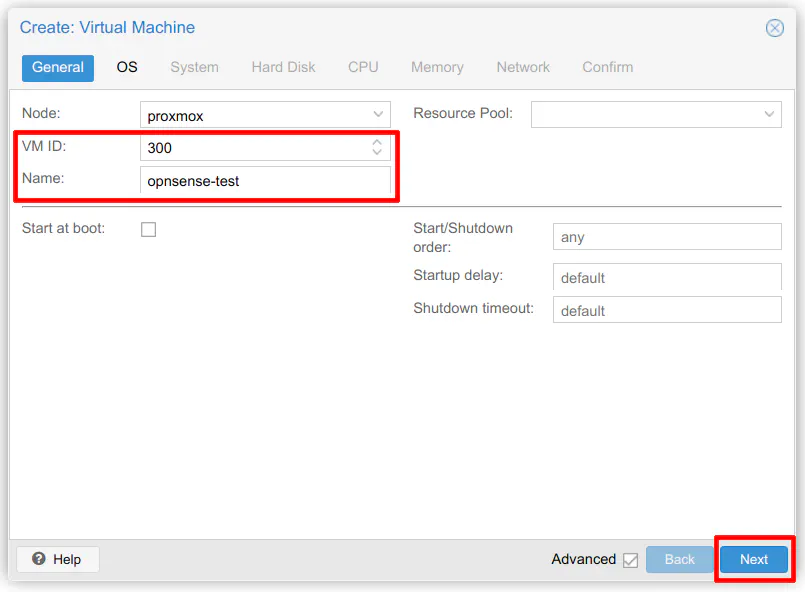
To create a new virtual machine in Proxmox, click the blue “Create VM” button in the upper right hand corner of the web UI. If you have more than one Proxmox node, you can select it in the “Node” dropdown. Most new users to Proxmox will likely only have one Proxmox server or at least not have them clustered. The main settings you will need to set is the “VM ID” and the “Name” of the VM. You may use a ID/naming convention of your choice.
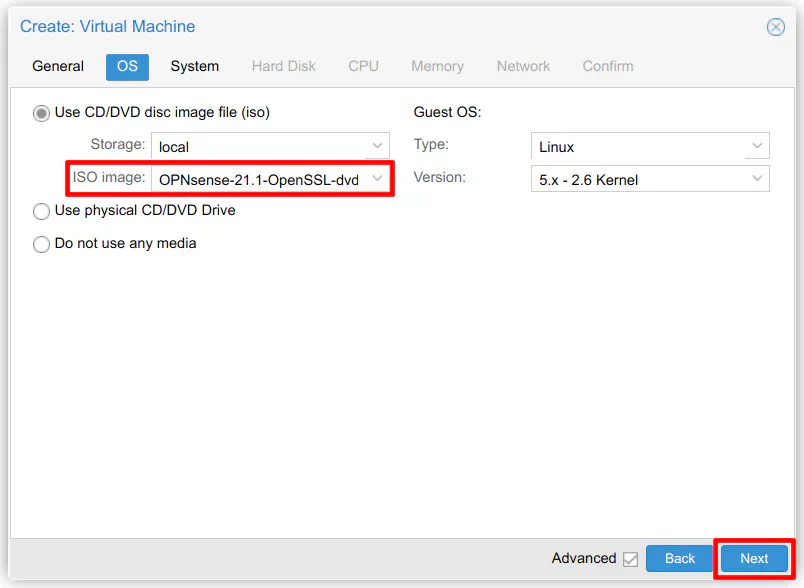
In the “OS” section, you need to select the OPNsense ISO image that you uploaded to Proxmox. You may leave the “Guest OS” at the default settings.
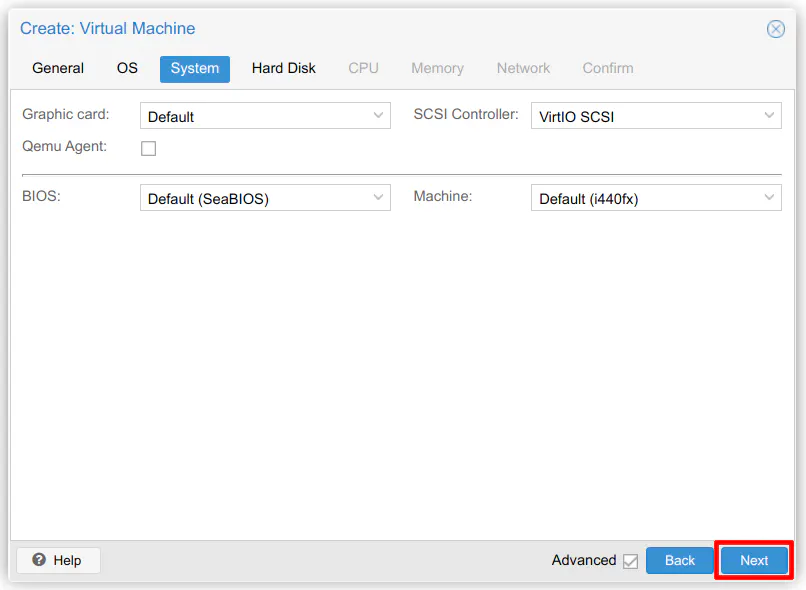
The “System” settings may be left at their default values.
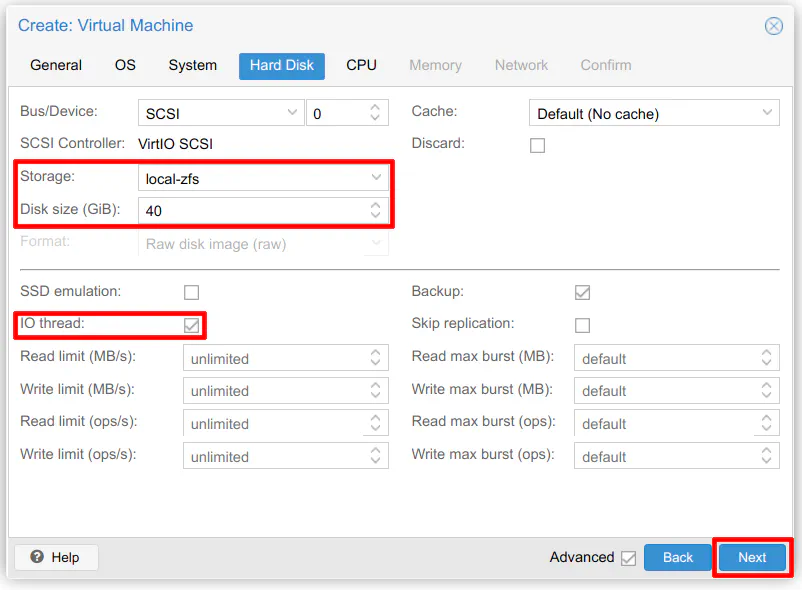
Choose the storage location where you want to store the VM. Proxmox by default creates a “local-lvm” or local-zfs" storage on your main boot disk depending if you configured your drives to use LVM or ZFS. If you created additional datastores, they will show up in the dropdown. I prefer to run my VMs/containers on my “local-zfs” storage location since it is on my fast NVMe drive (I have my VMs/containers replicated to a second Proxmox node so I am not as worried about losing my data).
Enter the amount of disk space you need for the VM. OPNsense recommends 40 GB so that should be a reasonable value. The “IO thread” option allows an additional CPU thread to be allocated per storage device for IO/disk operations. This option may be more useful when you have more than one disk assigned to the VM.
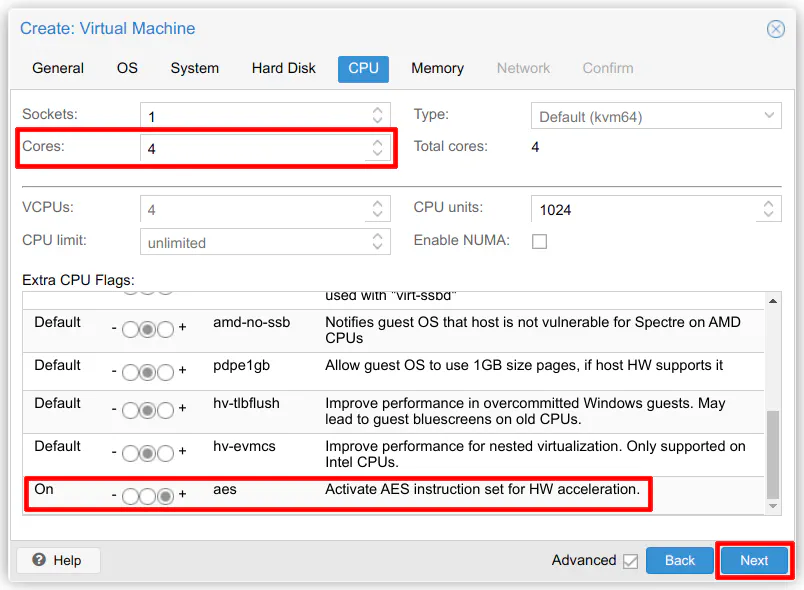
A good recommended value for the number of cores for OPNsense is 4 cores. For evaluation purposes, you could likely get away with fewer cores. Like with other virtualized resources, you can tweak this value later if you need more or less cores. You may want to set the AES instruction set in the advanced options when you are using the virtualized instance as your main router.
If you are running several heavy weight services such as Sensei, 8GB of memory should be the minimum value that you should use. It does not usually cause a problem if you allocate too much memory, but if you see the VM is using all of the allocated memory, you can increase the size later. I often take a best guess on the initial memory usage and tweak it later to be slightly above the maximum typical memory usage.

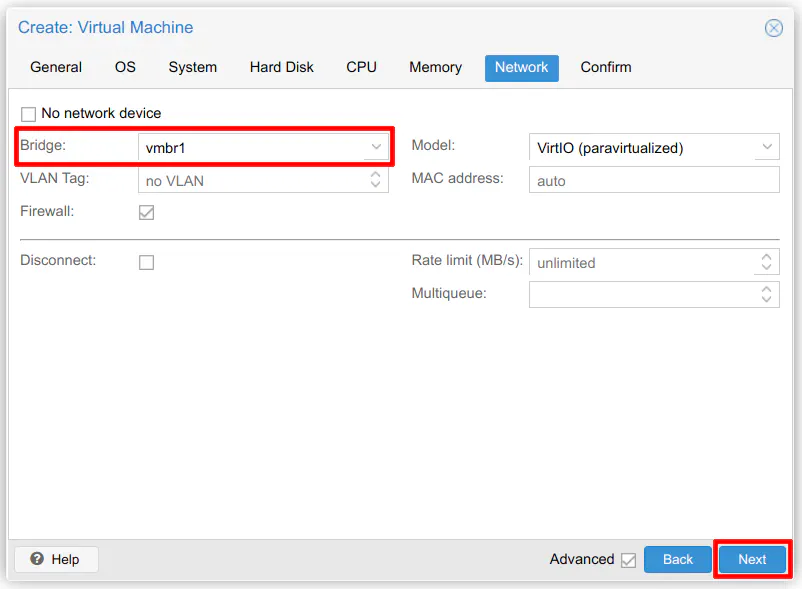
For the network, choose one of your bridges that you have created on the “System > Network” page. You will see the physical NICs in your machine (often listed as something like enp8s0 – yours may have different numbers, etc) as well as any bridges that you have created (usually in the format vmbr0). On my system, I have the motherboard Ethernet port as well as a 4 port Gbit NIC installed. I have created a bridge for each device so I have a total of 5 bridges that I may use for my containers/VMs.
Each physical port is connected to my managed switch and each is assigned to a different VLAN on my network. This allows me to run containers/VMs on any of my VLANs so I can put the services in the network which is the most appropriate. Although you may accomplish the same thing with a single NIC in Proxmox using VLANs, the configuration is simplified when using separate physical ports. All you need is a bridge for each port. No VLAN configuration on Proxmox is needed since the switch handles the VLAN tagging and DHCP will assign the appropriate addresses to the containers/VMs as though new physical systems are being plugged into the network. What I love about this setup is that all I need to do is pick the appropriate network where I want my container/VM to exist by picking the appropriate bridge and everything else is handled automatically. Another advantage of separate ports, of course, is increased bandwidth. You are not bottlenecked by a single interface (unless you are using a 10Gbit interface).
All of that to say, for this example I am planning to use 2 separate bridges for the WAN and LAN interfaces in OPNsense. This will be similar if you are using it as your main router since you need at least 2 interfaces to keep things simple. Since I have more than one bridge set up for different VLANs, I am going to put the WAN in one network and the LAN in another network where I can easily access it from my PC. The WAN needs to reside in a network which has Internet access if you wish to download updates/plugins.
Important: You will want to make sure you assign the LAN interface to a network that is different than your main LAN network because by default the LAN interface gets assigned a static IP address of 192.168.1.1 which could interfere with your home network because of a conflicting IP address. If you wish to have the LAN interface reside on the same 192.168.1.0 network, you could try setting the network device to disconnected before starting the VM so that the LAN interface is not active. It is ok if your WAN interface is active because it uses DHCP by default and should not conflict with your home network.
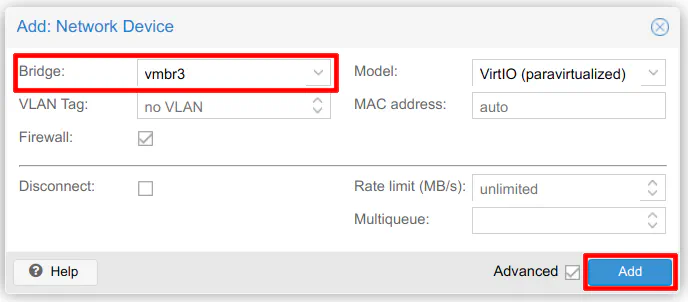
Choose one of your two bridges. You can only add one bridge during the wizard but more can be added after the VM has been created.
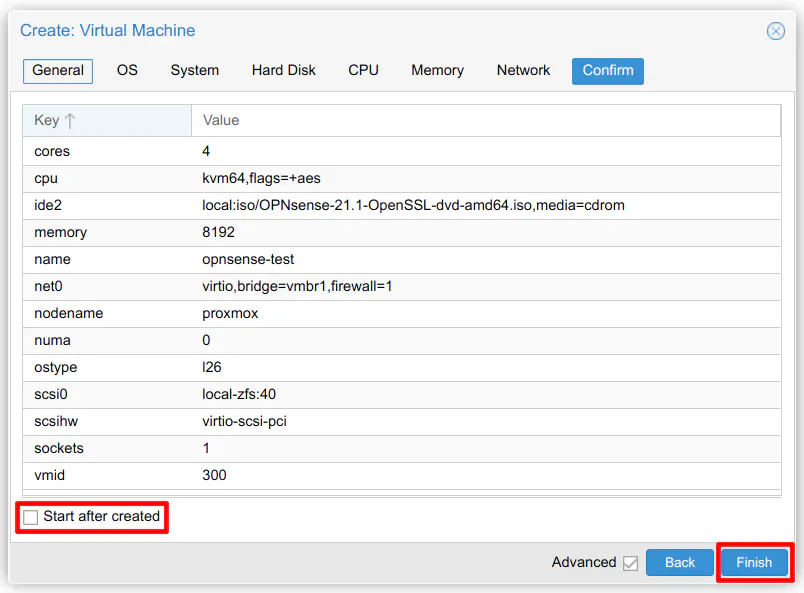
On the confirmation screen, make sure you do not start it after creating the VM since we need to adjust the settings to add at least one more network interface. Click “Finish” to create the VM.
Add another Network Device
Click on your new OPNsense VM from the left pane. Then click on “Hardware > Add > Network Device”.
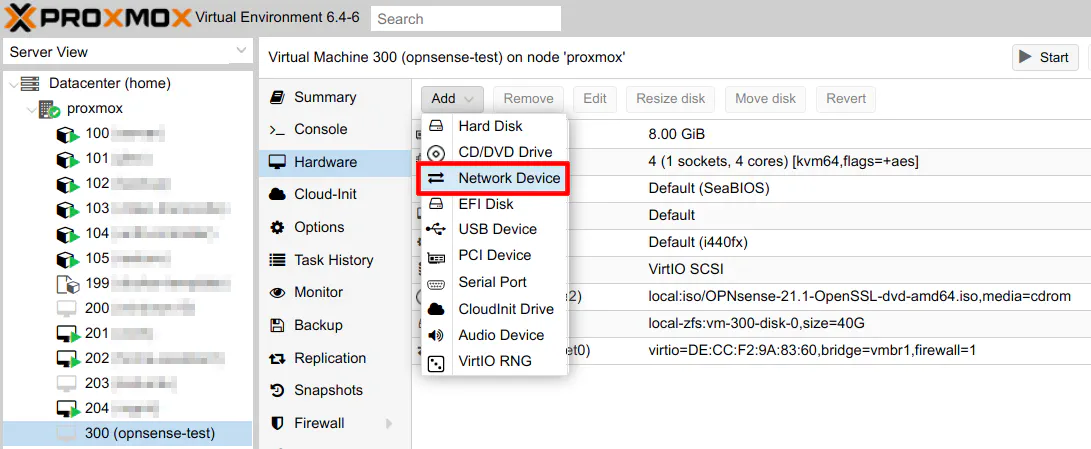
Now select the second bridge you wish to use for the WAN/LAN interface. Click “Add” to finish adding the device.
Start the OPNsense VM
To start the VM, ensure you have clicked on the OPNsense VM from the left pane and click on “Start” in the upper right hand corner of the page.
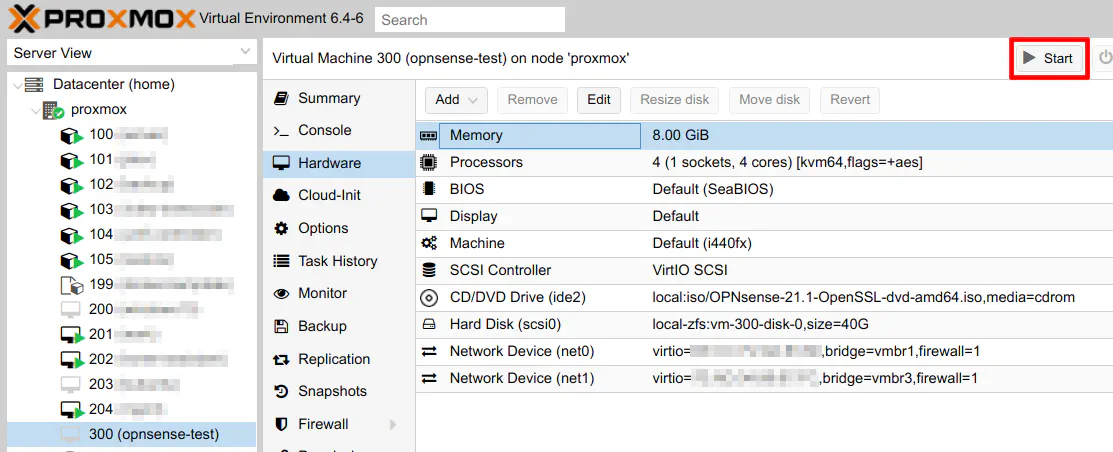
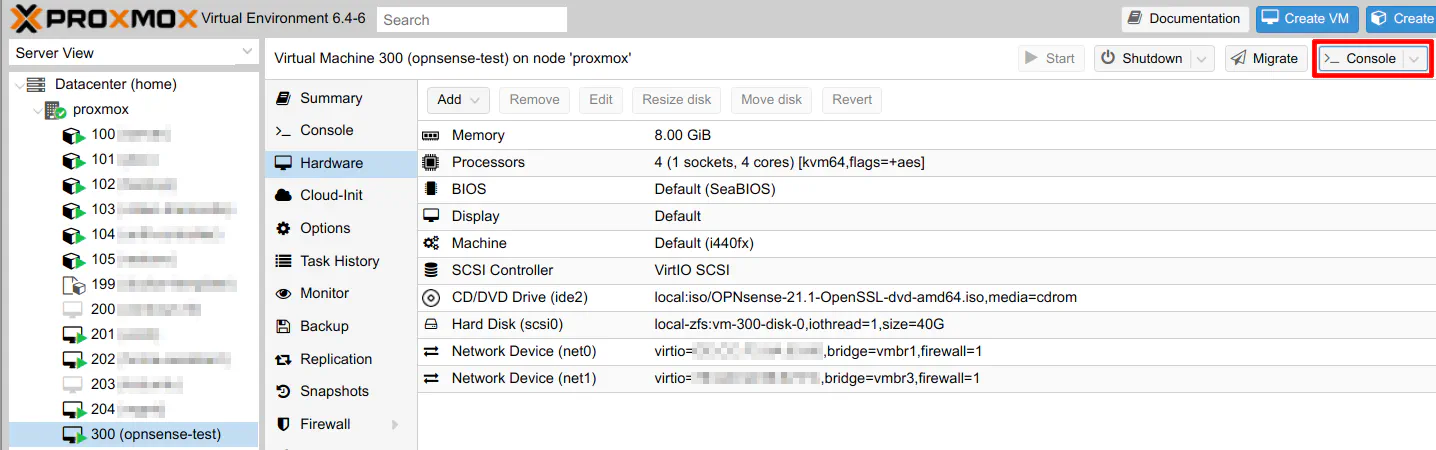
Once you start the VM, you should see the icon for the VM change to be a black screen with a green arrow. Click on the “>_ Console” button in the upper right hand corner of the page to open the console to the VM.
Install OPNsense
The OPNsense installer has several screens especially if you wish to manually set up the interfaces during installation, which is what you will want to do to ensure the proper interface is selected as the WAN/LAN. I tried the automatic setting and it, of course, chose the wrong interfaces.
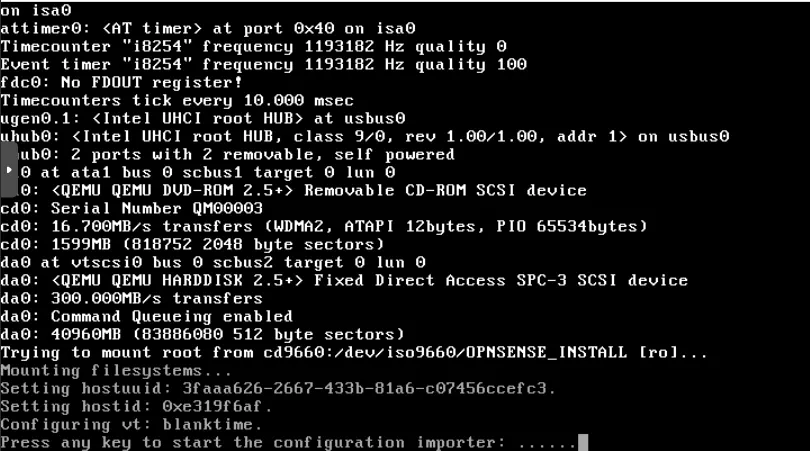
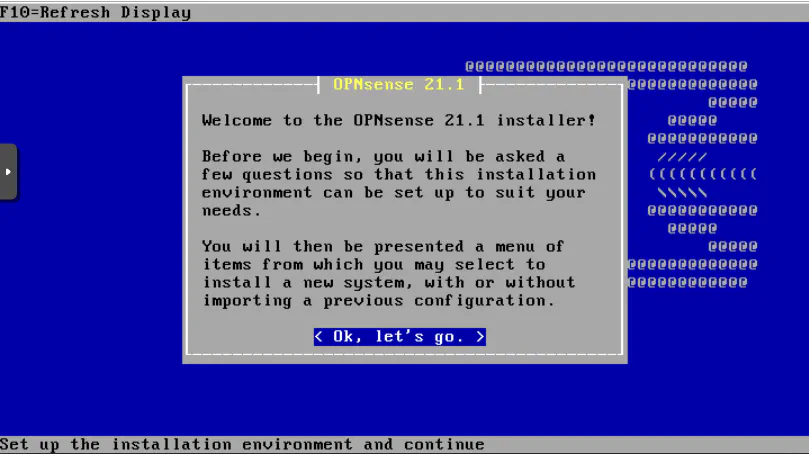
The first thing you will see is the message “Press any key to start the configuration importer”. Do not press any key since you are setting up a new installation from scratch.
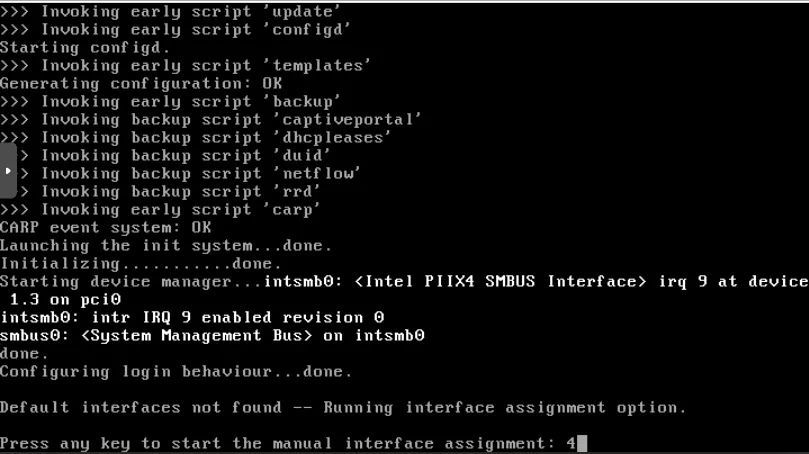
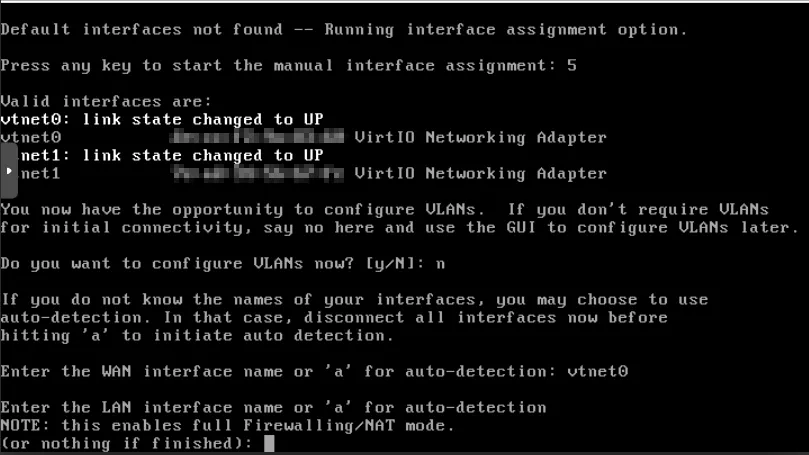
Press any key when it prompts to start the manual interface assignment.
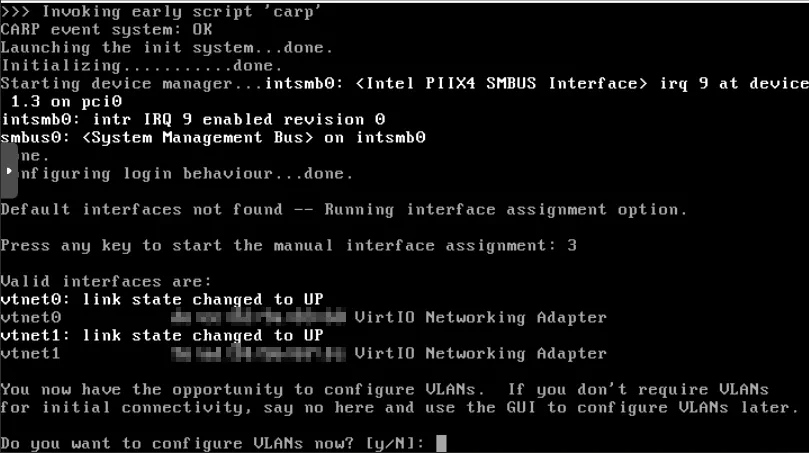
You will see both of your interfaces as their MAC addresses. You may need to refer to the MAC addresses in Proxmox to double check you are selecting the right interface (you can see the MAC addresses on the “Hardware” page of the VM). Enter “N” for configuring VLANs (or press “Enter” since “N” is the default value).
For the WAN interface name, enter “vtnet0” or “vtnet1” depending on the interface you want for the WAN.
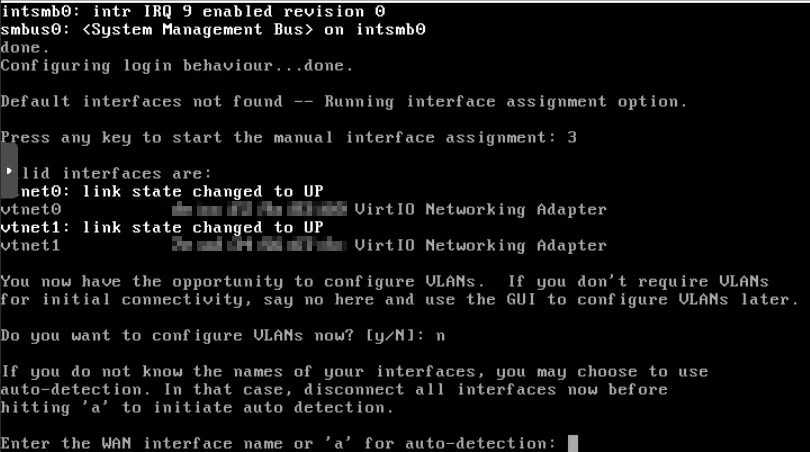
Enter the LAN interface name. It will be the other interface you did not use for the LAN. You will see the note about enabling the firewall/NAT mode once you enter the LAN interface. That is ok.
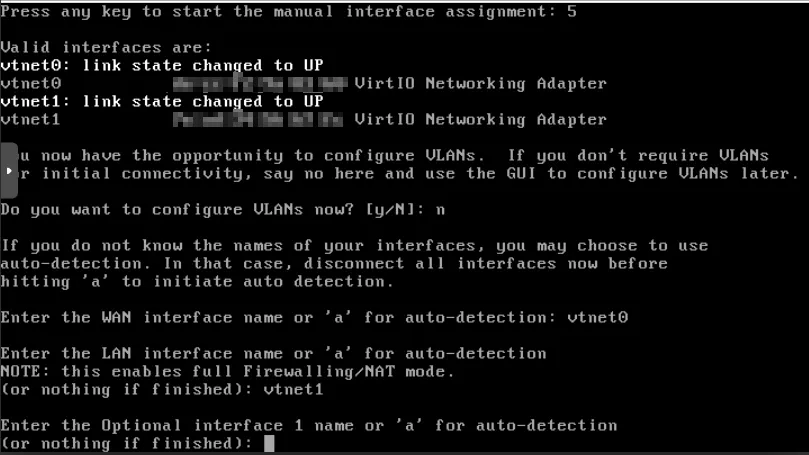
For the optional interface, just press “Enter”. There are no additional interfaces to set up.
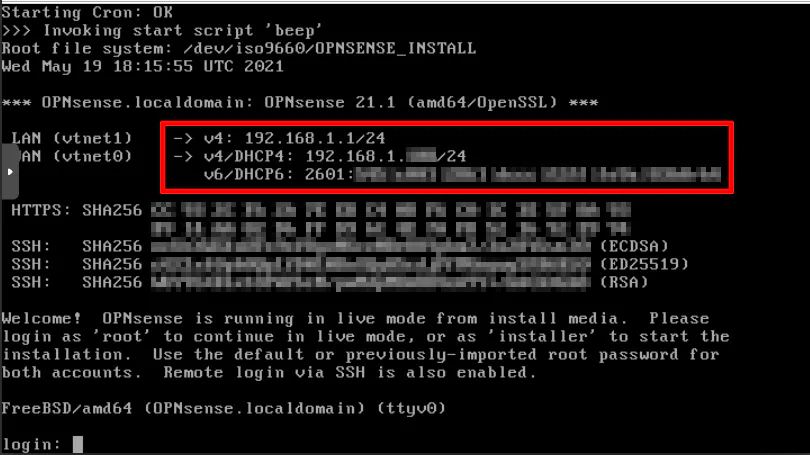
At this point you will see the addresses assigned to the interfaces. Remember when I said the WAN/LAN interfaces are on separate VLANs in my network? Notice that the LAN interface appears to be on the same network as the WAN. That is because the LAN address has a static IP address set to 192.168.1.1 by default. The static address of the LAN interface could be a problem if you are trying to assign the LAN interface to the same network as your primary home network router since it may conflict with your router’s IP address if it is also set to 192.168.1.1. Since I have my LAN interface assigned to a different network, the static IP of 192.168.1.1 does not conflict with my router. I assigned the WAN interface to the same network as my router but since it has DHCP enabled by default it does not conflict with my router.
The static IP address of the LAN will need to be changed later, but let us get through the installation process first. Right now, your OPNsense VM has booted into a live mode so that you can try out OPNsense without actually installing it (much like other Linux distros that have live bootable disk images).
Log in with the user “installer” and the password “opnsense” to start the installation process.
Press “Enter” to get started.
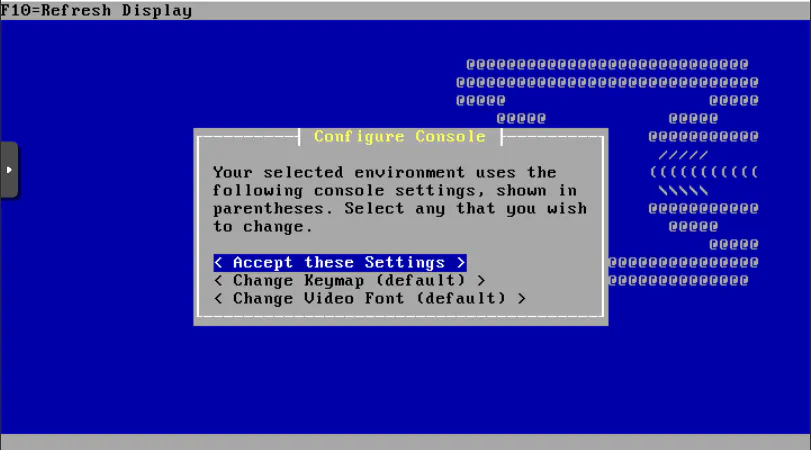
The default keymap and video font should be fine for most users. Press “Enter”.
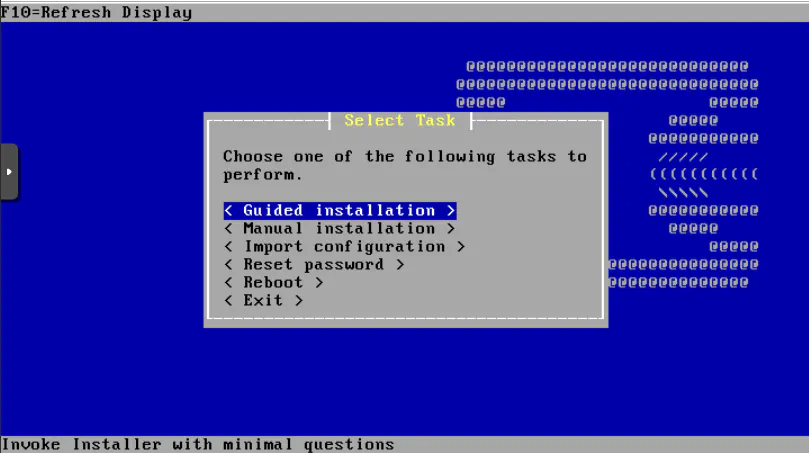
Select “Guided installation” and press “Enter”.
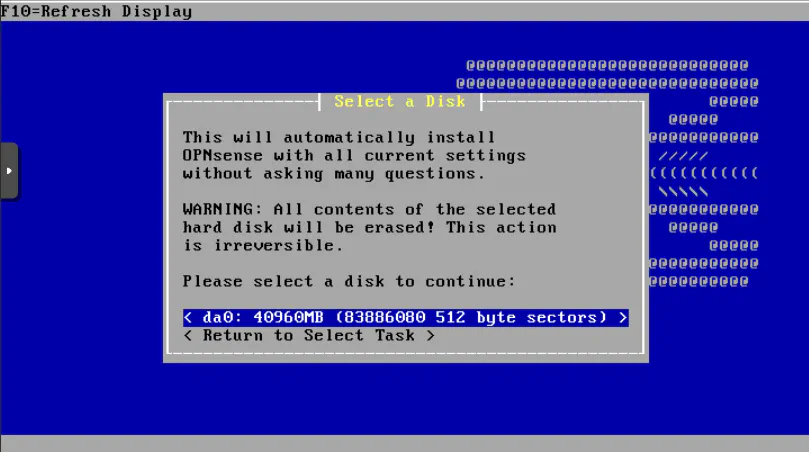
There should only be one disk available for installation so simply press “Enter”.
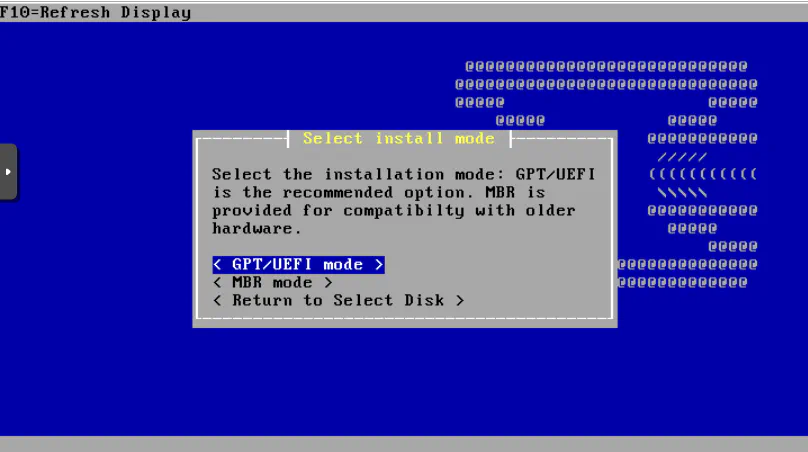
The recommended “GPT/UEFI mode” is what you should select. Press “Enter”.
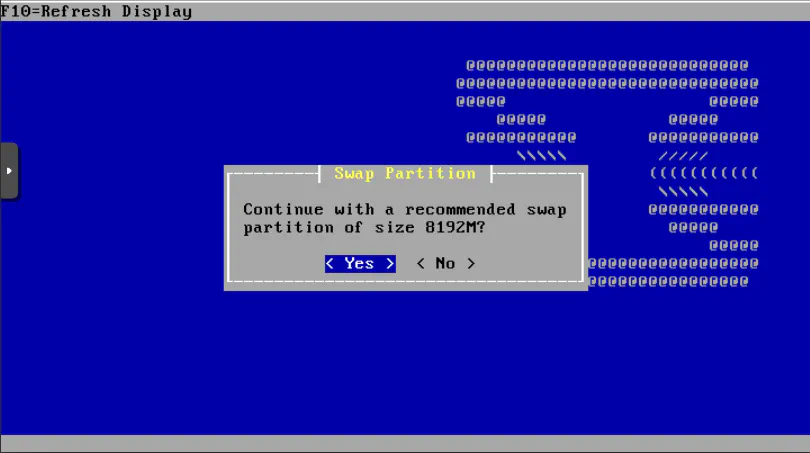
Press “Enter” to use the default value. If you have enough memory allocated, you may not need to utilize that much swap space.
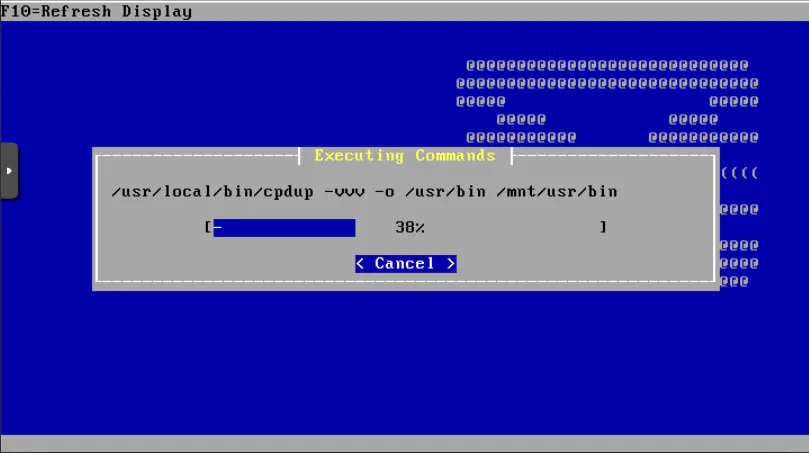
OPNsense should now install its files.
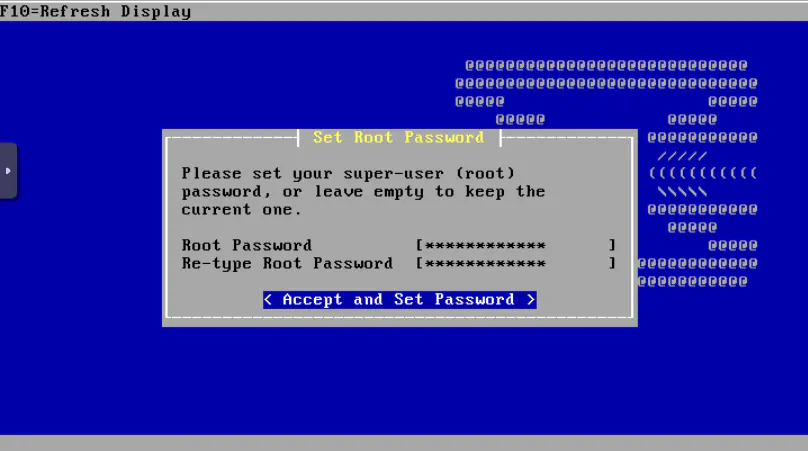
Enter your super secret password if you are using this VM as your primary router or you could enter a basic one you can remember if you are using this VM for evaluation purposes.
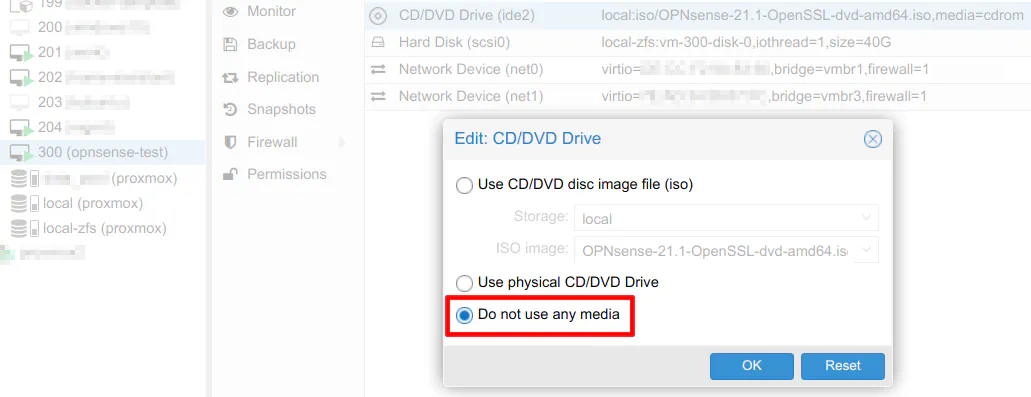
You should see a screen about rebooting the system. Before pressing “Enter” you may want to remove the OPNsense installation ISO image from your VM to ensure it does not try booting from that ISO again.
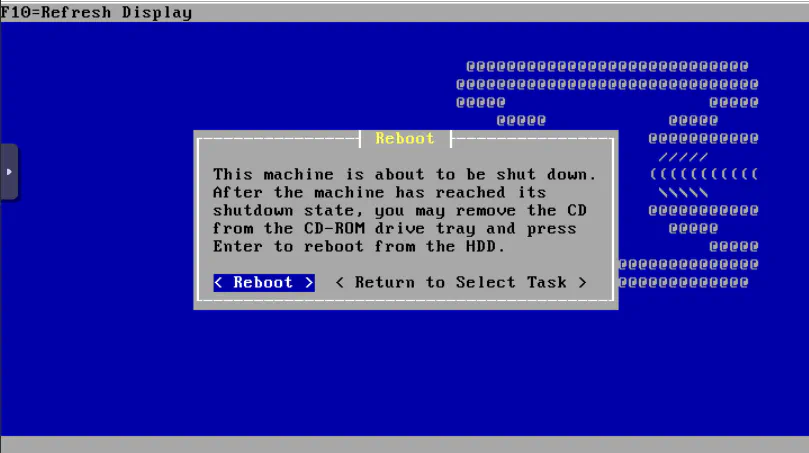
Go to the “Hardware” page of the OPNsense VM, and click on the “CD/DVD Drive”. Then select “Do not use any media”. Click “Ok” and return to your console window.
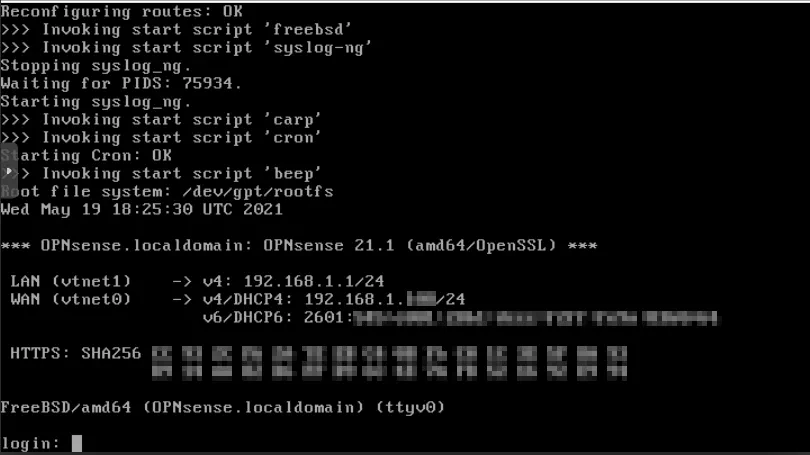
The screen you will see before rebooting occurs.

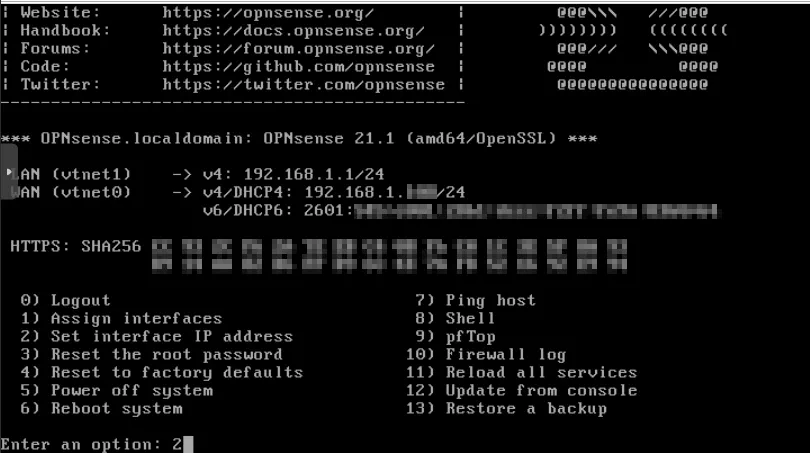
Now you will end up at a login screen that is similar to the live mode of OPNsense. You should not see any message about being in live mode. Login using the “root” user with the password you entered during the installation process.
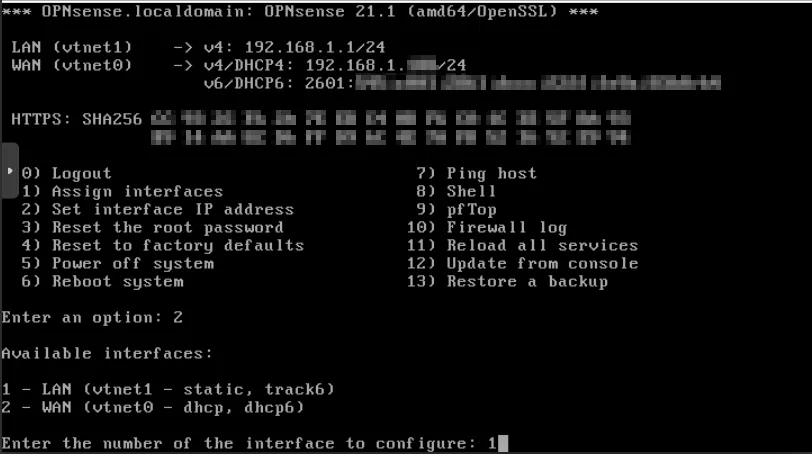
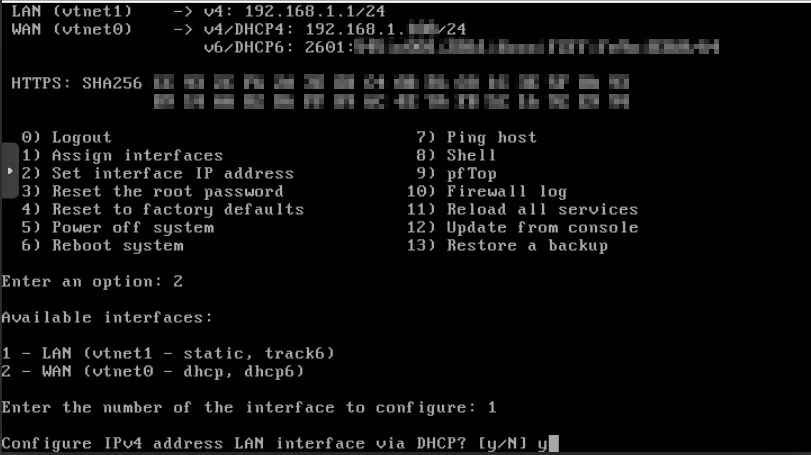
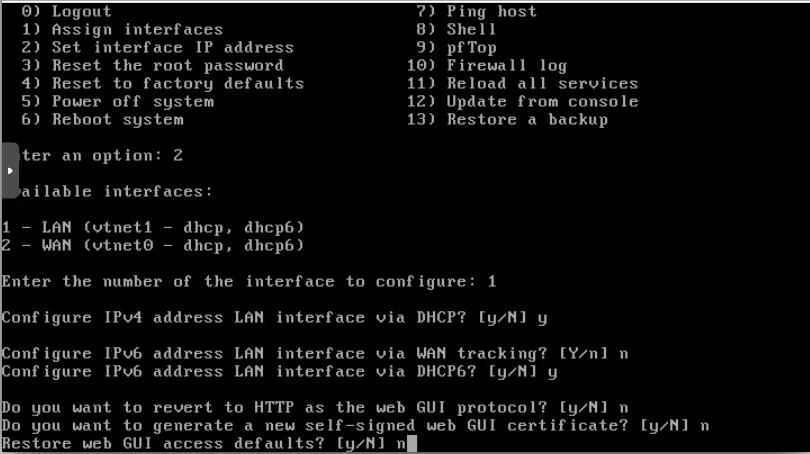
It is time to fix the LAN interface address. Enter option “2” and press “Enter”.
Enter “1” to configure the LAN interface. Notice that it says it is set to “static” for IPv4 and “track6” for IPv6.
Enter “Y” to set the LAN address to use DHCP. This will cause the LAN interface to obtain a network address in the VLAN where the physical port is plugged into (with how I have my Proxmox configured). In this example, that would be VLAN 20 with the address space of 192.168.20.0/24 so you will want to see the address to change from 192.168.1.1 to 192.168.20.x when finished with the configuration.
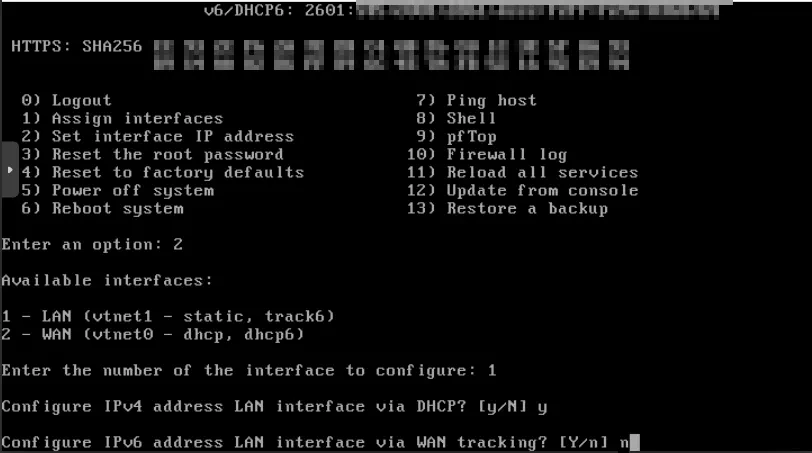
For IPv6, tracking the WAN interface is a common way to assign IPv6 addresses to your local network. However, since I have my primary router for my home network set up to track the WAN interface and the virtualized router is on my internal network, you will need to enter “N” for WAN tracking. The WAN for the virtualized OPNsense will not be the one obtaining the IPv6 addressing from the ISP so you do not want to track that interface.
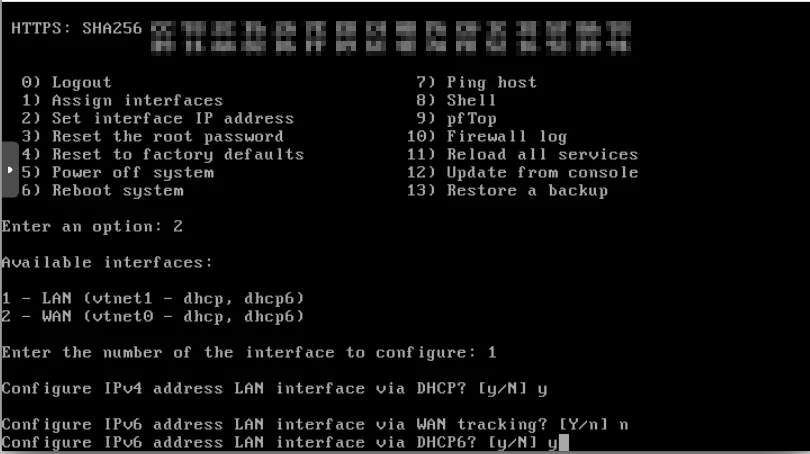
Enter “Y” for enabling DHCP6 for the LAN if you wish to obtain an IPv6 address from your network via DHCPv6. This assumes you already have a proper IPv6 configuration in your home network. If you do not wish to use IPv6 for the LAN interface, you could enter “N”.
You will now be prompted if you wish to use the web interface with HTTP. Enter “N” since HTTPS should work just fine, and it is more secure, of course.
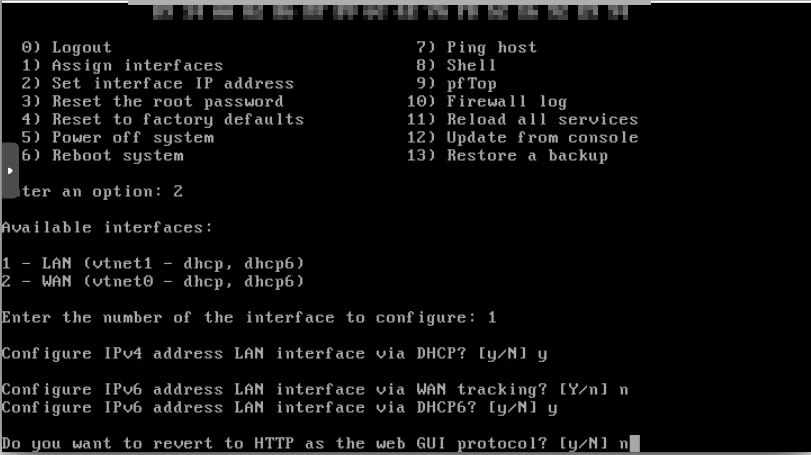
Enter “N” for generating a new self-signed certificate.
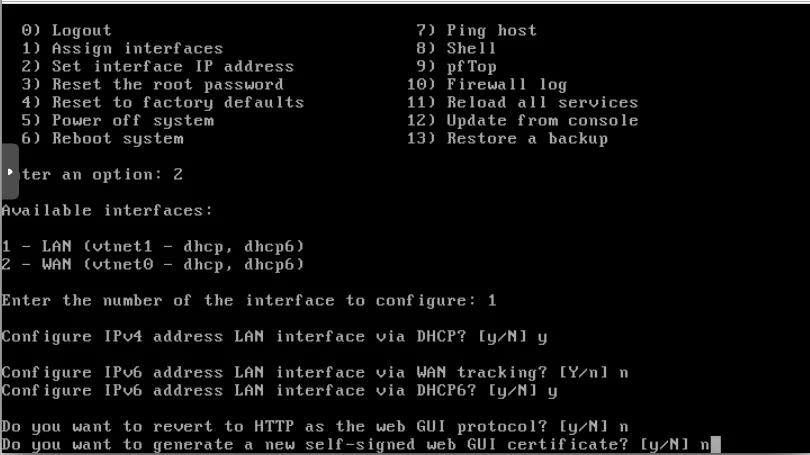
Enter “N” for restoring web GUI access default. Perhaps this option is nice if you somehow messed up your access to the web UI.
Finally, you are now able to see the LAN interface with the proper 192.168.20.x address as well as an IPv6 address. The LAN address listed on your screen is what you will use to access the web interface. (Unfortunately, the noVNC window puts an overlay on the console window so that is blocking the “WAN”/“LAN” names.)
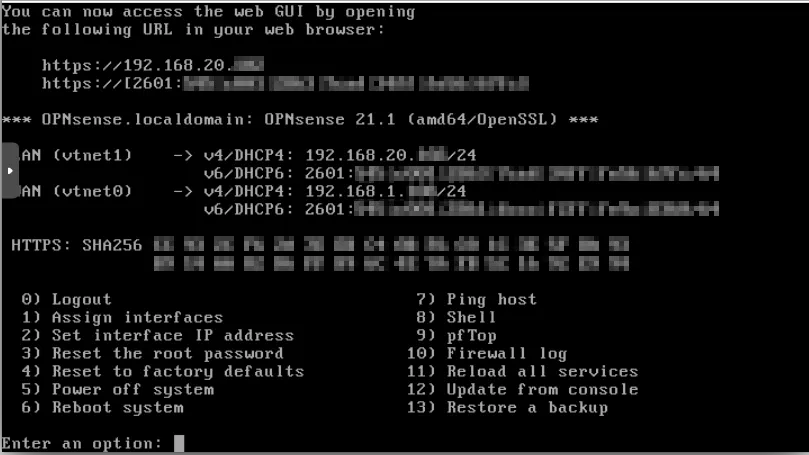
Access the OPNsense Web Interface
Using the IP address shown in the console, enter that address in your browser to open the web interface. Use the same “root” user and password you entered during the installation process.
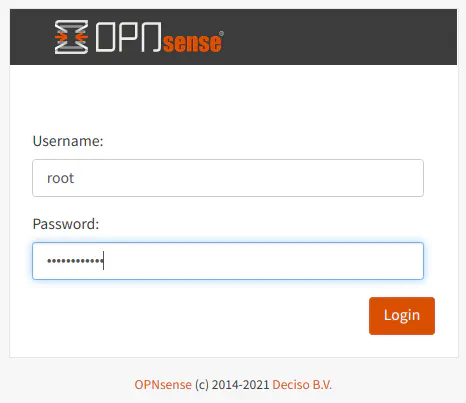
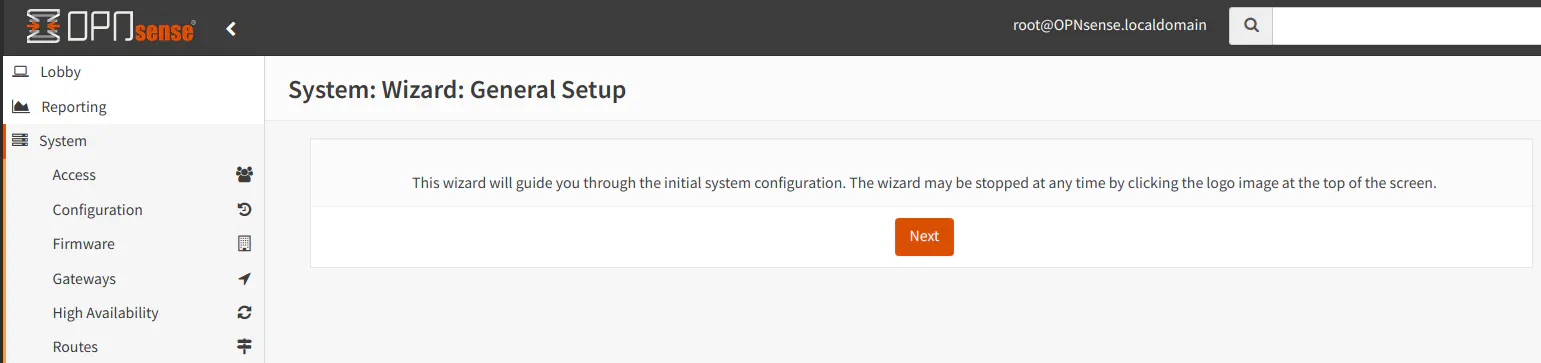
Once you log in, you will see the “General Setup” wizard. You do not have to go through the wizard to use OPNsense. However, in the next optional section, I will describe a few settings you may wish to change.
Some Recommended Settings (Optional)
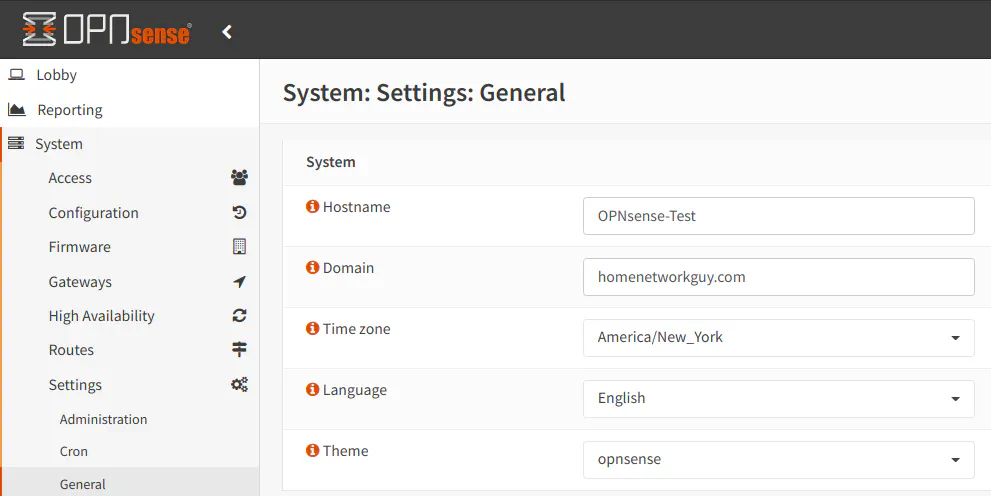
After successfully installing OPNsense and accessing the web interface, there are a few settings to consider modifying. On the “System > Settings > General” page, you may set a “Hostname”, “Domain”, and “Time zone”.
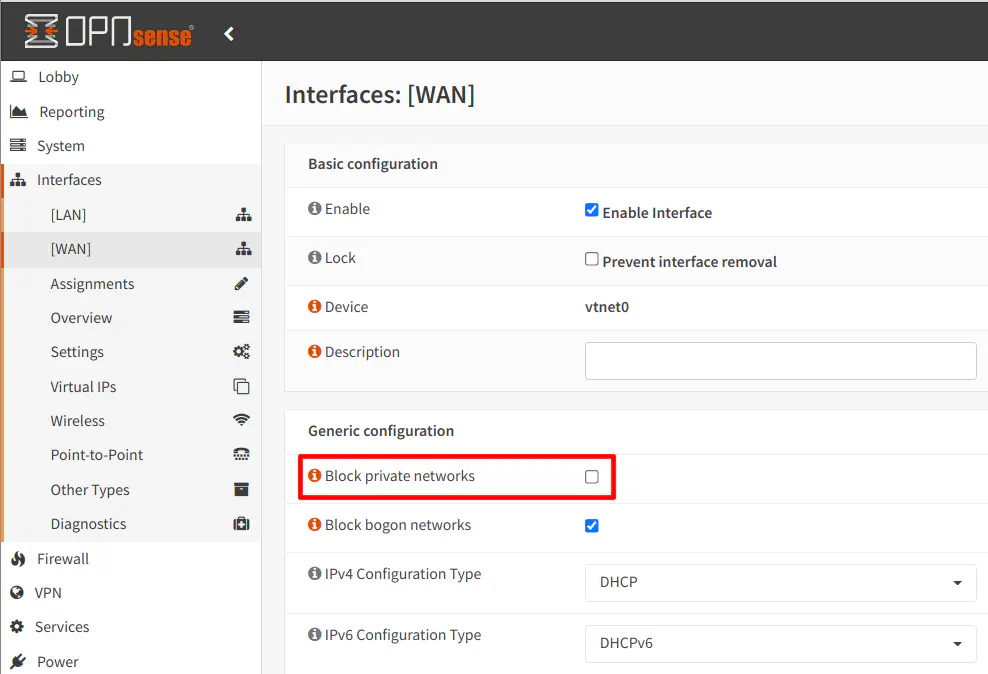
On the “Interfaces > [WAN]” page, you may want to check if the “Block private network” option is checked. Since the WAN in the VM is not public facing and resides on the local network, you may want to uncheck the option to allow internal network requests to access the WAN interface. Perhaps you would want to run a service on your virtualized OPNsense that you would like to test such as a VPN server. If that is the case, you will need to uncheck this option to ensure the requests are not blocked. Normally you should not be receiving local addresses on the public Internet, but when you have an internal router (virtualized or not), you may need to allow local addresses depending on what you are doing with your internal router.
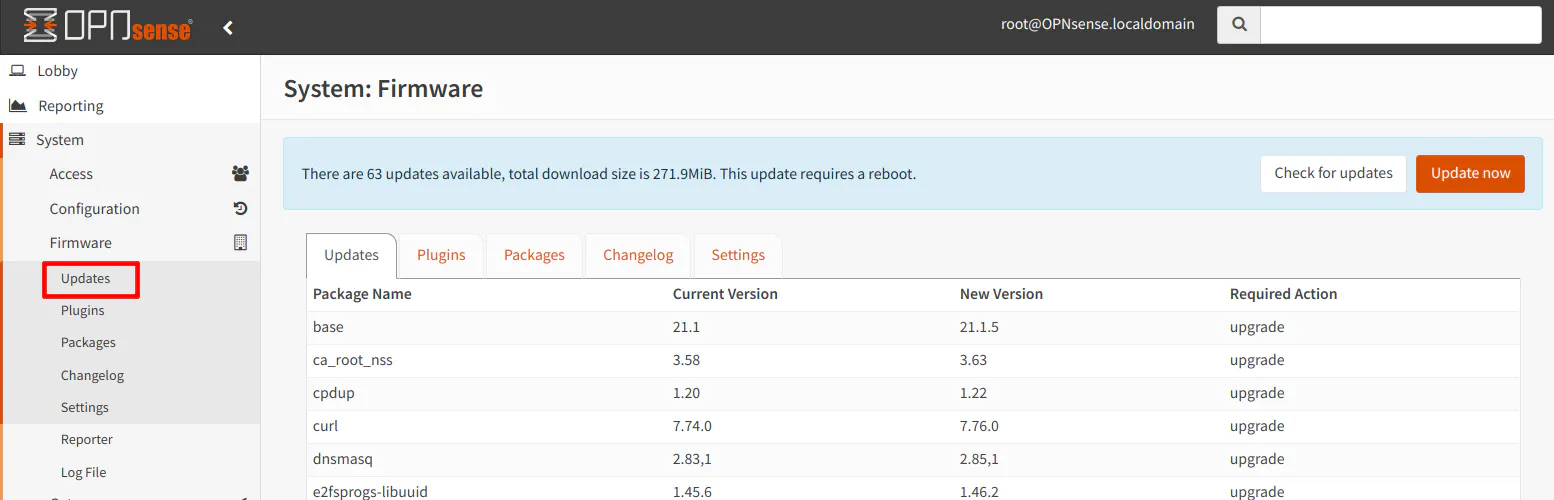
Do not forget that you should be able to download updates as long as your WAN interface has access to the Internet.
Conclusion
The process of setting up OPNsense in Proxmox is not too difficult even though there are quite a few small steps to click through. I hope this how-to helps you get started with evaluating OPNsense or to use it as the primary router for your home network. If you decide to use the VM as your primary router, you will need to go beyond this guide.