How to Install and Configure OPNsense

Photo by gorodenkoff from iStock
Table of Contents
While much of the content on this site focuses on more advanced home networking topics, I thought it may be helpful for new users to write a guide on installing and configuring OPNsense. This information should be a good starting point for beginning the OPNsense journey.
For new users, I often recommend starting with the basics before diving deeper into more complex configurations. Once the basics are well understood, implement one additional feature at a time until you achieve your desired goals. Not only does this allow you to grow in knowledge about each feature, but it also aids with troubleshooting your network. If your network is functioning properly and you try implementing something new which breaks your network, you will know that the configuration for the new feature is the root cause of your issue(s).
If you are interested in reading this guide, I am going to assume that you have some level of understanding of why you want to use OPNsense and you are now ready to try it out. With that said, let us get started!
Choose Your Hardware
The first step is to choose the hardware in which you are running OPNsense. You can either run OPNsense directly on the system (bare metal) or in a virtual machine on a hypervisor such as Proxmox, ESXi, etc. Many home users will either choose a dedicated mini-PC firewall appliance or a virtual machine on a hypervisor.
If you are not familiar with how to set up virtual machines, I recommend you either gain a solid of that first or start with a mini-PC firewall appliance. Mini-PC firewall appliances are compact, power efficient, silent, and powerful systems (compared to many consumer grade routers).
I personally prefer to have a dedicated device rather than using a virtual machine since it allows me to tinker with my Proxmox server without worrying about taking down my network. If you need some insight on the types of hardware options that are available, you may refer to my hardware recommendations page.
Download OPNsense
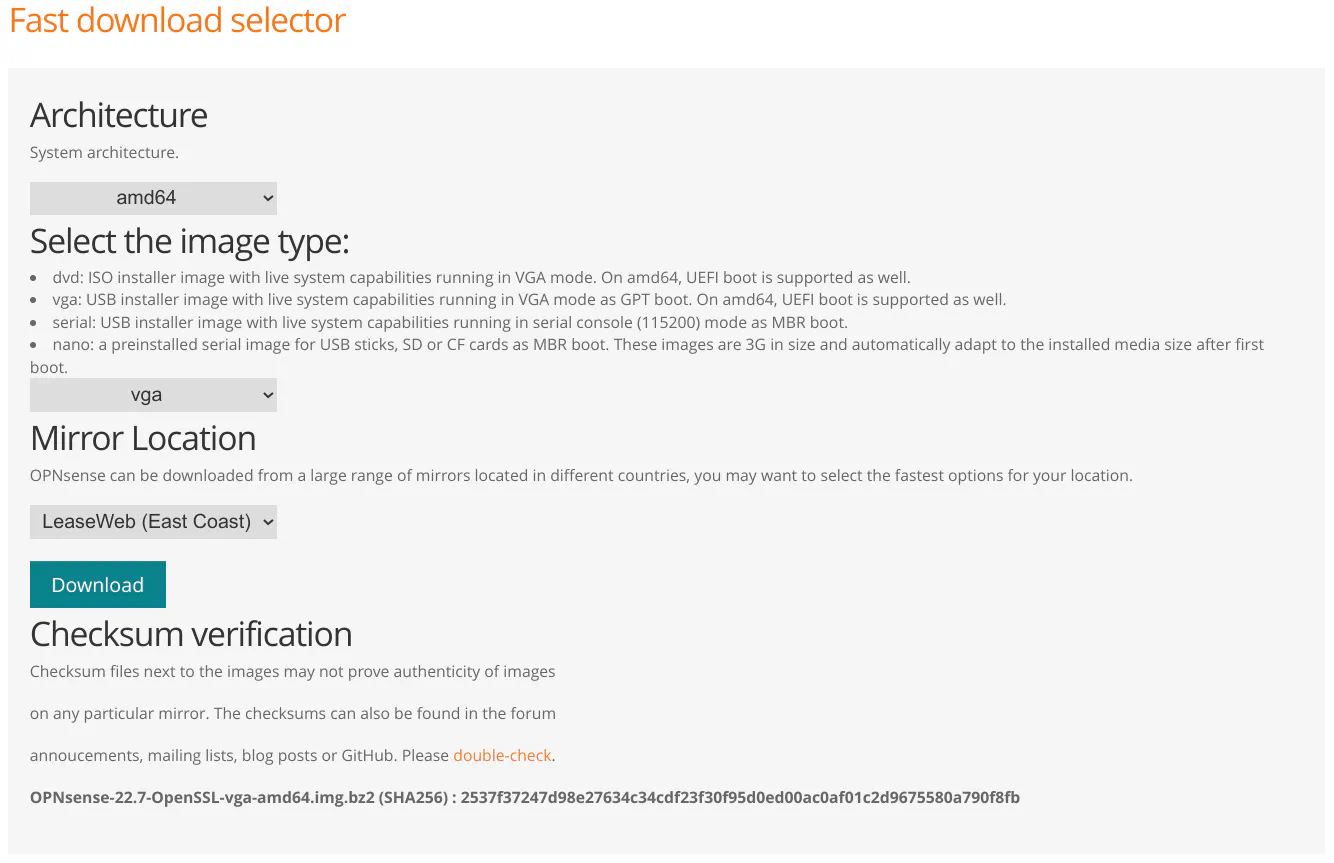
You may download OPNsense on their download page. I recommend downloading the default “vga” version of the installer since the mini-PC firewalls do not have CD/DVD drives and the installer will also work if you are installing inside a virtual machine. The “vga” installer lets you install the image on a USB drive so you can boot the installer from that drive.
Choose a mirror that is close to your location so the file will download faster and then click “Download”.
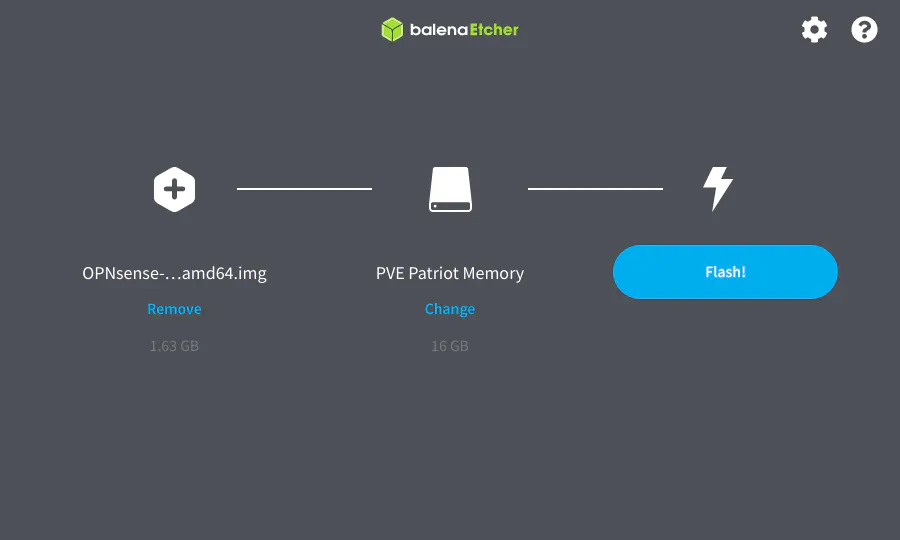
Flash USB Drive
Once OPNsense is downloaded, you will need to flash the USB drive with the installer. I prefer to use Etcher because it is a simple tool which works great. One nice feature is that you do not need to extract the image from a compressed file (if it is a format recognized by Etcher), which saves some time and disk space. Simply choose the compressed OPNsense file, the USB drive, and then click “Flash!”.
Install OPNsense
If you are installing OPNsense directly on the system, you may proceed with the installation. I am going to assume your disk is empty or you do not care about erasing the contents of the drive installed on your system.
However, if you are installing in a virtual machine, you will need to prepare the VM before you can continue with the installation of OPNsense. In this guide, I will leave the virtual machine configuration up to the user since many new users will likely be installing to a bare metal system (VM configuration is a topic for another guide). Once the virtual machine is set up, the installation steps are the same as installing on bare metal.
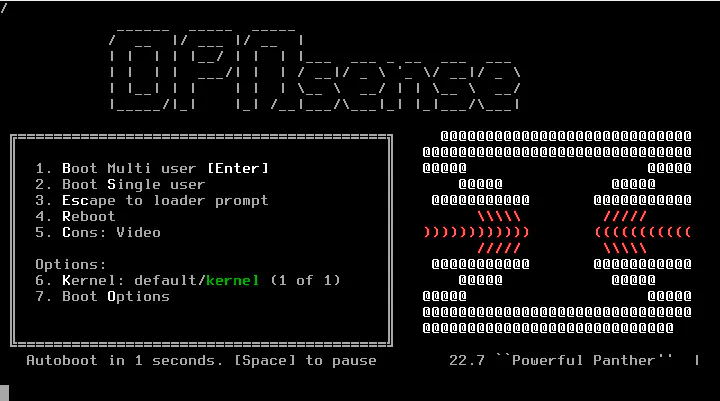
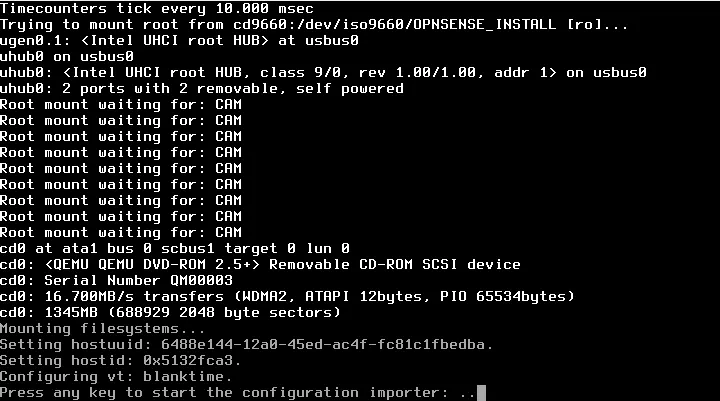
When booting up the OPNsense installer, you will see the default menu below. It only shows for a few seconds and you do not need to enter any options to proceed.
You will be prompted if you want to start the configuration importer. This option is very useful if you wish to restore from a previous configuration backup if your system crashed due to a hardware failure or you decide to reinstall from scratch to return the system to a known working state. Since I am discussing a new installation, wait a few seconds for the installer to continue.
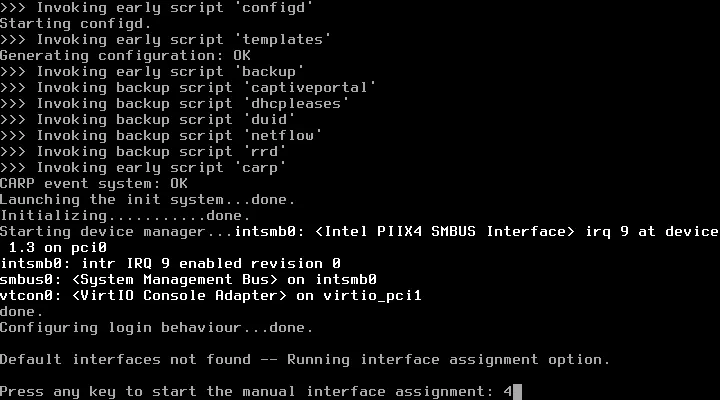
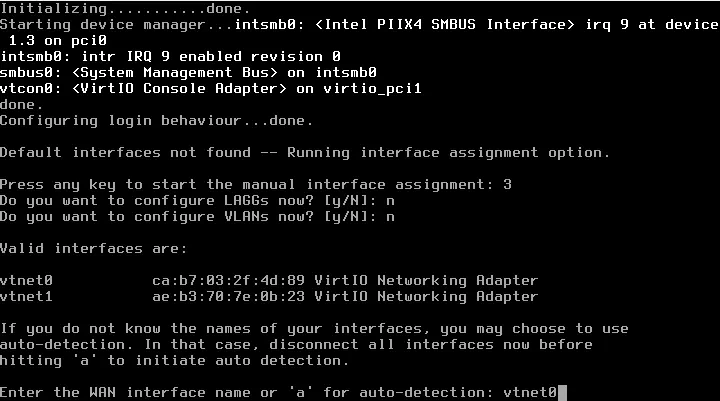
Press any key to manually assign interfaces. You only have a few seconds to hit any key. The reason you should manually assign interfaces is that I have found that it often chooses the incorrect interfaces you wish to use as the WAN or LAN interface. The automatic interface assignment will choose the first interface it encounters in the hardware, which may always not reflect its physical location on your router/firewall device.
If you are familiar with consumer grade routers, the leftmost Ethernet port is often used as the WAN interface so you may want to do the same on your device especially if your ports are not labeled WAN, LAN, etc. Some firewall devices such as Protectli actually have the WAN port on the right side of the device. If your device has labels, you should try to make sure it matches to minimize confusion. However, if your device is simply numbered 1-4, for example, it does not matter which one you use as the WAN interface so you can choose the left or right side or one in the middle if you like living on the edge.
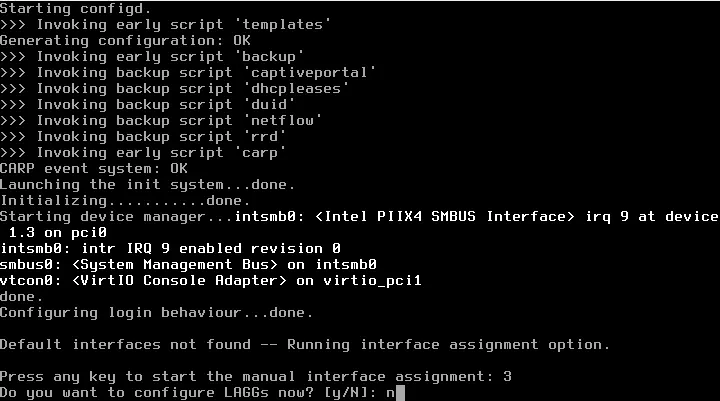
To keep this installation guide more basic, you may enter “N” or press “Enter” since “N” is the default value to skip configuring LAGGs.
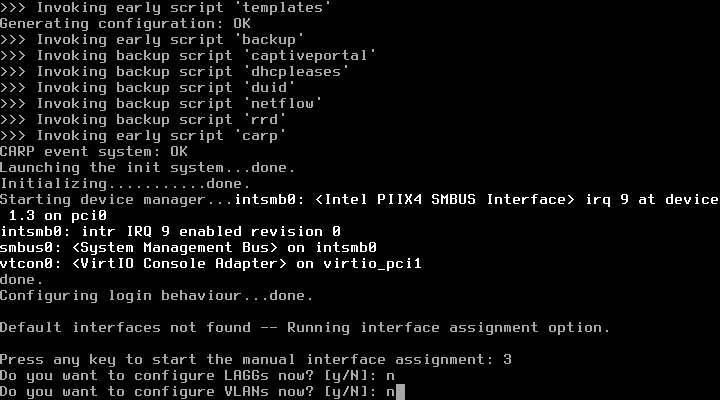
You may skip configuring VLANs as well by entering “N” or pressing “Enter” since you may configure them through the web interface after OPNsense installed. Also that would go beyond the basic installation of OPNsense and requires you to have network switches and wireless access points which have VLAN support. If you start with a simple LAN network when you are first learning, you can expand into having multiple networks as you gain more knowledge and experience with networking.
In this step, you should see a list of your network interfaces. Type in the name of the interface to select the WAN interface. On my test system, I have two interfaces named vtnet0 and vtnet1. Since I am using a virtual machine to demonstrate the installation process, I can easily tell which interface is the WAN and which interface is the LAN by the numbers at the end of the interface name. It corresponds with the network adapters net0 and net1 I added in Proxmox.
If you have different network adapters installed in your system, the interfaces may be easier to distinguish based upon the names of the network interfaces. Worst case scenario is that you have to reassign your interfaces later after you finish installing OPNsense.
If you are directly connected to your firewall device with a monitor and keyboard, you can easily reassign interfaces after installation since you do not have to worry about losing network connectivity while making configuration changes to the interfaces.
After selecting the WAN interface, you will need to select the LAN interface. The most basic network for home users will only have a single WAN and LAN interface.
Note
If you need to connect more than one device to your router/firewall device, you will need to use a network switch to plug more devices into it. Unlike a consumer grade router, by default you cannot use all of the extra Ethernet ports as a network switch since the interfaces are treated individually. It is possible to bridge the extra interfaces together so that they act like a network switch, but the packets are routed in software rather than in hardware like a network switch.
You will find that the general recommendation is to avoid bridging interfaces due to decreased network performance under heavy loads for certain hardware configurations. If you are still interested in bridging, you should experiment to see how much performance is decreased when there is heavy traffic on your network before committing to that decision. Otherwise you may be disappointed in performance if your router cannot handle large amounts of network traffic.
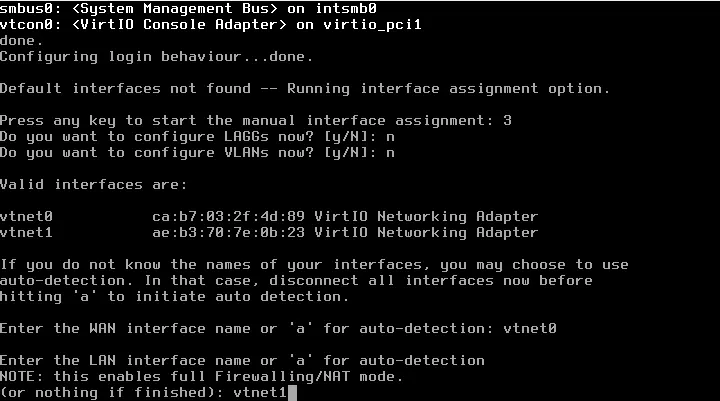
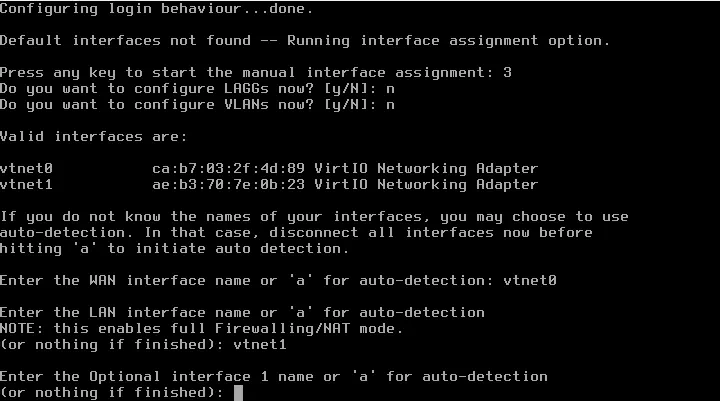
In this example, I am not going to assign any optional interfaces, but you could assign additional interfaces if you want to create multiple networks. Keep in mind that you can still add more interfaces later using the web interface after installation. You may find it easier to do the bare minimum configuration during the installation and do the rest of your configuration via the web interface.
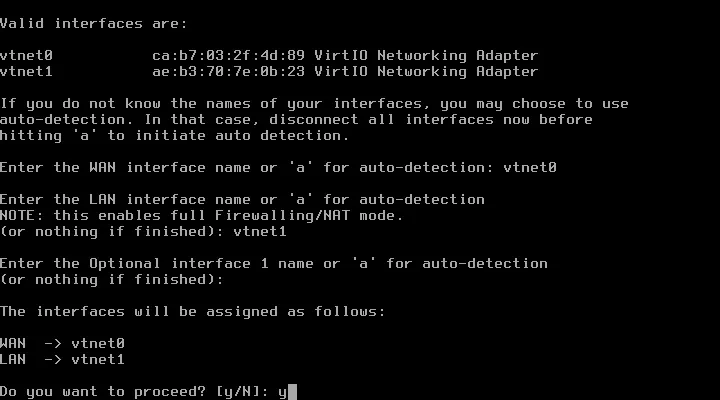
Enter “Y” to continue with the installation.
You should now see both of your interfaces listed along with their IP addresses. By default, the LAN interface will be assigned the 192.168.1.1/24 network.
The WAN interface will use DHCPv4/DHCPv6 by default and you may see your public IPv4/IPv6 addresses assigned by your ISP. The reason I say ‘you may’ is that there may be some delay from when you unplug your old router and plug in your new router when the new MAC address will be automatically registered with your ISP. Also if you are not plugged directly into your modem during installation, you obviously will not see your public WAN IP address(es) yet.
You may notice the WAN IP address in my screenshot below is an internal network address instead of a public IP address. I have my virtual machine connected to my LAN network so it was automatically assigned an IP address in my LAN network via DHCP. You may be doing something similar if you are testing your OPNsense system behind another router. I generally recommend making OPNsense your primary router but that requires setting your modem/router provided by your ISP to bridge mode or you need to purchase your own modem to use (you may be able to save on rental fees if you do this).
Warning
If you are using a VM on a hypervisor such as Proxmox and you are trying out OPNsense behind another router, be careful which interface you choose for the LAN. If you are using a bridged interface on your same network as your primary router, you may encounter an issue with IP address conflicts if your primary router is using 192.168.1.1/24 since OPNsense will use that network by default on the LAN interface.
In my example, I used a virtual network on Proxmox (a bridge that is not assigned to any physical interfaces) which allows me to put any VM or container behind that virtual network so that I can test out the virtual LAN network on my OPNsense VM without conflicting with my main network.
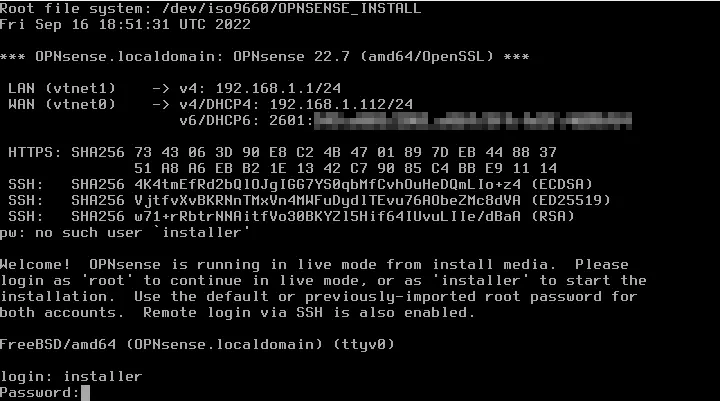
Enter the username of installer and the password of opnsense in order to continue with the installation. Do not login as root because you will end up running a live version of OPNsense which will not be installed to your system. Live mode is nice if you just want to try out OPNsense without installing anything, but this is guide about installing OPNsense on your system so there is no need to run in live mode.
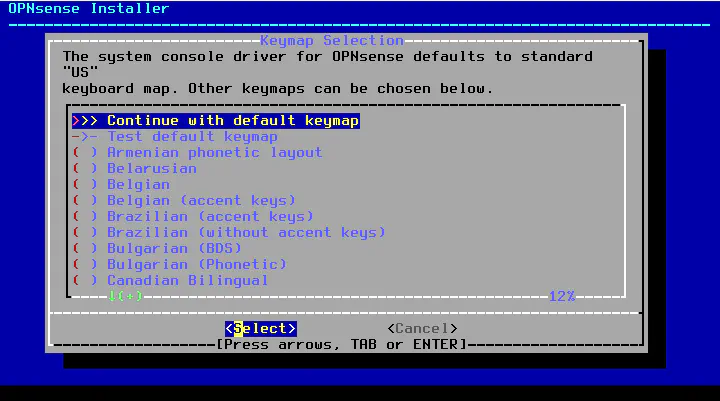
If you are a US user, you may simply press “Enter”. Otherwise, you will need to select your preferred keyboard layout.
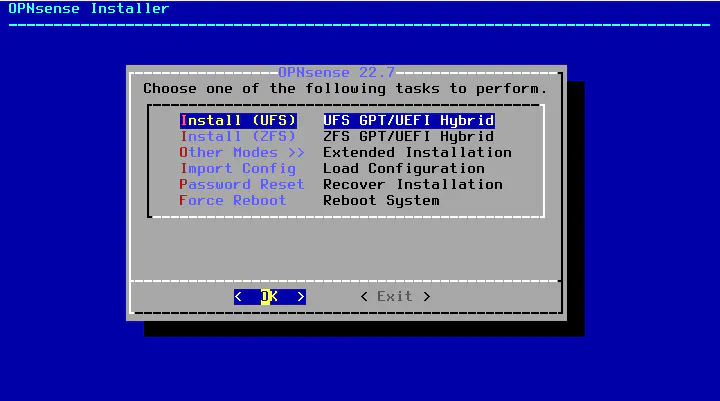
You may choose if you wish to run UFS or ZFS. If you are a novice user, you may prefer not to use ZFS because it is a more advanced filesystem. ZFS is more robust than other filesystems so you may want to use ZFS even if you do not understand anything about ZFS. You may not even notice the difference between the two filesystems if your hardware is functioning properly.
One thing that is important to consider with ZFS is that it requires more RAM than other filesystems so if your system does not have a lot of memory, you should use UFS instead of ZFS.
To keep things simple for this example, I am using the default filesystem of UFS.
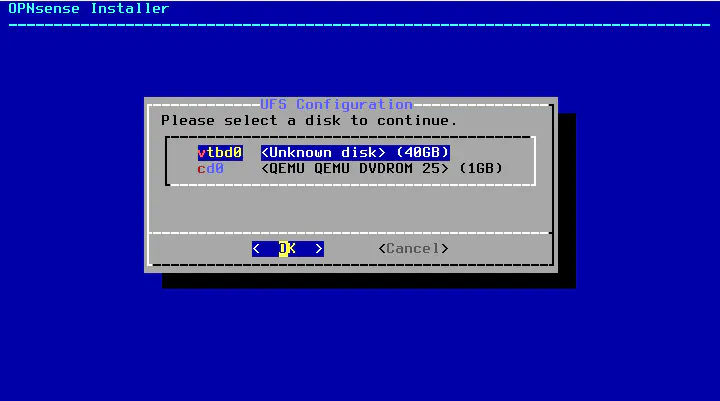
Select the disk which you wish to install OPNsense. In many router/firewall devices, there will be only one drive installed so you will only have one choice.
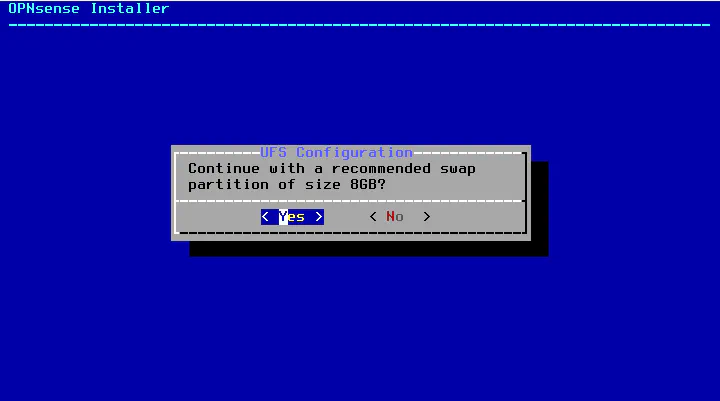
Select “Yes” for the recommended swap partition size. If you run out of system memory, it can lead to crashes so it is typically best to have some swap space. As you can see, the recommended size is relatively small so it should not impact your overall storage capacity by much. OPNsense does not require a lot of disk space unless you are doing a large amount of logging.
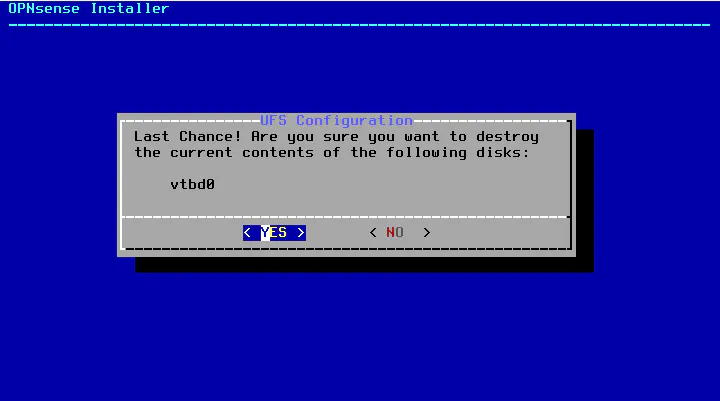
Press “Enter” to continue with the installation. I am assuming your disk is blank or you do not care about its contents.
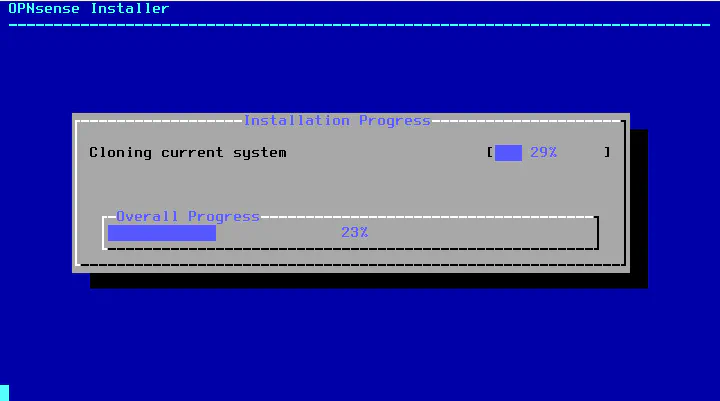
OPNsense should now be installing the system files.
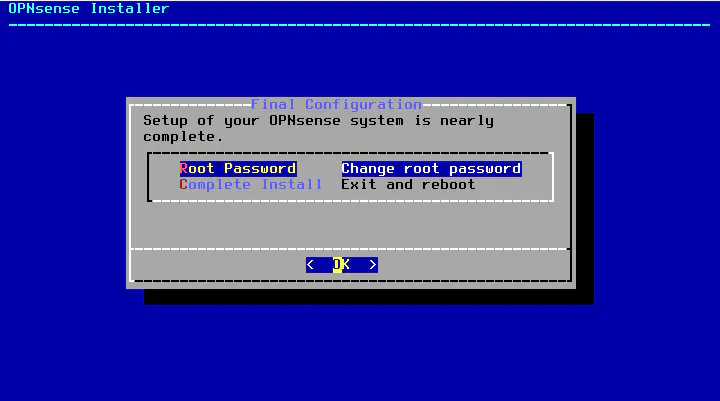
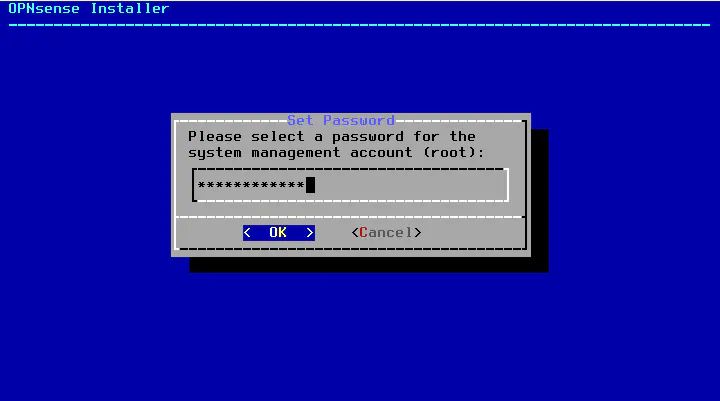
For security purposes, the recommendation is to change the default root user password. You should do this now so you do not forget later. The password can be changed later in the web interface if you decide to change it again.
Enter the new password.
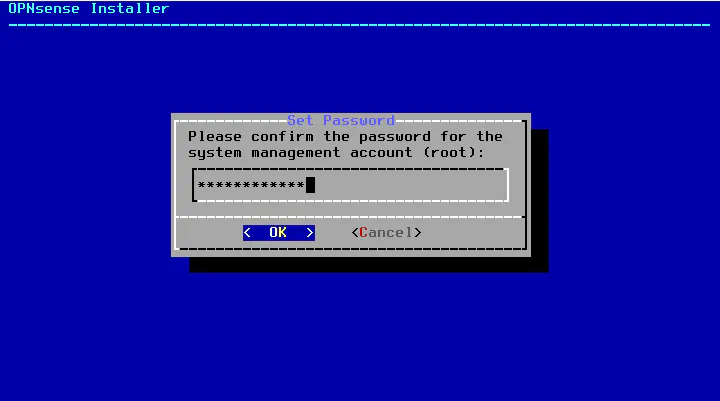
Enter the password again to verify you entered it correctly.
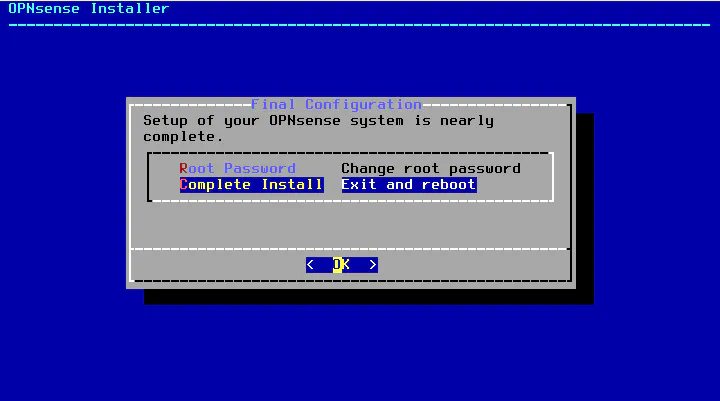
Press “Enter” to exit and reboot your system.
OPNsense is now installed! You can unplug your USB drive or eject your DVD disc depending on the medium used to install OPNsense since you will no longer need it.
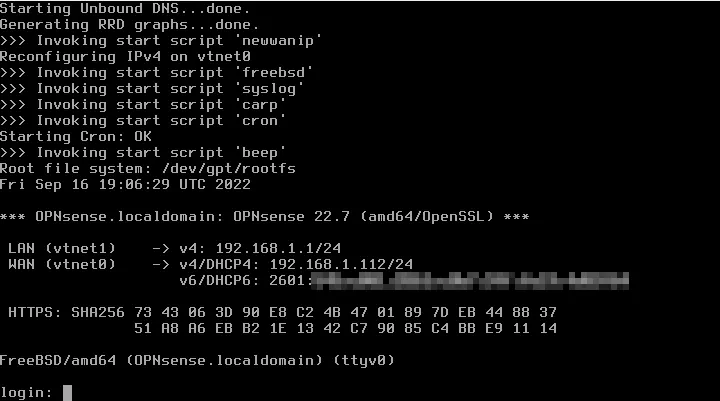
At this point if you have done already done so, I recommend you plug a network switch into the LAN port on your OPNsense system and plug at least one PC/laptop into the switch so that you can continue with the OPNsense configuration via the web interface. DHCP should automatically be configured for the LAN network so when you plug into a switch, your system should be able to obtain an IP address like it would with a consumer grade router.
Configure OPNsense
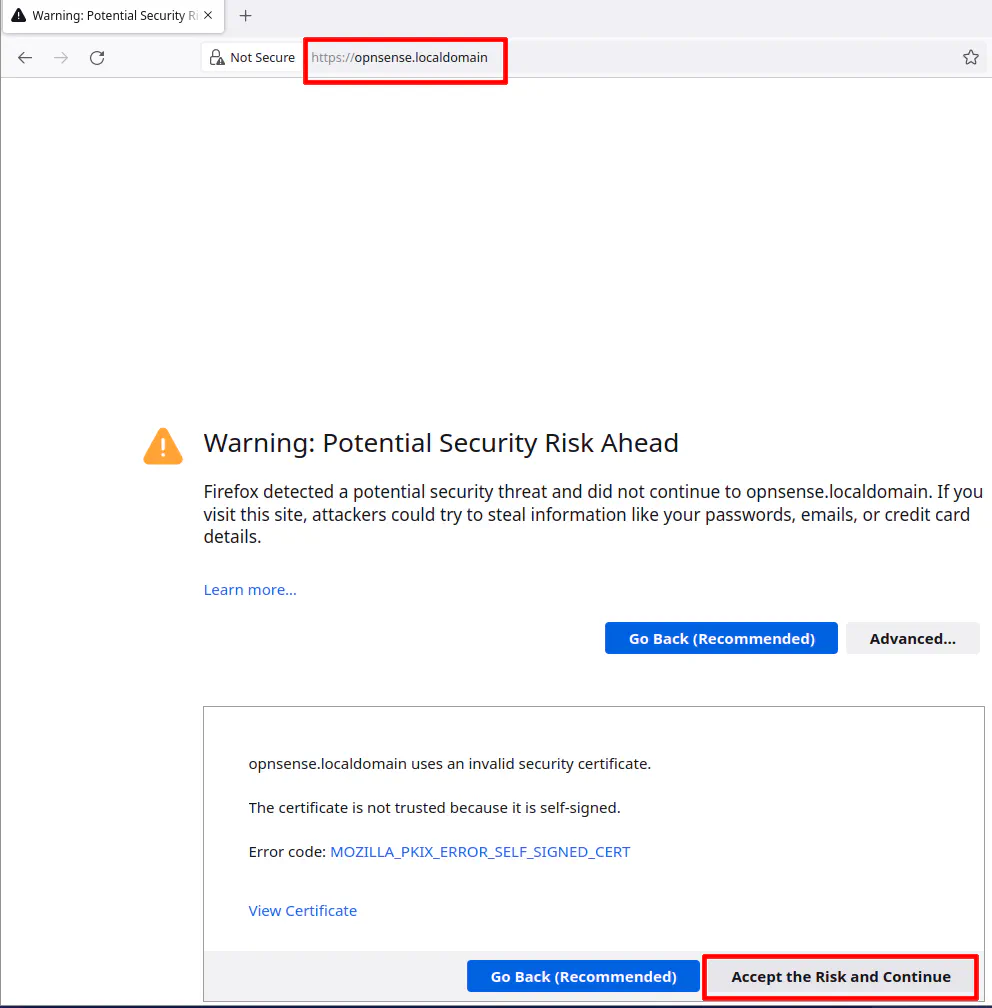
From the system connected to the LAN network of OPNsense, you can access the OPNsense web interface using the default hostname/domain name of the new OPNsense installation: https://opnsense.localdomain (or if you prefer IP addresses, you can use https://192.168.1.1). You should click the “Accept the Risk” prompt since OPNsense is using a self-signed certificate that is generated during the installation.
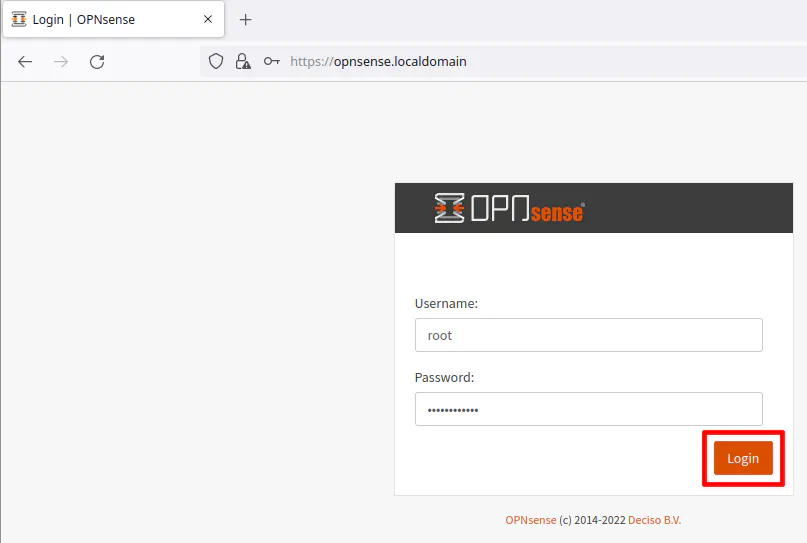
Login with the root user with the password you set during the installation process.
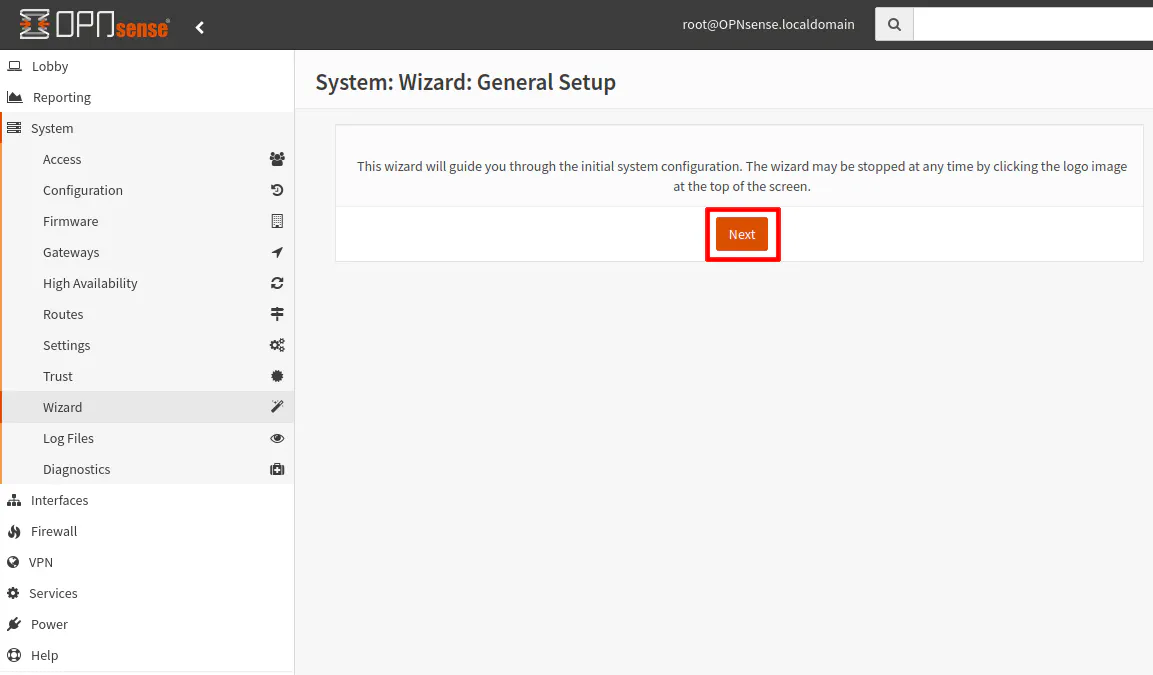
When you log into the OPNsense web user interface for the first time, you will be prompted to complete a general setup process. While it is not required to complete the wizard, I recommend new users go through the wizard to help guide you through a few basic settings that you may wish to change according to your preferences. Click “Next” to continue.
If you prefer, you may change the “Hostname” of OPNsense to some other name such as “router”.
Likewise, you can change the “localdomain” to some other domain. You can use any domain that is not a real domain name unless you own the domain name. The reason is that it would conflict with the real domain name if you happen to visit the website or any services that use that domain name.
For all of the DNS settings, if you leave everything at the default, your OPNsense installation will behave similar to a consumer grade router. Your ISP DNS servers will be used. That is what the “Override DNS” option does – it will prefer your ISP DNS over any DNS servers you provide. If you wish to use alternate DNS servers such as 1.1.1.1 or 8.8.8.8, you need to uncheck the “Override DNS” option and enter the DNS servers in the “Primary DNS Server” and “Secondary DNS Server” boxes. If you know your ISP or your specified DNS servers support DNSSEC, you can also check the “Enable DNSSEC Support” box (and hardening the DNSSEC data likely is ok to select unless the setting is incompatible with your DNS server).
I would recommend leaving all the DNS settings at the default settings unless you are comfortable changing them and know the impacts of such changes. Once you gain a greater understanding, you can change the DNS servers at a later time. Click “Next” to continue.

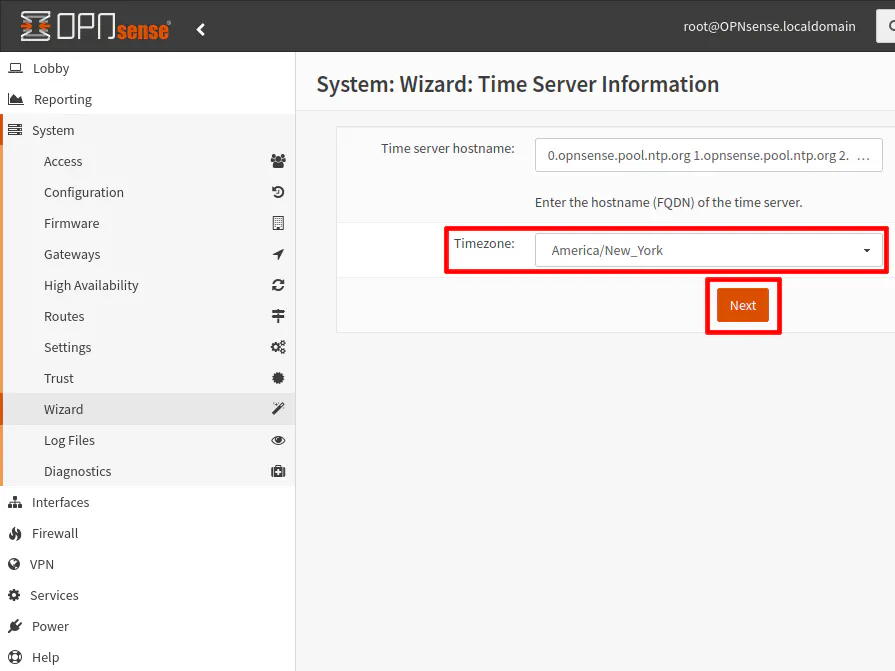
The main setting you may want to change on this screen is to set your local timezone. If you prefer to use other time servers, you can replace the default OPNsense timeservers. Click “Next”.
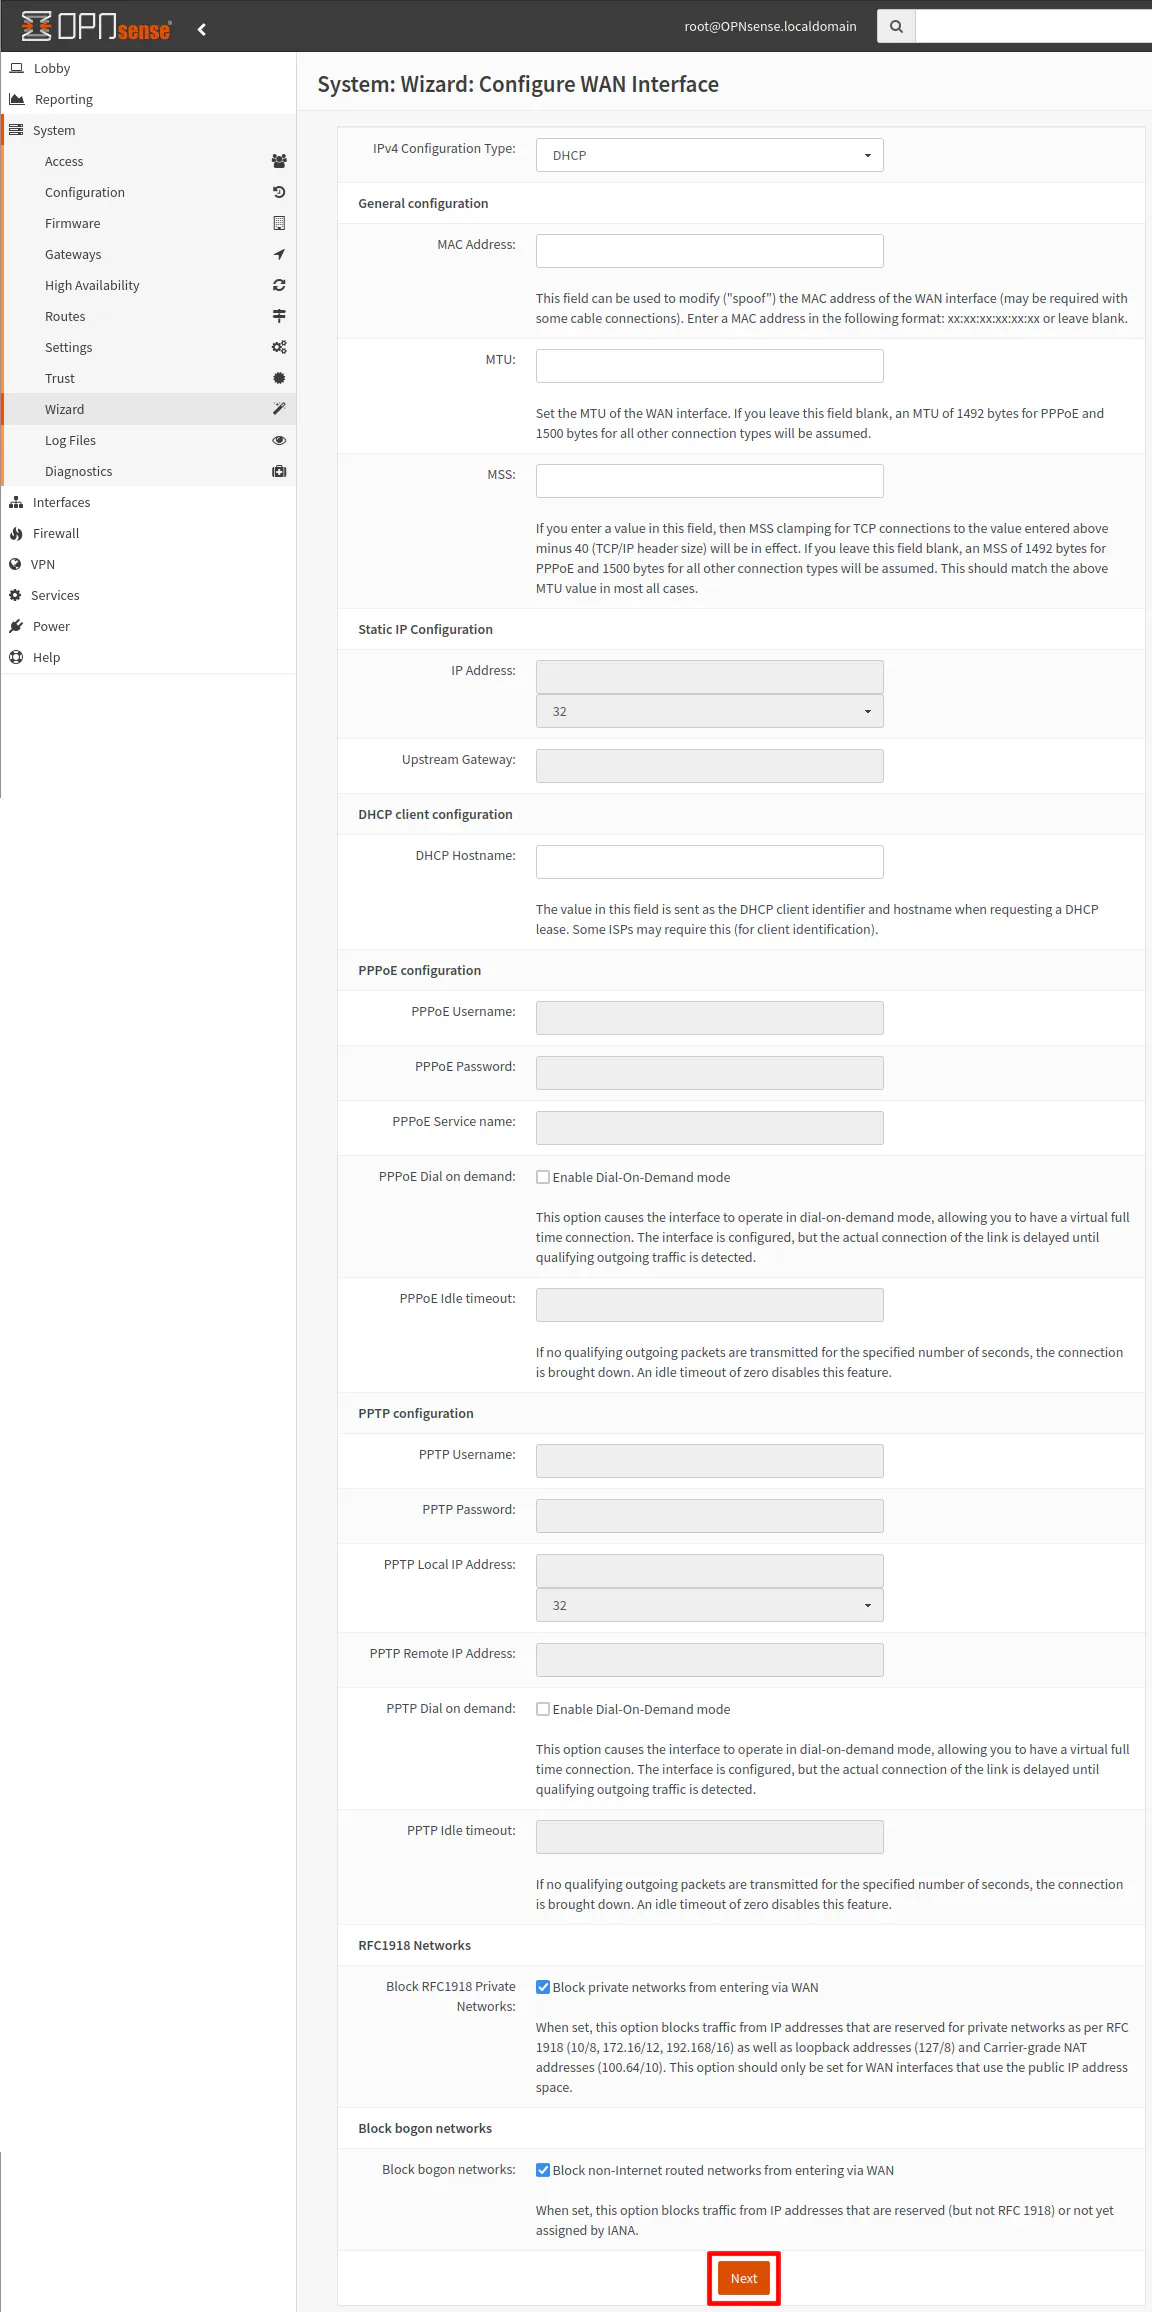
The WAN interface configuration page has a bunch of settings available since there are various ways to connect to the Internet. If you happen to have an ISP where you can use DHCP, you may simply leave everything at the default setting and click “Next”. However, other ISP configurations may be more complex and OPNsense provides a number of ways you can connect to your ISP.
If you are planning to use your OPNsense router behind your ISP router, you will need to uncheck the “Block RFC1918 Private Networks” and the “Block bogon networks” boxes so that your WAN interface can operate correctly on your local network. Otherwise, all local network traffic will be blocked and you will have trouble accessing the Internet through your ISP provided router.
For the sake of simplicity of this guide, I am going to assume you are using OPNsense as your primary router. Click “Next” once you have entered the appropriate settings.
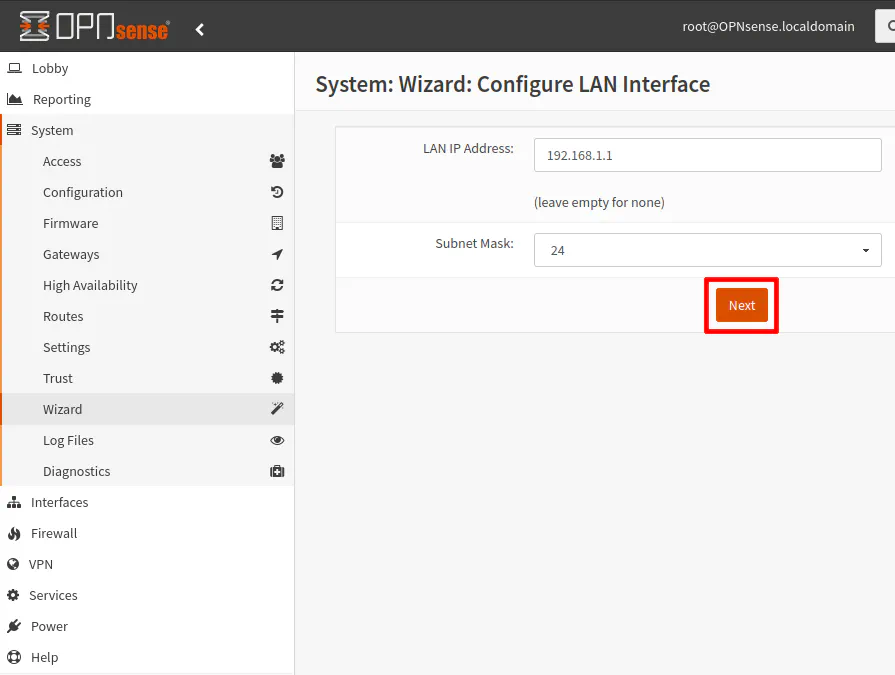
In comparison to the WAN interface, the LAN interface settings appear to be very simple. The setup wizard does not provide the full set of available configuration options for the LAN interface (possibly due to the fact you could end up losing connection or locking yourself out of the web interface if you are not careful).
Keep in mind if you change the default network addresses for the LAN, you will lose connection at the end of the wizard and will either need to reload your DHCP lease or disconnect/reconnect to your network to obtain a new IP address (that is assuming the wizard also sets up the appropriate DHCP address ranges – I have not personally tested it).
To keep things simple for a basic OPNsense installation, simply click “Next” without making any changes.
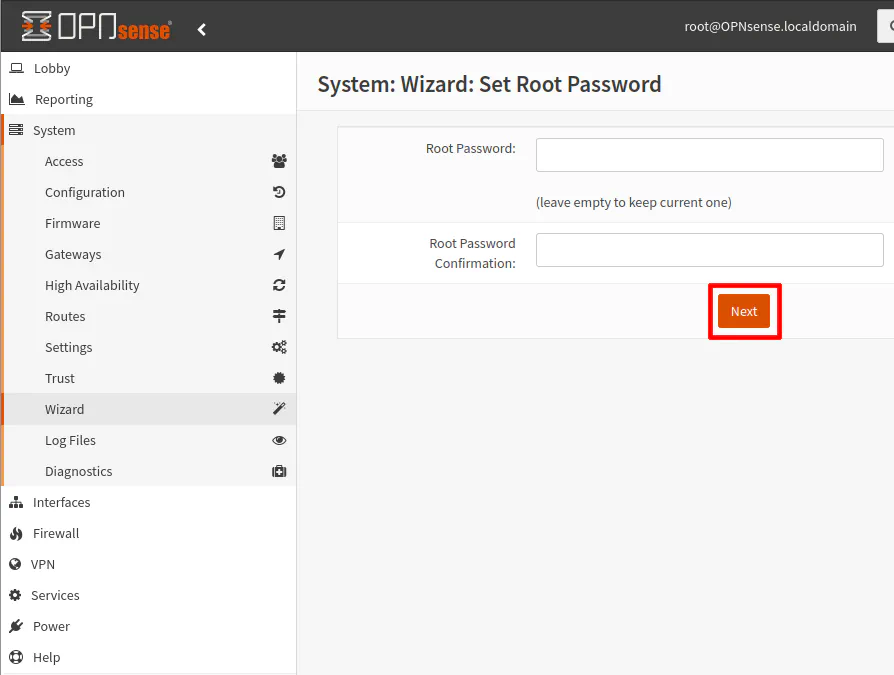
If you already changed your root user password during the installation process, simply click “Next” since you do not need to change it again. This would be a great time to change the default password if you did not do so during the installation process.
It would be quite silly to leave the default password unchanged when you are installing a very secure router/firewall OS like OPNsense – do not leave the front door unlocked in an otherwise secure building!
Click “Reload” to apply all of the changes you have made so far. If you changed the hostname/domain name, you may need to enter the new host/domain name to access the web interface again or simply use the IP address of the LAN interface.
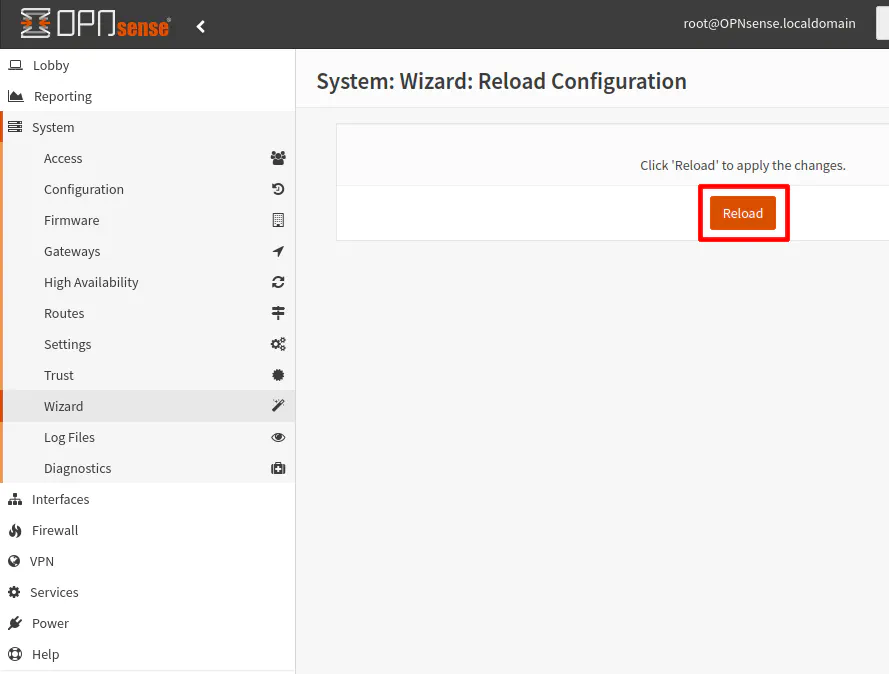
You will see a status message of the configuration reloading.
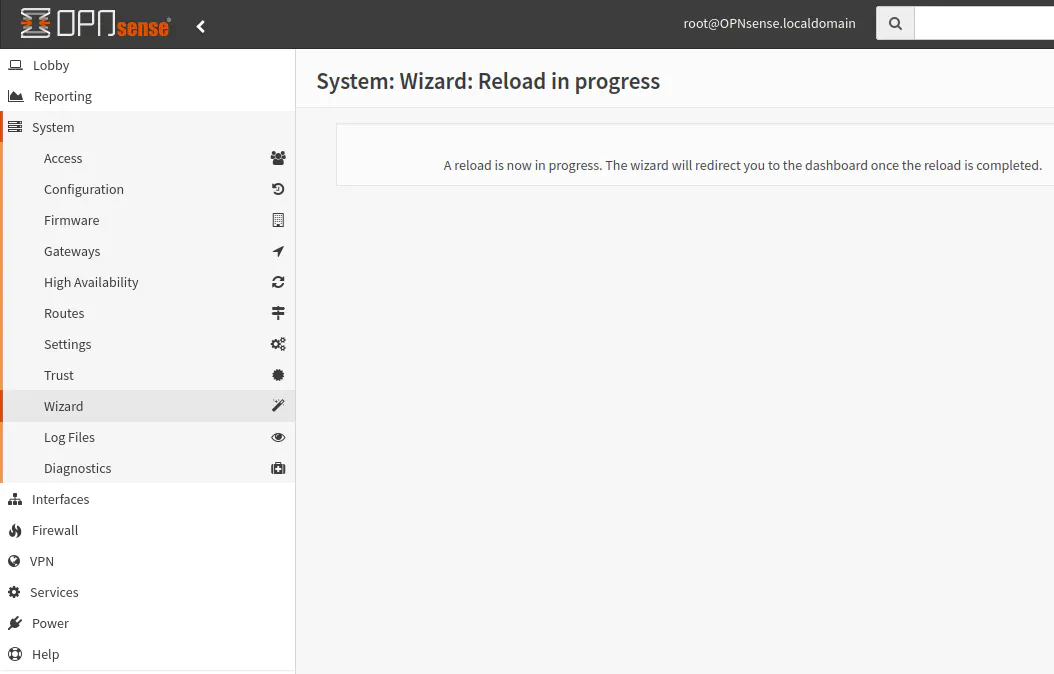
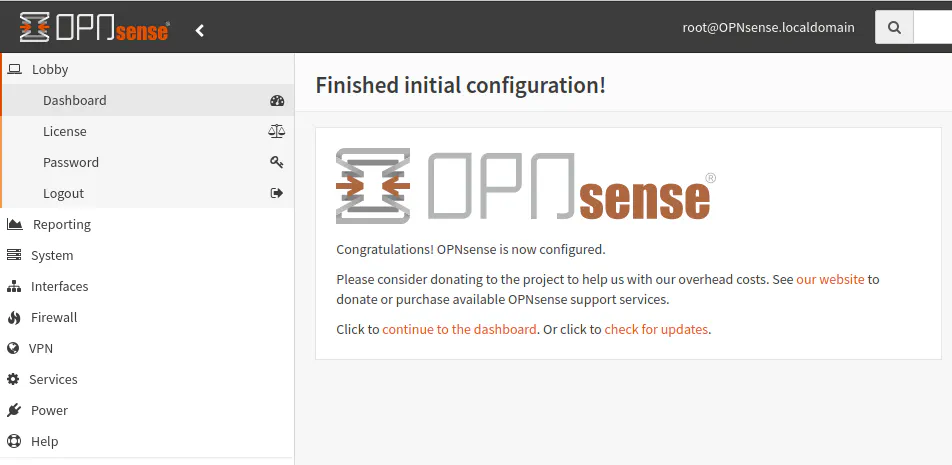
All changes have been applied!
Next Steps
If your basic network is functioning properly with your new OPNsense installation, I would like to say congratulations! You have taken the first step in learning more about securing your home network. You may wish to take some time to get familiar with the configuration options available on the web interface. If you have tinkered with the settings in consumer grade routers in the past, you may come across several settings which look similar. However, there are many more knobs and dials to turn in OPNsense.
It is worth noting that by default all incoming connections to both IPv4 and IPv6 addresses are blocked by default and all outgoing connections are allowed much like a consumer grade router. There is a basic level of protection in place for incoming connections so you do not need to worry about being completely vulnerable and exposed with the default installation.
When you are ready to implement more security measures beyond the default configuration, I have compiled a non-exhaustive list of features you may wish to consider.
This site covers a variety of OPNsense related topics as well as other home networking information such as how to configure your network switches to use VLANs. Whenever you are ready to tackle a new topic, be sure to search this site to see if there is a guide to help you.
Please feel free to contact me about suggestions for new topics, and I will see what I can do to try to cover it. Because I do not do this full time, I operate this site using the few brief moments of time I have available to work on it.