Build Apple AirPlay Powered Outdoor Speakers Using a Raspberry Pi

Table of Contents
When my family is spending time in our backyard especially when weather is nice, there have several times we brought a small Bluetooth speaker outside with us so we can have a little bit of music while the kids are playing. We also have birthday parties which we play some background music during the party. The Bluetooth speaker was stored in our walkout basement when it was not being used so we had relatively easy access to it. It was mildly inconvenient to repeatedly take it outside and plug it in.
I have thought for a while that it would be nice to have a set of outdoor speakers that are mounted and dedicated for that purpose. We have a deck that extends from the kitchen/dining room of our main level of the house which overhangs our walkout basement. That location would be an ideal location to mount speakers since they would be inconspicuous and they would be better protected from the elements (even though people claim they survive being exposed directly to all weather conditions).
To sweeten the idea of outdoor speakers, I thought it would be extremely convenient to power the speakers with a Raspberry Pi that has Apple AirPlay installed since we can control it natively with our iPhones while being outside. Since the Raspberry Pi will be wired to my home network, it would have a much greater range than Bluetooth since it can be accessed via WiFi. I have a relatively small backyard with full WiFi coverage so I will be able to control the music from anywhere outside my house which is awesome!
I think it is worth mentioning that this is the first bigger project that I am able to do using funds earned through advertising revenue from this site. These are the sorts of fun projects I want to work on and write about for the benefit of the community. I wrote about doing such things in my Privacy Policy to be transparent about how I plan to use the ad revenue from this site, and it is just now finally coming to fruition nearly 2 years later.
Parts List
Below is a list of parts I used for my project. I cannot guarantee that all parts will be available when you view this how-to but it will give you an idea of what you may want to use if you wish to do this project. Disclosure: The links in this parts list are Amazon affiliate links. It does not cost you any extra money to use these links, but I can earn a small percentage for the referral if you purchase something within 24 hours, which I can then use for other future projects!
- HiFiBerry Amp2
- 24V 5A Power Supply*
- MicroSD card
- Micro-HDMI cable or adapter (for the initial configuration)
- Ethernet cable (if you plan to wire to your network, which I recommend)
- Speaker wire (I found that the Amazon basics brand speaker wire is actually good quality wire that is also affordable and color coded – if you plan to bury the wire you may need to find something that is rated for direct burial)
- Polk Audio Atrium 4 or Polk Audio Atrium 5 speakers (or your preferred outdoor speakers)
If using the Raspberry Pi 3:
If using the Raspberry Pi 4:
* Important Note: Do not make the mistake of trying to save a little money by buying an underpowered power supply or you may have stability or booting issues. I originally bought a 24V 3.3A power supply with provides ~80W of power. I figured since the amp only takes 60W when it is fully utilized and the Raspberry Pi 3 only uses a few watts of power, I thought I would be ok. Even if you assume an 80% efficient power supply that leaves about ~63W. The HiFiBerryOS would not even boot. I tried other operating systems. Raspbian Lite would boot, so I manually configured the Amp2 driver and Shairport Sync for Apple AirPlay and it would work for a short while before crashing. After a while of troubleshooting, I decided that maybe the power supply was not providing enough power. Therefore, I returned the power supply for a 24V 5A model, which provides 120W (96W at 80% efficiency). Sure enough, that did the trick. The RPi 3 with the Amp2 has been running very stable ever since the power supply swap so it is worth the extra $5 or so for more power.
Install HiFiBerryOS
Since I am using the HiFiBerry Amp2 as the amplifier for my project and the fact that HiFiBerry created a basic Linux image with support for all of their hardware along with support for Apple AirPlay, Bluetooth, etc., I decided to try out the HiFiBerryOS. My end goal is to primarily use Apple AirPlay so I do not need any user interface or support for other media player software. While HiFiBerryOS comes with a basic user interface and supports some software such as Spotify, if you desire features beyond what HiFiBerry OS offers, Volumio is another great option I see being used on the Raspberry Pi. They offer a paid subscription for additional features.
To install HiFiBerryOS, go to the download page and click on Raspberry Pi 3 (or Raspberry Pi 4) depending on which device you are using.
Then you can use your favorite imaging software such as Etcher. Etcher allows you to copy an image to a microSD card from a zip file so you do not even need to waste time extracting the file. It is a pretty straightforward process since you simply pick the zipped image file, the microSD card you wish to use, and then click the button to image the microSD card.
Mount the HiFiBerry Amp2
Since I used an older Raspberry Pi 3, I already had some heat sinks installed on the board as you can see in the image below. I thought it may be worth mentioning that there is enough room to leave the heat sinks installed with the HiFiBerry Amp2.


To be honest, I do not know if it is bad to leave the heat sinks on or not. Will it draw heat off of the RPi board and put more heat on the Amp2? If you have any thoughts on that, leave them in the comments below. It does not seem to be causing me any problems so far. Only audio streams are being processed on that RPi so it should not be a heavy load.
The HiFiBerry Amp2 comes in a box similar to the Raspberry Pi.

When you open the box it is kind of like a Chinese takeout box that folds into a plate.

Now for the HiFiBerry Amp2 which will power the outdoor speakers.

It comes with plastic standoffs which I am not really a fan of, but i suppose that saves them a little bit of money. I would be willing to pay an extra dollar or two to have metal ones. You must be extremely careful to not over tighten the screws because you will strip the screws. The Amp2 does not beed to be secured very tightly because most of it is secured by the GPIO pins on the Raspberry Pi. The standoffs give the board a place to rest and to prevent the board from moving around.

Once you have the Amp2 unboxed you can mount it to the Raspberry Pi. Use the standoffs, screws, and nuts to secure the Amp2.

Connect the Speakers
It is time to connect the speakers so the system can be tested. HiFiBerry shows the speaker connections of the Amp+ as a reference for the Amp2 with the exception that one of the channels on the Amp2 having the polarity reversed. Therefore, you will need to make sure you properly wire each speaker. The positive/negative terminals are labeled on the Amp2 board so you will know the proper way to wire each speaker.
From left to right, the first 2 terminals can be used to power the Amp2/RPi as an alternative to the standard power plug (which I am not using for this project), the left speaker terminals, and the right speaker terminals.
Plug In Everything
If you have not already, insert the microSD card with HiFiBerryOS, plug in the Ethernet cable, monitor, mouse, keyboard, and power supply. At this point, the Raspberry Pi will be booted. While the HiFiBerryOS can be ran headless (without a monitor), I recommend using one when you first set up the HiFiBerryOS to see the progress of the initial boot process and to run through the basic configuration wizard.
Also, do not be tempted to put everything in the case just yet in case something does not work because it can be frustrating to have to take things apart.
Boot the Raspberry Pi
The HiFiBerryOS should be booting up. If you are using the Raspberry Pi 3, it will take several minutes. For a little while, I was wondering if it was working properly or not so do not be too concerned if it takes longer than you expect. The system is automatically configuring some initial services and the driver for your Amp2. It is nice that it auto-detects the hardware you are using. Once the system auto configures, it will reboot.
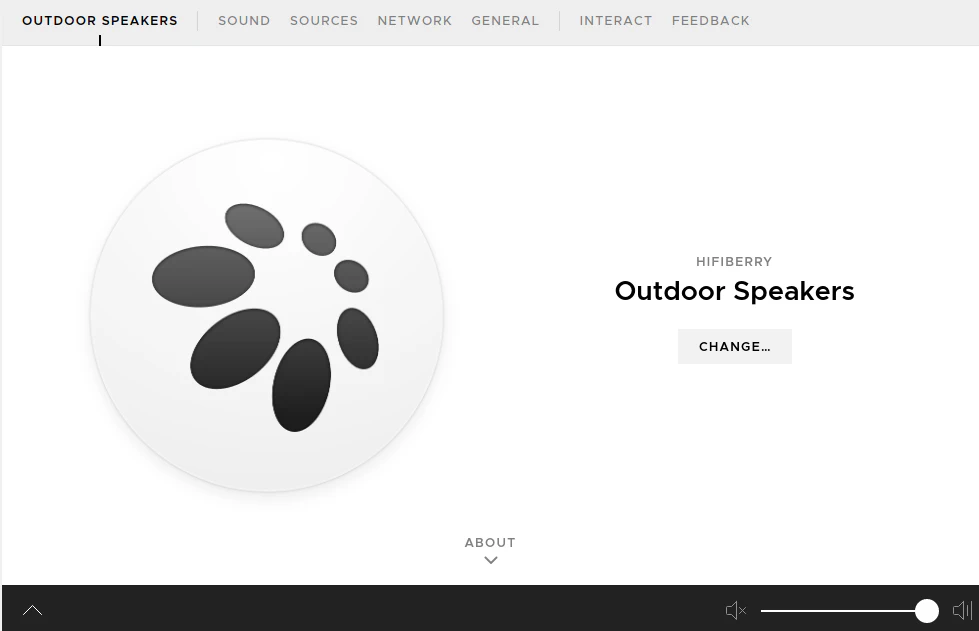
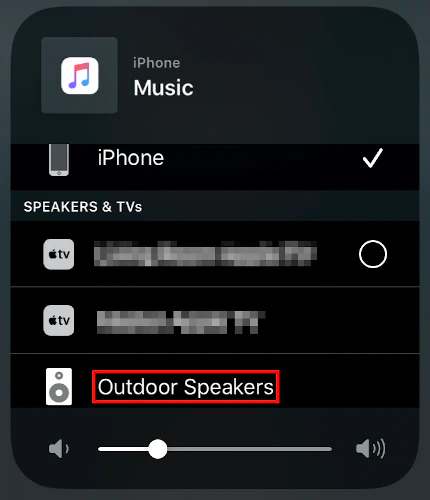
After rebooting, you will be presented with a basic setup wizard. When prompted for the name of the device, I entered “Outdoor Speakers” so that it will show up on my iPhone AirPlay list with that name. HiFiBerry added a web interface to recent versions of HiFiBerryOS, which makes things easy to access and configure. When I originally posted this how-to, I wrote that there was no web interface, but I discovered the same day I posted this how-to that the current version does have a web interface (go figure). It is possible I was led to believe it did not have one due to an older page reference that stated they were considering adding a web interface… or maybe I just read it wrong.
Once you are finished with the initial configuration, you will be brought to the main screen which will show the name of the device or what is currently playing.
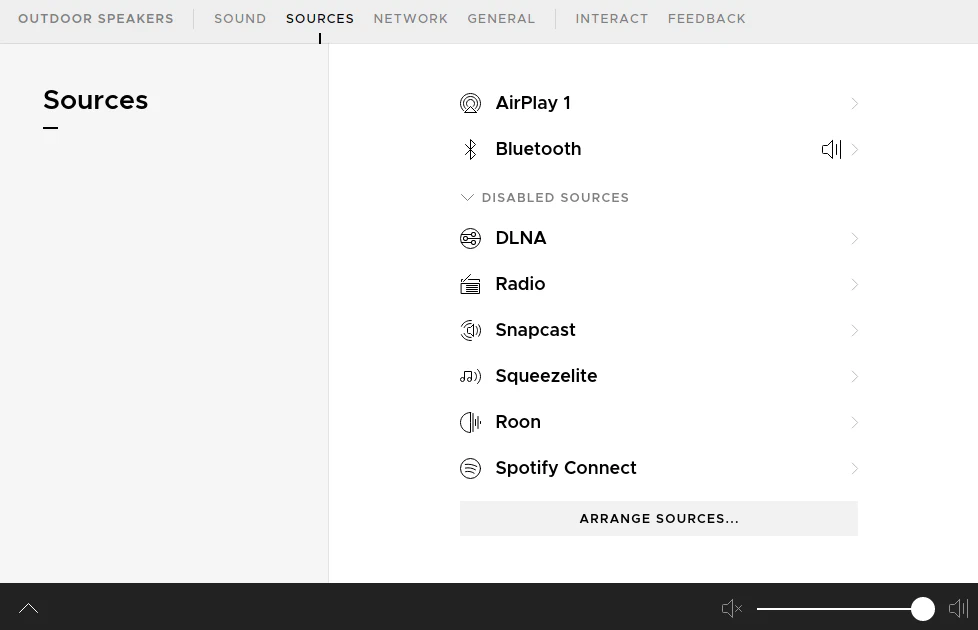
There are menu options when you click the down arrow in the top left corner of the screen. If you click on “Sources”, you can shut off any services that you do not wish to run, which may be a good idea if you are running an older RPi with fewer hardware resources available. I turned off everything except for Apple AirPlay and Bluetooth.
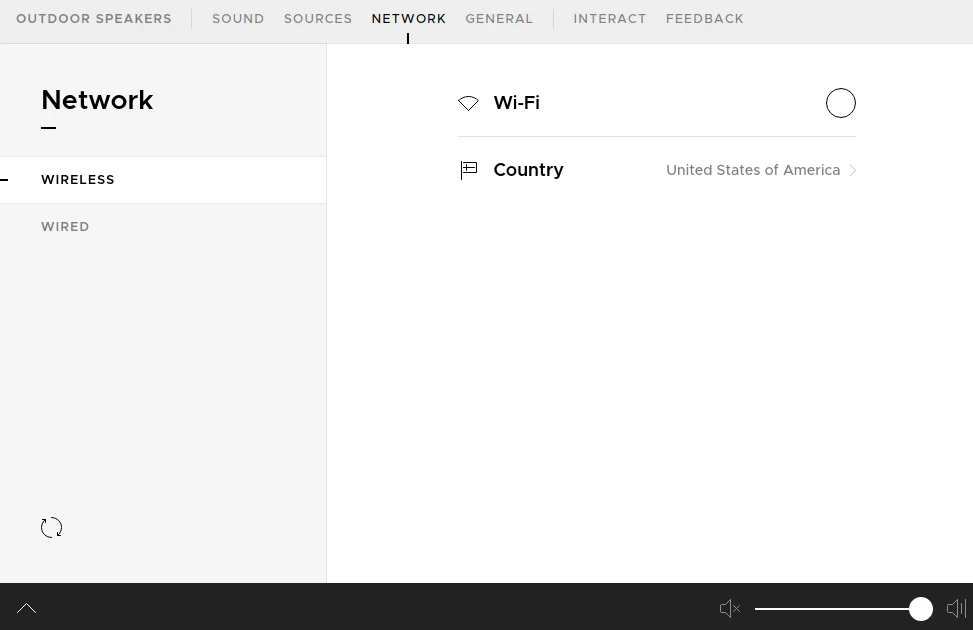
In the “Network” section, I turned off WiFi because I am using a wired connection. WiFi is enabled by default.
If you go to the “General” page, you will see that you may check for software updates among other things. By default, security updates are set to be automatically applied at night when the system is not being used. It is nice they are considering security as something important. You can change the setting to apply other updates as well.
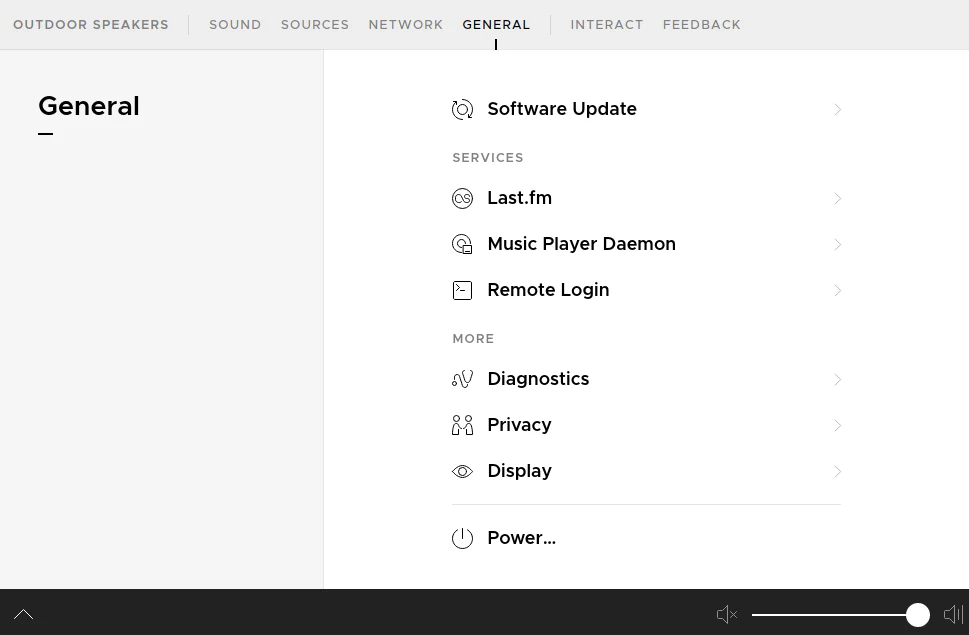
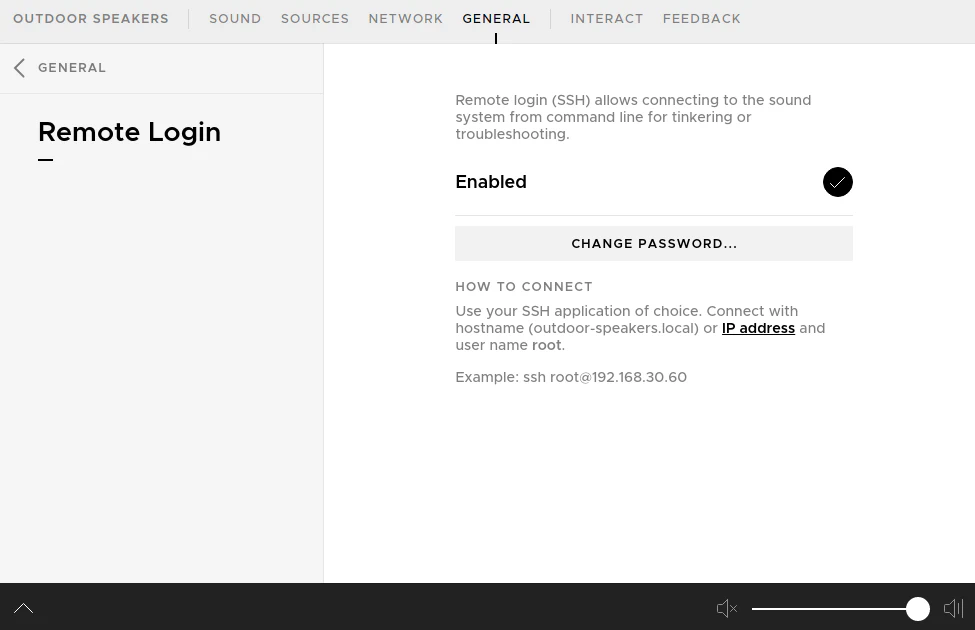
One other item of interest is “Remote Login”. You may wish to disable or change the root password using the “Remote Login” page.
Now that the system has been configured, subsequent boots will be much faster. I imagine it will boot even faster if you turn off unused services.
Change the Root Password for SSH or Disable SSH
By default SSH is enabled with the default password “hifiberry” for the root user. You either need to disable SSH in the user interface or change the password. The password can be changed through the interface, or you can log into the HiFiBerryOS with the root user and then change the password using the passwd command. This step is important for security reasons, of course.
Test the System
This is the moment of truth! Open your iPhone (or Android phone if you wish to use Bluetooth) to see if the “Outdoor Speakers” show up in the list of Apple AirPlay devices. You should see something like below:
When testing the system, I recommend you listen to several minutes worth of music and let it run for a little while. You will know if your system is stable with a good power supply if it does not crash while playing music and if your device does not boot at all, that could also be an indication of an inadequate power supply (but could also mean there is an issue with your microSD card or OS image).
Assemble the Raspberry Pi Case
If everything seems to be working properly, the finishing touch is to put the RPi in its case if you purchased one. You not need to have a fancy case if you wish to save money and you do not even need a case at all (but make sure you do not ground/short out your RPi!). I do think having a case definitely makes the installation look a lot cleaner, and it may even help keep the RPi itself physically cleaner from dust and debris. Since I am planning for this project to be a permanent fixture of my home for the foreseeable future, I see more value in buying an enclosure.
For this project, I chose to use the HighPi case (affiliate link) since it is actually made to support the various DACs/amps produced by HiFiBerry. I knew everything would fit properly. As stated in the parts list, the Raspberry 3 version of the case is plastic but the Raspberry Pi 4 has a nice metal enclosure which looks quite nice (I am actually a little disappointed that they do not have that case available for the Raspberry Pi 3, but maybe one day I will upgrade to the nicer case if my RPi 3 dies).
As you can see the case is tall enough for the Amp2 and there are some cutouts on the case for the various DACs/amps. Depending on the hardware you are using, you can break open the appropriate tabs to expose the ports/terminals to allow for power cables and speakers wires.

The other side of the case has a slot in case you wish to attach additional hardware to the GPIO pins. There should be enough room to run wires through the side of the case. I will not be using that.

Not too much to write home about on the back of the case. There is a place you can push on the back to help pop the top of the lid off of the case.

For the bottom of the case, you will see that you may mount the case on a wall or ceiling. The case also comes with nice little clear rubber feet to prevent the case from sliding on a smooth surface. It sits will on my metal server rack shelf. You can see I already have the RPi mounted in this picture (I forgot to take one of the empty case).

Both of the tabs/cutouts will need to be removed on this case for this project since you need the full width of the opening for the power supply and speaker connections.

When you look down into the case from the top, you will see there are instructions on how to insert the Raspberry Pi into the case. The case is designed for the Raspberry Pi to snap into the bottom of the case. Some pressure needs to be applied. You will see Step 1 is to insert the Pi on one side of the bottom of the case and then for Step 2, push down on the other side. You will feel and hear it snap into the case.

This is what it looks like mounted in the bottom of the case. I am using my test speaker wires in this image and is not the speaker wire I used outside under the deck.

Mount Outdoor Speakers
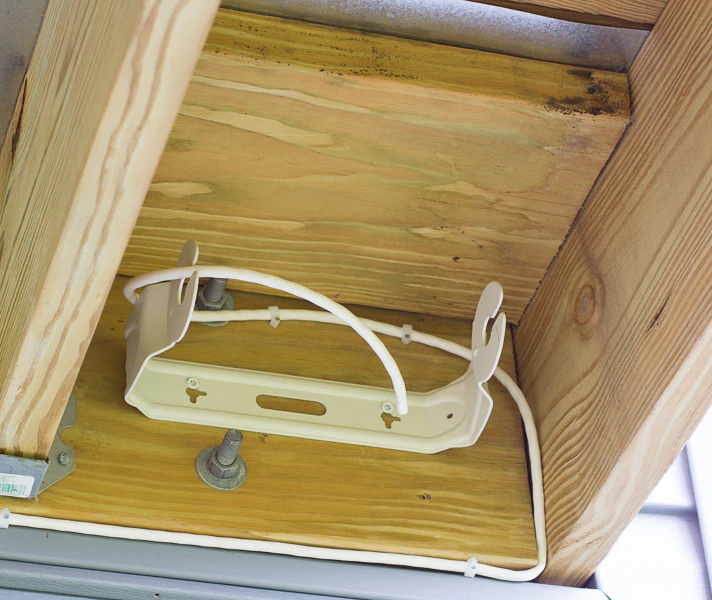
Mounting the outdoor speakers is an exciting step because it means the project is almost finished and is finally being realized. I have a raised deck off of the main level of my house and a walkout basement so the deck is about 9-10 feet above the ground. It is a great location to tuck in some outdoor speakers. I decided to mount them in the floor joists of the deck on both sides of the 10ft x 20ft deck to keep them more discrete and more protected from the weather (even though some have said they leave them out in the open).
First, you must install the bracket and run your speaker wire to the desired indoor/outdoor locations. Since my walk out basement is unfinished (but is built to be finished), it makes it easy for me to drill holes in the side of my house and run cables. I am trying to do several of those outdoor projects like running IP security camera Ethernet cables, etc. before we finish our basement.
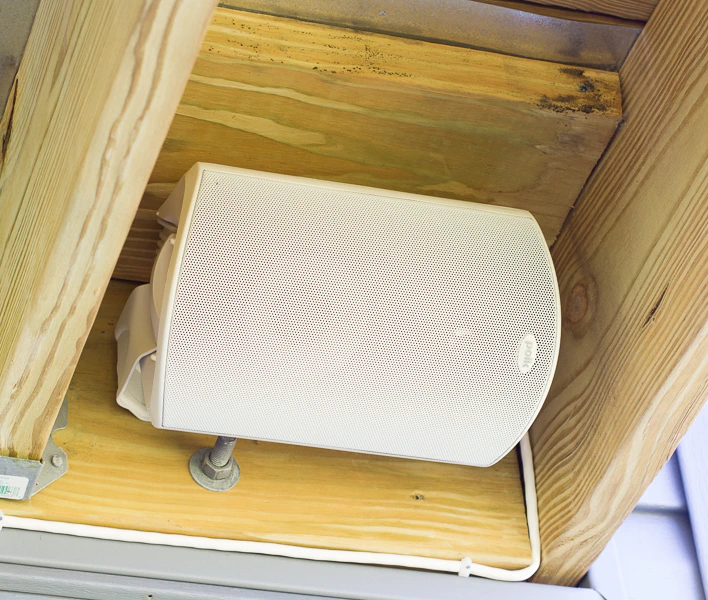
Finally, mount the Polk speaker mounted. I think it looks pretty clean and you do not really notice the speakers are there when out in the yard.
Set Up the Raspberry Pi HiFiBerry Amp in its Designated Location
With everything assembled and mounted, you can put the Raspberry Pi HiFiBerry Amp in its designated location in your server rack, closet, etc. if you have not done so already. After routing your speaker wire in or along your ceiling/walls and wiring it into the amp and plugging everything in, your project should now be complete! Congratulations! You now have an AirPlay (or Bluetooth) powered outdoor speakers for you to enjoy!
This is how mine looks on my server rack shelf:

Conclusion
Overall, I am pretty pleased with this project. I discovered that a 60W amp is just enough power for the size of yard that we have (about 0.27 acres). It is loud enough that I do not need to use the maximum volume to hear music on the back corner of the yard. At full volume it probably does not even bother our neighbors that live on both sides of my house. Our houses are like 30-40ft apart in our development so they are fairly close together. When we are close to the deck, the volume level is more than loud enough. We actually have to turn it down quite a bit if we are under the deck pushing the kids in their swing or when we our in our porch swing. I am glad that it has just enough power to hear it in the entire yard without blasting out our neighbors.
I think the main downside of mounting the speakers in between the floor joists of the deck is that it may dampen and muffle the sound slightly. It could be part of the reason the volume does not carry quite as far, but for our needs it still works well. If you are in front of the deck or under it, the sound is a little bit better. If you are concerned more with sound quality/loudness, you may get better performance if you mounted them lower under the deck than I did (if you have a similar situation)
I also discovered that although the WiFi seems to have a good range and reasonable performance outside from my wireless access point that is mounted upstairs on the ceiling, there are moments when I am walking near the deck that the audio starts cutting out on me. It seems to occur when I am actually closer to my house under the deck. The wood of the deck and the outdoor patio furniture on the deck seems to be a little bit too much for that access point because it is also going through several walls. I am planning to get another UniFi access point for the basement when I finish it since the 5GHz signal does not make it to the basement so that should cover more of the outside yard especially under the deck because it is next to my walkout basement door.
My recommendations based on my personal experience of implementing this project are the following:
- Use a power supply with more than enough capacity even if you do not need to max out that capacity (it is better if you do not)
- Test your project before putting it into place to work out any issues
- Mount your speakers based on aesthetics or sound quality since you may have to sacrifice one over the other (if they are more discrete, it may not sound quite as well)
- Ensure you have a great outdoor WiFi signal if you do not want your audio to cut out (using a wired connection to your Raspberry Pi can help some so you do not have wireless on both ends)