EnGenius ECS1112FP and EXT1105P Switches

Table of Contents
When EnGenius sent me two wireless access points to review, they promised to send me some switches so that I can try out more of their ecosystem. EnGenius has product lines for midsize business/enterprises and for small business/home users.
I received two midsize business/enterprise managed switches: the ECS1112FP and EXT1105P. The ECS1112FP is a 8 port Gigabit PoE+ switch which has 4 Gigabit uplink interfaces. The power budget is 130 Watts. The second switch, the EXT1105P, EnGenius labels as a “switch extender” since the switch is powered via PoE from another switch.
Although their midsize business/enterprise wireless access points have to be managed via the cloud, the midsize business/enterprise switches can be managed either locally or in the cloud. I think it is nice that local control is an option for the network switches since it provides more flexibility especially if you would like to use a switch on isolated/air gapped networks where the switches will not have access to the Internet.
Unboxing
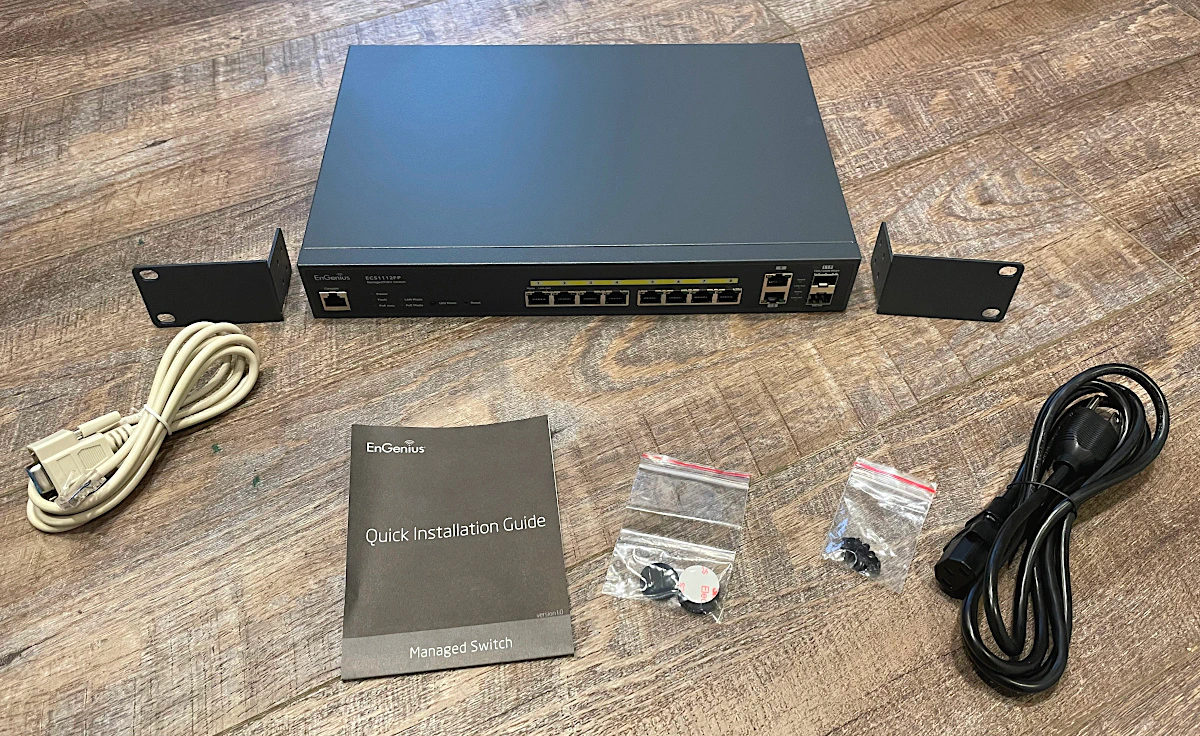
First up is the ECS1112FP switch. Besides the switch itself, you receive rack ears, screws for the rack ears, felt pads if you wish to set the switch on a table or shelf, the power cable, a Quick Installation Guide, and a RJ45 to DB9 serial cable.
I find it interesting that the switch comes with a serial cable since not many switches I have unboxed come with one. Enterprise users may appreciate the extra cable. Personally for home network usage, I prefer to use web interfaces to manage switches since it is very convenient to use, and it is nice to see the port configuration visually.
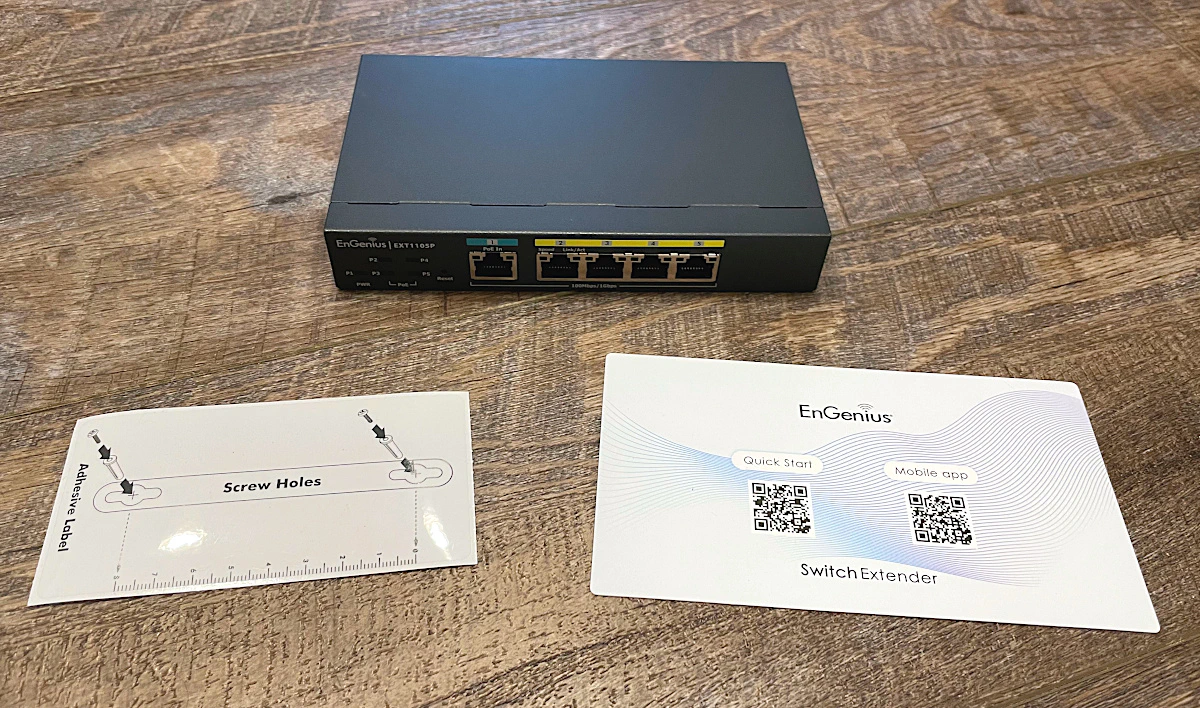
The EXT1105P switch comes with a screw hole guide if you wish to wall mount the switch and also comes with a card with QR codes for quick access to Quick Start guide and the EnGenius Cloud To-Go mobile app.
The switch does not come with a power cable since it is intended to be powered from another PoE switch. A switch such as this is convenient if you just need a few extra ports in a location that may be lacking in Ethernet drops.
Build Quality
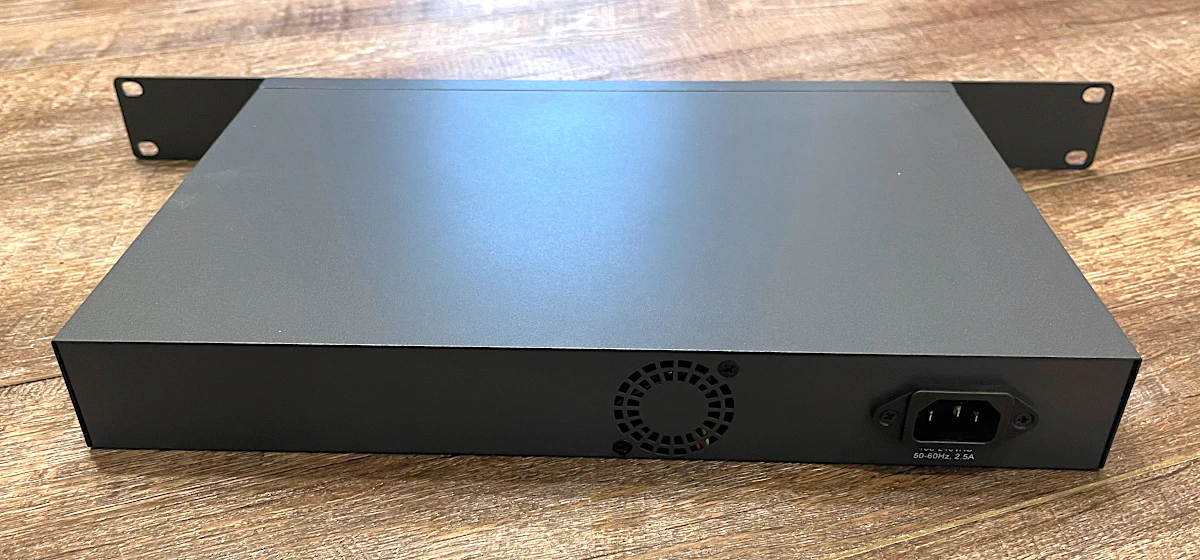
The switches seem to be well constructed – even the rack ears. I have seen some switches produced by other vendors that use thinner gauge metal for their rack ears, which causes the switches to sag in the rack (a sad sight to see).
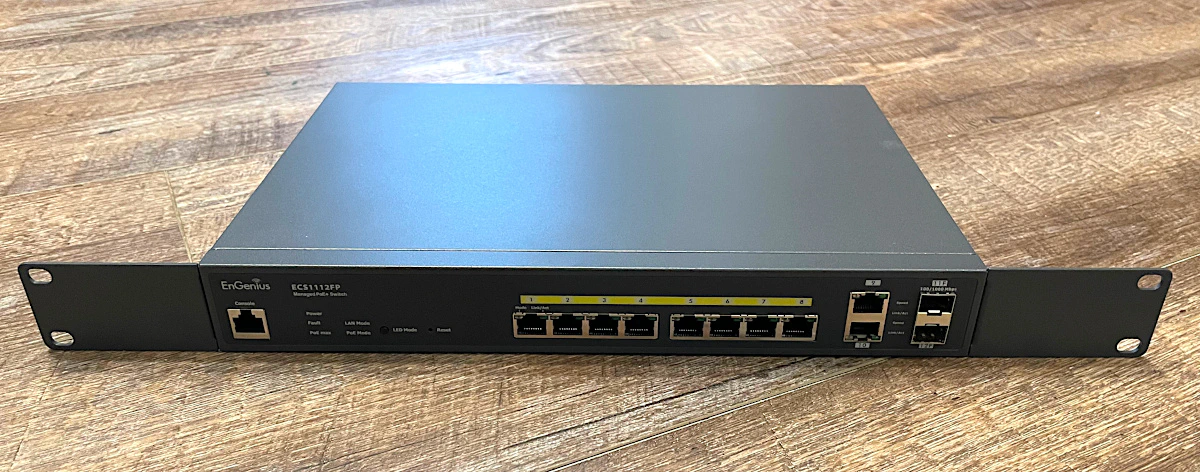
On the ECS1112FP switch, the far left port is the console port. Next to the console port is the LED mode button. This button allows you to toggle between showing the network activity and the devices which are using PoE power.
The yellow labeled ports are the 8 Gigabit PoE+ ports followed by 4 Gigabit uplink ports. The non-PoE ports may be used to connect to other network switches or to other devices which do not need PoE so that you can save more of the PoE ports for devices which need to be powered via PoE.
On the back of the switch, you will notice that there is only one fan and the power socket. The switch seems to be pretty quiet when there is not power being used by the switch. 8 port PoE switches are easier to keep cool than 24 and 48 port PoE switches.
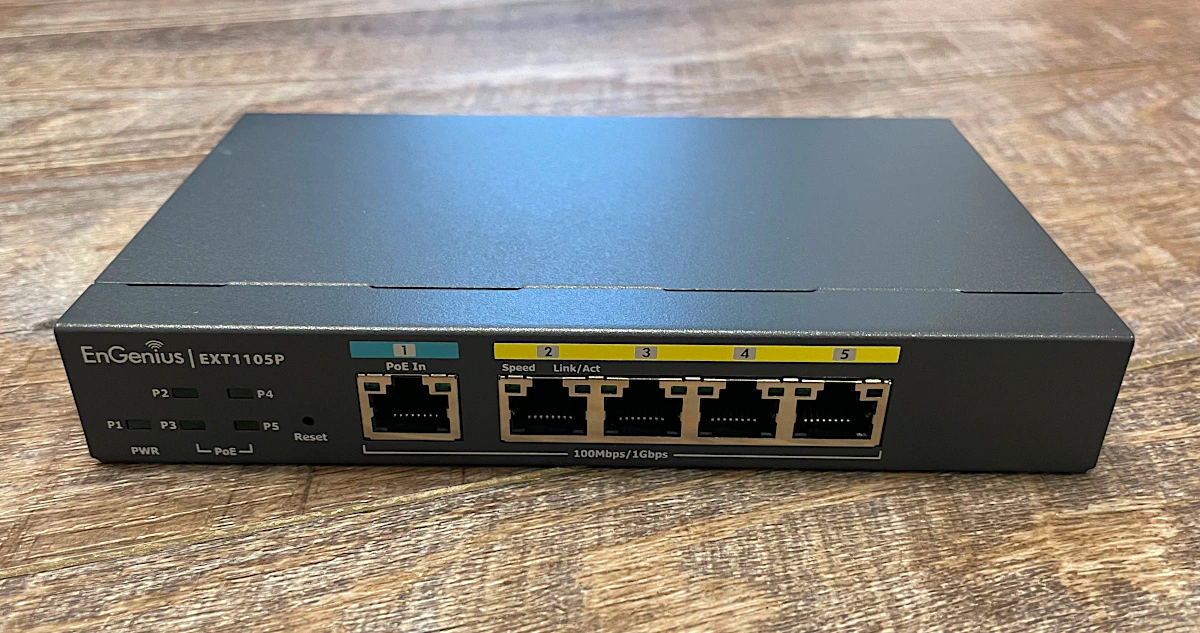
The first port of the EXT1105P extender switch is the PoE++ input used to power the switch and the remaining 4 Gigabit ports. Although the first port accepts PoE++ for maximum power, you may also use PoE+ but you will lose half or more than half of your power budget.
When using PoE+ to power this switch, I found that I could not connect 2 of the EnGenius wireless APs at the same time since I barely exceeded the power budget. You may be able to only power 1 or 2 devices when using PoE+ so it is best to use PoE++ to power the switch when possible.
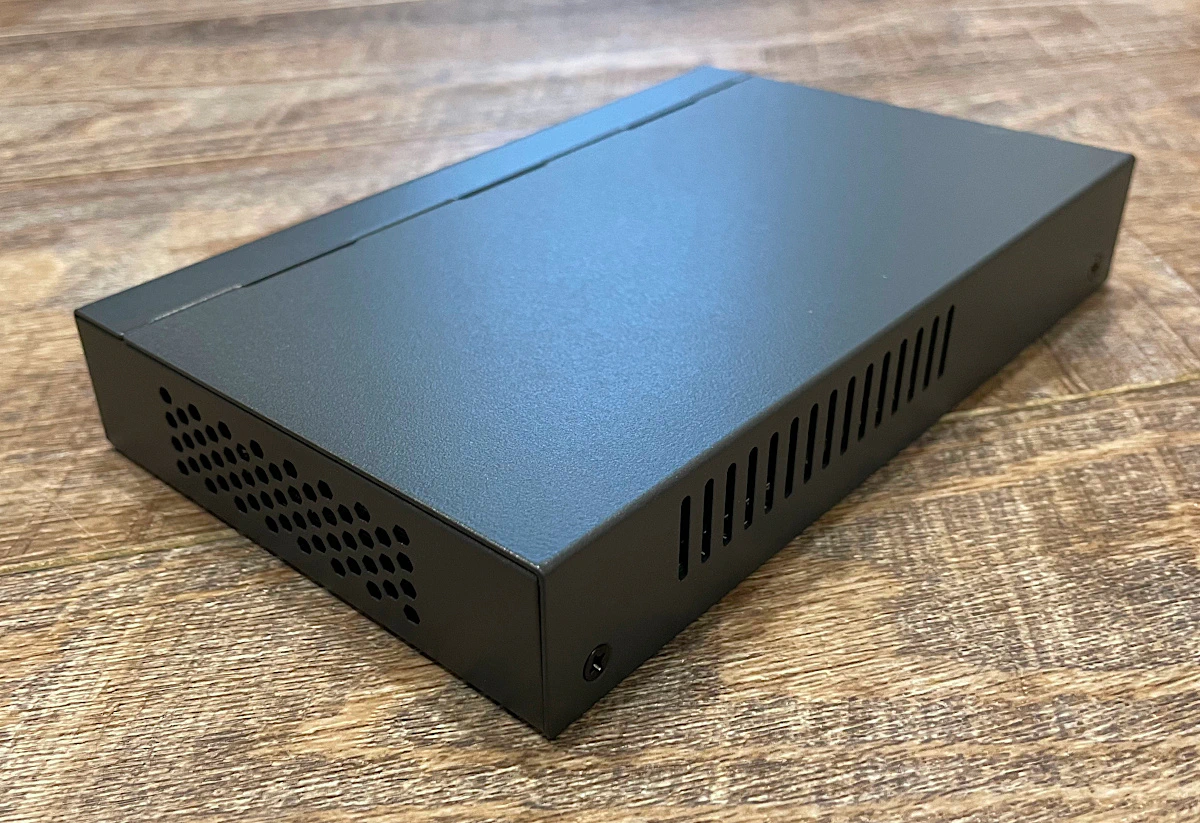
On the side of the switch you can see there are vents on all sides to ensure the switch stays cool since it is a fanless switch. Because it is fanless, it makes a great switch to use at your desk or in your work space where you may not want to have a lot of extra noise.
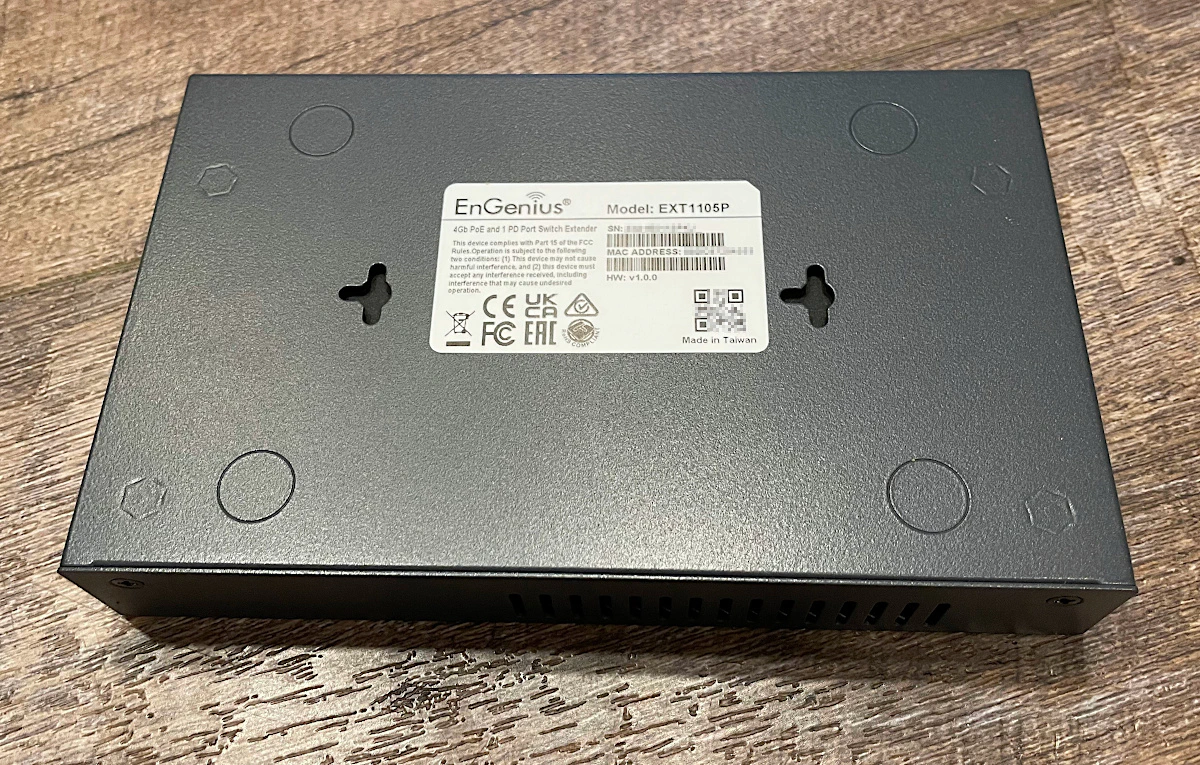
Looking at the bottom of the switch, you will see the serial number, MAC address, and a QR code that you can scan to add your devices to your EnGenius cloud account.
There is also two holes that you can use to mount the switch to a wall or perhaps under a desk.
Power Consumption
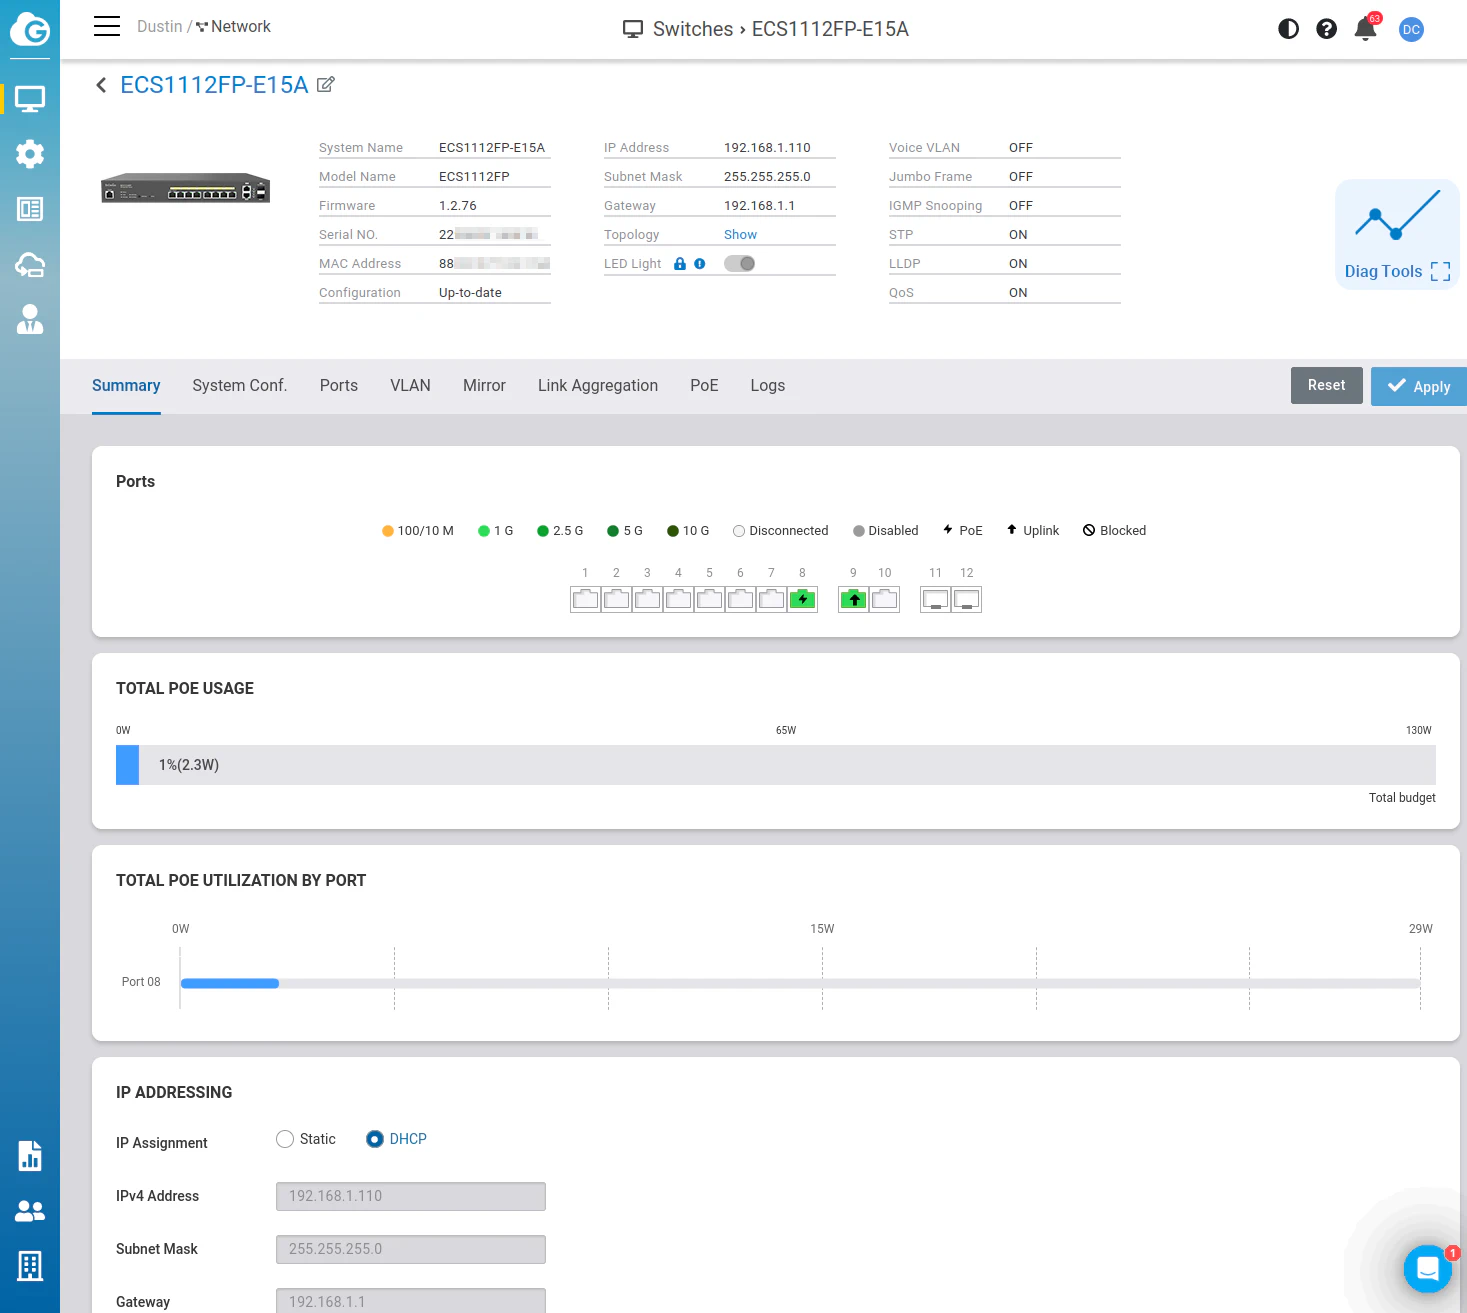
For the EXT1105P switch extender, the reported power usage when plugged into the ECS1112FP is 2.3 Watts so the small PoE switch uses very little power.
I plugged the ECS1112FP into a smart plug with energy monitoring to determine that the average power consumption was between 9-10 Watts. When I have the switch extender connected to the ECS1112FP, it jumped up to about 13 Watts.
Local Management
Unlike their midsize business/enterprise wireless APs, the switches have local management. The local web interface is different than the cloud management interface so I will show the highlights of both interfaces.
Local Management: ECS1112FP
The first local web interface I will cover will be for the ECS1112FP.
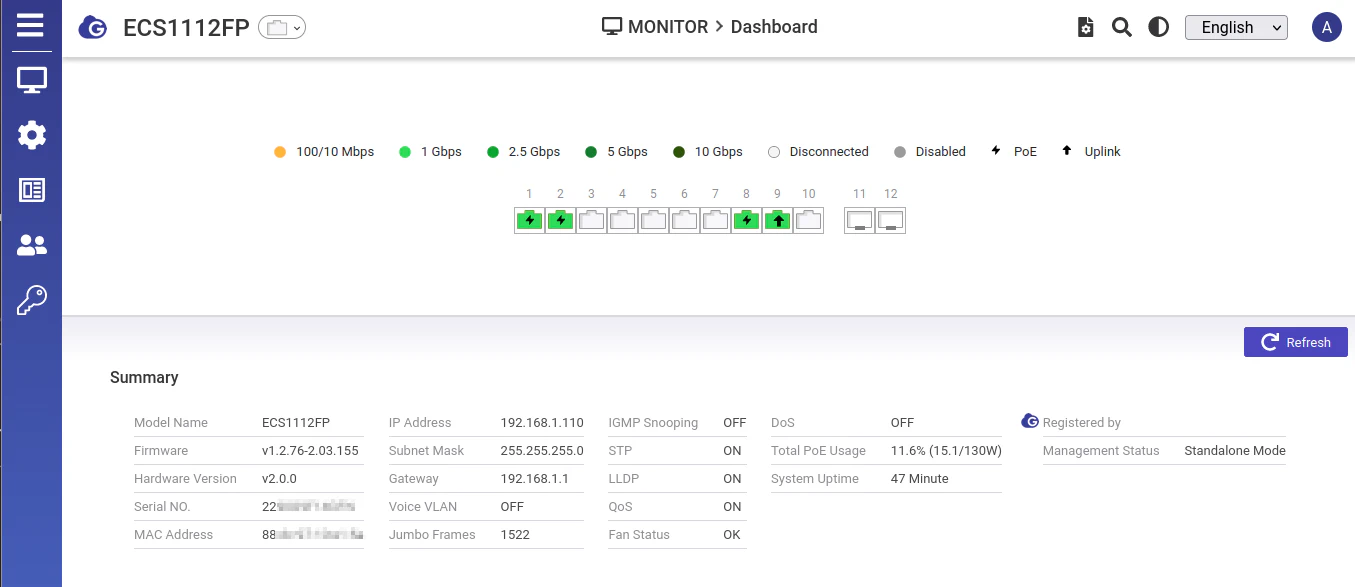
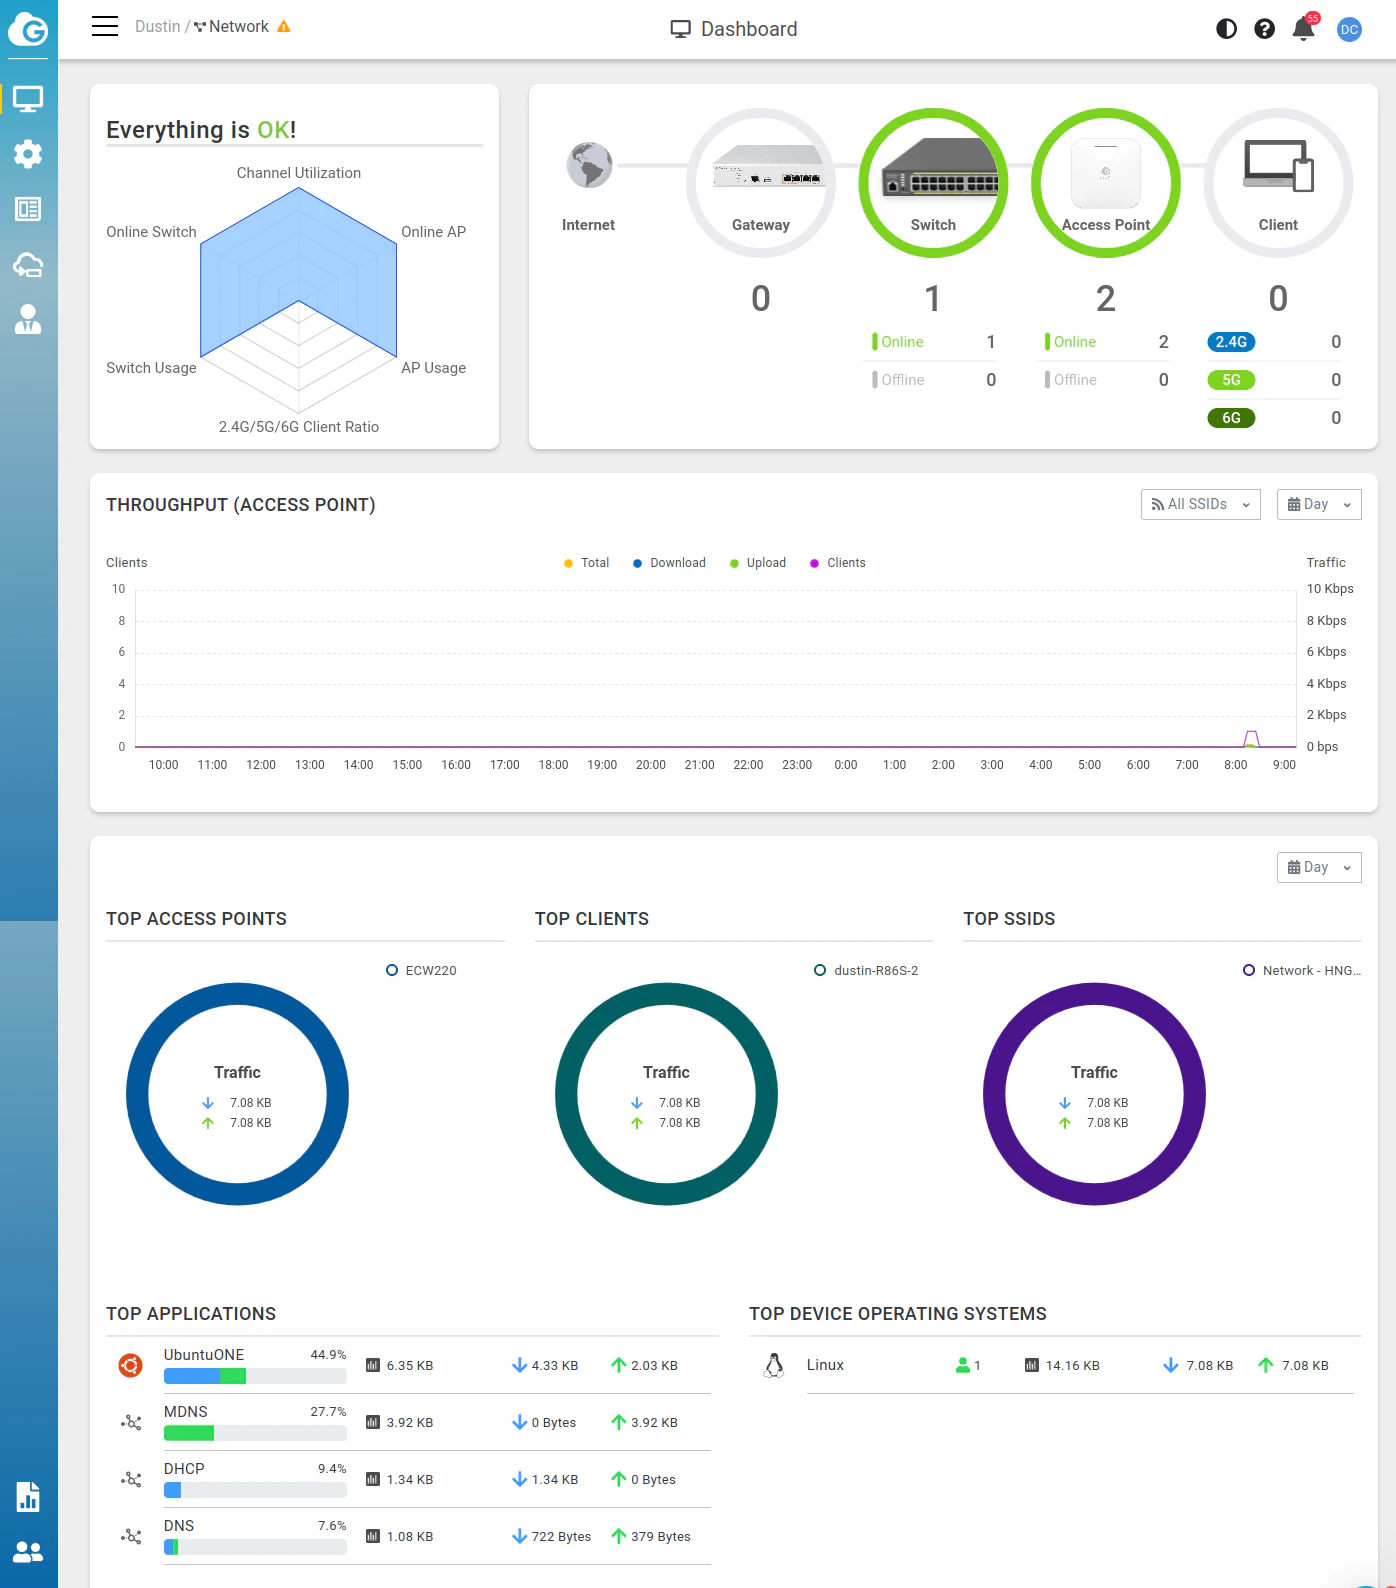
ECS1112FP: Monitor > Dashboard
The “Dashboard” is where you land after logging into the local web interface. It provides a nice overview of the network switch.
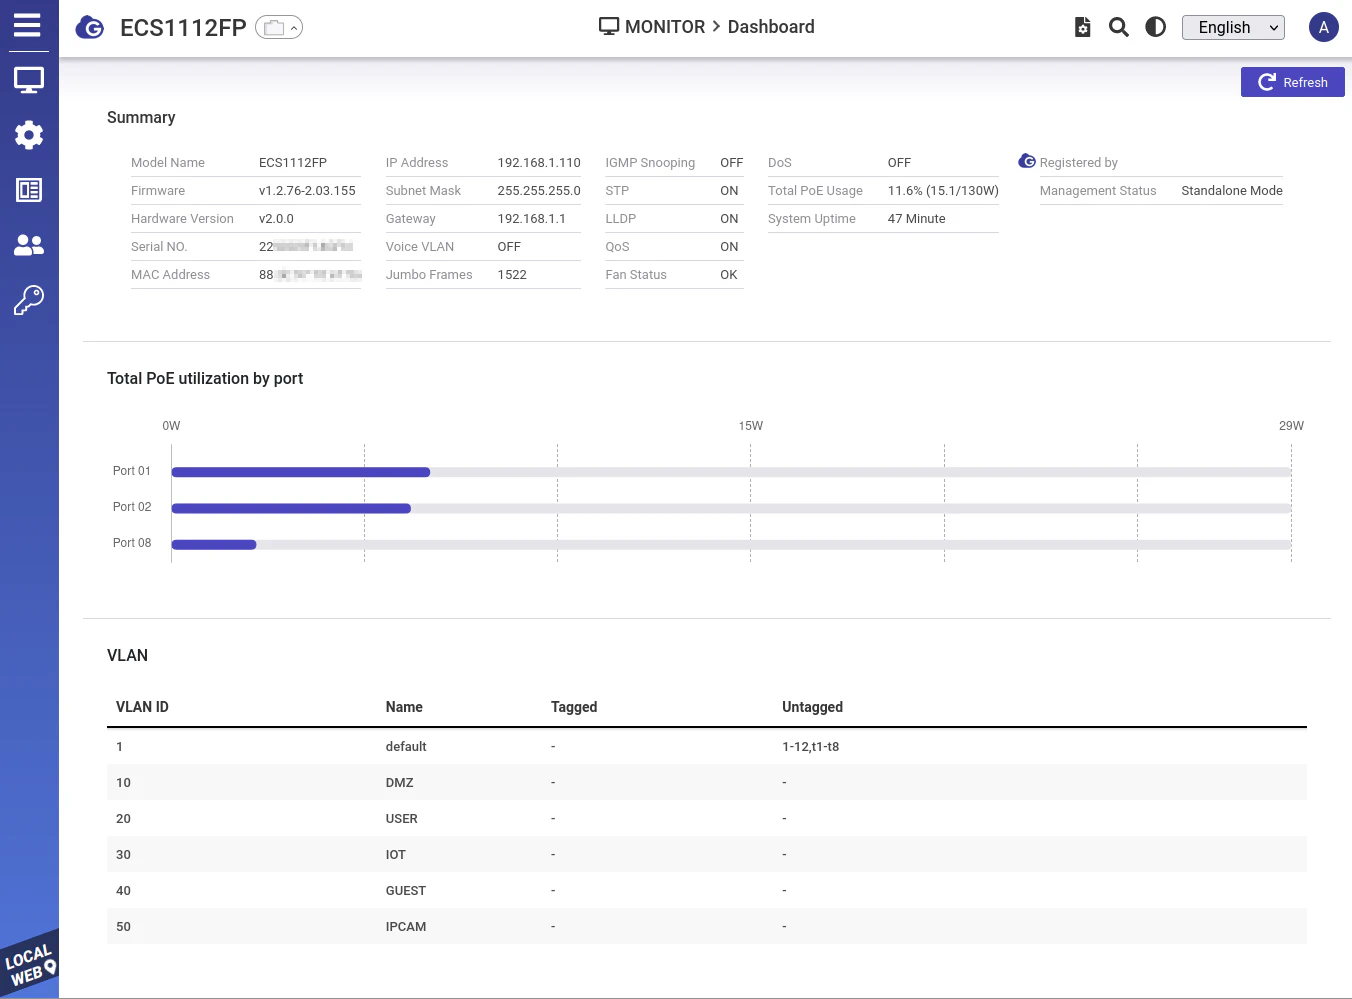
If you click oni the Ethernet icon at the top of the page, you drop down an overlay which shows additional information about what is connected to the switch and if the devices are using PoE power.
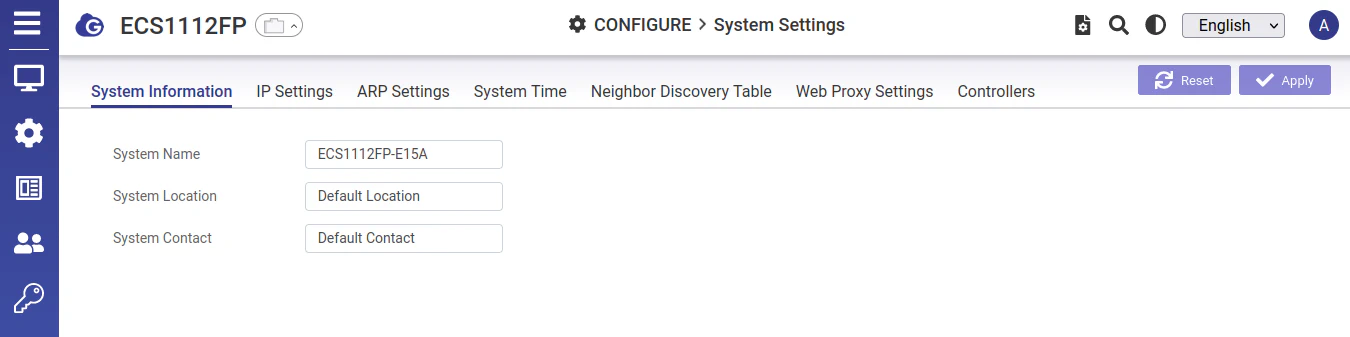
ECS1112FP: Configure > System Settings
On the “System Settings” page, there are some basic configuration options such as the name of the switch, the IP settings, and the system time.
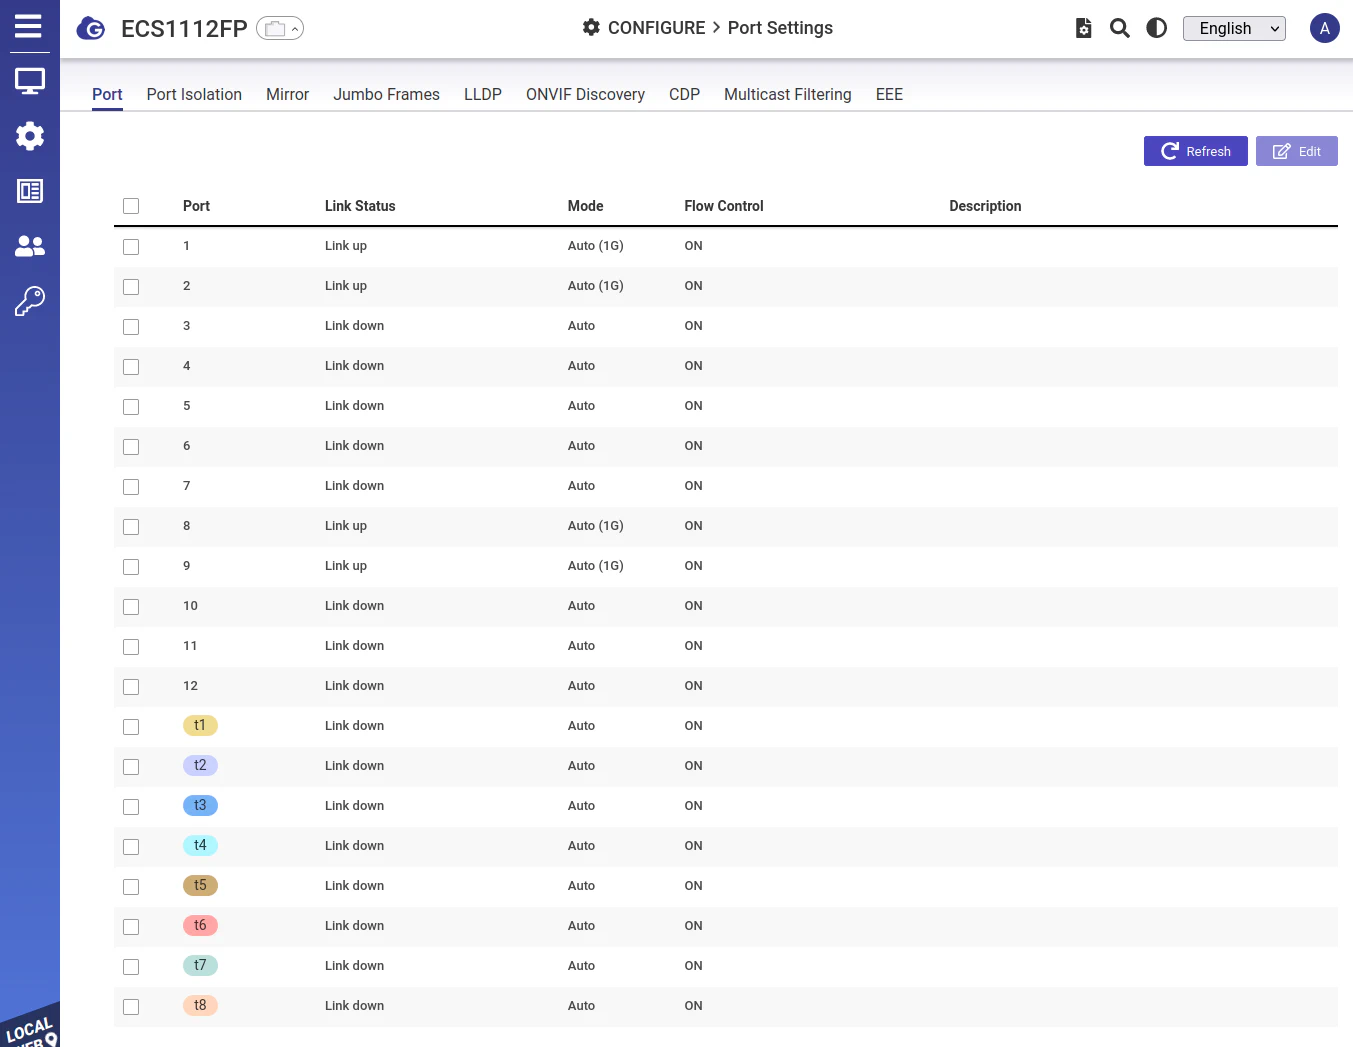
ECS1112FP: Configure > Port Settings
The “Port Settings” page is where you can include descriptions for the ports as well as see the status of the links. On various tabs, you can configure port isolation and port mirroring.
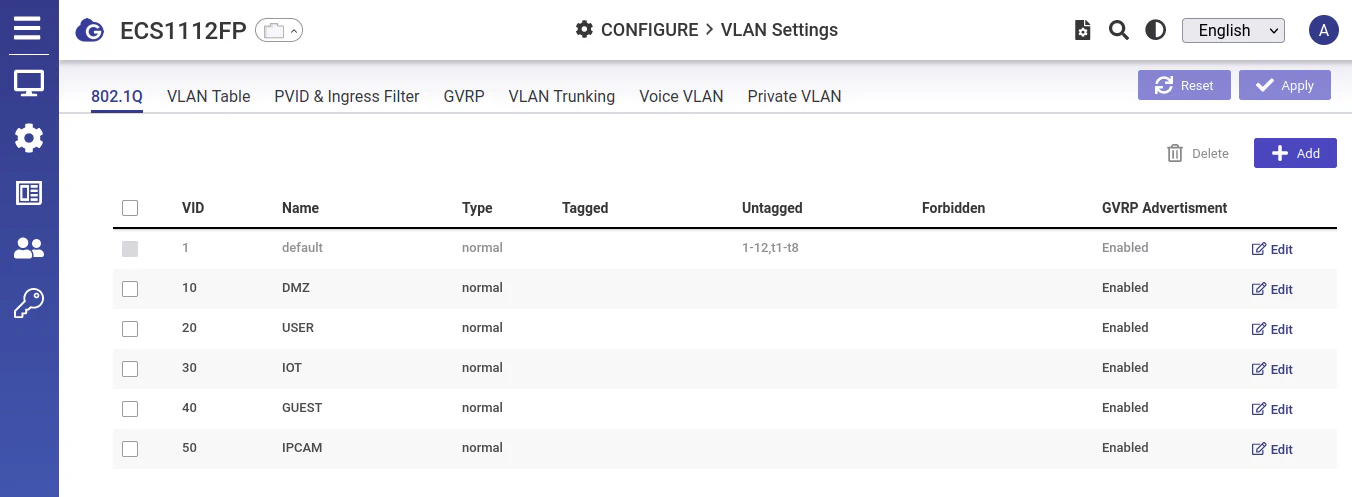
ECS1112FP: Configure > VLAN Settings
The “VLAN Settings” page allows you to configure all of the VLANs you wish to assign to your interfaces.
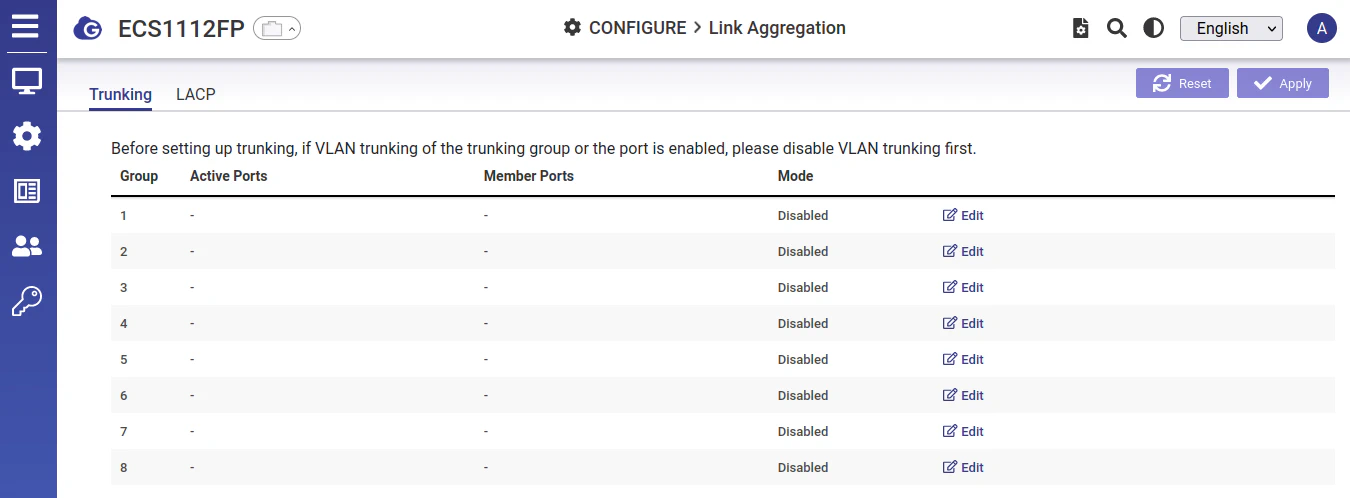
ECS1112FP: Configure > Link Aggregation
Link aggregation is a feature you may wish to make use of especially for 1G switches to help increase bandwidth if you have multiple devices that are transferring large amounts of data at the same time.
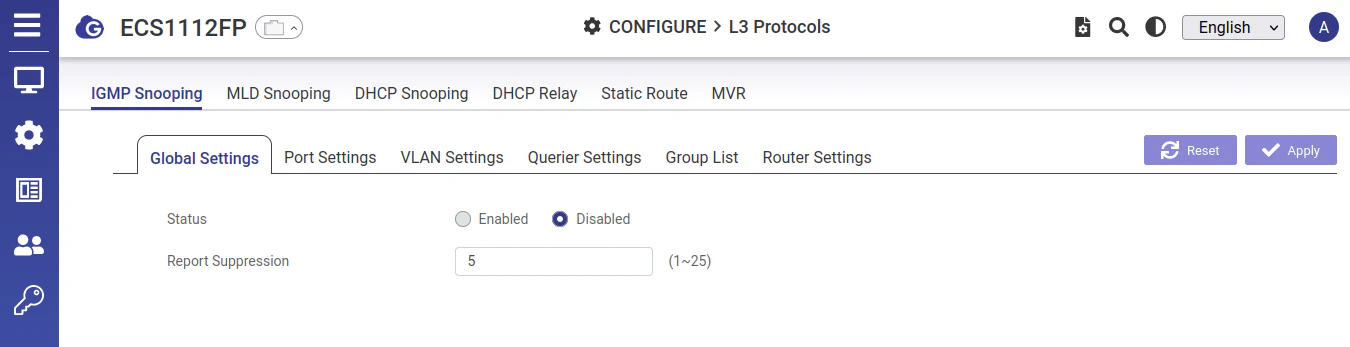
ECS1112FP: Configure > L3 Protocols
There are a few Layer 3 protocols you may wish to make use of on your networks, and they can be found on the “L3 Protocols” page.
IGMP snooping can help reduce network traffic for video broadcasts, for instance. You can also configure static routes if you have a more complex network architecture.
Local Management: EXT1105P
Now it is time to look at the local web interface for the EXT1105P. There is not as much to look at for the switch extender since the settings are much more basic.
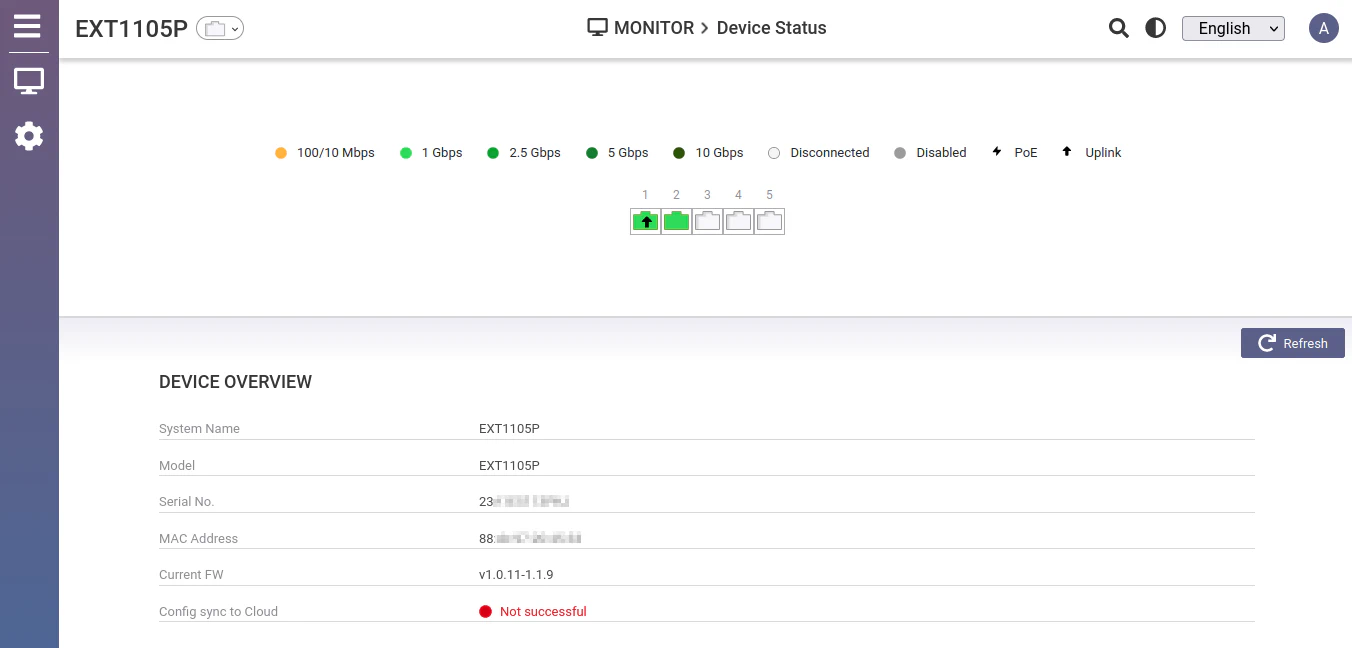
EXT1105P: Monitor > Device Status
The “Device Status” page is where you are taken after logging into the local web interface.
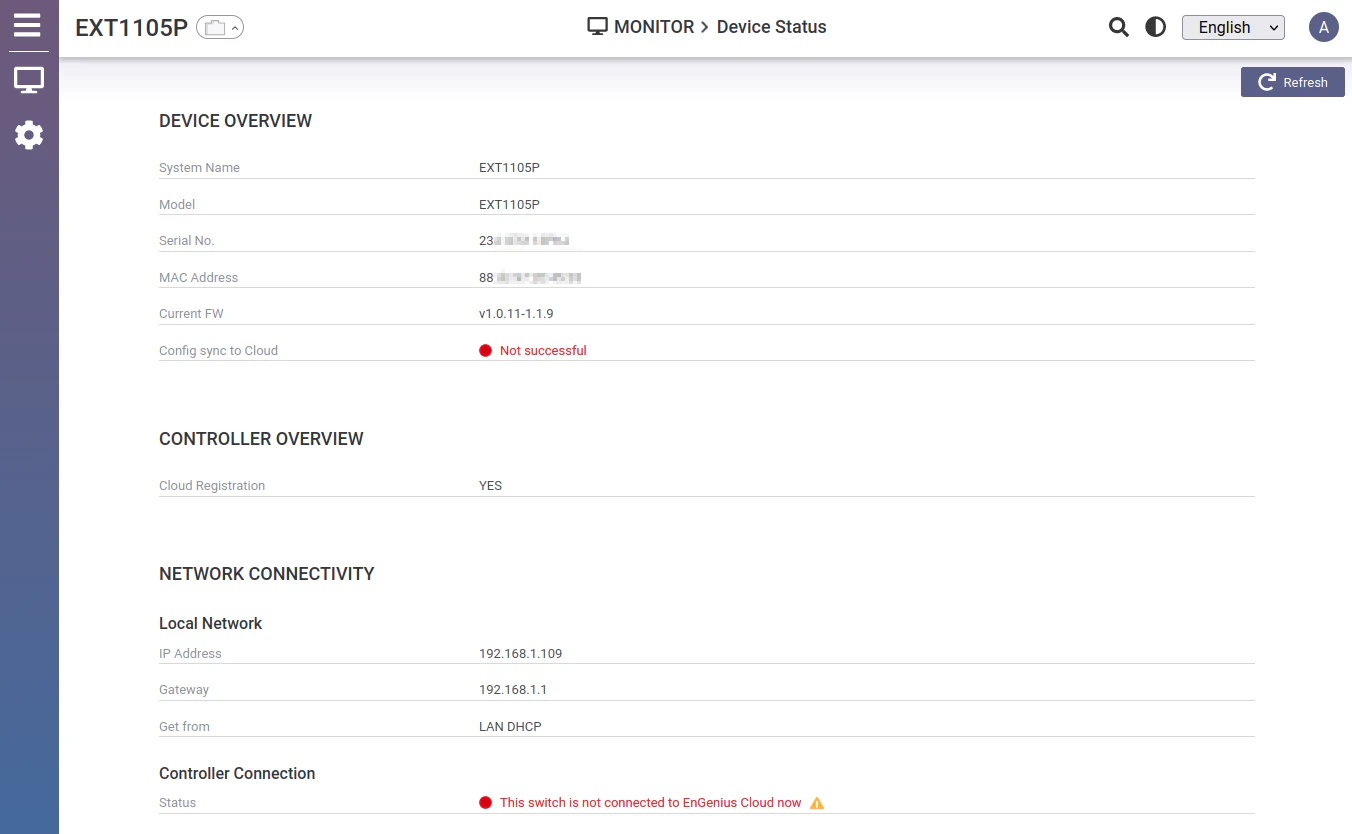
Similar to the ECS1112FP web interface, you can click on the Ethernet icon at the top of the page to show more switch details.
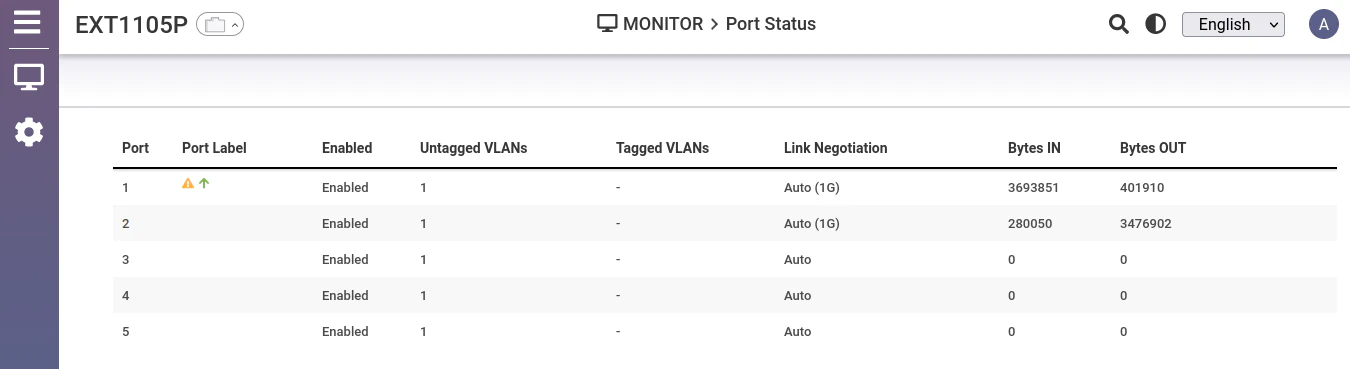
EXT1105P: Monitor > Port Status
The “Port Status” page shows the list of ports, the VLANs they belong to, and some basic traffic status.
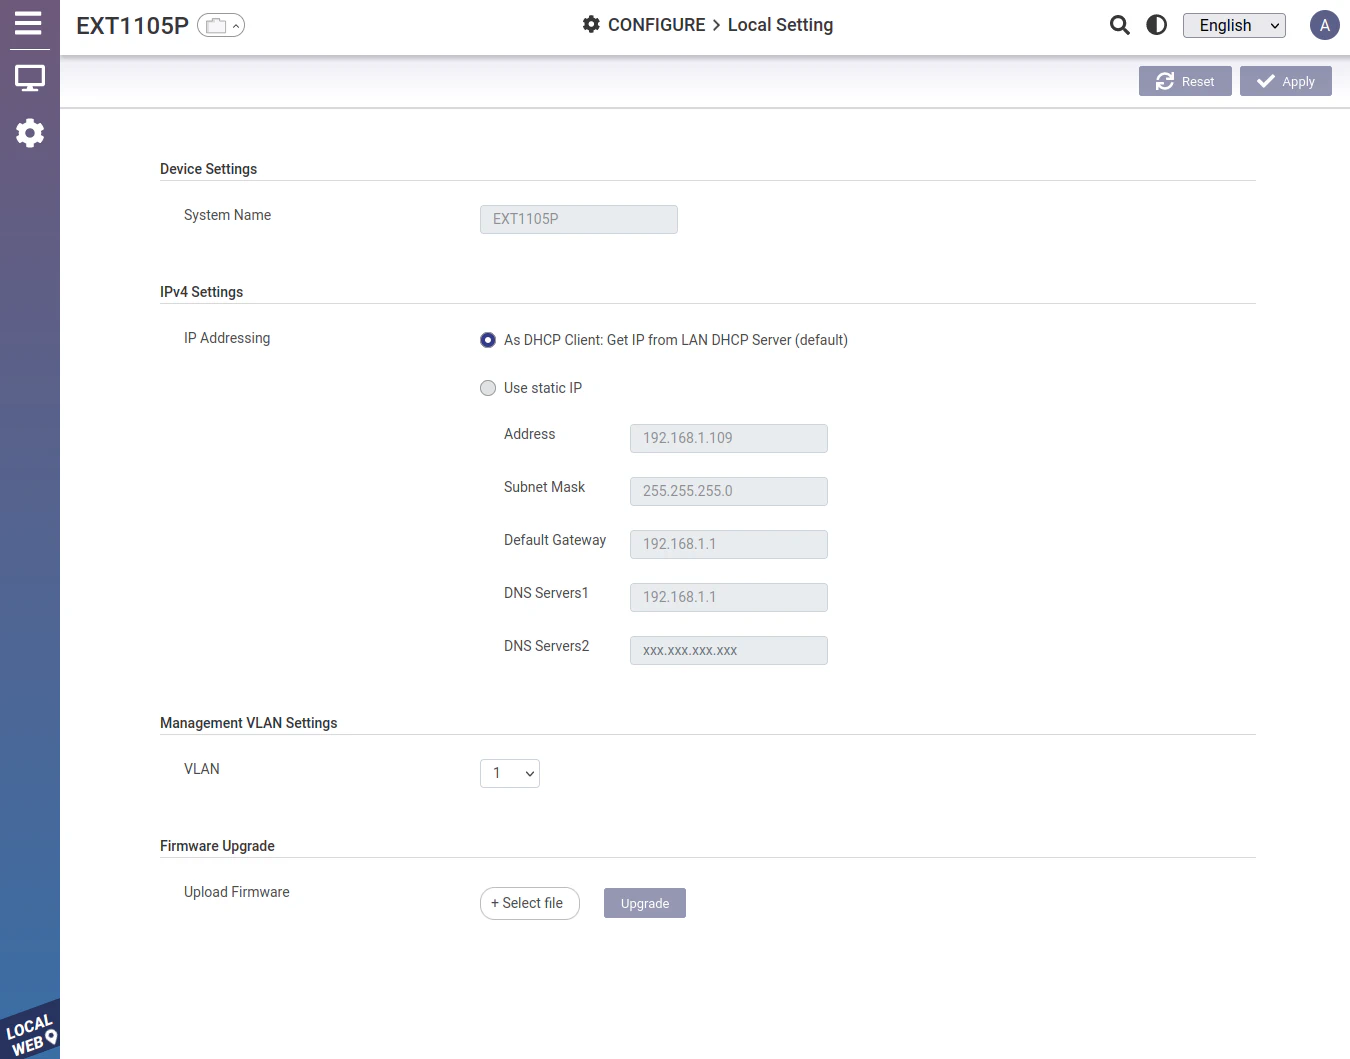
EXT1105P: Configure > Local Setting
You may change the IP address settings if you wish to use static IP addresses as well as change the management VLAN ID. You have to create a VLAN ID on the “Port Configuration” page in order to see a VLAN ID other than 1.
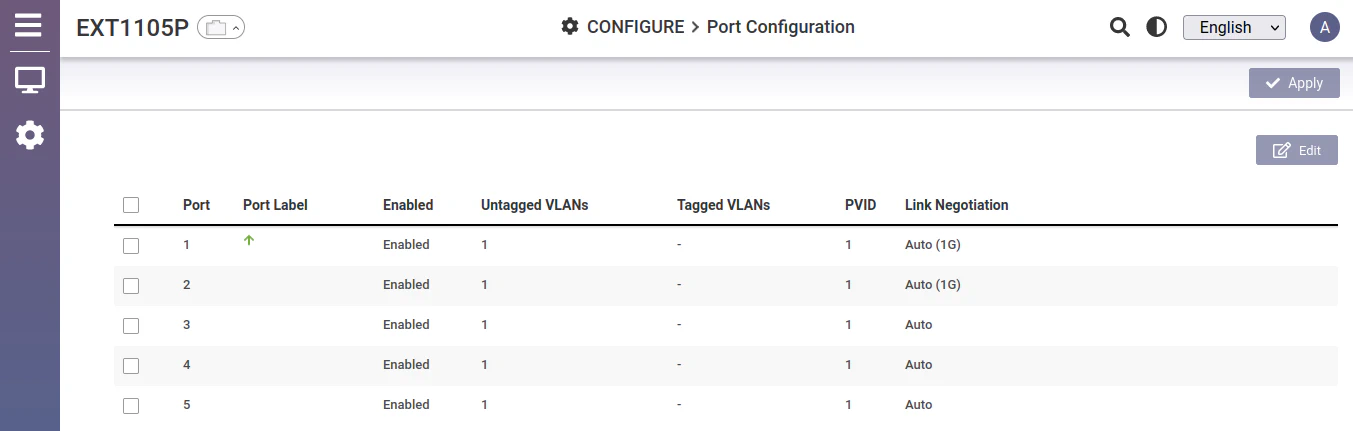
EXT1105P: Configure > Port Configuration
The “Port Configuration” page looks very similar to the “Port Status” page except you have the option to edit the ports by clicking on the “Edit” button.
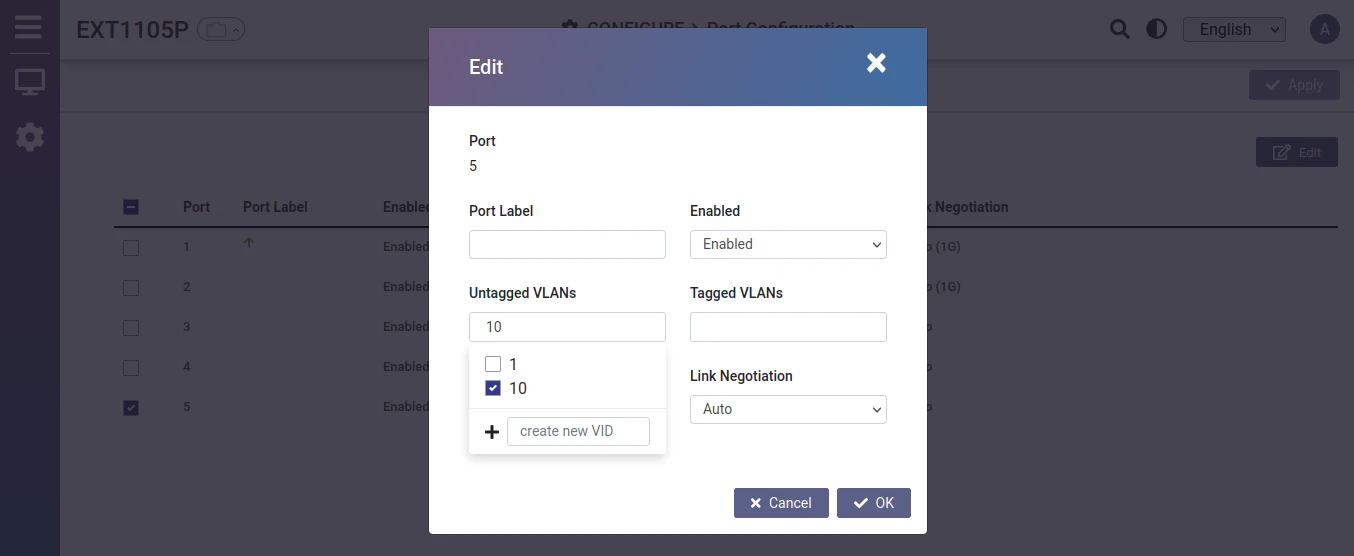
When you click the “Edit” button you can set the VLAN IDs for the different ports. It not quite as intuitive in my opinion where you should set the VLANs for the switch extender as it was for the other switch. There is no VLAN page to edit VLANs. You have to create a new VLAN ID when you click on the “Untagged VLANs” or the “Tagged VLANs” input boxes.
Once you enter the VLAN IDs on this page, you can use any of those VLAN IDs as your management VLAN when you edit it on the “Local Setting” page.
Cloud Management
As mentioned earlier, you must use the cloud management for these access points. You will need to visit the EnGenius cloud portal or the EnGenius Cloud to Go mobile app to create an account.
Once you have an account, you can add your APs two different ways. On the web portal, you can enter the serial number of the APs or with the mobile app, you can scan the QR code on the bottom of the APs.
Cloud Management: Dashboard
The “Dashboard” page contains a summary of the devices you have associated to the cloud account as well as a traffic statics and deep packet inspection (DPI) information.
Cloud Management: Manage > Switches
In the “Manage” menu you can view all of the network switches you have added to your cloud account.
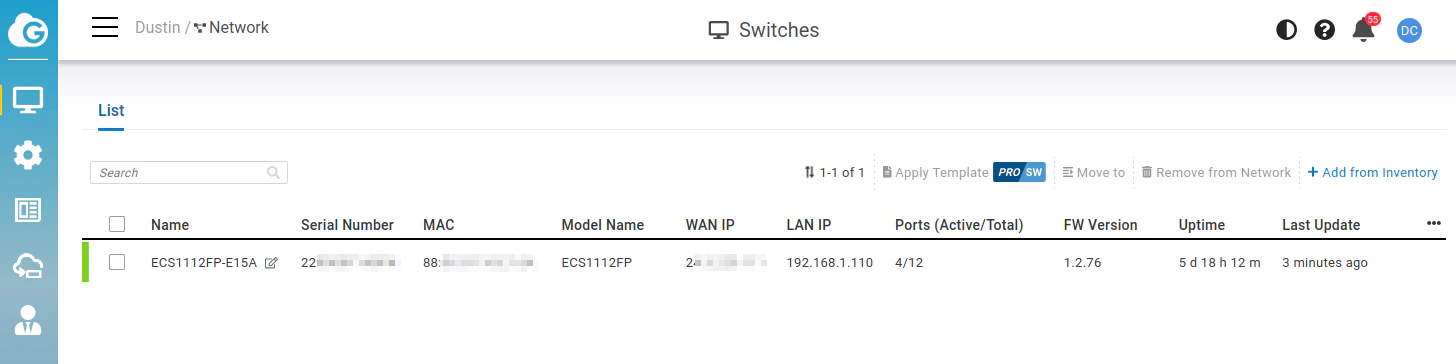
Clicking on a switch opens the overlay underneath the switch so you can see some quick switch information at a glance.
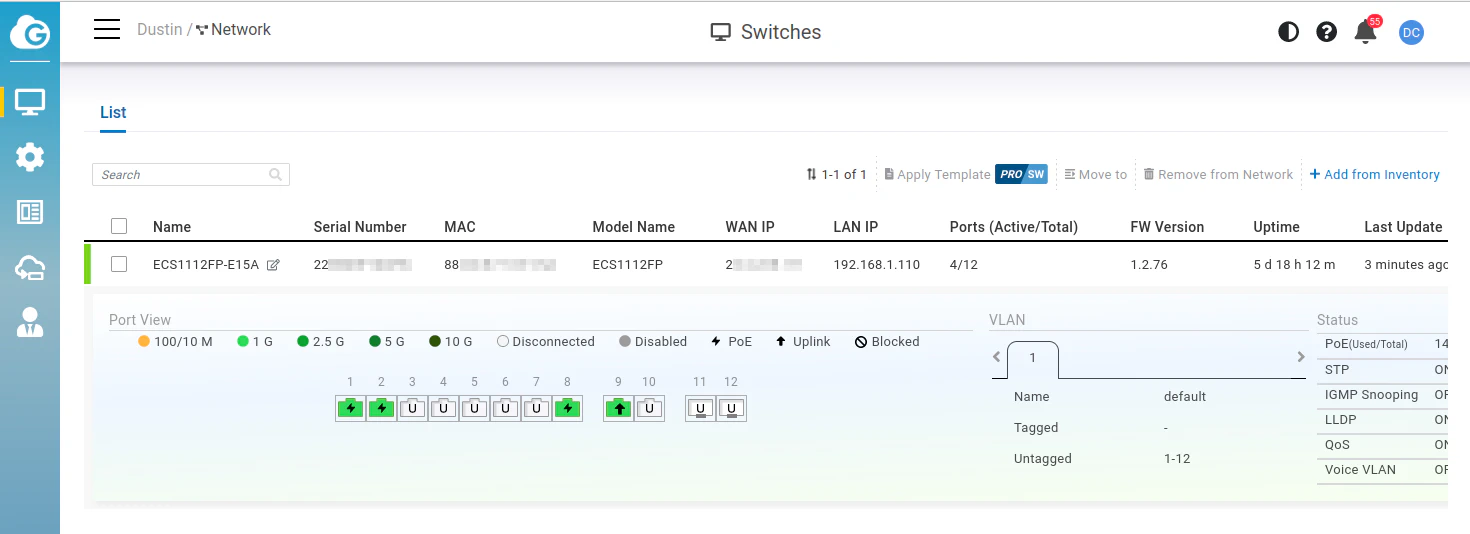
If you hover the mouse over the switch, you will see some additional menu options that you may select.
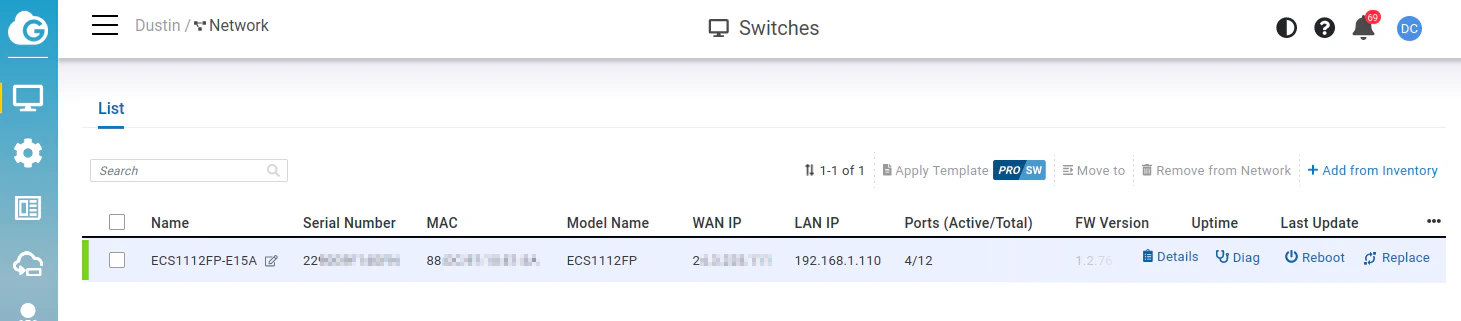
The first hover menu option is the “Details” page for the switch. Here you will find some “Summary” information as well as the location where you can configure VLANs and link aggregation.
Another item on the hover menu is the “Diag” (“Diagnostics”) page. This page is interesting since you can do some troubleshooting with the various screens. A few of the features are considered pro features so you will need a license to use them.

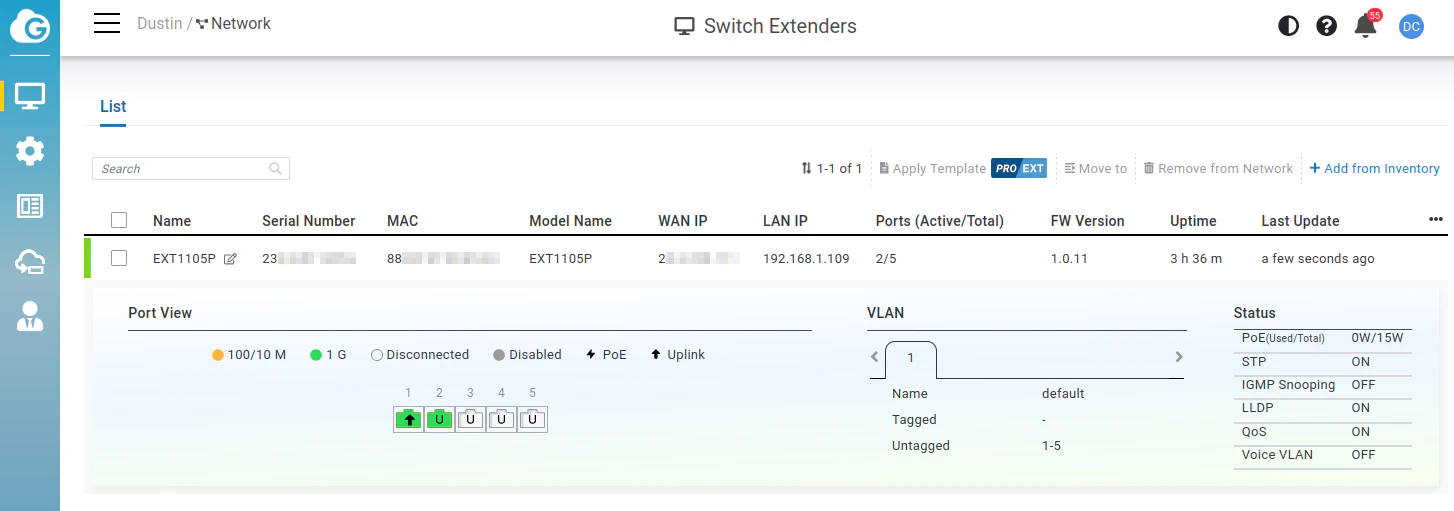
Cloud Management: Manage > Switch Extenders
For some reason EnGenius groups what they call “switch extenders” on their own configuration pages even though they are simply switches that are powered via PoE from other PoE switches. This page looks identical to the manage switches page.
You can also open the overlay for each switch extender to view more details.
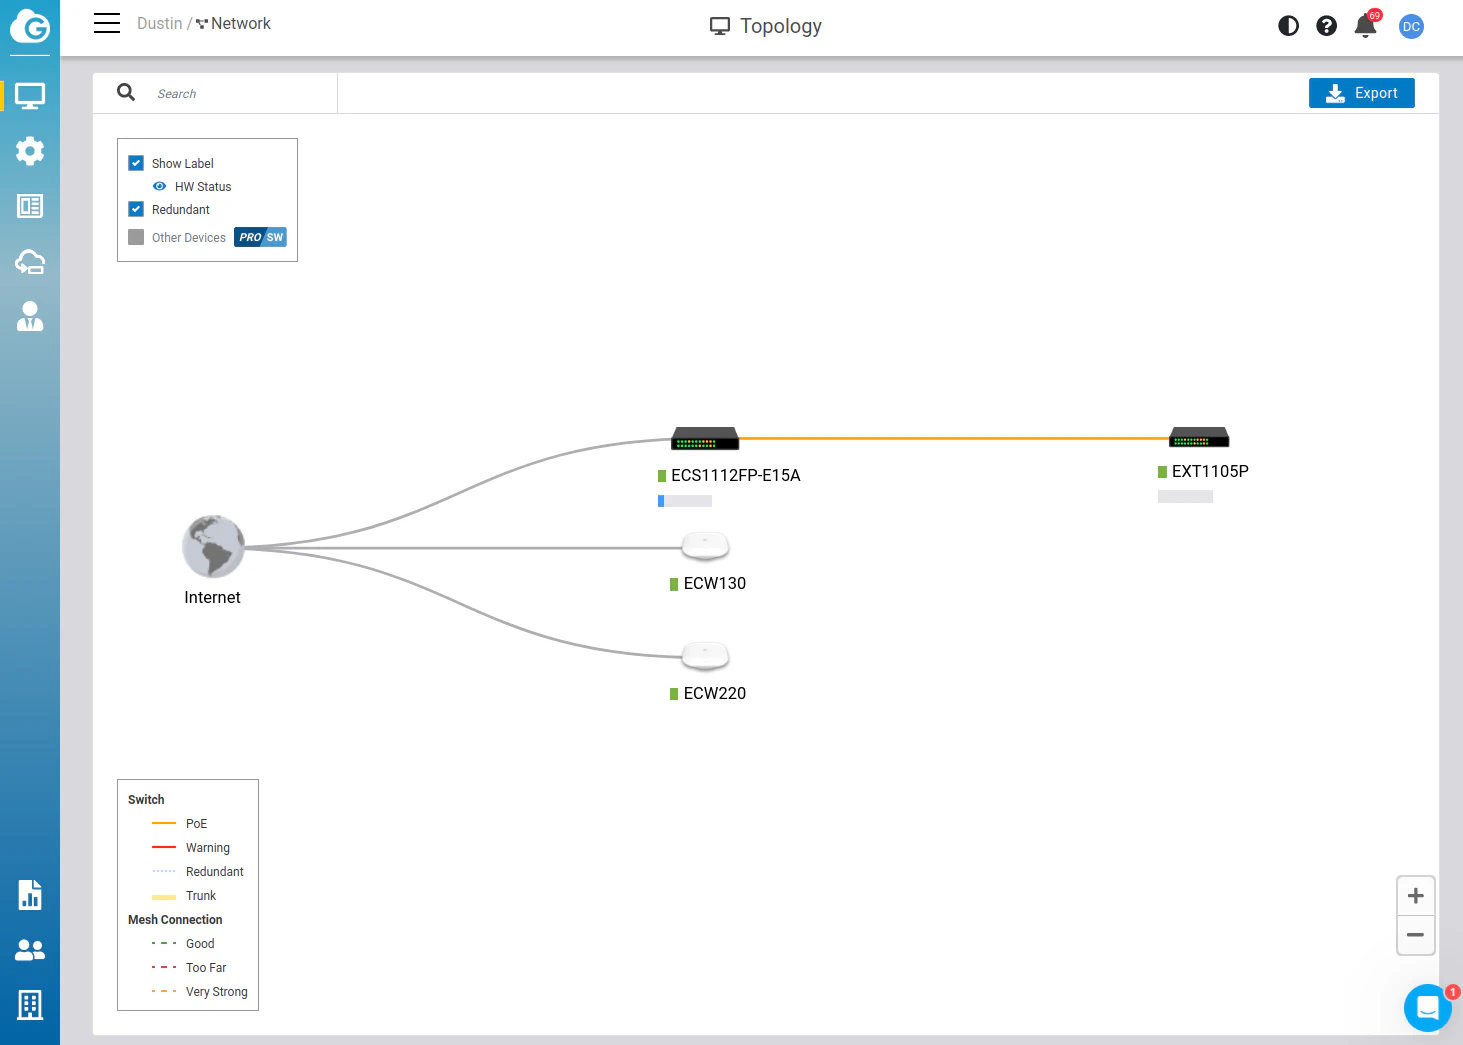
Cloud Management: Manage > Topology
Network topology graphs are nice to see especially when you have more complex networks. That is one benefit from using products from the same ecosystem (of course you could also use 3rd party software to discover the topology of your network).
Cloud Management: Manage > Map & Floor Plans
If you have multiple physical locations, having a map is useful. Most home users may not find a lot of value in a map even if they have separate buildings such as a detached garage or a shed since the proximity will likely still be very close together.
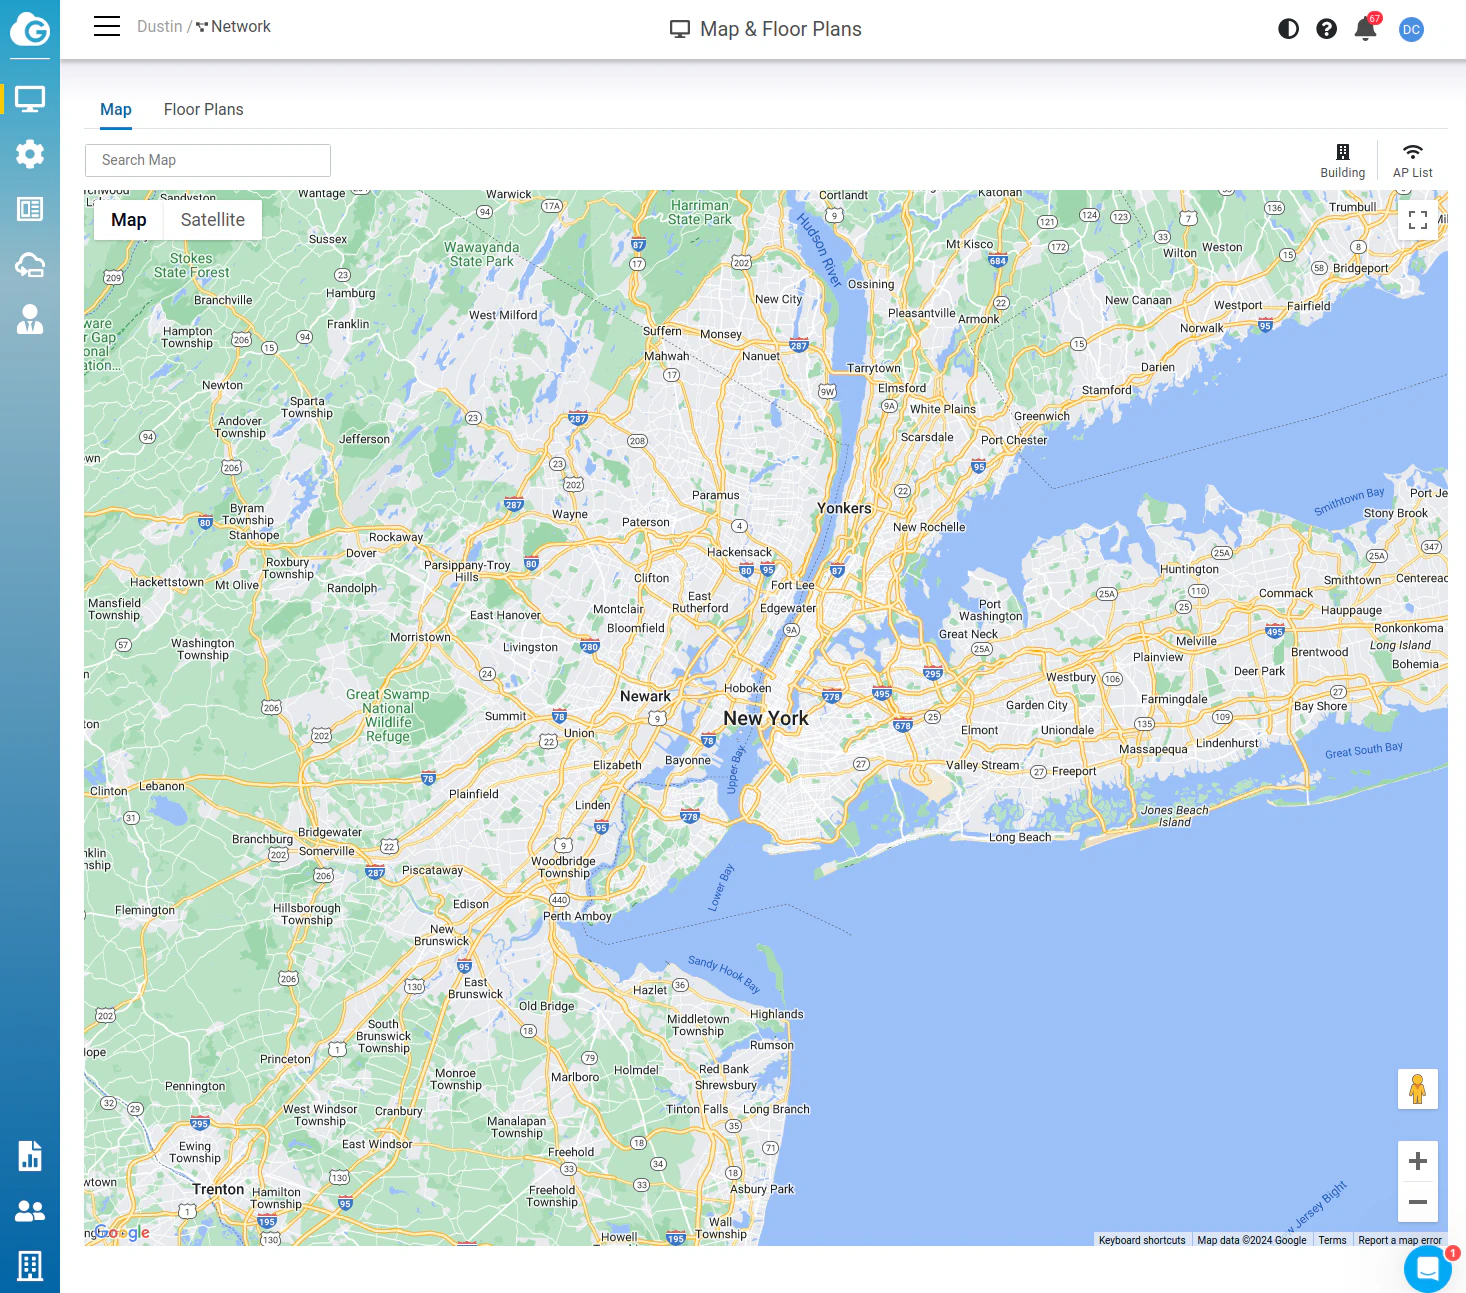
You can add floor plans to plan out how you want to place your wireless access points. Unfortunately, there are certain features that are locked behind the pro features such as creating obstacles. The floor plan tool will not be very useful for home users other than seeing the maximum theoretical distance the AP will reach.

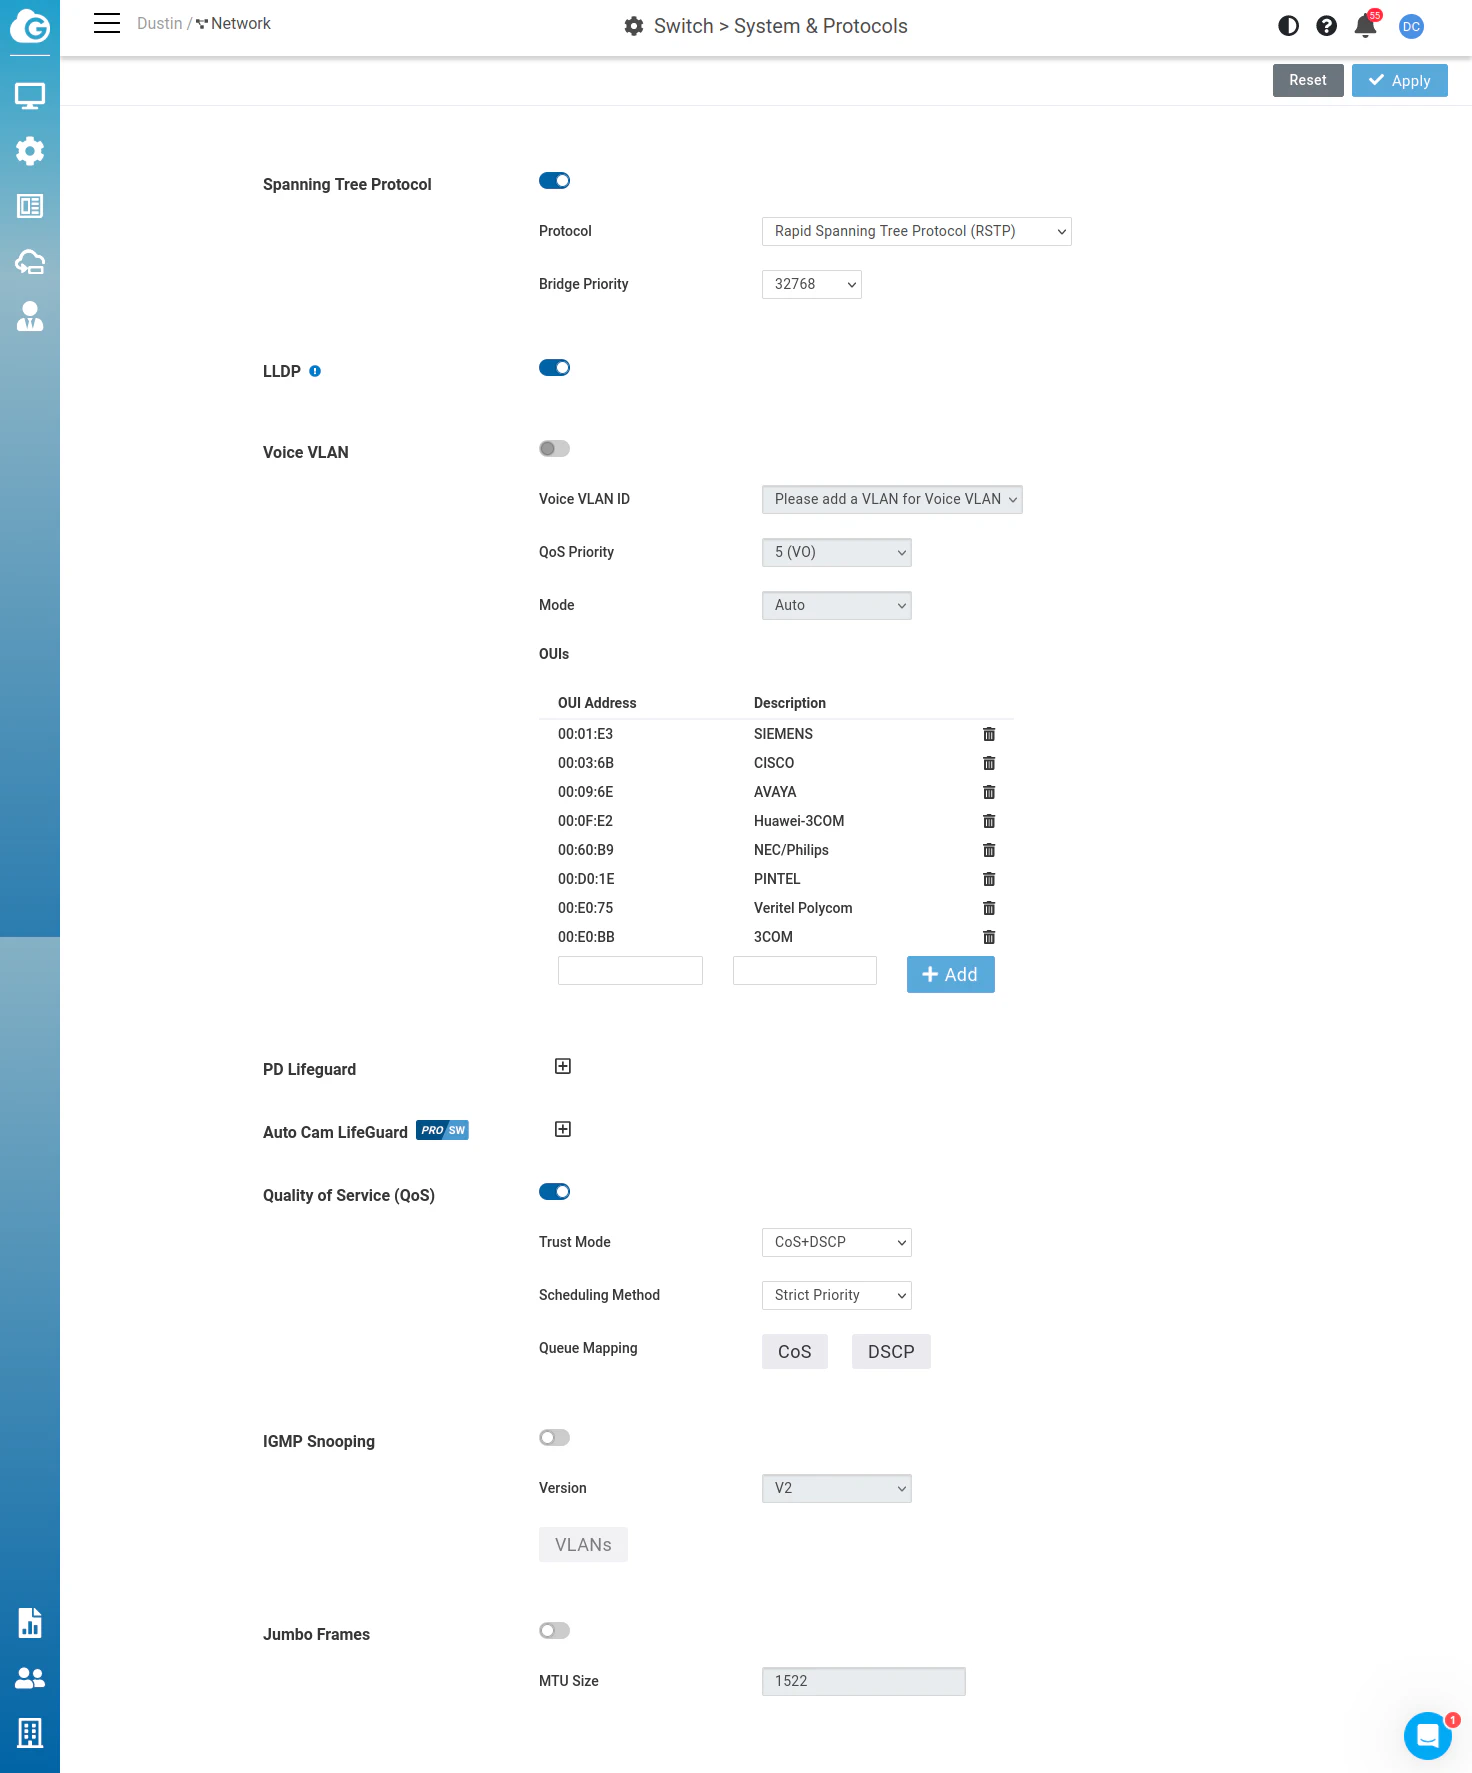
Cloud Management: Configure > Switch
On the configure “Switch” page, there are options for general settings that apply to all of your switches such as Spanning Tree Protocol and IGMP snooping.
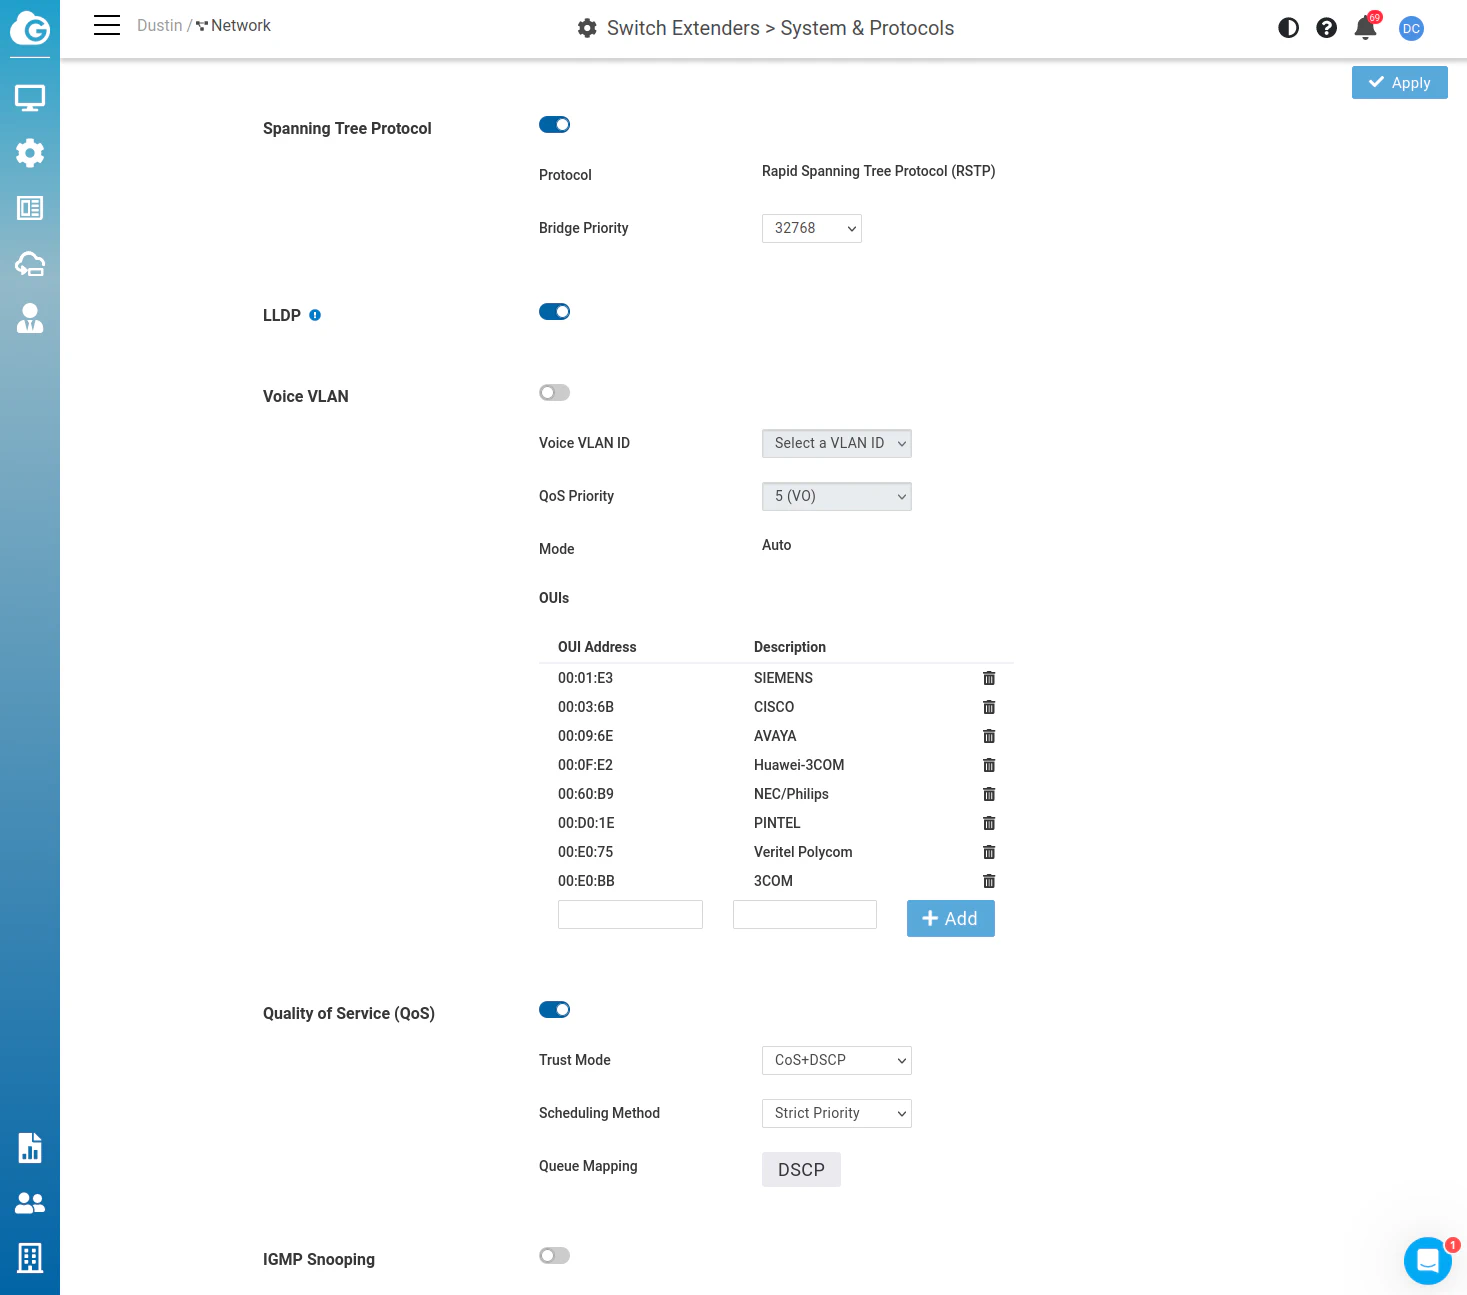
Cloud Management: Configure > Switch Extenders
The configure “Switch Extenders” page offers similar general settings to the configure “Switch” page.
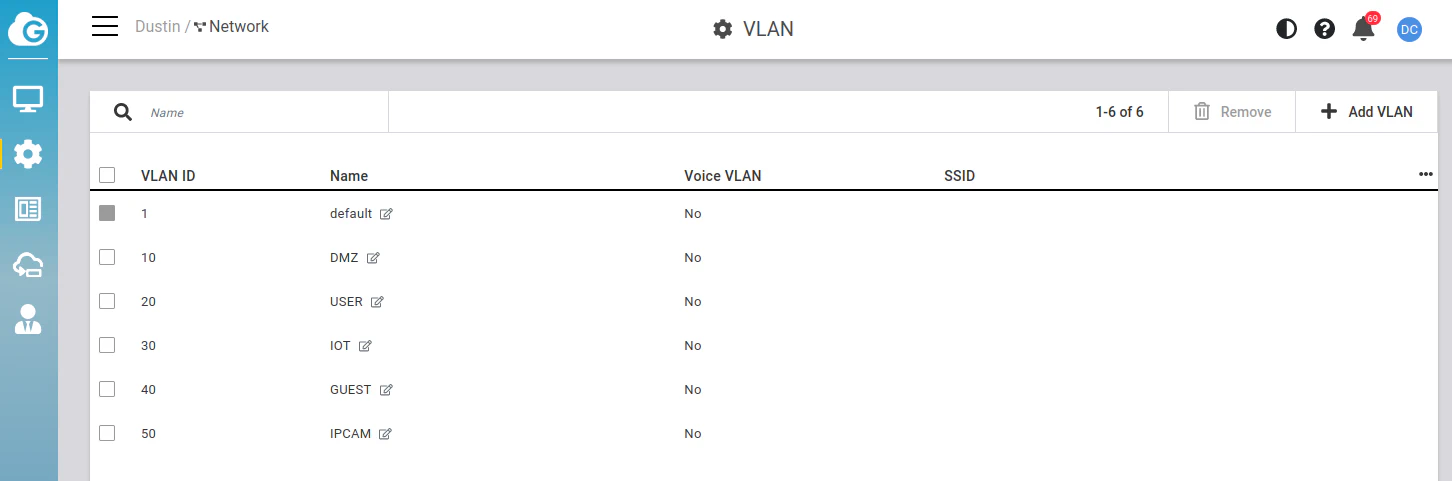
Cloud Management: Configure > VLAN
The configure “VLAN” page is where you create new VLANs that you may assign to your switches and wireless APs using the manage switch/AP pages.
A Note about Cloud Management
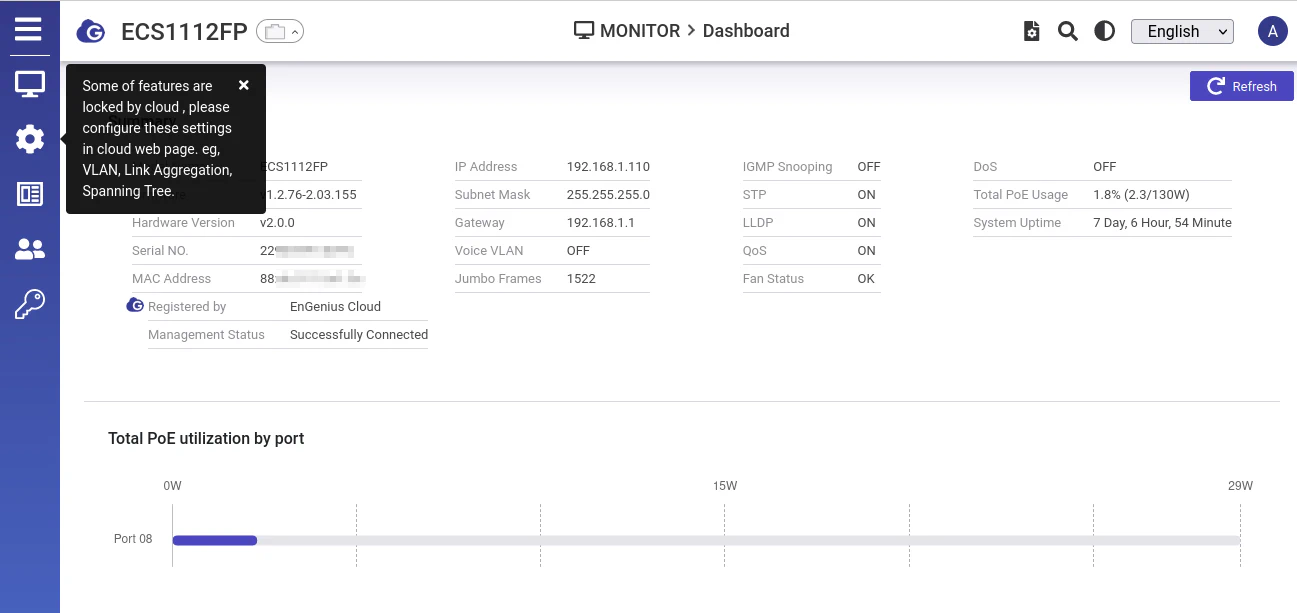
I discovered that once I added the switches to my cloud account, I now had limited control over the switches from the local web interface.
Once you set the switches up in the cloud, you will need to manage them from the cloud, which is interesting because that is something I am able to do with other switch vendors such as Grandstream. The configuration simply is synchronized between local web access and the software controller (that is located on your network or in the cloud).
That is something I thought I should point out so you are aware of this scenario when you cloud manage your devices.
Where to Buy?
The EnGenius switches in this review may be purchased on Amazon if you would like to use my referral links for the ECS1112FP (affiliate link) and the EXT1105P (affiliate link) to support my efforts. I greatly appreciate your support!
If the stock is out on Amazon or you do not wish to use the affiliate links, you can find the ECS1112FP and the EXT1105P on the EnGenius online store.