Harden Your Home Network Against Network Intrusions

Photo by TheDigitalWay from Pixabay
Table of Contents
The Internet is full of malicious actors looking to take advantage of insecure networks and devices. While corporate and government targets may be the biggest targets because of the valuable data they possess, home users still need to be cautious. Phishing attacks usually via email is the most common attack for home users. Fortunately, those attacks are typically easy to avoid by alert users who do not blindly click every attachment and web link contained in their emails.
However, malicious activity is becoming increasing common in regards to consumer routers and Internet of Things (IoT) devices, which many users have on their home network. Software and firmware updates for routers and IoT devices are often neglected by users – either due to lack of awareness and/or the lack of technical ability to apply the updates.
Many routers are providing intrusion detection as an additional security feature. Routers typically have firewall capabilities built in and there is a growing trend to also include intrusion detection. Intrusion detection can be used in conjunction with the standard firewall on the router and provides an additional layer of security. You can think of intrusion detection as a set of indicators/rules that may be used to alert or block specific types of Internet and network traffic. It can be suspicious, dangerous, or other unwanted traffic on the network (such as peer-to-peer or tor traffic).
OPNsense is an open source router software that supports intrusion detection via Suricata. Once enabled, you may select a group of intrusion detection rules (aka a ruleset) for the types of network traffic you wish to monitor or block. The rulesets can be automatically updated periodically so that the rules stay more current. Some rulesets are free while others require a subscription. For home users, the free rulesets should offer reasonable protection.
If you are planning to build your own router, you may consider purchasing a fanless mini-PC to use as a network appliance (affiliate link) . Fanless mini-PCs are great for building your own router/firewall since they are small, silent, power efficient, and typically have 2 to 6 Ethernet ports on them. You will need at least 2 ports since one port will connect to your modem as the WAN interface and the other most likely will connect to a network switch to use as your LAN. You will need to make sure you have an adequate amount of RAM if you plan to use intrusion detection (4GB may be a good minimum). Suricata is multithreaded so it can make use of multiple cores when processing rules so having a quad core system would be preferred to dual core even though dual core will likely be fine for a router if you are not running too many processes on the router.
Configuring Intrusion Detection in OPNsense
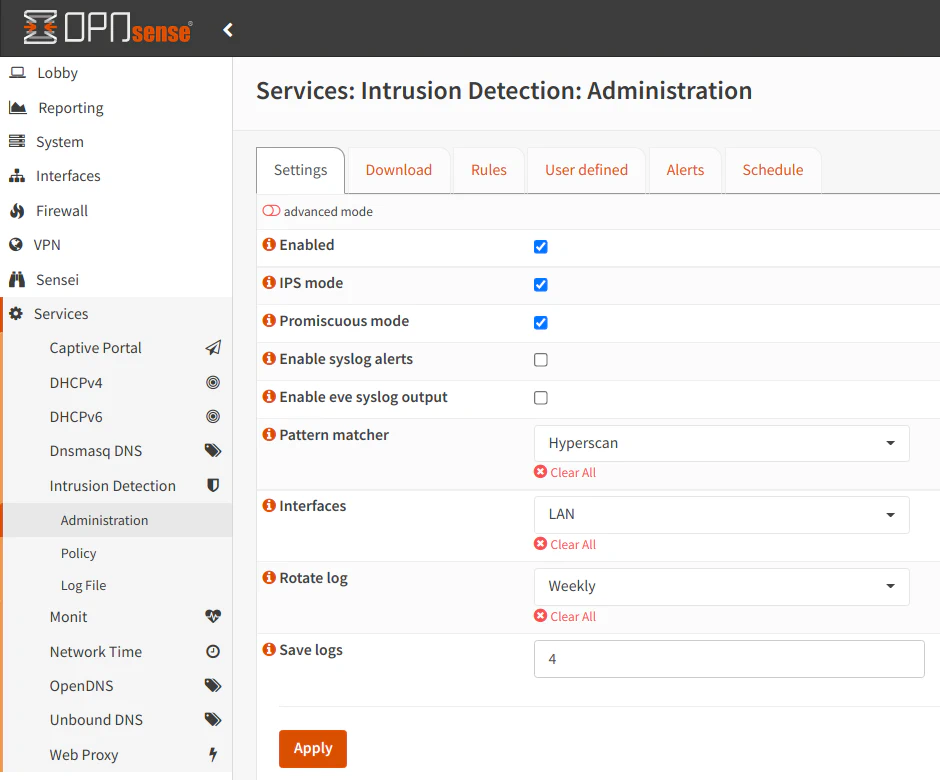
To configure intrusion detection in OPNsense, go to “Services > Intrusion Detection > Administration” page which defaults to the “Settings” tab. Click the “Enabled” checkbox to enable intrusion detection. To allow network traffic to be blocked instead of only generating alerts, click the “IPS mode” checkbox. If you are using VLANs and you want to monitor your LAN interface, you will need to click the “Promiscuous mode” checkbox. This is important in order to capture data on the physical network interface.
The pattern matcher defaults to Aho-Corasick, but you can likely set it to Hyperscan. I noticed a huge increase in network performance on my LAN interface when using Hyperscan. I highly recommend using this setting if you have a modern CPU since the performance increase is quite significant. According to this OPNsense forum post, the Hyperscan algorithm should work with 64-bit processors that support SSE3 instructions.
In the “Interfaces” select box, choose the networks in wish you want to apply intrusion detection. You need to ensure that you only select physical interfaces and not any of your VLAN interfaces. If you select a VLAN interface, your VLANs will no longer function properly. I made this mistake the first time I set up intrusion detection, and I lost connectivity on all of the VLANs.
The interface selection is important, and it depends upon your needs. Some users choose to only monitor the WAN to protect the perimeter of their networks while others prefer the LAN to monitor activity more closely on their internal networks. Some even choose to monitor both interfaces.
Below is an example configuration for monitoring the LAN interface. If you do not have any VLANs, you can leave the “Promiscuous mode” unchecked:
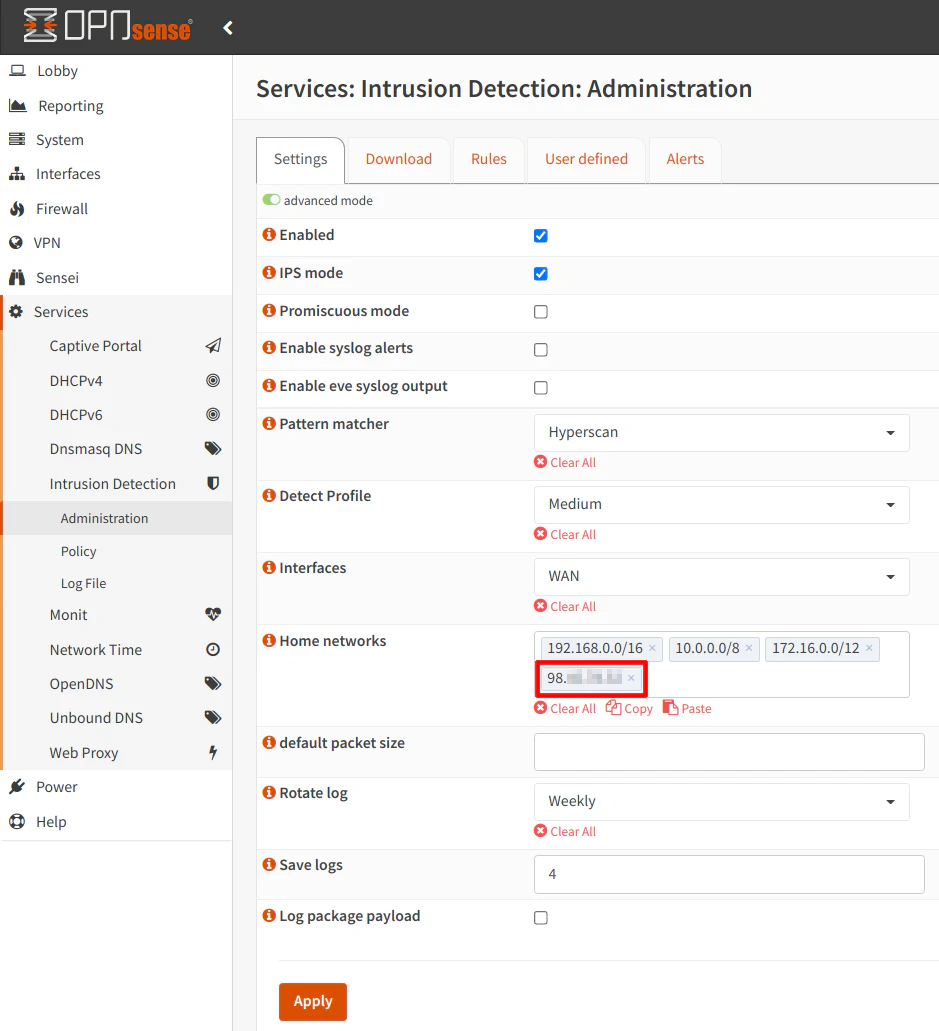
If you choose the WAN interface, you should click the “advanced mode” button at the top of the page. You will see additional options displayed. In order for Suricata to function properly on the WAN interface, you will need to enter your WAN IP address in the “Home networks” box (as highlighted in red in the screenshot below). Unfortunately, you cannot use a fully qualified domain name pointing to your external IP address so if you WAN address changes, you will need to update your IP address in this box. For many ISPs, if you stay online for long periods of time, it is unlikely your IP address will change. If your IP address changes very frequently and you cannot work around that issue, you either have to be willing to keep it updated or you can simply monitor your LAN interface(s).
Some users choose to use Suricata to protect the WAN while they use Sensei to protect the LAN. That is what I have chosen to do especially since at the time of this writing, you cannot run Suricata and Sensei on the same interface(s). Personally, I think these two technologies can complement each other to add more layers of defense to your network.
The OPNsense documentation says security is not usually increased by monitoring the WAN interface because the firewall blocks all incoming connections by default. However, I believe Suricata monitors both inbound and outbound connections on the WAN since I am able to see blocked connections where my external IP was the source of a request and the destination was some other external IP address. If Suricata was only blocking incoming connections, I would expect all of the destination addresses would be my external IP address.
When you have finished configuring the options on the “Settings” tab, click “Apply”. Even though we have enabled intrusion detection, nothing is really going to happen at this point until we have downloaded some rulesets and configure at least one policy.
Downloading and Enabling Rulesets
There are a variety of opinions on which rulesets you should download. Ideally, you should probably choose ones which apply to the types of network traffic you expect to have based on what hardware/software/protocols you use on your network. The link to the descriptions of the rulesets can be found in the OPNsense documentation.
You should consider the amount of hardware resources you have available when you enable the rulesets. When I enabled most all of the rulesets, my RAM usage was around 1.5-2GB. If you are running other services such as Sensei, you could easily utilize 4GB of RAM or more. Another aspect to consider is network throughput. If your router has a slower CPU, you may notice reduced network throughput with intrusion detection enabled.
Go to the “Download” tab and click the checkboxes beside each ruleset you wish to enable. I selected several rulesets in this example.
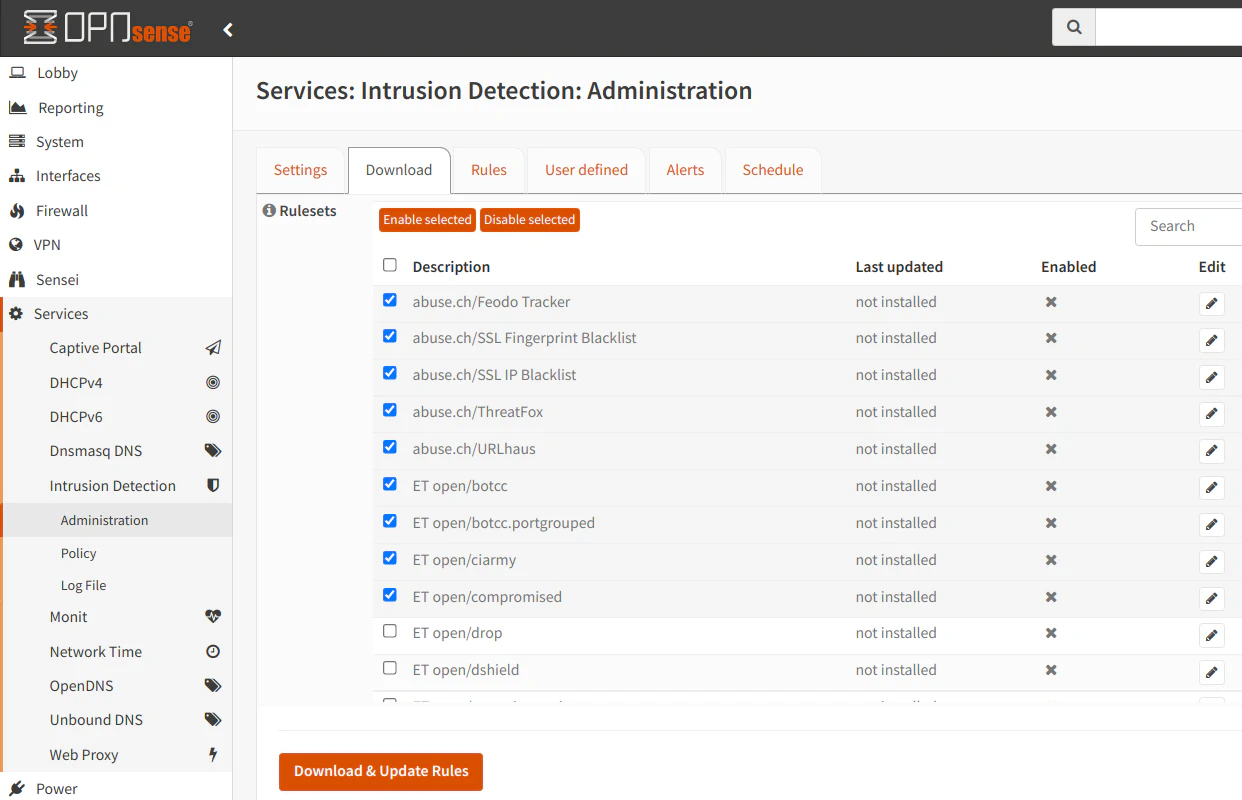
When you are finished selecting rulesets, click the “Enable selected” button to enable the rulesets. You should see a checkmark beside the rulesets you have enabled.
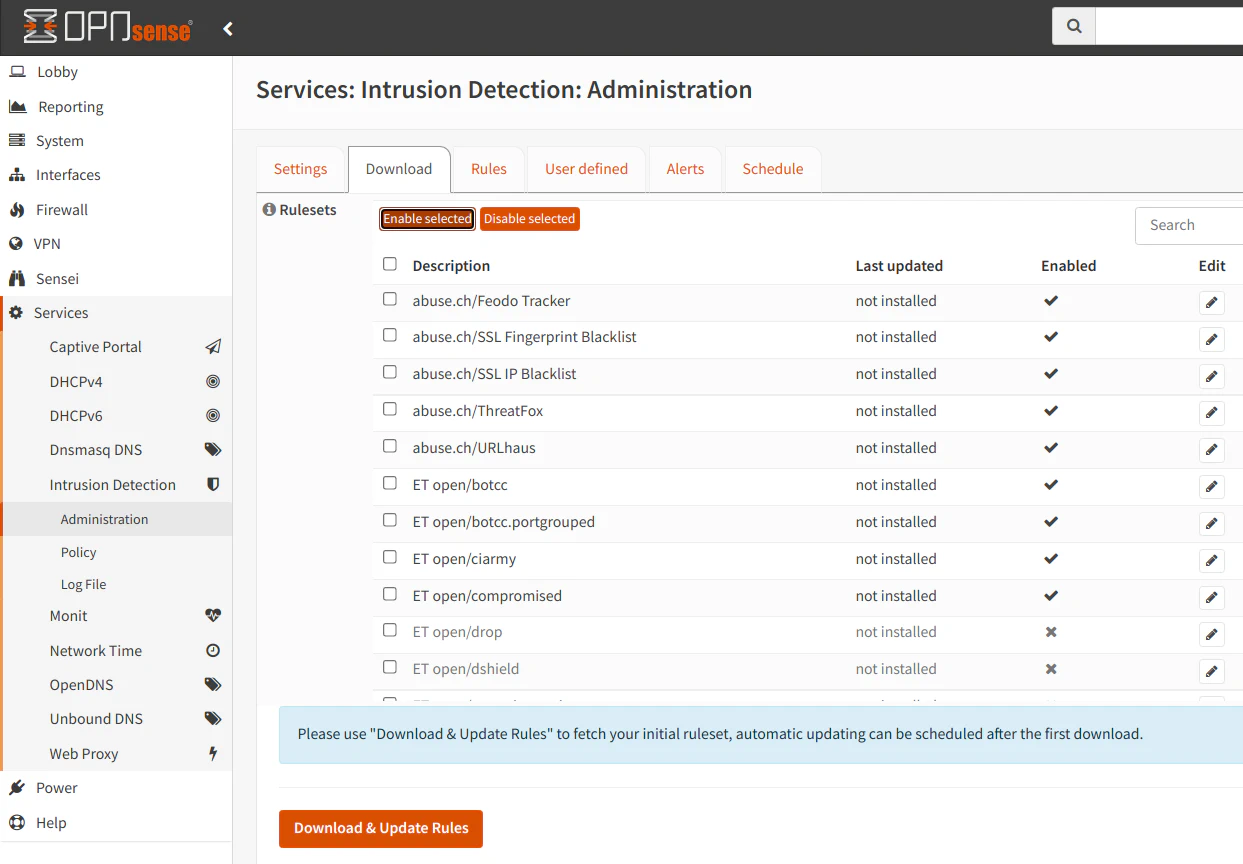
Then click “Download & Update Rules” button to retrieve the rules. You will see the date of the last download beside the rules which are installed.

Creating a Policy
In OPNsense 21.1, the policies functionality was added. This allows you to apply the same set of configuration to one or more rulesets and allow for more efficient processing of large sets of rules. Policies also help manage the rules in a more granular fashion since you can apply various filters to the rulesets. Before policies were added, you had to enable entire rulesets and then manually go through hundreds or thousands of rules you wanted to enable/disable. You could have blindly enabled or disabled several rules at one time using the “select all” checkbox, but it was still not an efficient way to manage the rules.
Since you have selected and downloaded the rulesets you wish to use, you will be able to create policies. At least one policy is required for intrusion detection to be configured properly. Go to the “Services > Intrusion Detection > Policy” page. Click on the “+” icon in the bottom right hand corner of the policy list (which will be empty the first time you set up intrusion detection).
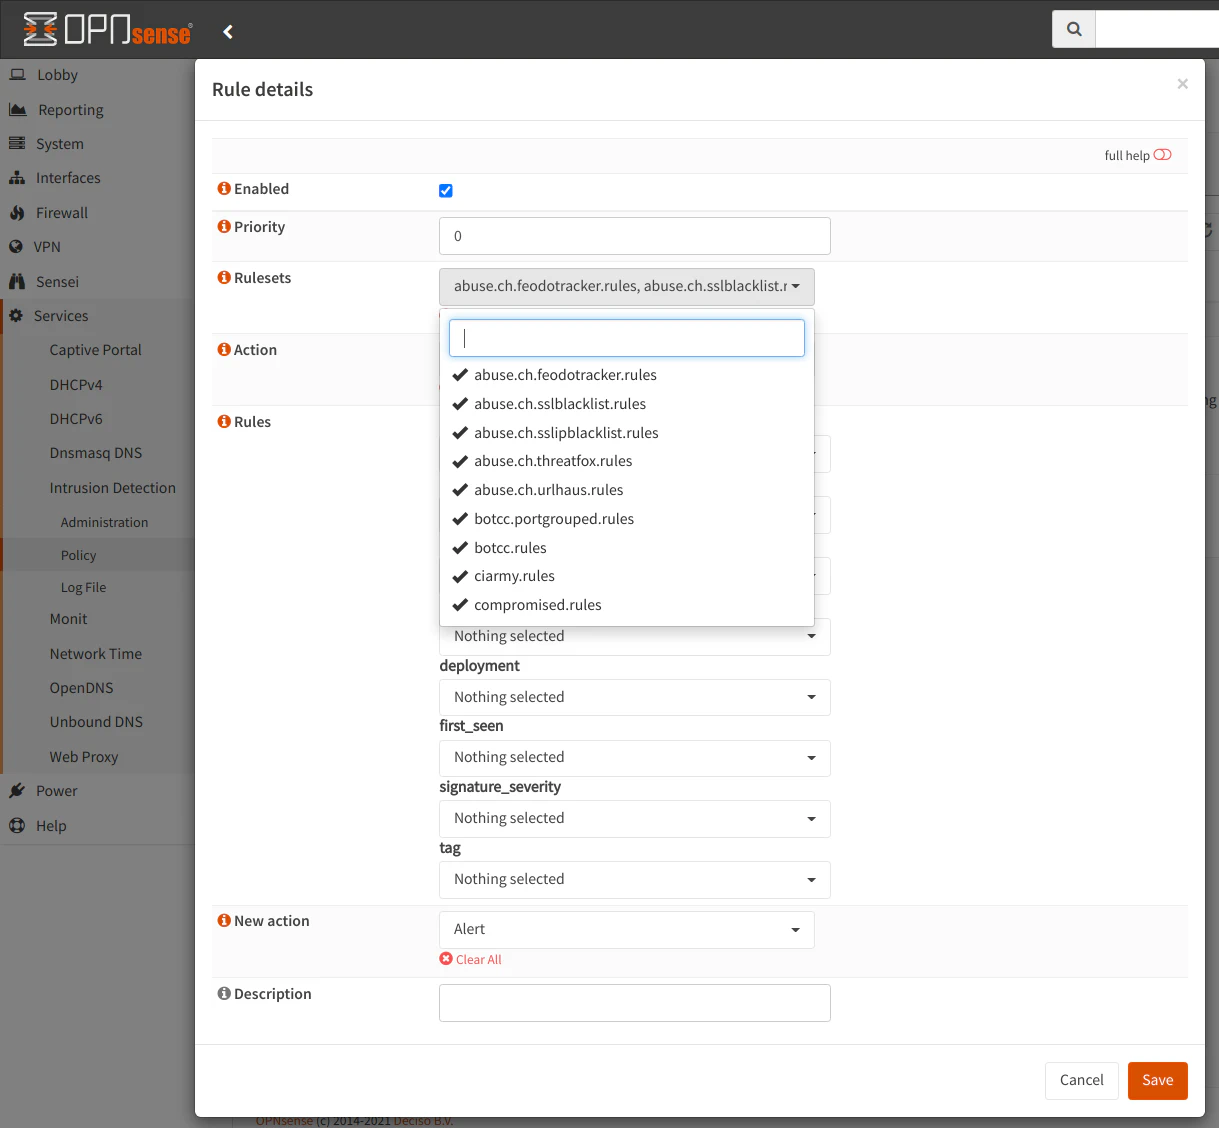
In the “Rulesets” dropdown box, select all of the rulesets you wish to use in the current policy. If you want a simplified experience, you could select all of the rulesets under a single policy but you have the ability to add several filters below the “Rulesets” dropdown.
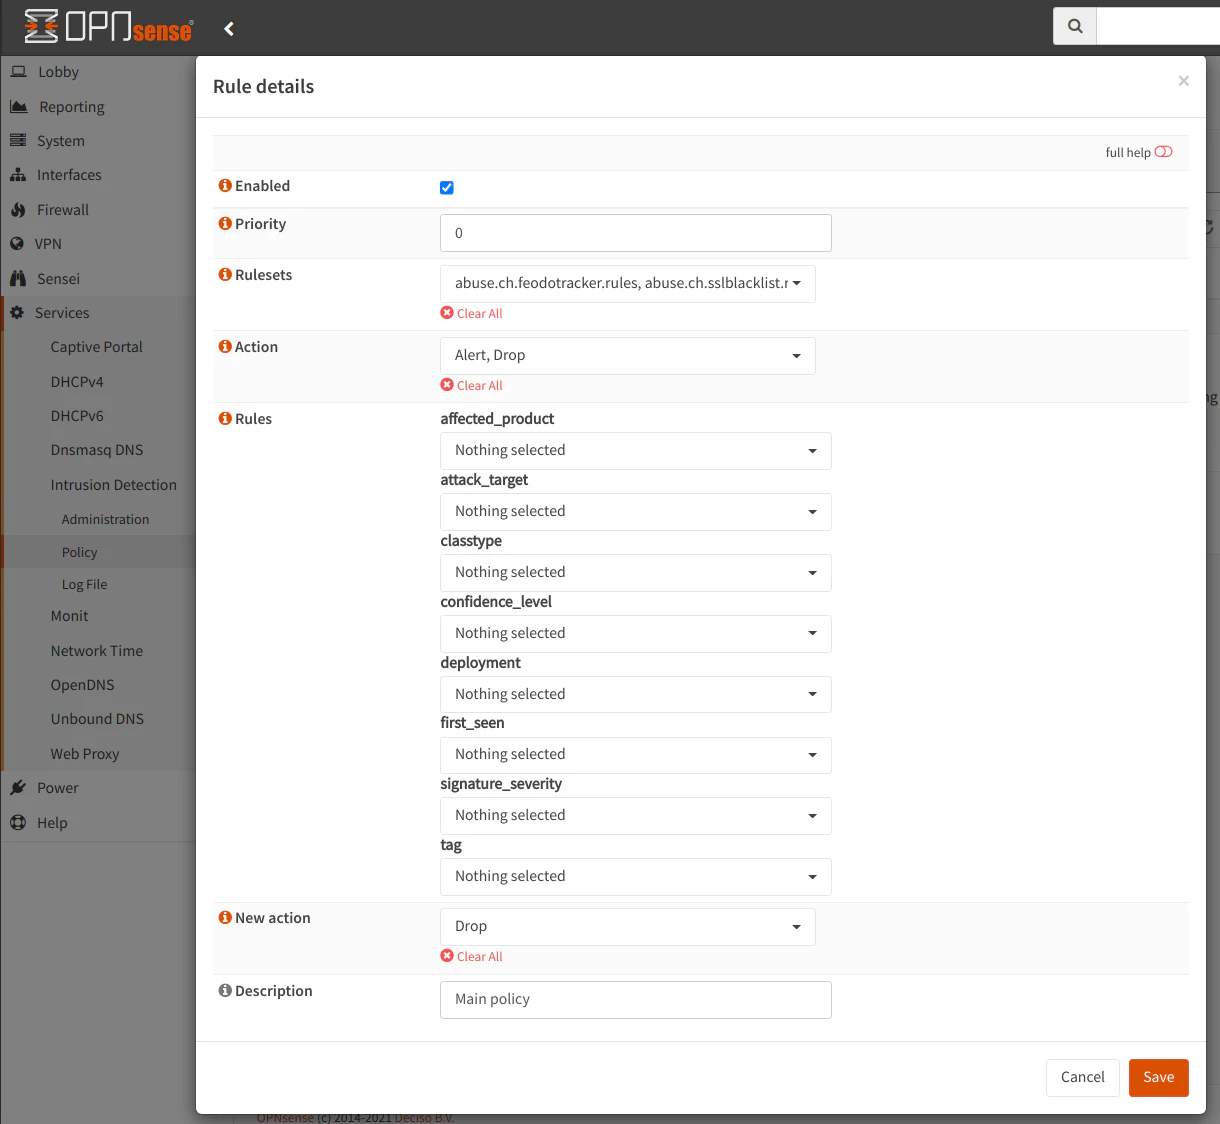
The “Action” dropdown box allows you to select the rules in the ruleset which have the default action of “Alert”, “Drop”, or “Disabled”. When you download the rulesets, the action for all of the rules is set to a default value. This option therefore lets you choose which of those rules you wish to apply the policy. I have mine set to “Alert” and “Drop”. I am not sure how many rules are disabled by default, but it is possible those are old or not very useful rules. You can decide which rules you wish to select.
You may apply additional filters below the “Action” dropdown but those filters may greatly reduce the number of rules in which your policy will apply. The filters are great for granular policies, but you may want to have at least 1 overarching default policy to apply to a majority of the rules. Then you can later create more granular policies if you so desire.
For the “New action” option, this is the action you want to set for all of the rules which fall under this policy. If you only want to alert and not block, set the value to “Alert”. Otherwise, set it to “Block”. I imagine most users want to use intrusion detection to block potential malicious traffic before it enters or leaves their network rather than just report that something bad is potentially happening.
Click “Save” when you are finished.
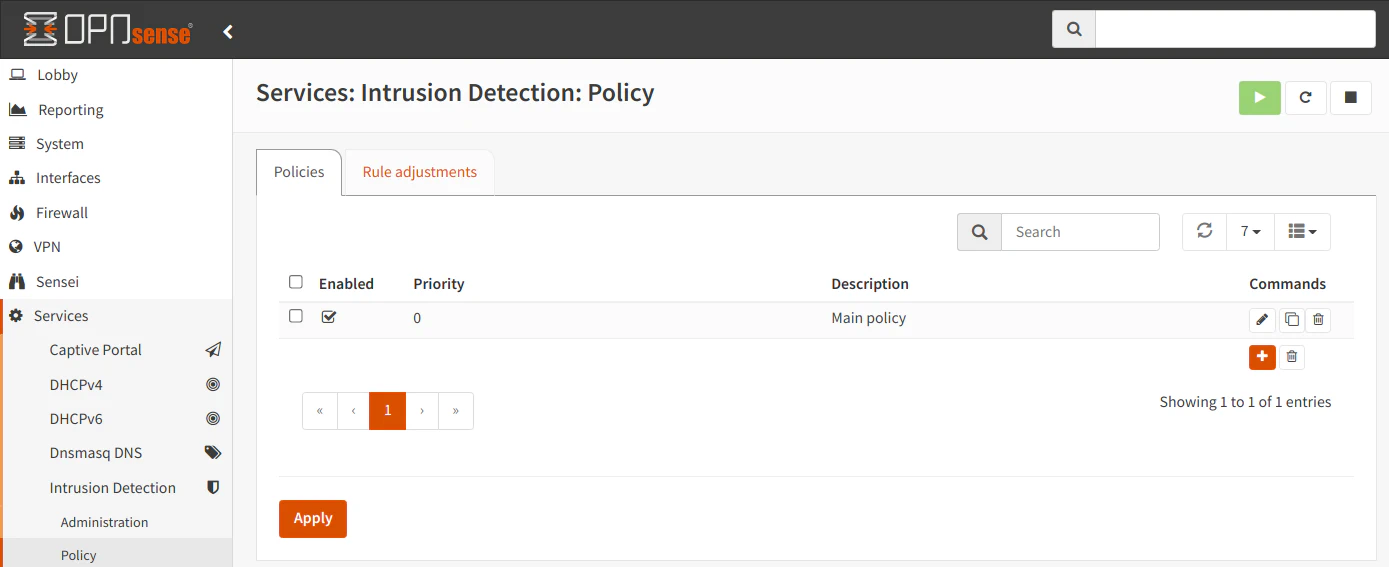
You will see your new policy in the list on the “Policy” page. You will notice a “Rule adjustments” tab. It gives you the ability to make manual adjustments to specific rules. OPNsense recommends keeping manual adjustments to a minimum since it can slow down the user interface, but I imagine it could also slow down rule processing as well which could reduce your overall throughput.
Scheduling Updates to Rulesets
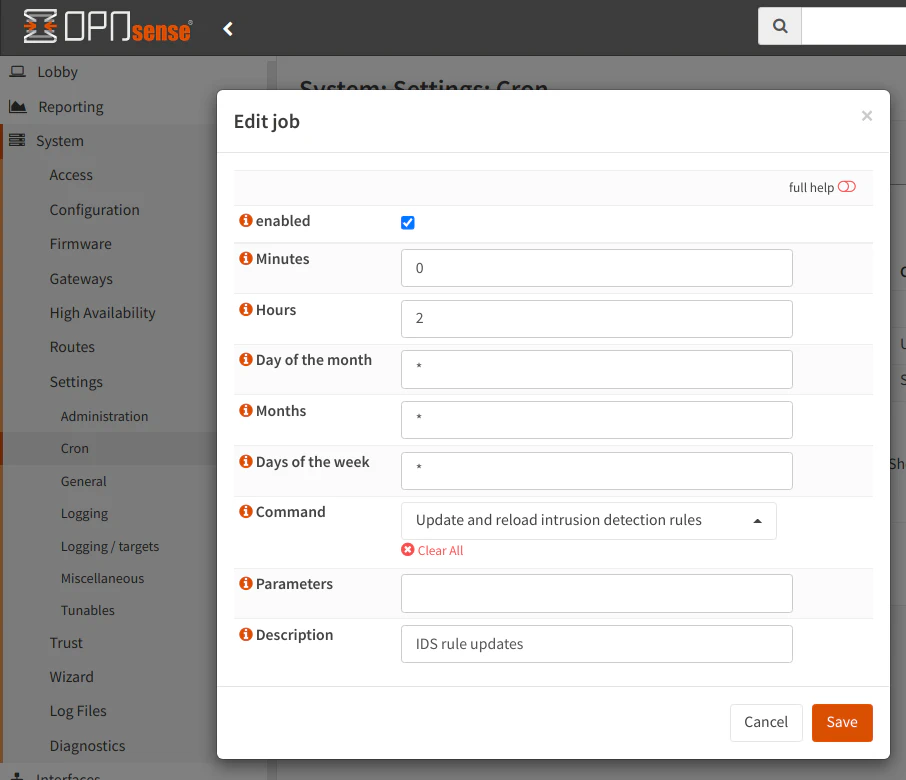
Finally, all that is left to do is schedule a time for the rulesets to be periodically updated. Go to the “Schedule” tab and click the “enabled” checkbox. Then enter a frequency you would like to update the rules. In the example below, the rules will be updated at 2:00am every day. For the “Command” select box, select the “Update and reload intrusion detection rules” if it does not already default to that option. You may optionally provide a “Description”. The description will be displayed along with any other scheduled tasks you may have set up for other services (on the “System > Settings > Cron” page).
The configuration for the intrusion detection is now complete!
Please Note: You should be aware that the free intrusion detection rulesets are on a 30-day delay from the paid rulesets (at least for the ET rules) so it is possible you could still get hit by rapidly spreading zero-day vulnerabilities. While keeping up on patching will not necessarily prevent this scenario from occurring, it is still a very good practice because the Internet is constantly being scanned by attackers for vulnerabilities – both known and unknown. A layered approach to defense if often the best strategy to protect your systems/devices.
If you want more up to date rulesets, you can either pay for a subscription or for the ET Pro ruleset, you can subscribe for free if you are willing to share telemetry data with Proofpoint. The telemetry data helps improve the rulesets and provide more information about ongoing malicious activity.
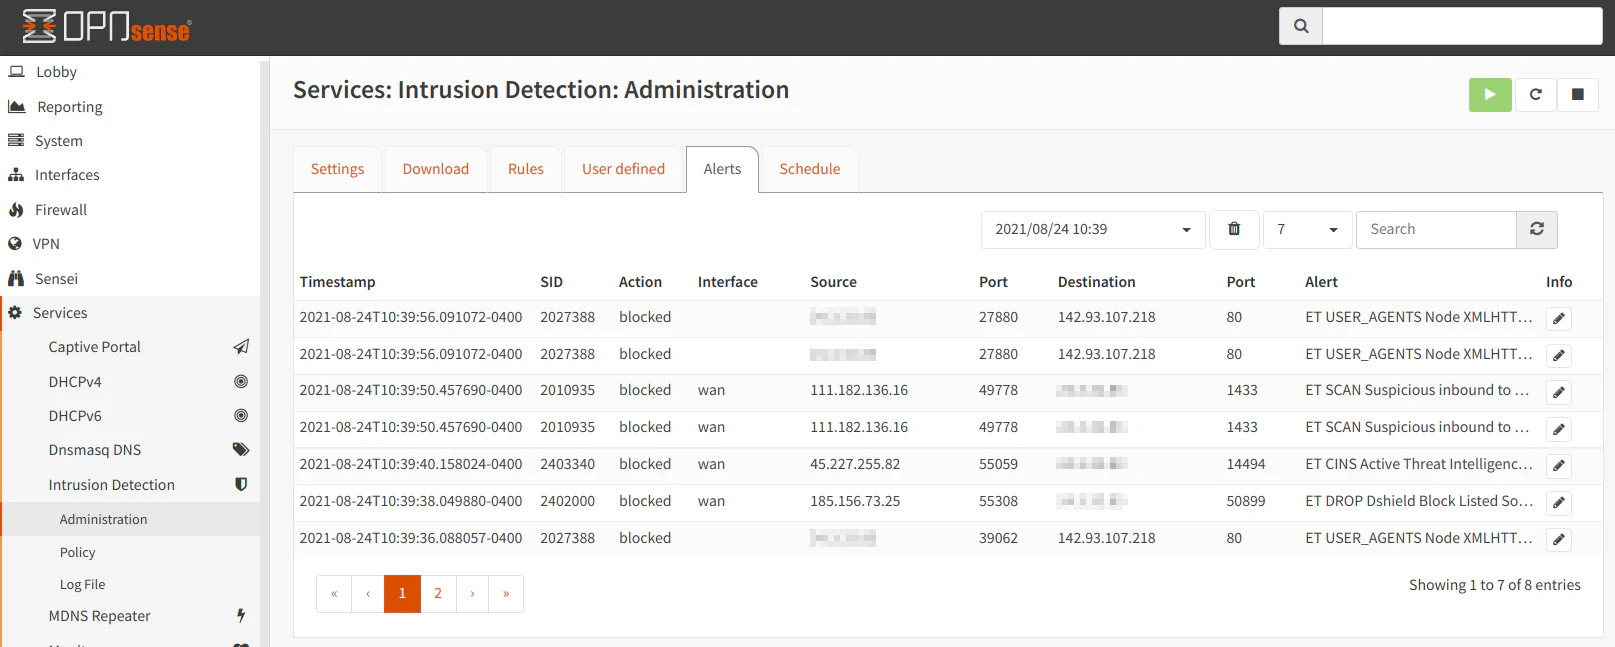
Viewing Alerts
After some time of running intrusion detection, you may periodically check the “Alerts” tab to see the activity that is occurring on your network. It will list the time of the event, whether the connection was blocked or simply logged as an alert, the interface the event occurred, the source/destination IP addresses of the network activity, and the description of the rule triggered.