How to Configure VLANs on a UniFi Switch

Photo by Mohamad Hidayat from iStock
Table of Contents
I had the opportunity to help with a small network deployment, which included a Ubiquiti UniFi 48-port PoE switch (USW-48-PoE) (affiliate link) . Since I have only covered UniFi wireless access points, I thought I would take the opportunity to write about setting up VLANs on a UniFi switch. The process is straightforward even though Ubiquiti has their own unique way to configure VLANs on their web interface.
Create VLANs
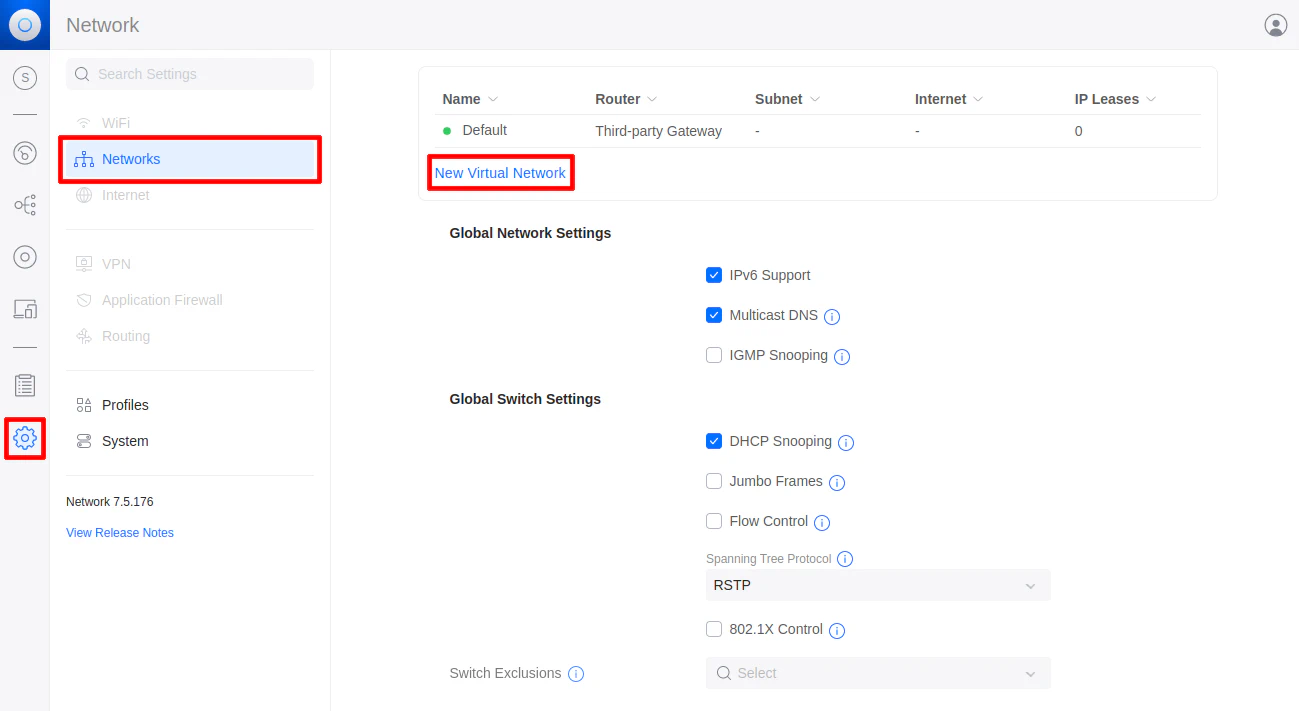
The first step is creating the VLANs that you want to have on your network. Go to the “Settings > Networks” page. You should see the “Default” network which is set to VLAN 1 by default like nearly every managed switch.
Click on “New Virtual Network” to create a new VLAN.
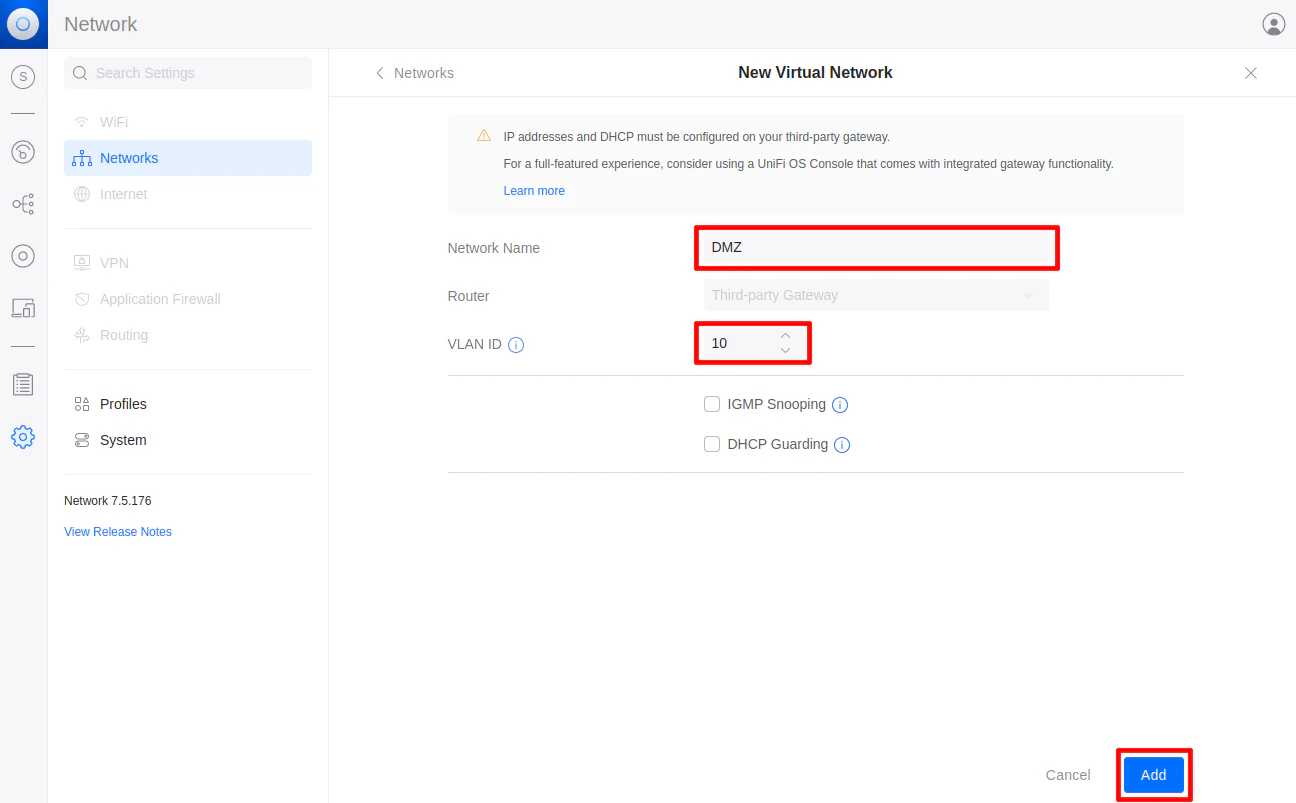
Enter the “Network Name” such as DMZ and a VLAN ID such as 10. While the name can be anything descriptive, you need to make sure you use the same VLAN ID on your router/firewall as well as any other network switches if you have more than one switch.
There are some additional options such as “IGMP Snooping” and “DHCP Guarding” if you would like those features. IGMP snooping can help conserve bandwidth if you have a lot of multicast devices such as cameras, IPTVs, etc. while DHCP guarding can help prevent issues if you are concerned about having rogue DHCP servers on your network.
Click the “Add” button when you are finished.
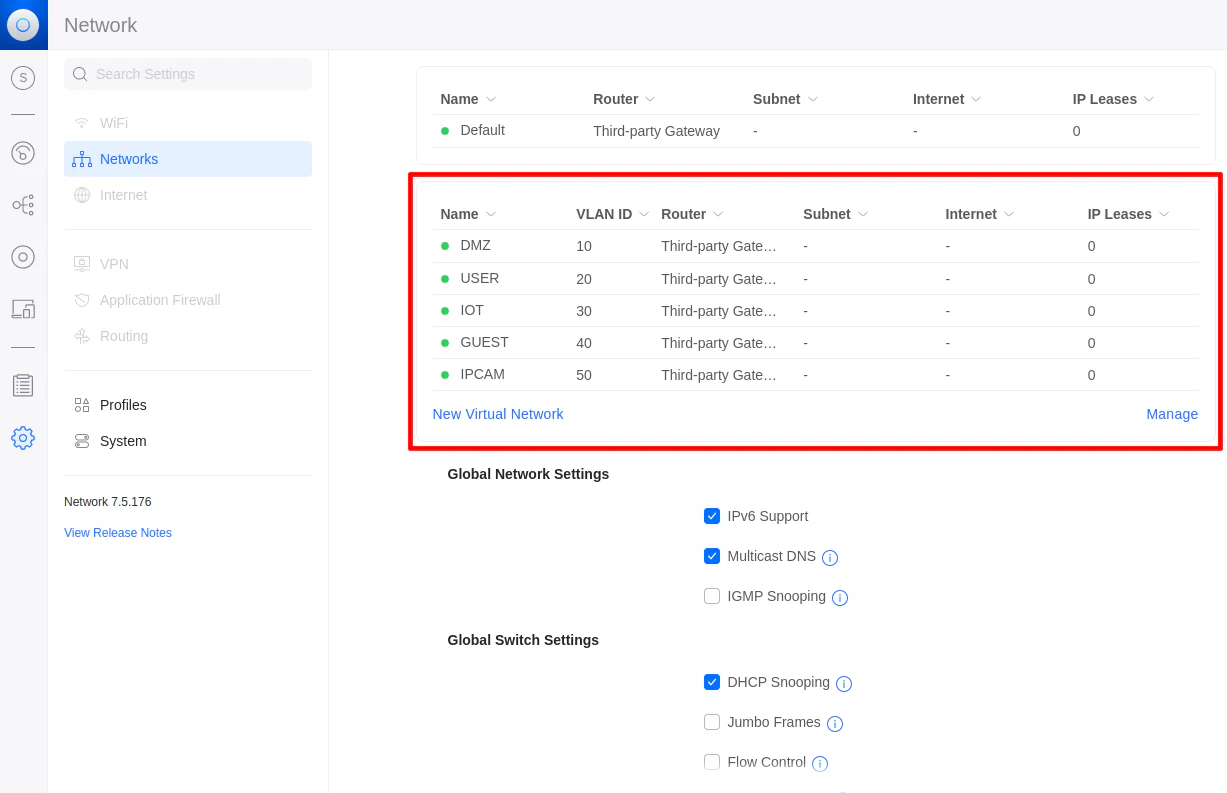
You may repeat this process for any number of VLANs that you would like to have as you can see in the screenshot below.
Assign VLANs to Interfaces
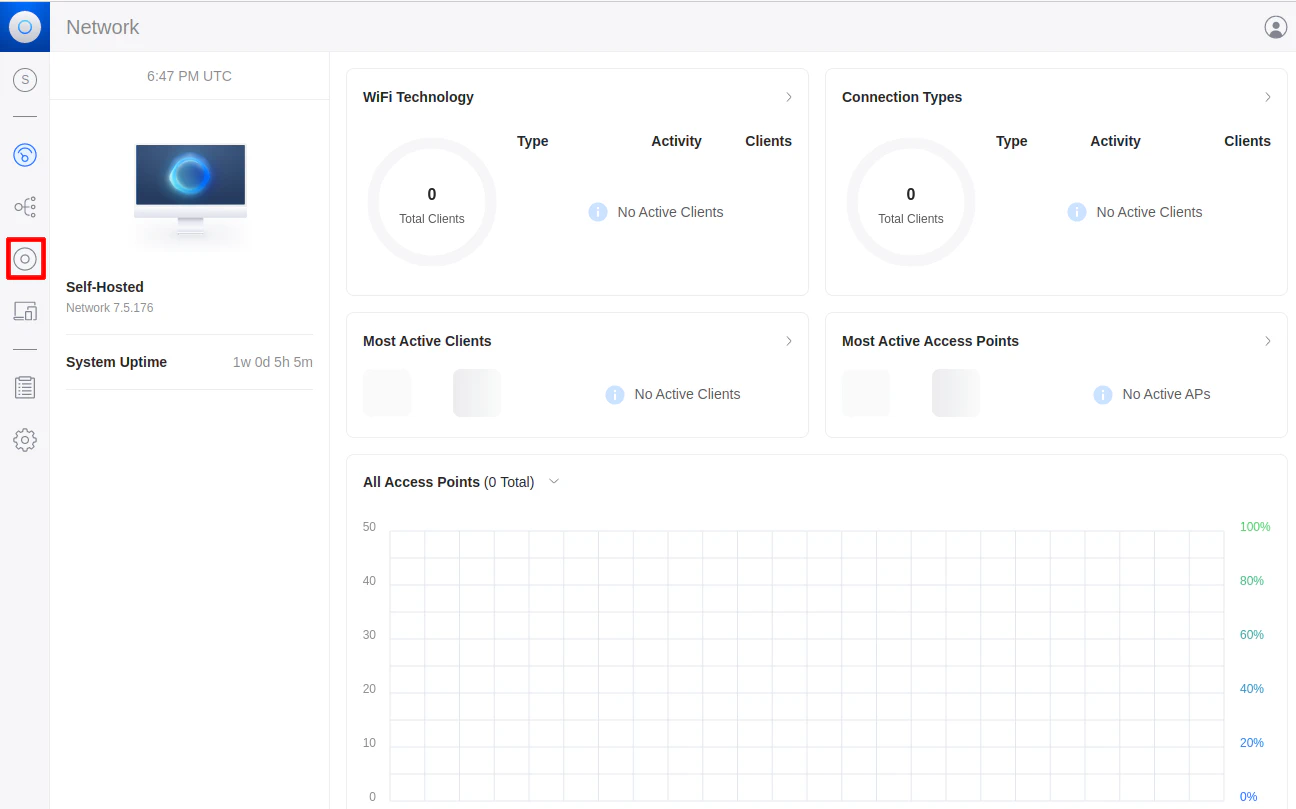
Now that the VLANs have been created, you may assign them to interfaces on your network switch. Click on the “Devices” icon to show a list of your UniFi devices.
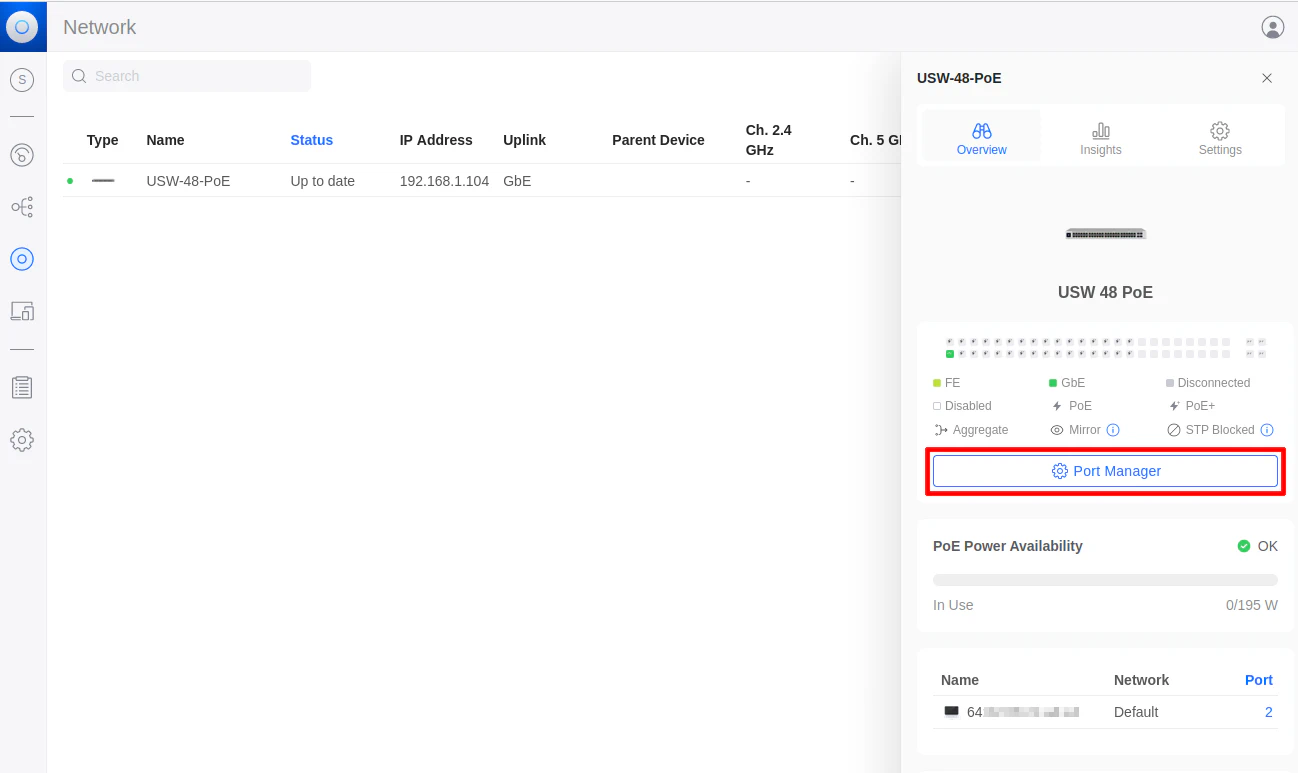
Click on your UniFi switch and then the “Port Manager” button in the “Overview” tab.
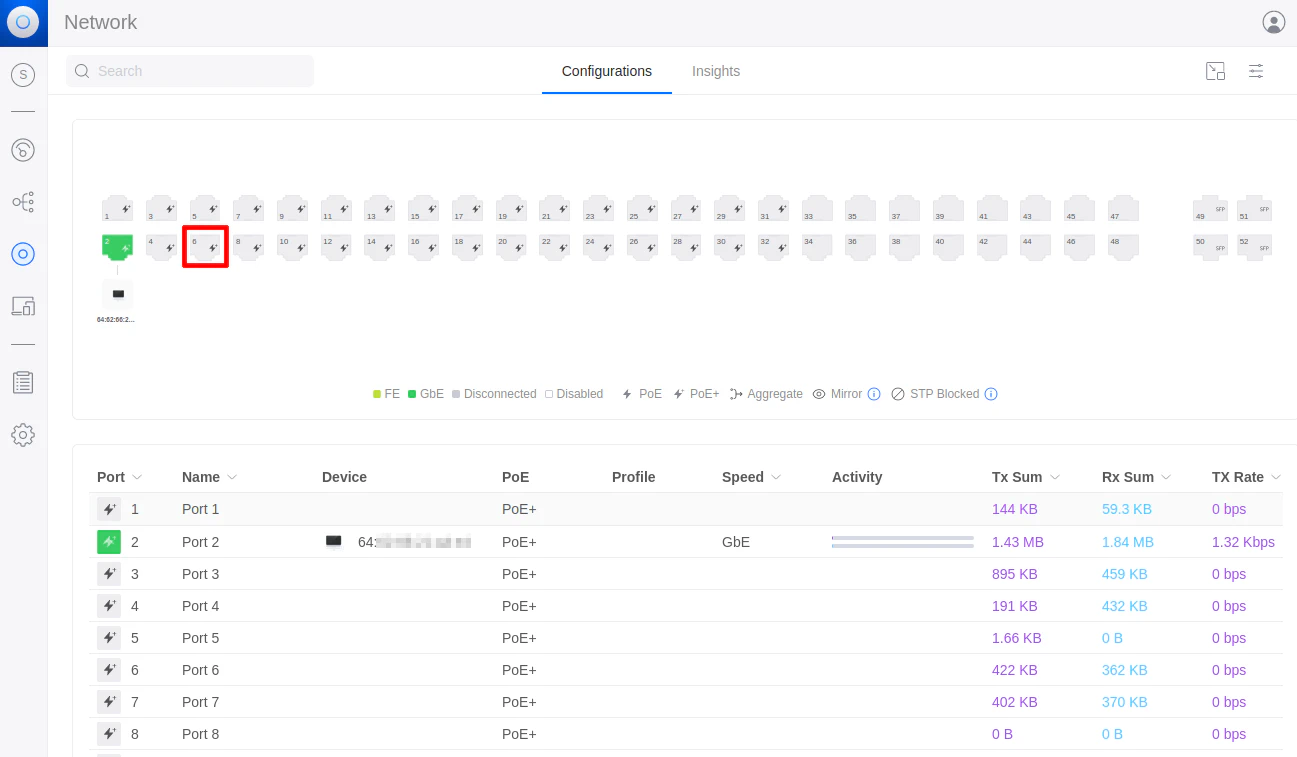
You should see all of your ports. They will be shown as green if a device is plugged into the interface.
By default all of the interfaces are set to the “Default” network for the “Primary Network” option. The “Default” network on UniFi switches allow all VLAN traffic to pass through the interfaces. Therefore, the interfaces are set as “trunk” ports. No additional configuration is necessary if you simply want to allow all of the VLAN traffic through an interface.
If you are not familiar with the process of creating VLANs, the ports where routers/firewalls/switches/access points are connected need to be set as “trunk” ports to allow all VLAN traffic to pass through. You may leave all of those trunk interfaces set to the “Default” network (keep in mind this applies to the UniFi switches – other vendors may take a different approach so you may have to explicitly set an interface as a “trunk” port).
You only need to change the “Primary Network” for an interface if you want the interface to belong to a specific VLAN. For all of your clients on your network (PCs, laptops, printers, game consoles, etc.), you will want to assign the interface on the switch to the appropriate network.
For example, suppose you want port 6 to belong to your “USER” VLAN. Click on port 6.
Choose USER (20) for the “Primary Network” and click “Apply Changes”. The device which is plugged into port 6 will now be on the “USER” network.
Note that there are options to restrict which VLANs are allowed or blocked on an interface via the “Traffic Restriction” option should you need such an option.

You are able to select more than one interface at a time if you wish to assign multiple interfaces to the same VLAN.
Conclusion
As you can see, the process of assigning VLANs on UniFi switches is very simple. I hope this information was helpful since VLAN configuration can be a confusing topic for users new to VLANs. UniFi has made the process simple even though the process is a bit different than other vendors.
Even though I did not discuss it in great detail, more advanced options for VLAN configuration are available in the web interface should you need them, but in the context of a home network, you may not find yourself needing to make use of those options.