Create an OPNsense Virtual Machine in VirtualBox for Screenshot or Evaluation Purposes
Table of Contents
When creating content for this website, I often have the need to take screenshots of the OPNsense web interface. Sometimes I am able to use my actual home network router to take screenshots, but I have to be careful not to modify any settings. I sometimes have to resort to tweaking the screenshot slightly after taking it in order to show what the interface should look like without everything already configured. It was definitely less than ideal, and I ran the risk of messing up my network. So it was finally time to take the time to set up a proper virtual machine that I could use to take screenshots.
First Attempts
I tried several times to set up an OPNsense virtual machine in VirtualBox in the past, but I would have trouble accessing the OPNsense web interface. The best I could do was to only enable a single network adapter so that OPNsense would configure that interface as a WAN interface, which would allow access to the web interface. When only a WAN interface is present, the NAT firewall is not enabled and it seems as though other settings such as blocking local network addresses is not enabled on the WAN interface. This works well enough if you wish to browse through the web interface to evaluate the available features. I used this configuration to take a few screenshots, but I soon had a need to take screenshots that required me to have a LAN interface.
Adding another network adapter in VirtualBox is quite simple. However, when I add a second network adapter to the virtual machine and enable the interface in OPNsense, the NAT firewall and other settings are activated, which blocks access to the web interface from the WAN interface. I tried setting up firewall rules and changing some other settings. Nothing seemed to work for what I was trying to achieve. I looked up examples online about how to set up OPNsense with 2 network interfaces in VirtualBox. They usually involved setting up the first adapter as a “Bridged Adapter” so it has a virtual, unique IP address on your network (which makes it look like a separate physical machine on your network) and setting the second adapter to “Host-only Adapter”.
One article I read was out of date and it does not seem VirtualBox functions quite the same way. The initial configuration step of setting up a “Host-only Networks” does not exist in current versions of VirtualBox (at least not in that location). On the step where the second network adapter is set to a “Host-only Adapter”, there is nothing to select in the dropdown box. Other articles simply show how to install OPNsense and nothing else. That is not super helpful in showing how to access the OPNsense web interface with the LAN interface enabled.
Light Bulb Moment
After thinking about this further, an idea crossed my mind… what if I set the second network adapter as a “Bridged Adapter” too? That means it would appear that there was another machine on the network like with the WAN interface. I was thinking to myself, ‘how would I “plug into” that virtual network so that I would be on the LAN network and could access the web interface?’ Since I am running virtualization software that allows to create an entire virtualized network (at least I do not think VirtualBox can do that… let me know in the comments if it is possible), I could not just spin up another virtual machine and be “connected” to that LAN network. Then I wondered if I could just visit the LAN IP address to access the OPNsense web interface. It turns out that the answer is “Yes!”
Please keep in mind that this configuration is likely only useful for screenshots or for evaluating the features that are available in the OPNsense web interface. I do not think it would be useful for actually routing any real network traffic due to how it is configured. That is ok for my purposes since I am not using it as my main router or a secondary firewall for internal networks to further isolate the DMZ network from internal networks.
Setting up the Virtual Machine
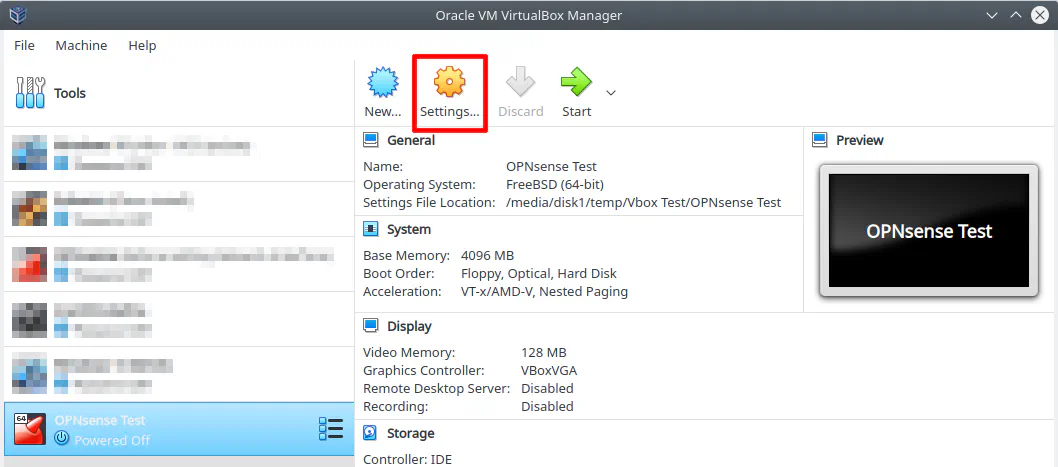
After you set up the basic configuration for your OPNsense virtual machine in the VirtualBox Manager (by picking where to store the files, how much disk space to use, and the type of operating system), you will need to edit the virtual machine settings by clicking on the new virtual machine entry in the list of machines and click “Settings”.
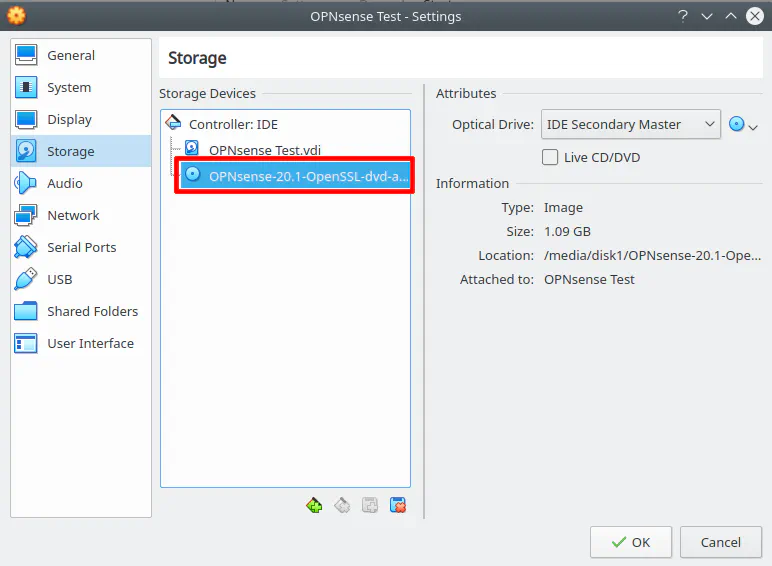
The first thing you will need to do is add the OPNsense DVD ISO image under “Storage”.
Next you will want to go to “Network” to set up 2 “Bridged Adapters”.
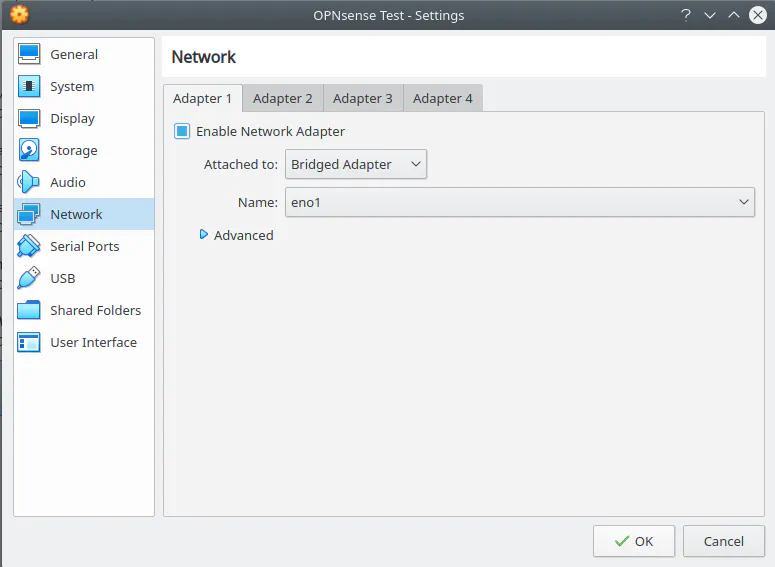
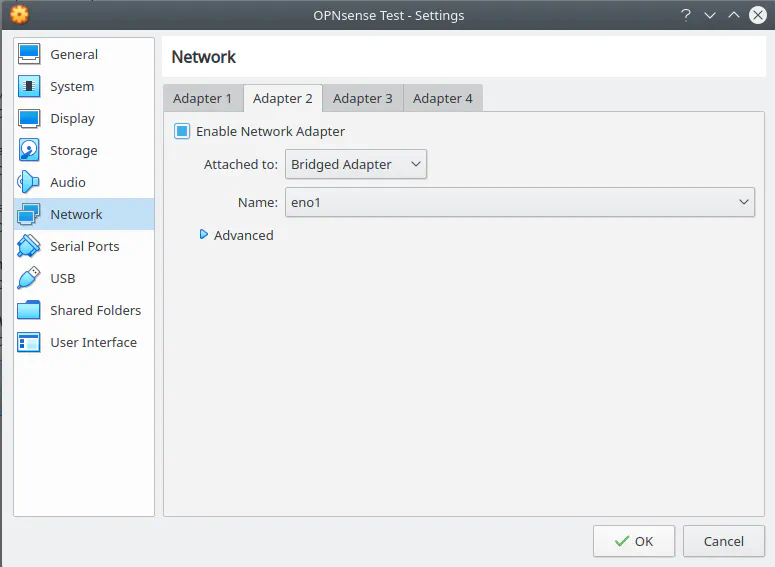
Now you can start the virtual machine. It will run the live mode of OPNsense. You may let it auto assign the interface addresses. When 2 network adapters are detected, it will by default make the WAN interface use DHCP and the LAN interface use 192.168.1.1. You will want the LAN IP to also use DHCP so it is assigned an address that is in the same network as your host machine especially if you are using VLANs.
Note: If you are not using VLANs and/or your host machine is on your actual LAN network, it is possible the default LAN interface IP of your OPNsense in VirtualBox will conflict with your router’s IP address because it uses the default 192.168.1.1. I am using a host machine in a different VLAN so I did not experience any issues. I think this possibility may be worth considering. In this scenario, you would be better off adding the second “Bridged Adapter” after setting up OPNsense with a single adapter because when you assign the LAN interface from the OPNsense web interface you can select DHCP. Once you do that, you will lose WAN access to the web interface but then you can switch over to your LAN IP address to access the web interface once again.
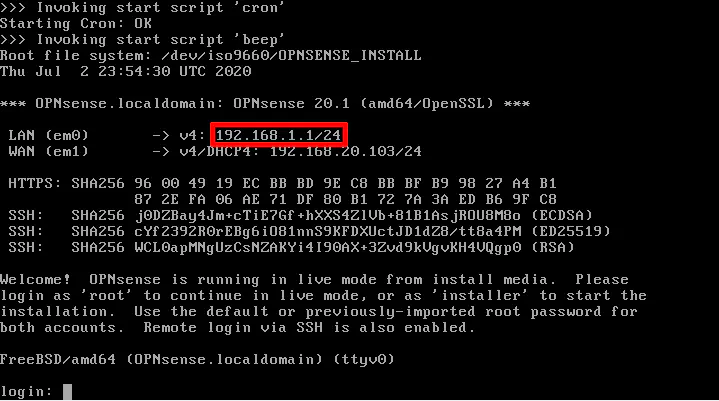
Sign into the live instance of OPNsense by entering “root” as the username and “opnsense” as the default password. Select option 2 to change the interface IP addresses.
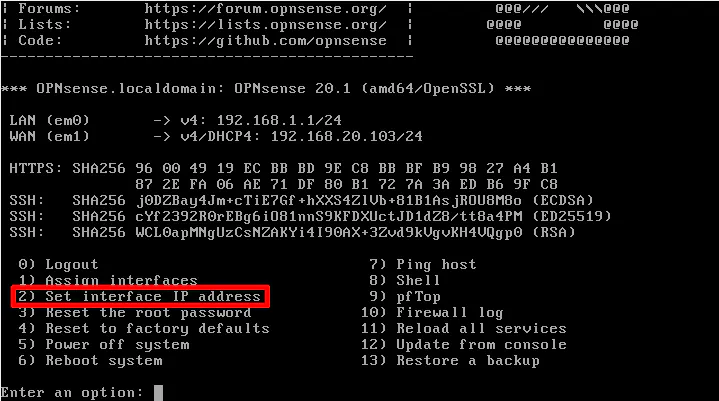
You will want to enter the following values at the prompts as seen in the screenshot below. Select the LAN interface. In my case, it was option 1. Then enter “Y” for configuring the IPv4 address to use DHCP. This step is important (if using IPv4). You can leave the IPv6 as the default “Y” as track interface. It does not matter as much for IPv6 unless you are using that exclusively in your home network and not running a dual stack configuration. Finally, you can enter the default “N” for reverting to HTTP for the web interface. It is best to use HTTPS but it may not be so important in this case since this virtual machine is intended for assisting with taking screenshots or for web interface exploration.
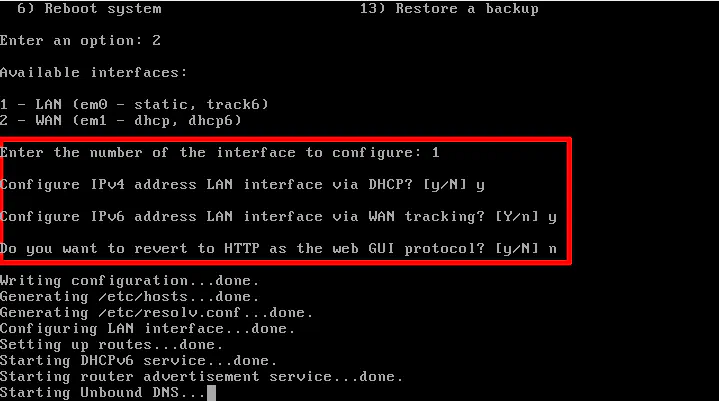
After finishing the configuration, you should notice that the LAN IP address changes to an address assigned by DHCP and it is the same IP address that it states can be used to access the OPNsense web interface.
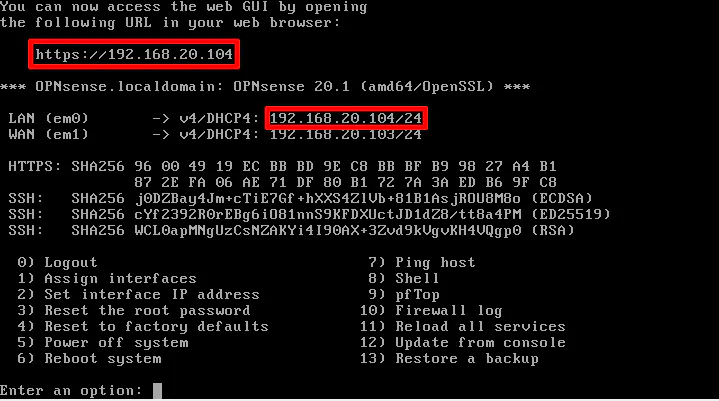
Select option 0 to log out of the root account. Do not reboot the virtual machine at this point or you will lose your settings! Log back into OPNsense using the “installer” user account with the same default password of “opnsense”. This will start the installer using the interface settings that you configured. When the installer is finished before rebooting, I noticed it said that you can access the web interface on the LAN using the web address of https://192.168.1.1 but once the virtual machine rebooted, it still had my LAN using DHCP so I could access the web interface through that screen so do not be worried if you see that message before rebooting.
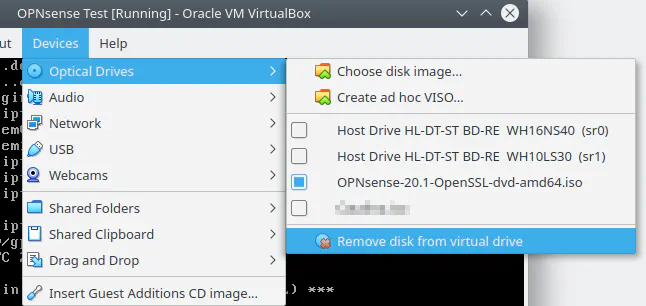
Before the system reboots, you should remove the OPNsense ISO image so it will not try to boot into the live mode again. You can go to the “Device” menu and select “Remove disk from virtual drive”.
Once the system has rebooted, you should be able to log into OPNsense web interface using the LAN IP address that was assigned via DHCP. In my example, it is https://192.168.20.104. You will have to run through some basic configuration when you first open the web interface. For purposes of this demonstration, you should be able to leave everything at the default and you will be brought to the OPNsense “Dashboard”. You will see there is both a WAN and LAN interface.
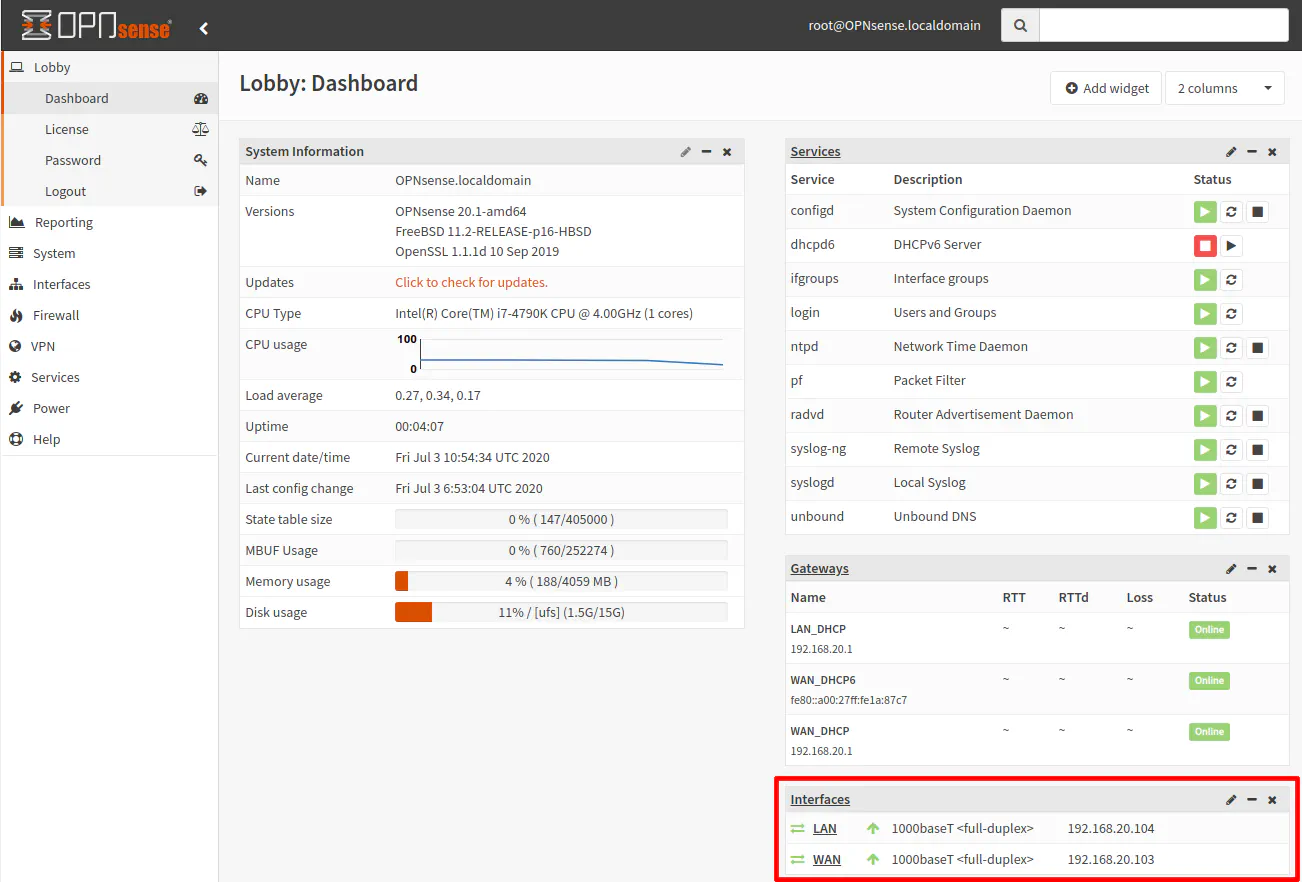
Congratulations, you can now explore the OPNsense web interface and even take some screenshots, if that is your thing (do it for the community)!
Why Does This Work?
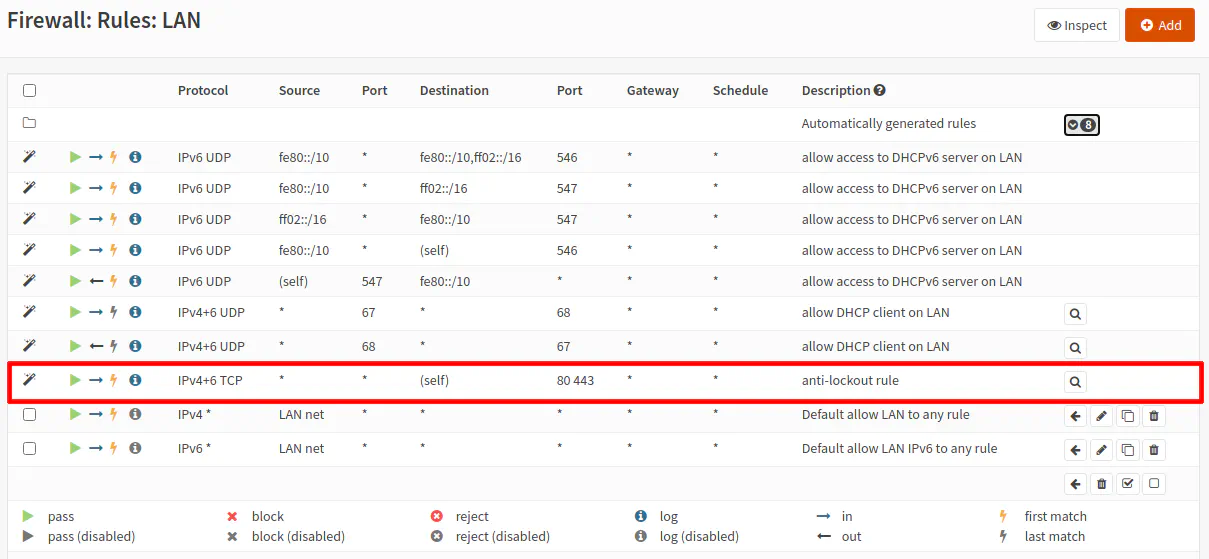
For those who are curious, I believe this works because of a few reasons. First, the LAN interface is made accessible to the network using a “Bridged Adapter”. Second, there is the default anti-lockout rule on the LAN interface that prevents you from creating firewall rules that would deny access to the web administration and therefore lock you out. You will notice the rule allows any source coming into the LAN interface to access port HTTPS port 443.
