How to Enable Multi-Factor Authentication in OPNsense

Photo by tsingha25 from iStock
Table of Contents
Enabling multi-factor authentication for your accounts is a good security practice to follow and the account used to access the OPNsense web interface is no exception. Even though most users will not expose the web interface to the outside world, enabling the extra authentication improves security within your network in the event a device on your network is compromised. Hardening your internal home network is similar to a zero trust architecture but is generally less sophisticated than enterprise zero trust networks (unless that is your specialty and you wish to go to such great lengths to secure your home network).
Add a New Authentication Server
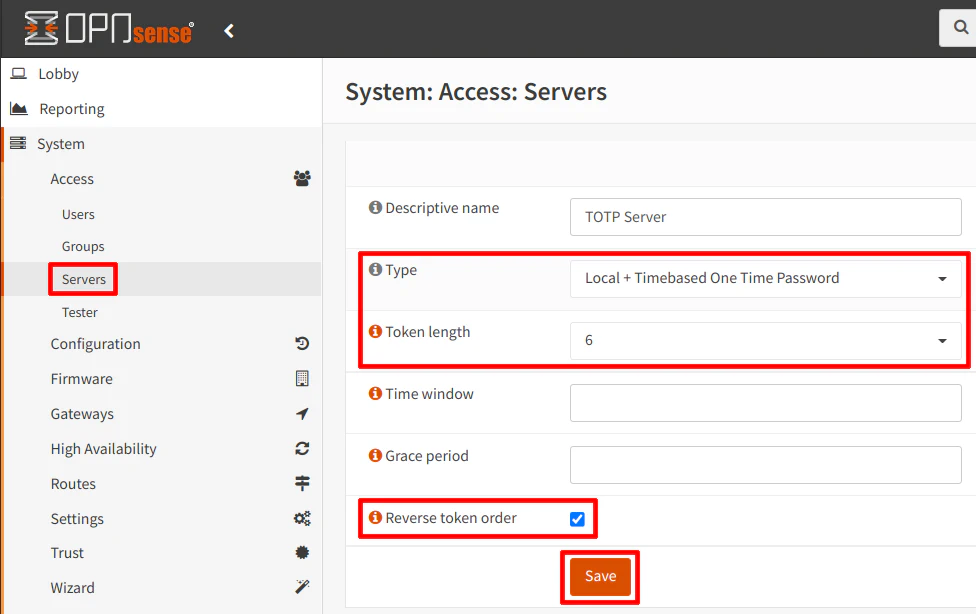
There are a couple of steps you must take to enable multi-factor authentication. On the “System > Access > Servers” page, click the “+” button to add a new authentication server. Then select the “Type” of “Local + Timebased One Time Password” from the dropdown. The token length needs to be “6” for standard TOTP apps such as Google Authenticator (although my personal preference is Authy because you can sync codes across devices and to migrate to new devices more easily – the seeds to your codes are encrypted, of course).
Tip
Normally the order in which the auth token is entered is the token first followed by the password. However, if you are using a password manager such as Bitwarden, you should reverse the order by clicking on the “Reverse token order” checkbox because after you have Bitwarden fill in the password, you can simply paste the auth token after your password very quickly using the standard “Ctrl + V” keystroke for paste. I believe the automatic copying of the auth token is enabled by default in Bitwarden. Otherwise, you will need to enable that option. I find that to be a very convenient way to utilize multi-factor authentication using a password manager.
Generate the OTP Seed
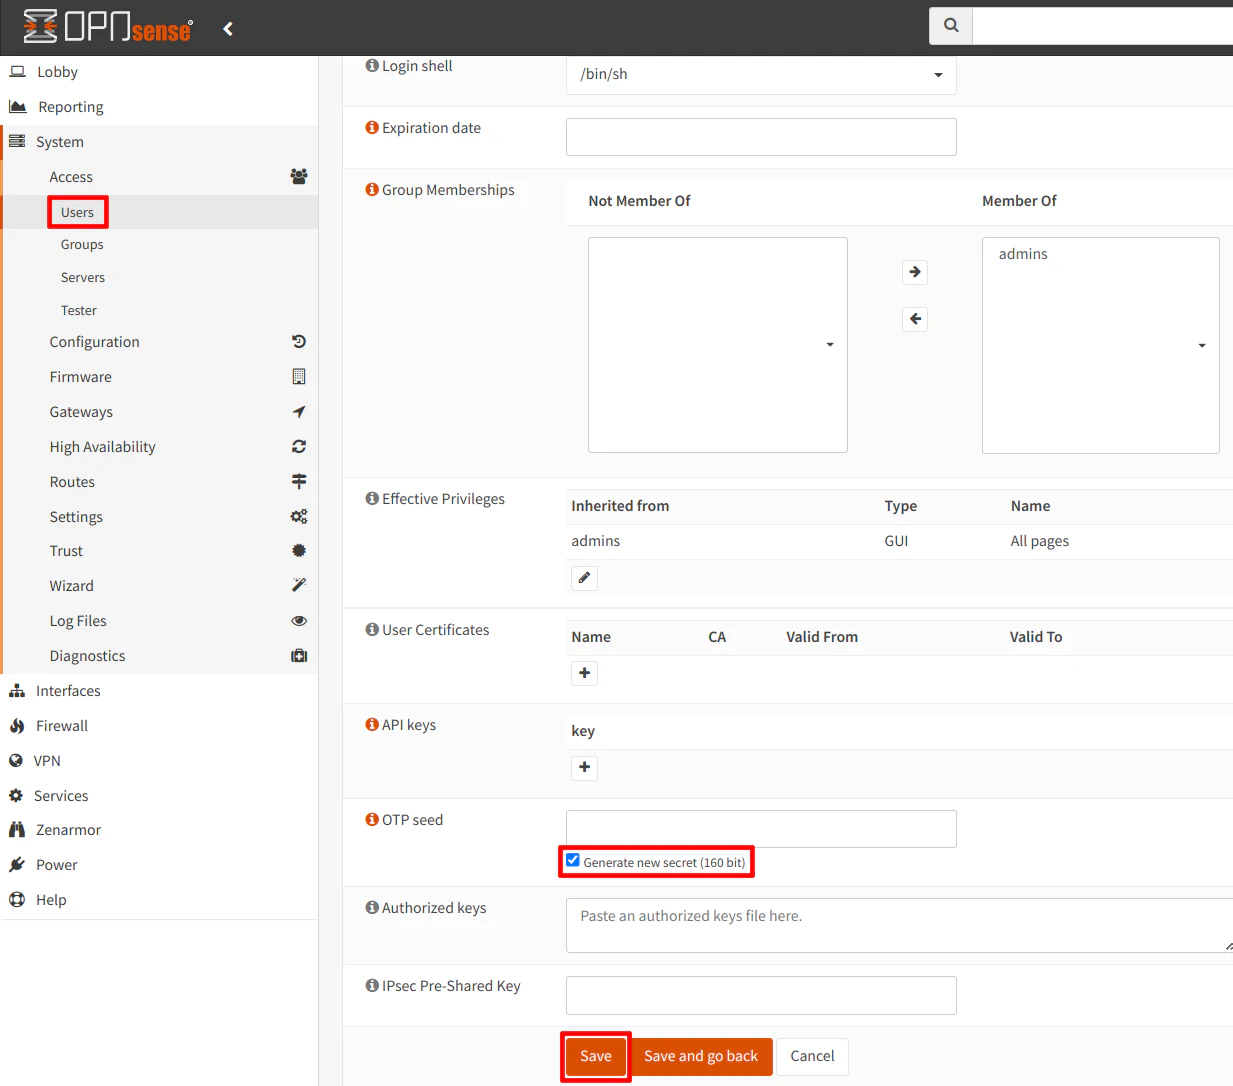
Once you have saved the TOTP server configuration, you need to go to your admin user on the “System > Access > Users” page and click the pencil icon to edit the user. Then click the “Generate new secret (160 bit)” checkbox for the “OTP seed” option. Click the “Save” button rather than the “Save and go back” button so that you can see the newly generated OTP seed.
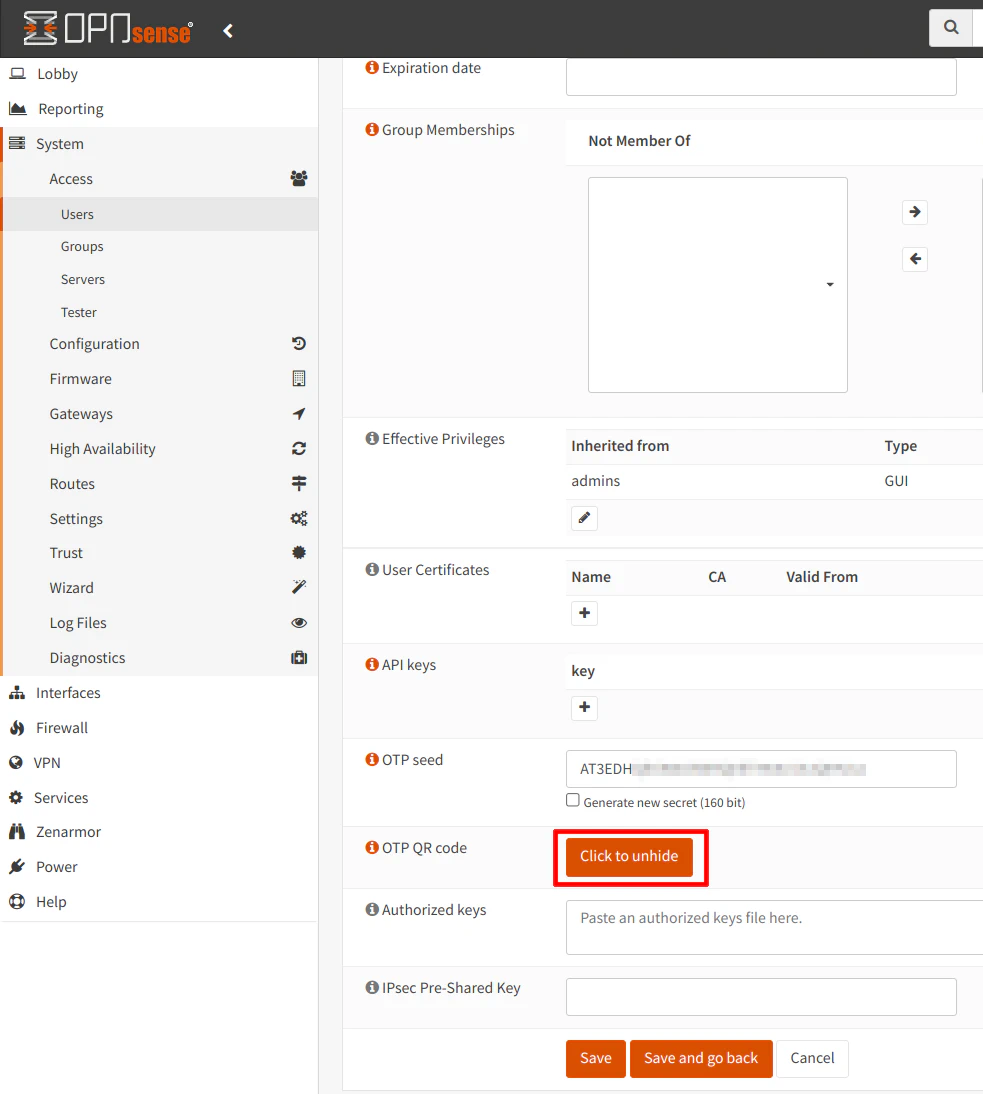
Click on the “Click to unhide” button to show the QR code which you can scan using your app such as Authy and/or you may want to copy the OTP seed to add it to your password manager such as Bitwarden.
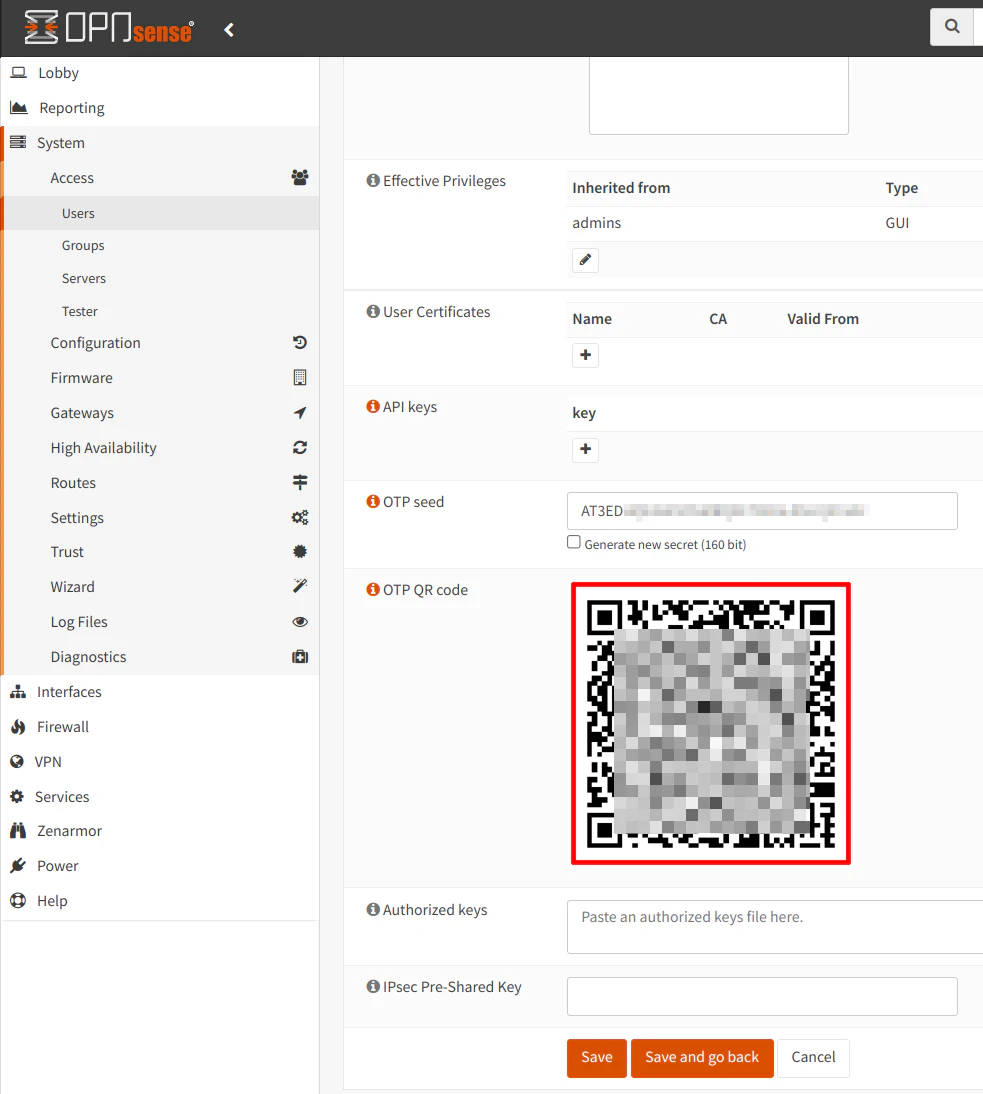
You should see the QR code. Scan the code in your app now.
Test the Multi-Factor Authentication
Before you enable the multi-factor authentication, you should test it using the “System > Access > Tester” page. It is nice you can test your configuration before you fully enable it because if something is not configured properly, you could end up locking yourself out of the web interface.
Select your TOTP server. I named mine “TOTP Server” (how original, right?), but the name is whatever you entered for the “Descriptive name” when you added the authentication server. Then enter your “Username” and the “Password” including the auth token generated by your app. Depending on whether or not you reversed the token order, you will either need to enter the “password + token” or the “token + password”. When you click the “Test” button you should see a successful message at the top of the page.

Enable Multi-Factor Authentication
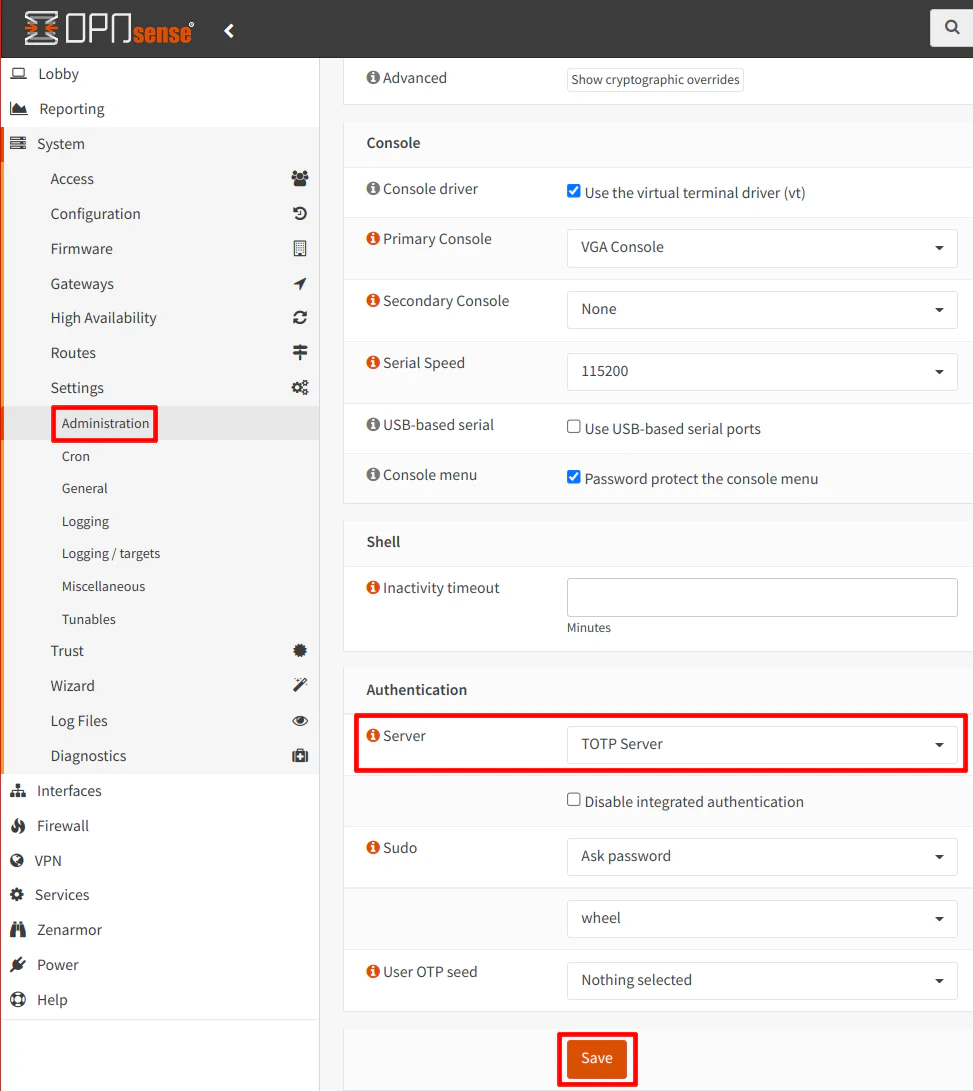
Finally, you need to enable the TOTP server by going to the “System > Settings > Administration” page and selecting the “TOTP Server” from the “Server” option under the “Authentication” section. If you use other authentication methods (for OpenVPN, etc.), you will need to select multiple authentication servers. Otherwise, you can simply select just the “TOTP Server”.
Note
Keep in mind that you will need to use the multi-factor token for logging into SSH via password with the same admin account if you allow password authentication for the SSH service (but if you login via a SSH key instead, you do not need to use the token).
Now you can log into OPNsense using multi-factor authentication!