How to Mirror a Local GitLab Repository to a Remote GitLab Repository

Photo by Gantas Vaičiulėnas from Pexels
Table of Contents
I have long considered self-hosting my own Git server to use for personal projects, but I never took the time to do so. Now that I have Proxmox and have come to love being able to run containers/virtual machines for everything, I thought it was time to set up a local GitLab installation. My main GitLab repository which I use to host this site is on GitLab.com.
Ideally, I would like to push all my updates to the local GitLab server and in turn have the updates be migrated to the remote repository on GitLab.com automatically. Fortunately this is possible with the free version of GitLab with the repository mirroring functionality! You may mirror a repository either by pushing updates or pulling updates. Pushing updates is free while pulling updates is not. This works out well because I only need to push updates to accomplish my goal.
Since I am using Proxmox, I will use a LXC container running Ubuntu to be more resource efficient than using a VM. I discovered a few odd things along the way when using a LXC container that may not necessarily occur if you were running Ubuntu in a VM or on bare metal. It is likely due to the fact that you do not have to navigate through the normal installation process when installing Ubuntu when creating a LXC container since you choose a template of the OS of choice and you are ready to use it fairly quickly. I make note of what I encountered in the following section.
A Note on Installation for Ubuntu Running on LXC Container in Proxmox
The instructions by GitLab for installation on Ubuntu is as simple as installing dependencies and a new repo. It is a very standard process for installation applications on Ubuntu via a traditional package repository. For a quick reference of how to install GitLab on Ubuntu, all you need to run are the following commands to install the necessary dependencies, package repository, and GitLab _(I am assuming you are logged in as root when running these commands).
apt-get install -y curl openssh-server ca-certificates tzdata perl
curl https://packages.gitlab.com/install/repositories/gitlab/gitlab-ee/script.deb.sh | sudo bash
EXTERNAL_URL="https://gitlab.example.com" apt-get install gitlab-ee
Note that you will need to change the
EXTERNAL_URLabove to the proper URL that you will use to access your GitLab server. You will need to ensure you have your hostname/DNS set up properly before setting the URL so that you will be able to access your GitLab server after installation. One thing to keep in mind is that you will need to allow external access to your GitLab server if you wish to use HTTPS since it will automatically install a Let’s Encrypt certificate unless you use your own certificate (which is a more complicated process). Since my server is only used internally, I chose to keep it simple and use HTTP. In fact, I have the container set up to be on the same VLAN as my PC instead of my DMZ network so I do not need to allow access across another VLAN or the outside world. If I really want everything to be encrypted internally, I can always add HTTPS access later (possibly using a proxy) or I could use SSH. When data is pushed to the remote network on GitLab.com, I use HTTPS so that data leaving my network is encrypted.
Although the installation process itself is simple, I encountered two warnings – one of which seemed to prevent the installation from continuing.
Set the Locale in Ubuntu
The first warning was about not having a locale set. Since I set up a fresh Ubuntu installation using a LXC template in Proxmox, it does not prompt you to set the locale during the creation of the container like it might during a regular OS installation. I recommend you fix this issue before attempting to install GitLab since it actually prevented me from accessing the web interface due to an incomplete installation.
If you enter the locale command in the console, you will see the following output if your locale is not set:
LANG=C
LANGUAGE=
LC_CTYPE="C"
LC_NUMERIC="C"
LC_TIME="C"
LC_COLLATE="C"
LC_MONETARY="C"
LC_MESSAGES="C"
LC_PAPER="C"
LC_NAME="C"
LC_ADDRESS="C"
LC_TELEPHONE="C"
LC_MEASUREMENT="C"
LC_IDENTIFICATION="C"
LC_ALL=
To set a locale, you must first generate one with the following command:
locale-gen en_US.UTF-8
You may want to use a different locale than the example below if you do not use United States English on your system. Once the locale is generated, update the system locale to the same one you just generated:
update-locale LANG=en_US.UTF-8
You will need to reboot your container for changes to take effect.
Warning about not having Root Password Set
The second issue was an error that was displayed during the installation stating the root password was not set for GitLab. However, according to the installation instructions you cannot set it until you open the web interface and log into GitLab for the first time. Once I entered a password on the web interface, I then ran the standard apt update and apt dist-upgrade commands to upgrade other packages that needed updated. I noticed that it then finished the full GitLab installation process since it had a root password. I thought that process was a bit odd, but it did work.
Prerequisite GitLab Configuration
There is a bare minimum configuration you will need to have established on your GitLab installation before setting up your repository mirror. Rather than assume you have them already configured, I will describe what I feel is the minimum amount of configuration to have everything function properly. If I miss anything important, please let me know!
Set up Email in Your Local GitLab Installation
Before you continue, you should probably set up your email settings if you have not done so after the installation of GitLab. You will need the email server configured if you wish to receive notifications from your GitLab server.
There are several configuration examples on GitLab’s website. For my installation, I simply used Gmail to send email to myself. Sometimes I prefer to use Gmail since I do not have to run a local mail service. Also it may be less likely to get rejected or marked as spam when sending to various email accounts since the mail coming from your own server will be not originating from a well-known email service provider.
Set up Your Local GitLab User
If you do not already have a user account created for your project on your GitLab server, you may do so from the root administrator account or sign up for a new account if you allow users to sign up. You will need the user account to import your exported project from GitLab.com since you do not want to use the root user account. You do not necessarily have to use the same user account name as your GitLab.com user account. When you push changes to the remote repository, you can specify the user account in the URL so all commits are made by the same GitLab.com user even if your local username is different. I made my username the same for both so that everything just appears to be the same user. It helps to make the experience more seamless, I think.
Export GitLab Project from GitLab.com
Now that your local GitLab server is ready, it is time to export your project from GitLab.com. Go to the “Settings > General” page and expand the “Advanced” section.
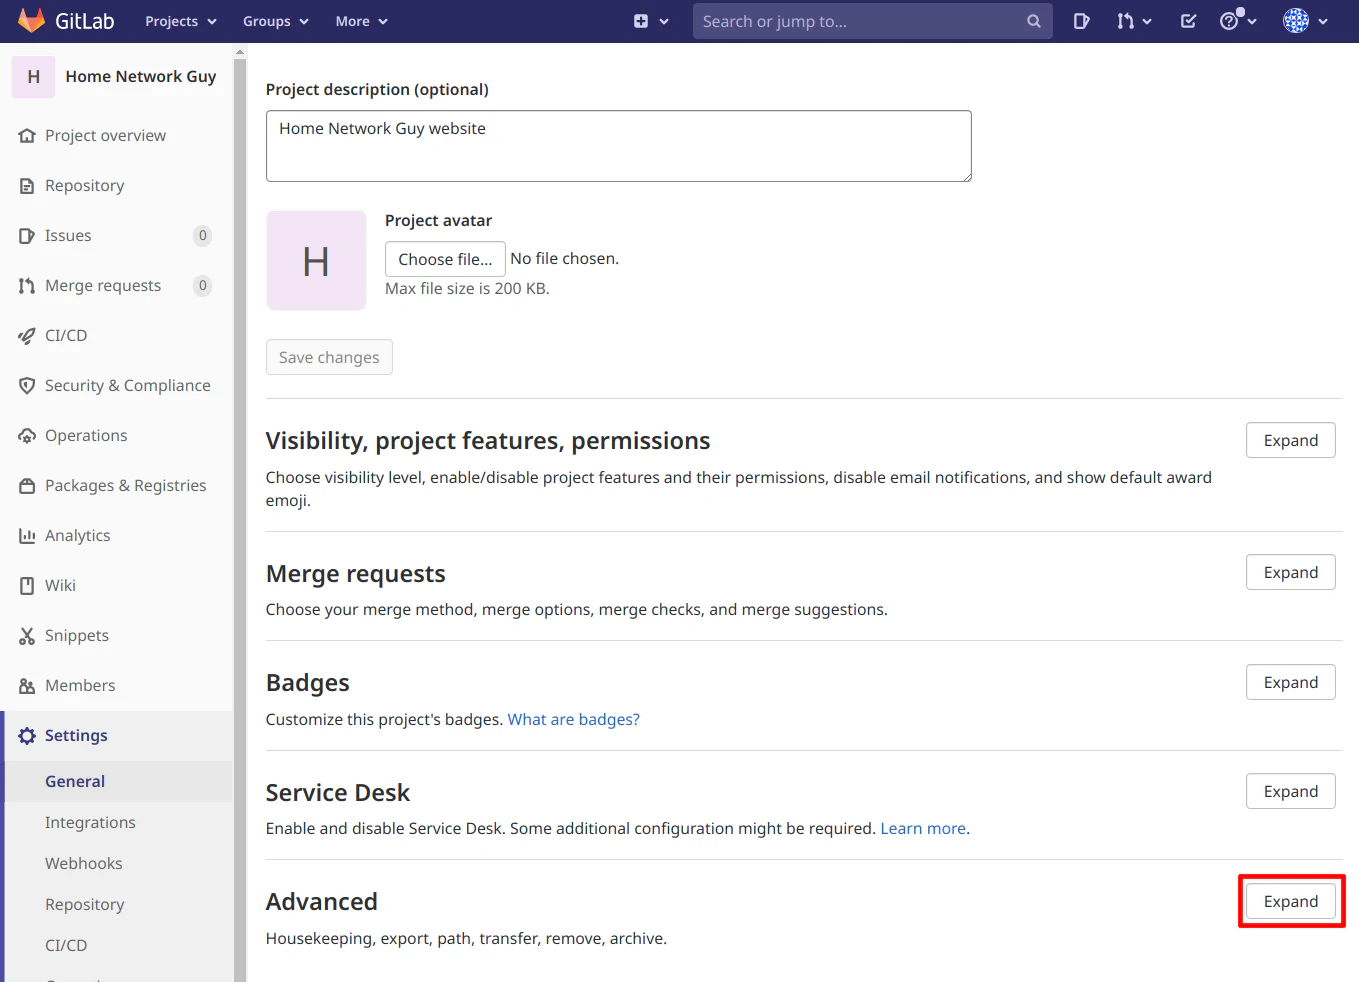
I am not sure why exporting your repository is considered an “advanced” task since you only need to click on the “Export project” button, but I digress…

Depending on the size of your project, it may take some time for GitLab.com to generate your exported project file. You can refresh the page to check if the export has finished. You should notice the “Download export” and “Generate new export” buttons. Click on the “Download export” button to download a copy of your exported project.

Import GitLab Project into Your Local GitLab Server
With the user account you created on your GitLab server, you may now import the repository which you exported from GitLab.com. Go to the “Projects > GitLab Import” page. You will need to enter the “Project name” and the “Project slug” which is used to identify the project uniquely within your repository. The “Project URL” is displayed based on what you use during the installation of GitLab. It is shown so you know the full URL of your repository. You will need to click the “Choose File” button to select the exported file which you want to import.
Click the “Import project” button when you are ready to import.

When you are importing the project, you will see an “Import in progress” message.

When the import has successfully completed, you will see the imported project in your “Projects” menu.

Configure Repository Mirroring
At this point, your local GitLab repository should contain exactly the same commit history and data. Do not commit anything new to your GitLab.com database so that all of your future commits can be pushed through your local GitLab repository.
To configure mirroring, you need to go to the “Settings > Repositories” page. Then expand the “Mirroring repositories” section to see the relevant settings for mirroring a repository.

You will need to enter the “Git repository URL” which you may obtain from the “Clone” button for your project on GitLab.com. I am using the HTTPS in this example. Also, I updated the URL to include the username which I use on GitLab.com. This may not be necessary if there is only one project user, but I added it anyway. I entered the “Password” of the user for GitLab.com. Click the “Mirror repository” button to finish setting up the mirror. That part was easy!

Switch to your Local GitLab Repository
Once the project is imported into your local GitLab server and mirroring has been configured, you will need to switch to the repository on your GitLab server. If you use the git command line to switch to your repository, this process will work regardless of the IDE/editor you use for your projects. Since the command line method should work for everyone, I will use it rather than show examples in different user interfaces. The process is quite simple even if you do not like using command line tools. You may copy/paste the repository URL using the “Clone” button on your project hosted on your GitLab server to use in the following command:
git remote set-url origin http://git.homenetworkguy.com/homenetworkguy/home-network-guy-website.git
You can verify that your remote location has changed by using this command:
git remote -v
You should see the following output:
origin  http://git.homenetworkguy.com/homenetworkguy/home-network-guy-website.git (fetch)
origin  http://git.homenetworkguy.com/homenetworkguy/home-network-guy-website.git (push)
Your repository is now using the URL of your GitLab server rather than GitLab.com. That is all you need to do to configure repository mirroring! Now you can start pushing commits to your local repository to see if the changes migrate to the GitLab.com repository.
Verify Proper Mirror Configuration
If you would like to check that the repository mirroring is functioning properly, you could go to the “Settings > Repository” and expand the “Mirroring repositories” section on your GitLab server. You should see the last update attempt and last successful update.

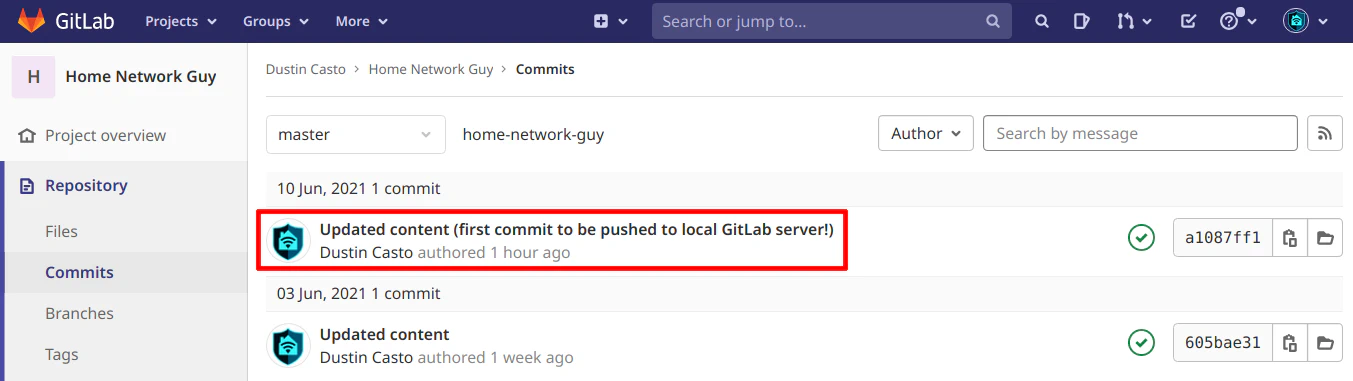
To further check for a successful push, go the the “Repository > Commits” page on GitLab.com to view if your last update was pushed to GitLab.com. You will see the last commit displayed if all went well.
Conclusion
As has been demonstrated, mirroring a GitLab repository is pretty straightforward. Even if you have an existing repository, the process is still easy to accomplish by exporting and importing the GitLab project. A simple git command is all is necessary to switch your project to the local GitLab server. The mirroring configuration will automatically keep the remote repository up to date with the latest changes. What is nice is that my CI/CD pipeline still executes as though I am committing directly to the GitLab repository so my statically generated website is updated after each push. With my personal GitLab repository up and running, I am able to have some projects locally hosted and only push the projects I want to be public facing.