Replace the OPNsense Web UI Self-Signed Certificate with a Let's Encrypt Certificate

Photo by NongAsimo from iStock
Table of Contents
When you install OPNsense, it will generate a self-signed certificate for the web interface. While a self-signed certificate will work just fine especially in a home network environment where you restrict access to the web interface, the situation is less than ideal.
The greatest concern is that you could be subject to a man in the middle attack since it is easier to impersonate a self-signed certificate. You will likely not notice any difference in the warning message you see with self-signed certificates and a malicious self-signed certificate.
Another issue is simply a matter of annoyance. You will have to click the warning message in the web browser when you need to log into OPNsense. If you are like me, you access the web interface on a regular basis so the added benefit of having a real certificate is a great bonus.
In OPNsense, you can generate Let’s Encrypt certificates using the ACME client, which is a plugin that is available in the repository. Let’s Encrypt certificates are great because they are free, and you can easily generate them for your domains.
Note
In order to generate a real certificate for your OPNsense web interface, you must use a real domain name you own or a dynamic DNS domain name.
Create an API Token (Cloudflare in this Example)
Before you can generate certificates, you will need to create an API token. Many DNS registrars such as Cloudflare provide an API for managing DNS records. This is the most efficient way to generate certificates because without an API, you will have to manually update DNS records to verify you own the domain name.
I am going to be using Cloudflare as an example since that is what I am currently using at the time of this writing and also because they are a popular service many use.
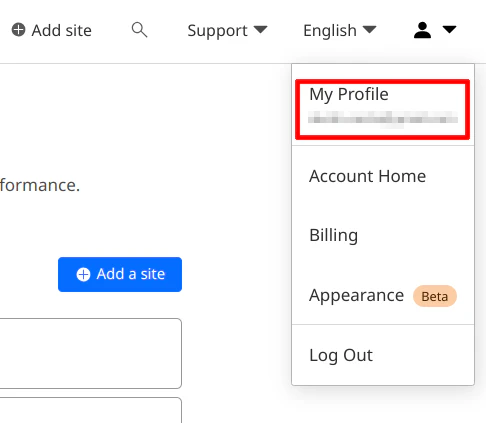
After you log into Cloudflare, go to the “My Profile” page.
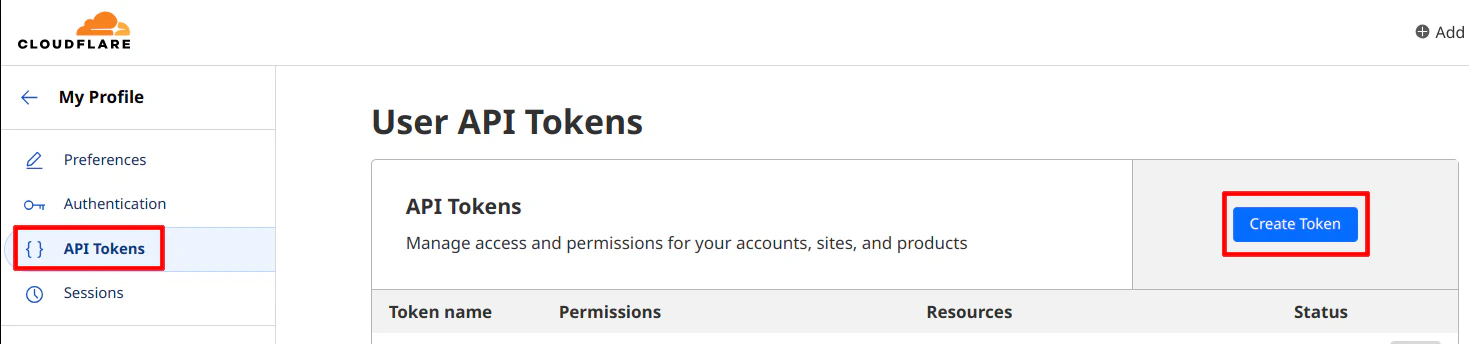
Click on the “API Tokens” menu option on the left side of the page. Then create “Create Token”.
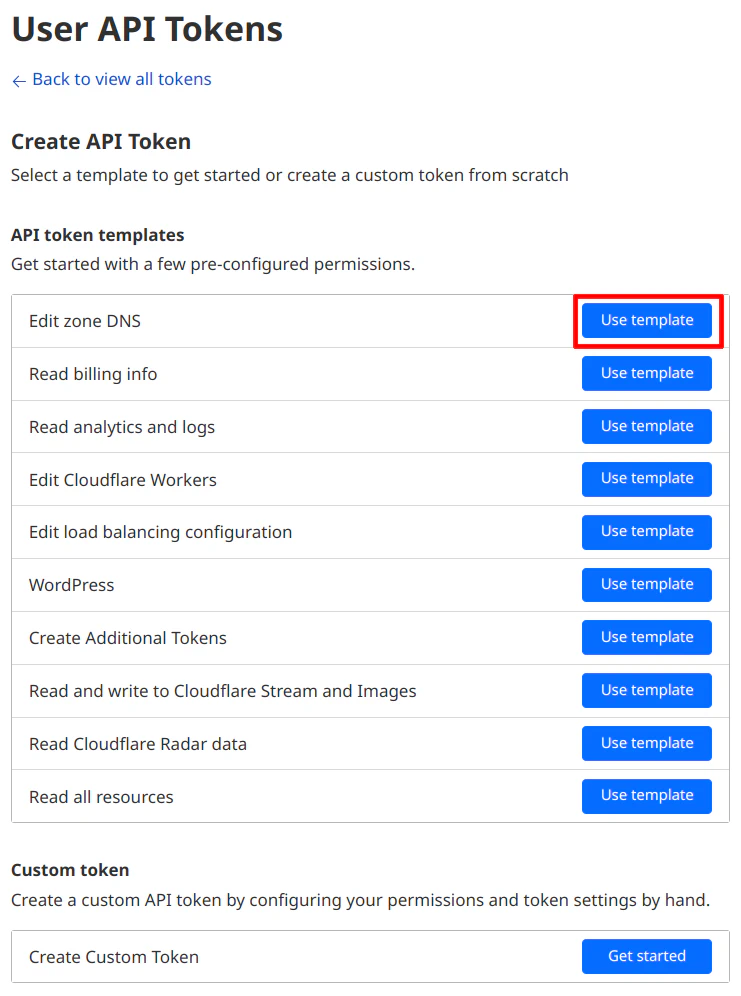
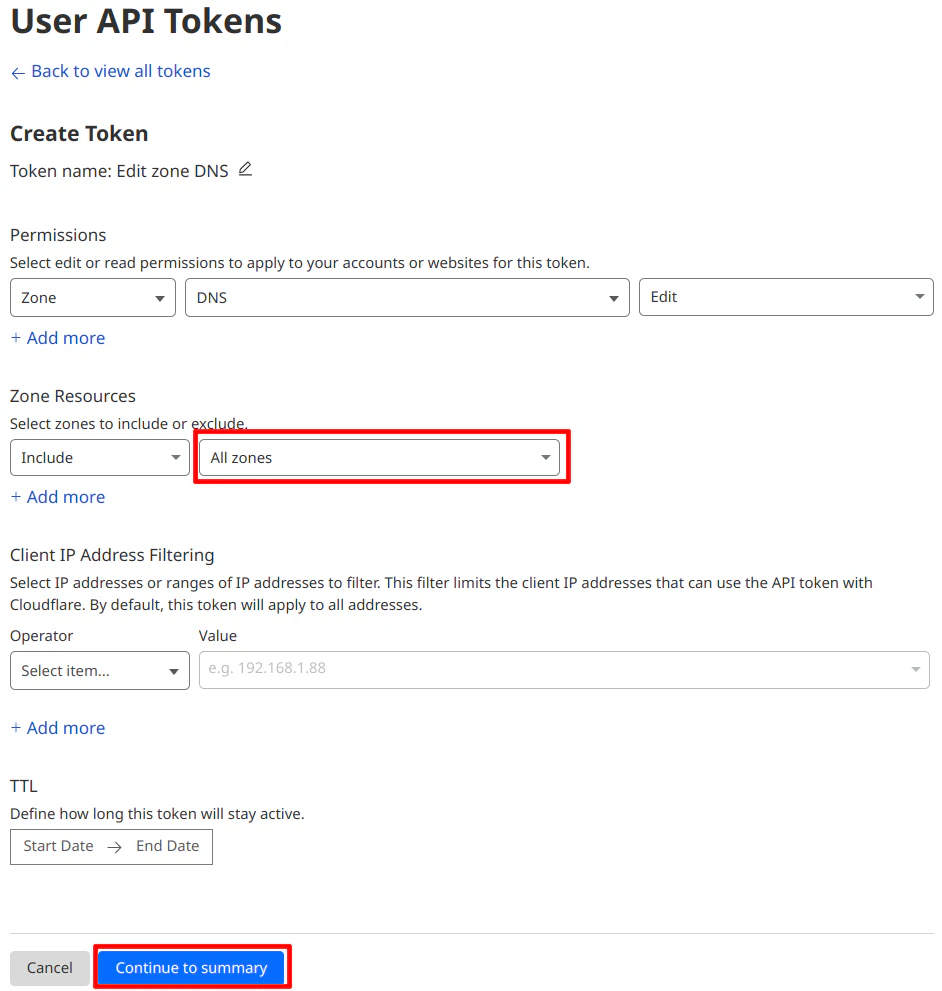
Select the first API token template option for “Edit zone DNS” by clicking on “Use template”.
In the “User API Tokens” section, the only thing you need to change is the “Zone Resources” option. You can select either “All zones” or a specific zone, which will be one of the domain names you own if you own multiple domains. Click on the “Continue to summary” button to proceed.
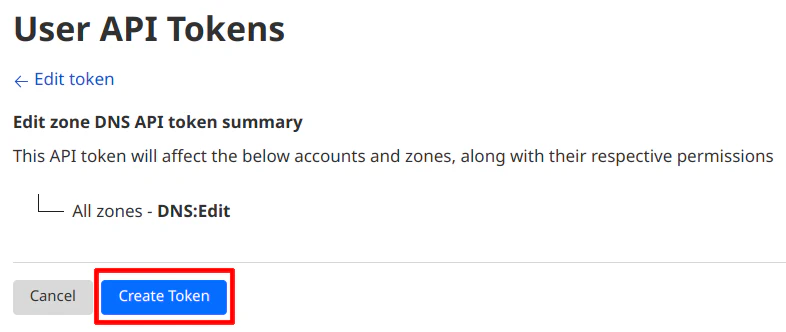
Simply click the “Create Token” button.
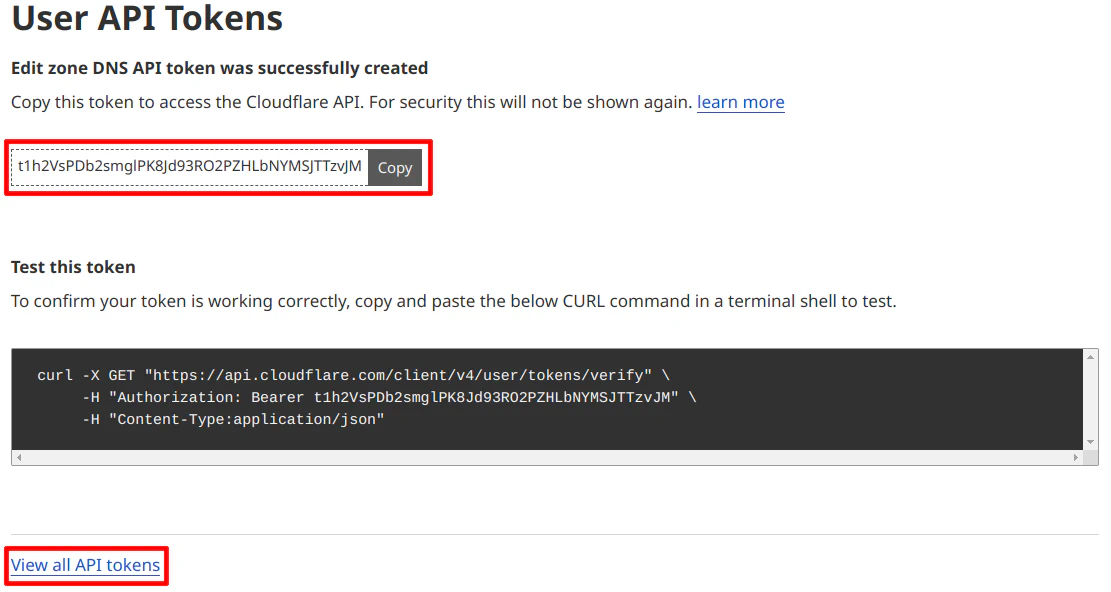
You will now see the API token. Make note of the API token because you will not see it again. You may want to save it in a password manager since you will be using the token essentially like a generated password. You may click the “View all API tokens” link to take you back to the main “User API Tokens” page.
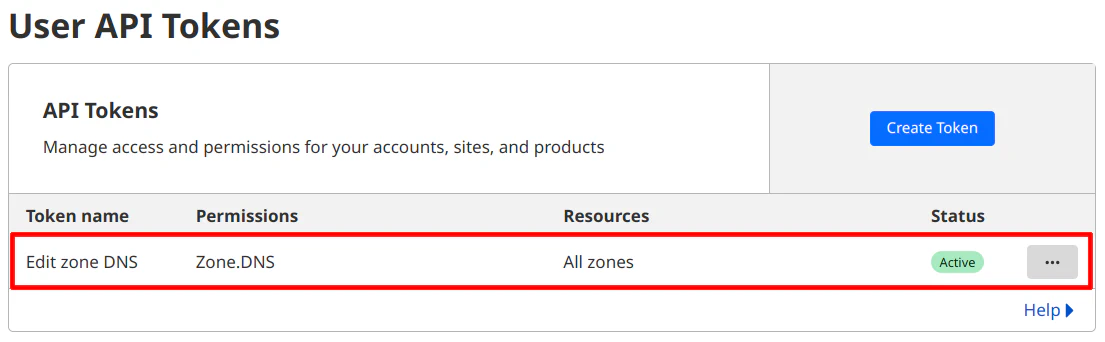
As you can see on the “User API Tokens” page, you will see the token you have created.
That is all you need to do! Creating an API token is pretty simple in Cloudflare.
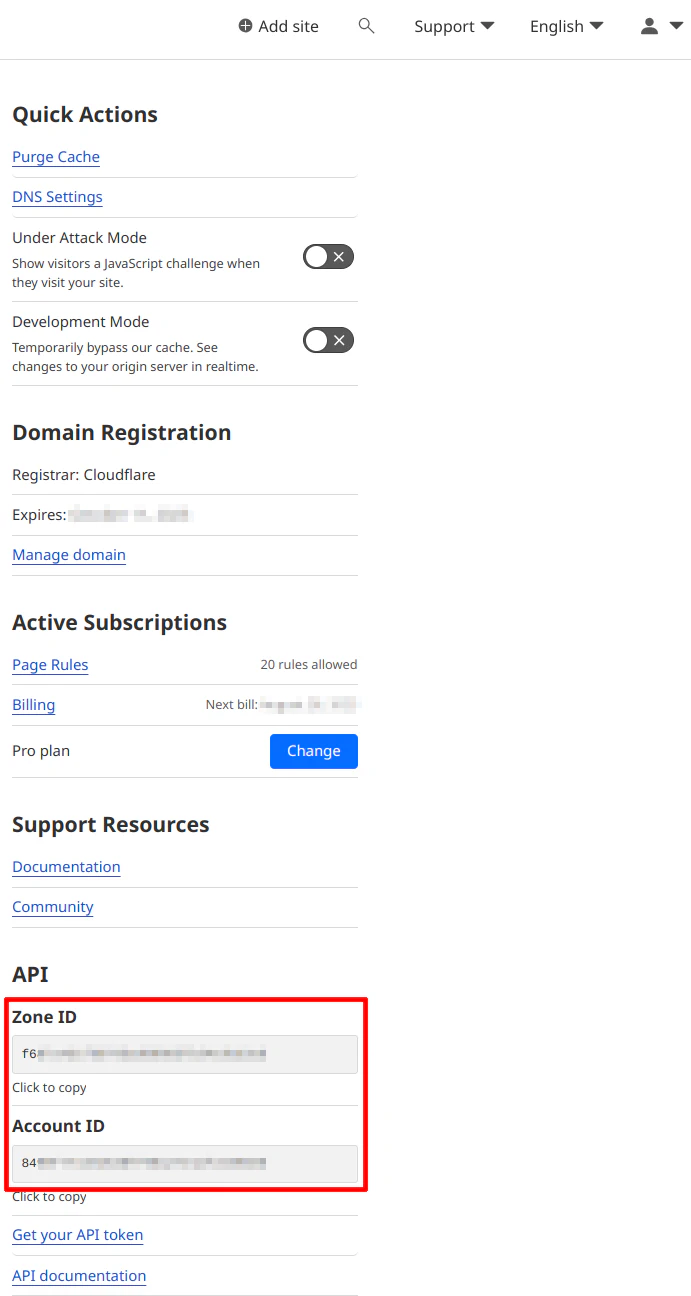
One last thing that you will need to make note of for the configuration later in this guide. You will need the Cloudflare account ID and the zone ID for the domain in which you are creating certificates.
Navigate to the domain’s “Overview” page from the Cloudflare dashboard in order to see the “Account ID” and “Zone ID” for that domain name as shown in the screenshot below.
Install the ACME Client
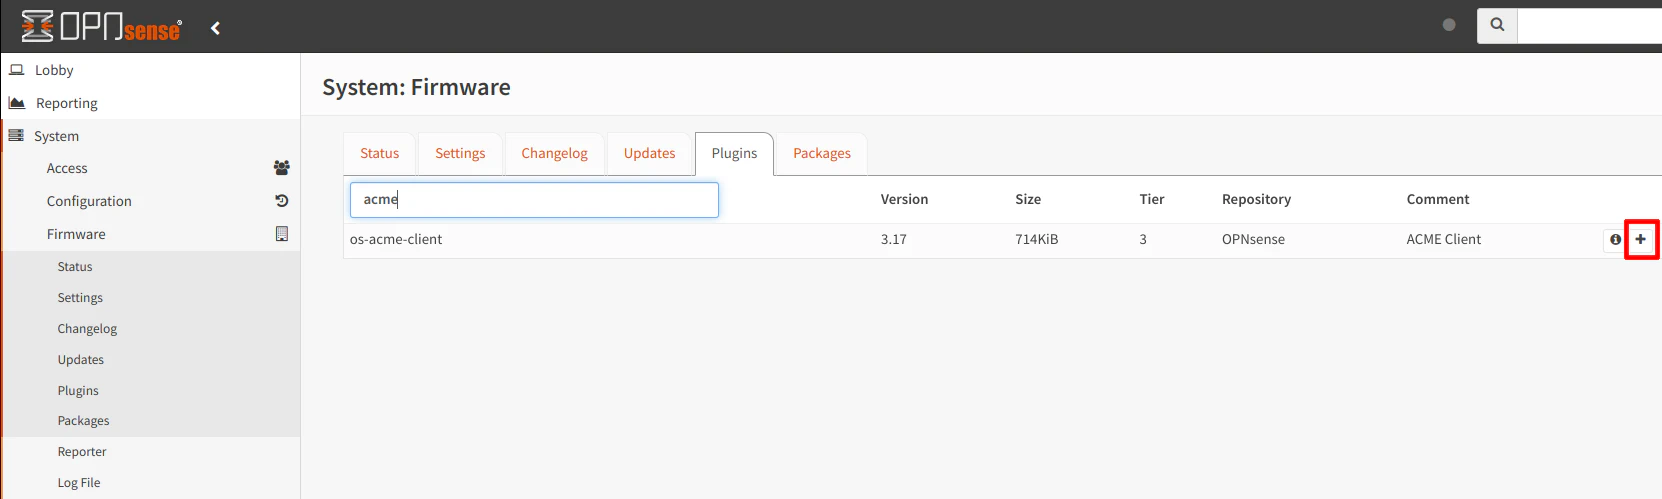
With the API token generated, you are ready to install the ACME client in OPNsense. Go to the “System > Firmware > Plugins” page and search for the os-acme-client plugin. Click on the “+” button to install the plugin.
After the plugin is installed, you will need to either refresh the webpage in your browser or click on another page so that the new “ACME Client” menu option will appear.
Configure the ACME Client
Now that the ACME client is installed, you will need to configure it so that it can generate and auto renew certificates.
The order in which you do some of these steps does not matter (for instance, you can set up the challenge type before setting up the ACME account). However, all of the configuration needs to be in place before you can start generating and auto-renewing certificates.
ACME Account Information
First up is entering the ACME account information. The account information is primarily used to notify you via email when your certificates are about to expire but is also a way to associate certificates to your identity. If you already use Let’s Encrypt for other services on your network or on the web, you may want to use the same account information.
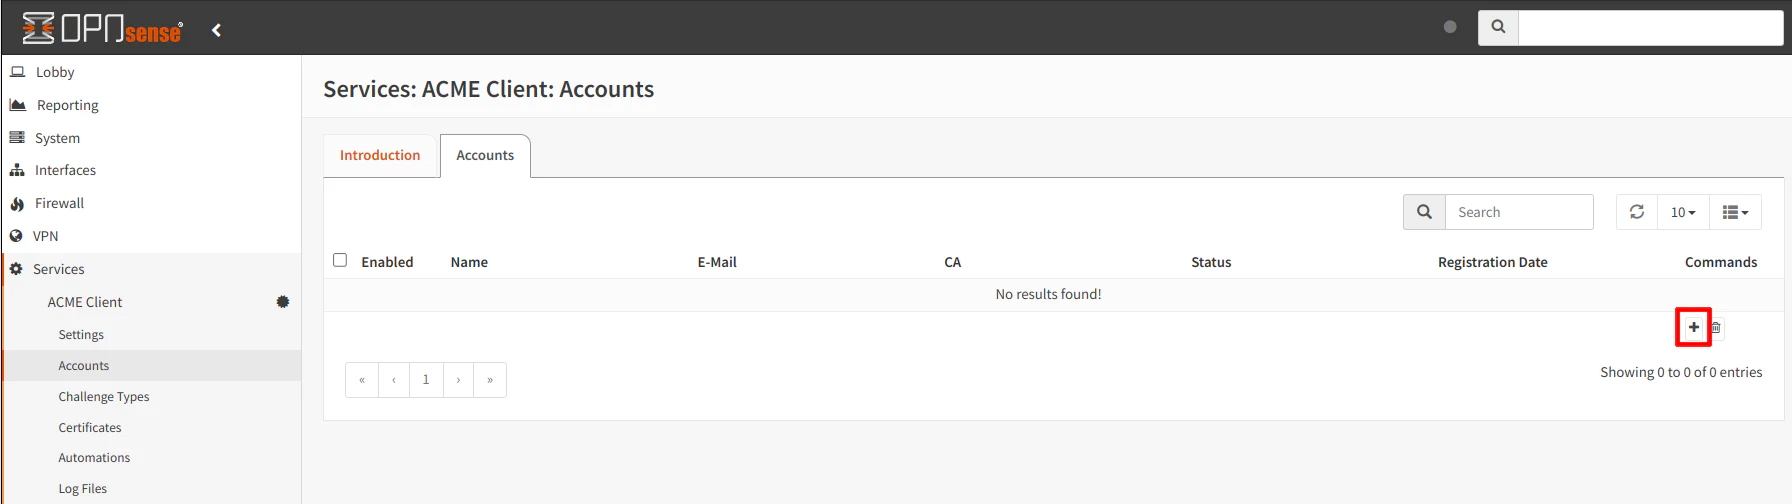
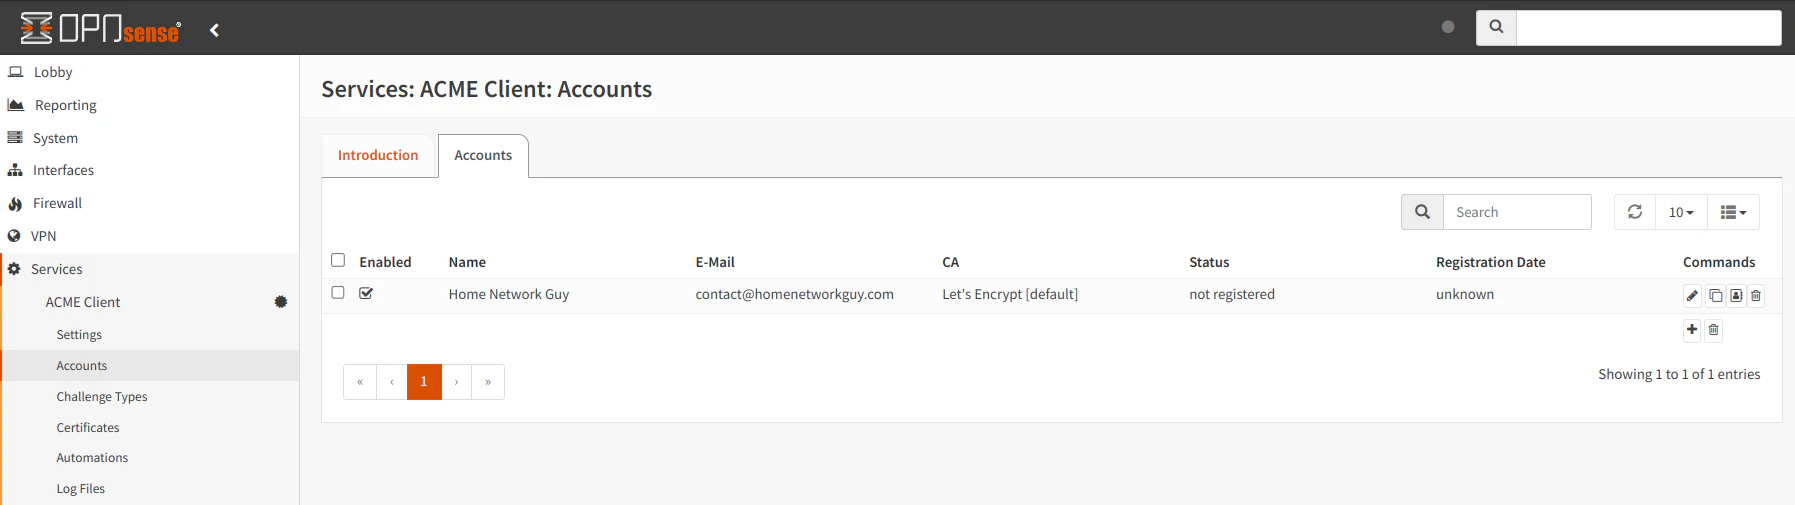
On the “Services > ACME Client > Accounts” page, you will see a list of accounts if you have created any. Click on the “+” button to create an account.
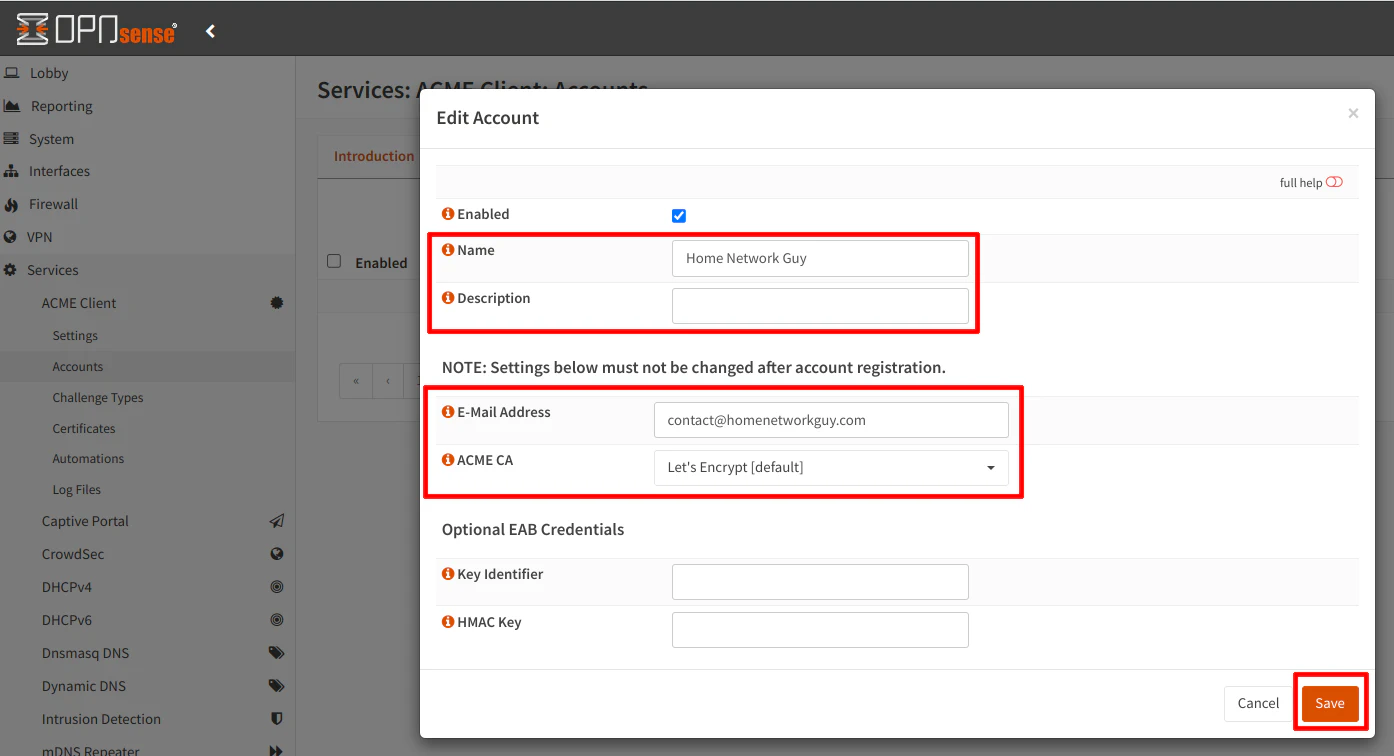
Enter at least your “Name” and “E-Mail Address”. Everything else can be left at the default values or empty. Click “Save”.
Once you save your account, you will see it listed on the “Accounts” page. Do not worry if it says the account is not registered even if you have used that account to generate other certificates in the past. The account will show as registered after you generate the first certificate if all goes well.
Challenge Type
There are multiple challenge types you can choose from but the DNS challenge type is the one I prefer to use because you do not need to open up any ports to your network in order to use it. You also have the advantage of issuing wildcard certificates.
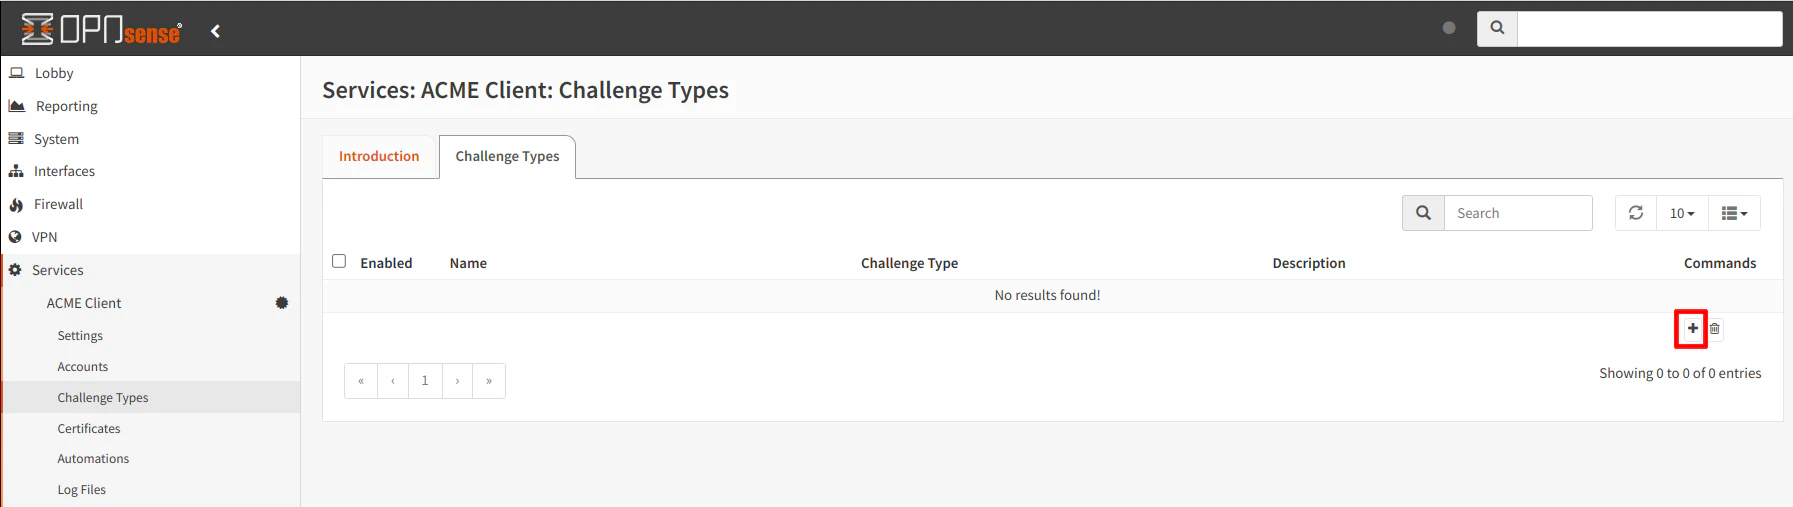
The “Services > ACME Client > Challenge Type” page lists the current challenge types that are configured. Click on the “+” button in order to add a new challenge type.
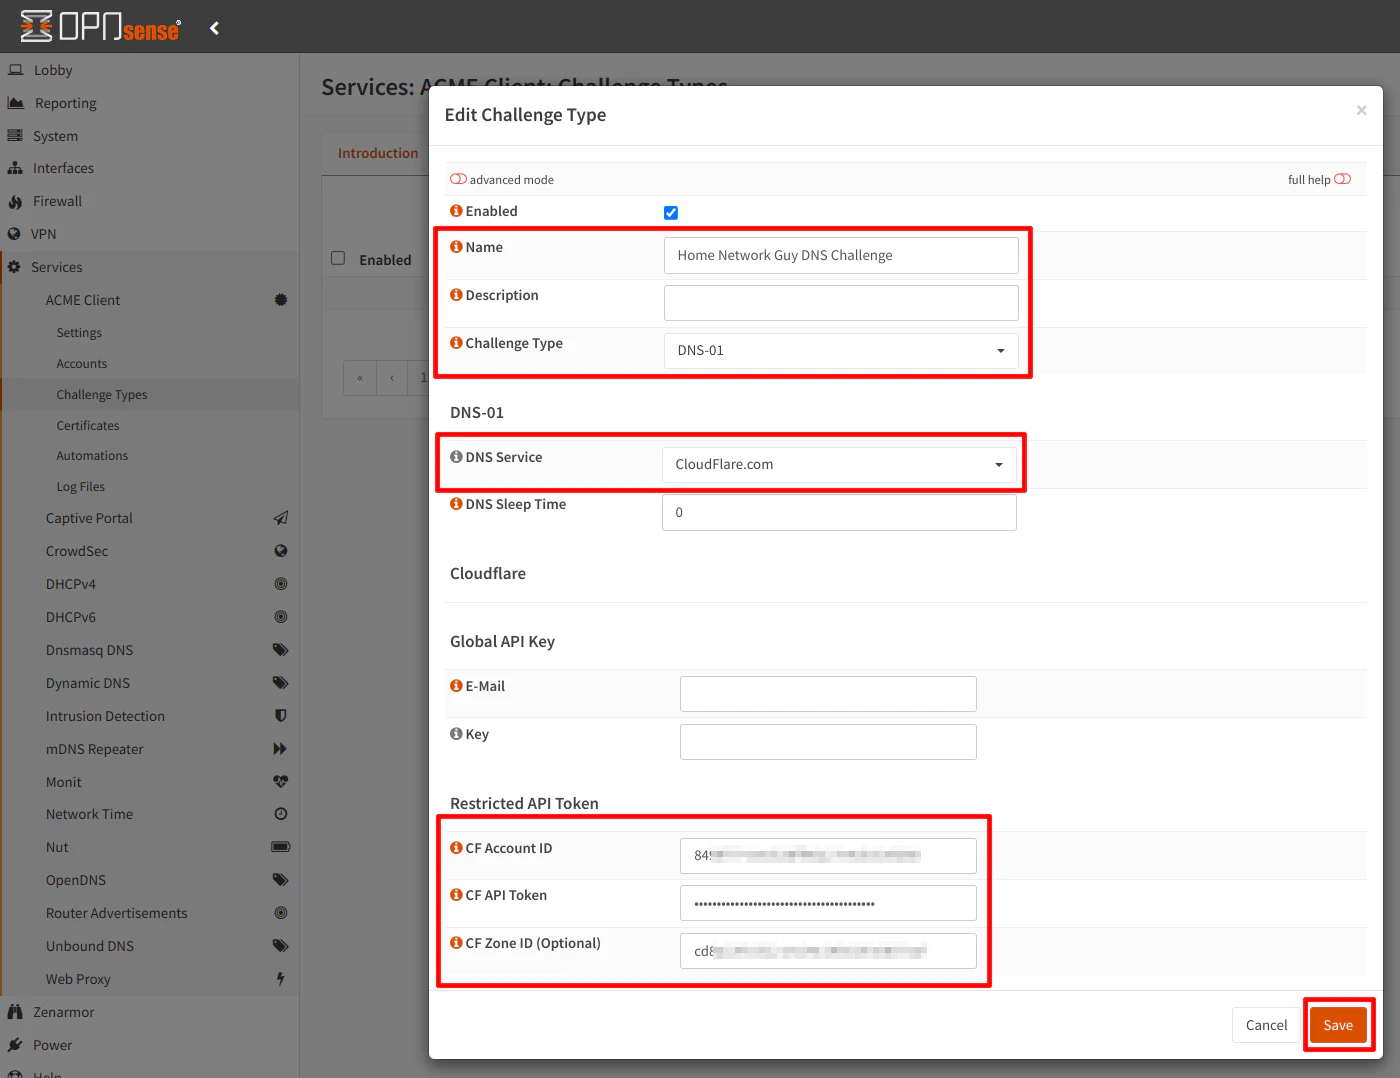
Enter the “Name” of the challenge type. The “Challenge Type” of DNS-01 may already be selected by default but if not, select that challenge type.
With the DNS challenge, you will need to select Cloudflare.com from the list of “DNS Service” options.
Simply enter your “CF Account ID” which is listed on the “Overview” page of the domain on the Cloudflare web interface. The same applies for teh “CF Zone ID”. The zone ID is optional especially if you restricted your API token to only one domain. If you have the token set to “All Zones” you may want to specify the zone ID. It certainly does not hurt to be more specific about which zone you are intending to edit.
Finally, enter the “CF API Token” that you generated in the Cloudflare web interface. Click the “Save” button.
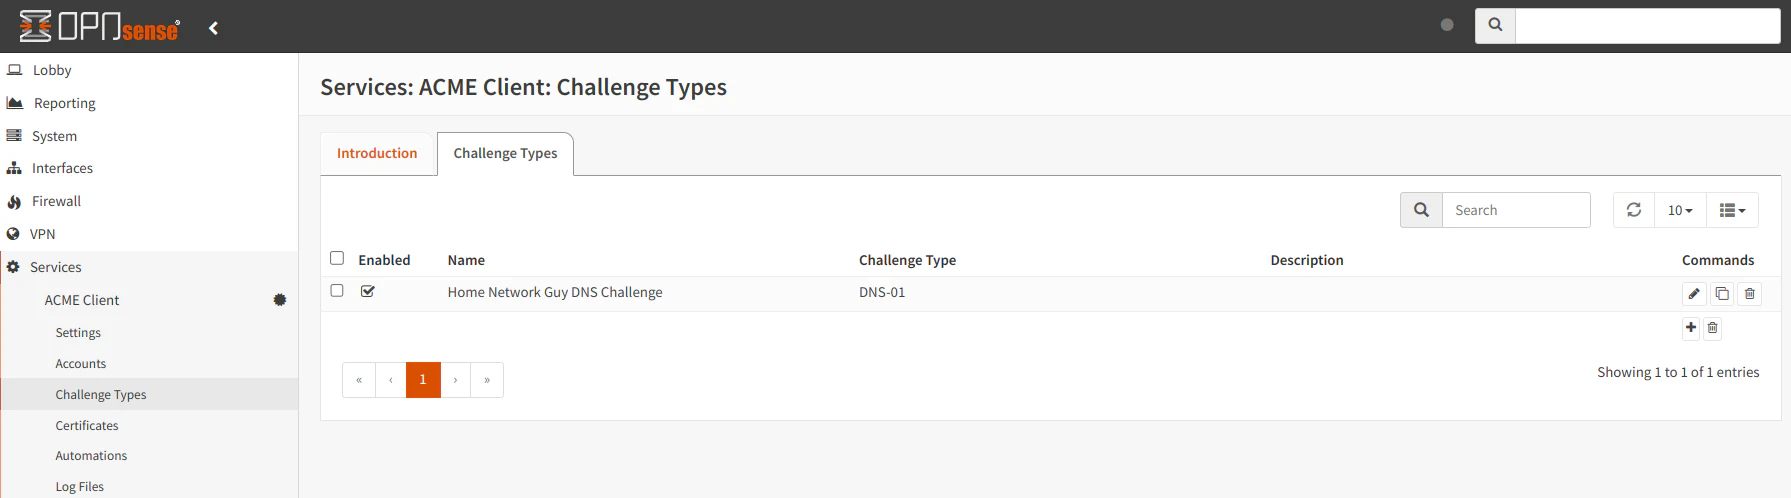
You will see the challenge listed on the “Challenge Types” page.
Create Automation to Restart Web UI
This step may be technically be optional, but I think it is important to set up an automation to restart the web interface after the certificate has been renewed. I believe I have seen others have issues with expired certificates with the web interface. By restarting the web interface service automatically upon certificate renewal, you will be ensured that you will always have an up to date certificate.
I have not tested how critical it is to configure this automation, but I wanted to include it for the sake of completeness. Also, this automation may help to prevent potential issues with certificate renewals.
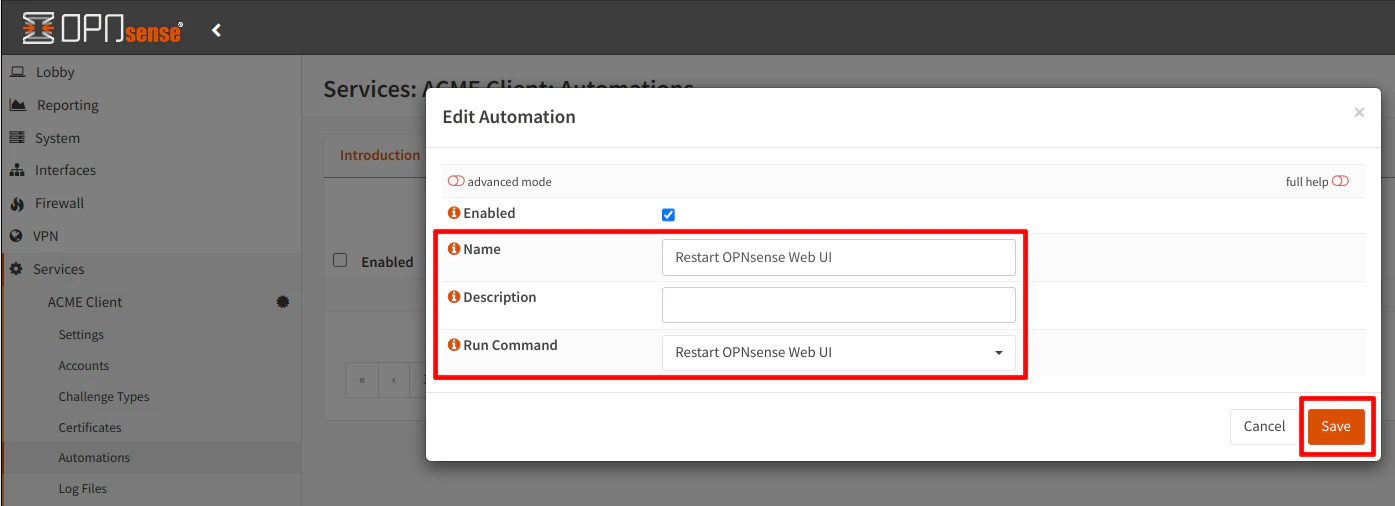
On the “Services > ACME Client > Automations” page, click on the “+” button to create a new automation.
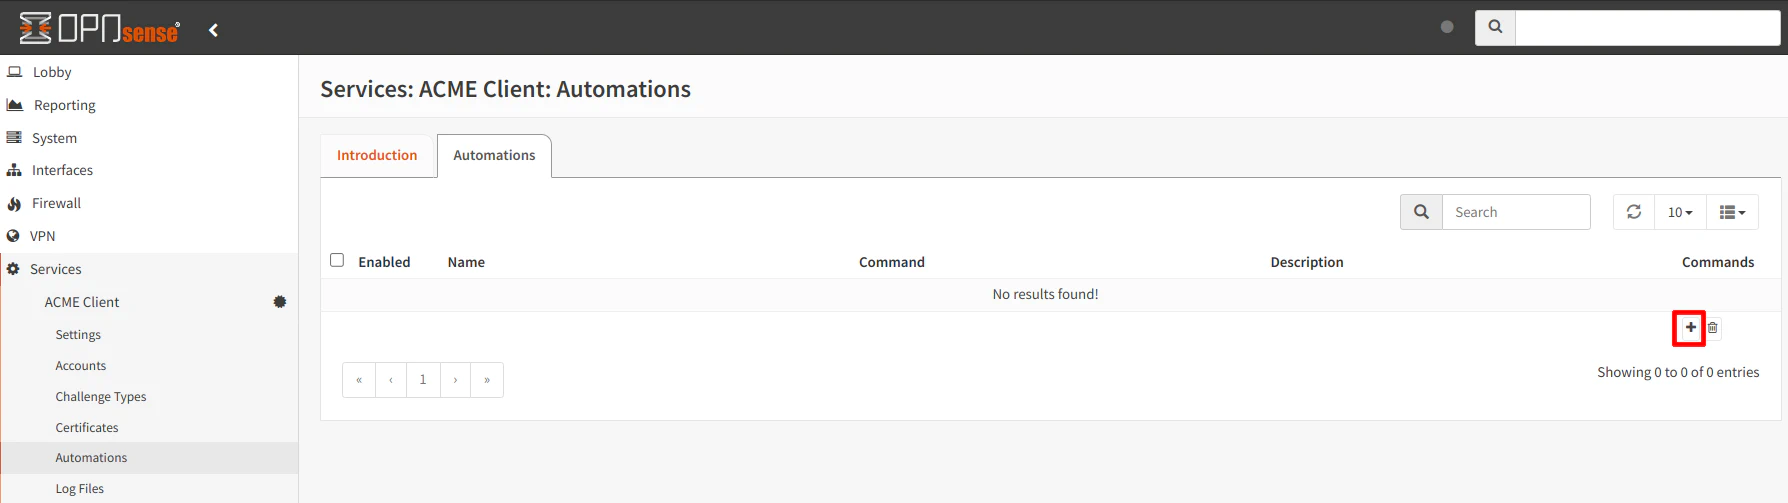
Simply enter a “Name” such as “Restart OPNsense Web UI” and choose the “Restart OPNsense Web UI” option for the “Run Command”. Click “Save”.
Certificate Configuration
After completing all of the other steps above, you can enter the information for the certificate itself.
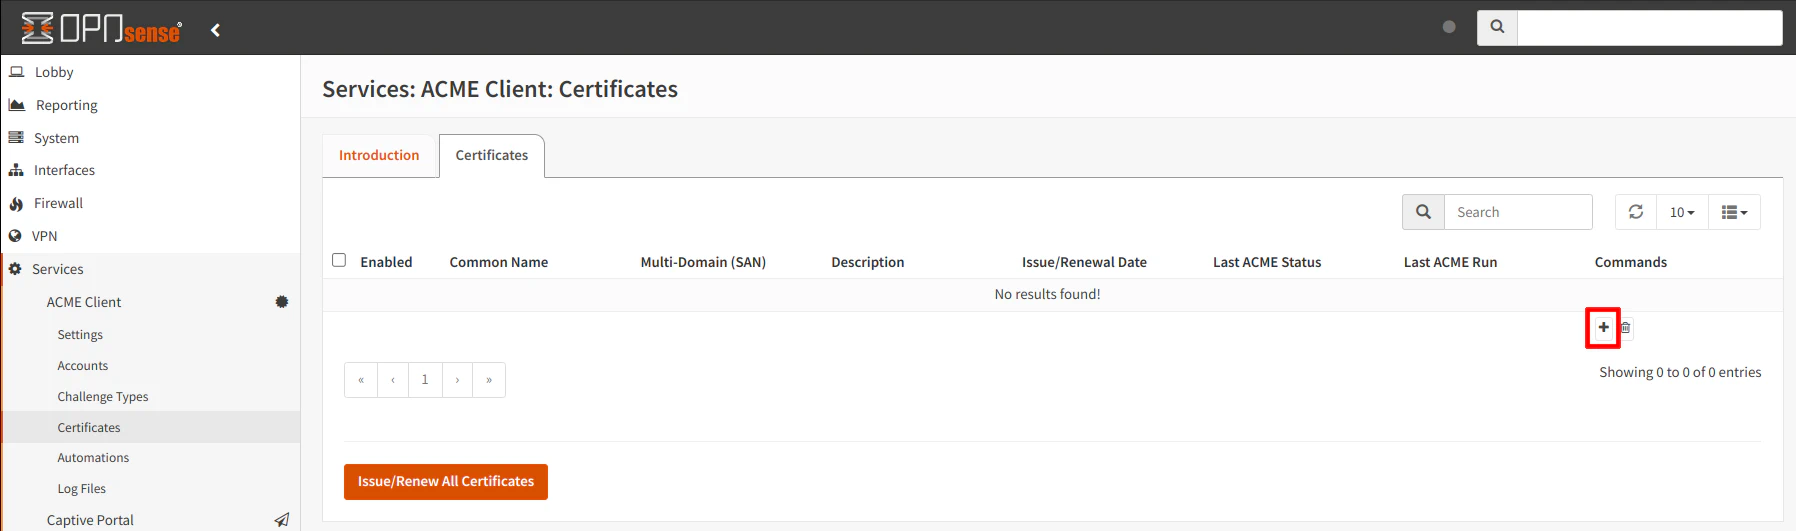
Go to the “Services > ACME Client > Certificates” page. Click on the “+” button to enter the information about the certificate to be generated.
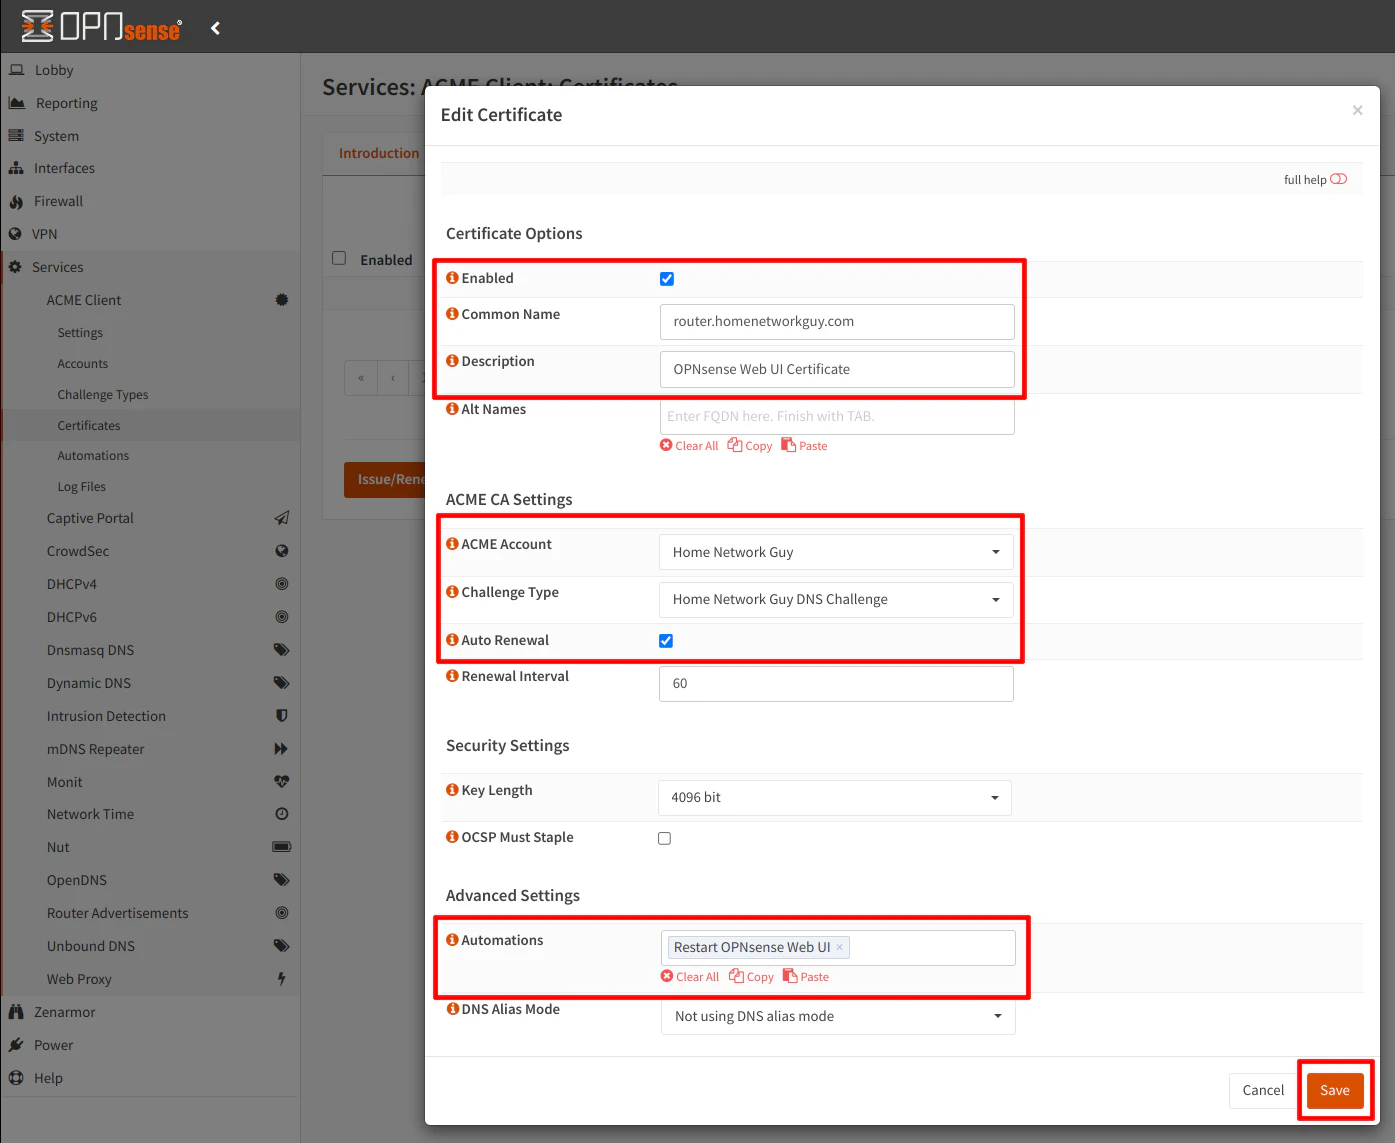
Enter the “Common Name” which is the hostname and domain name of the router. In my example, I am using router.homenetworkguy.com. This name needs to match the hostname/domain name of the OPNsense system. You may enter a “Description” as well.
Choose the “ACME Account” and “Challenge Type” that you configured earlier.
Last thing you need to select is the “Restart OPNsense Web UI” automation that was created in the previous step. Click the “Save” button.
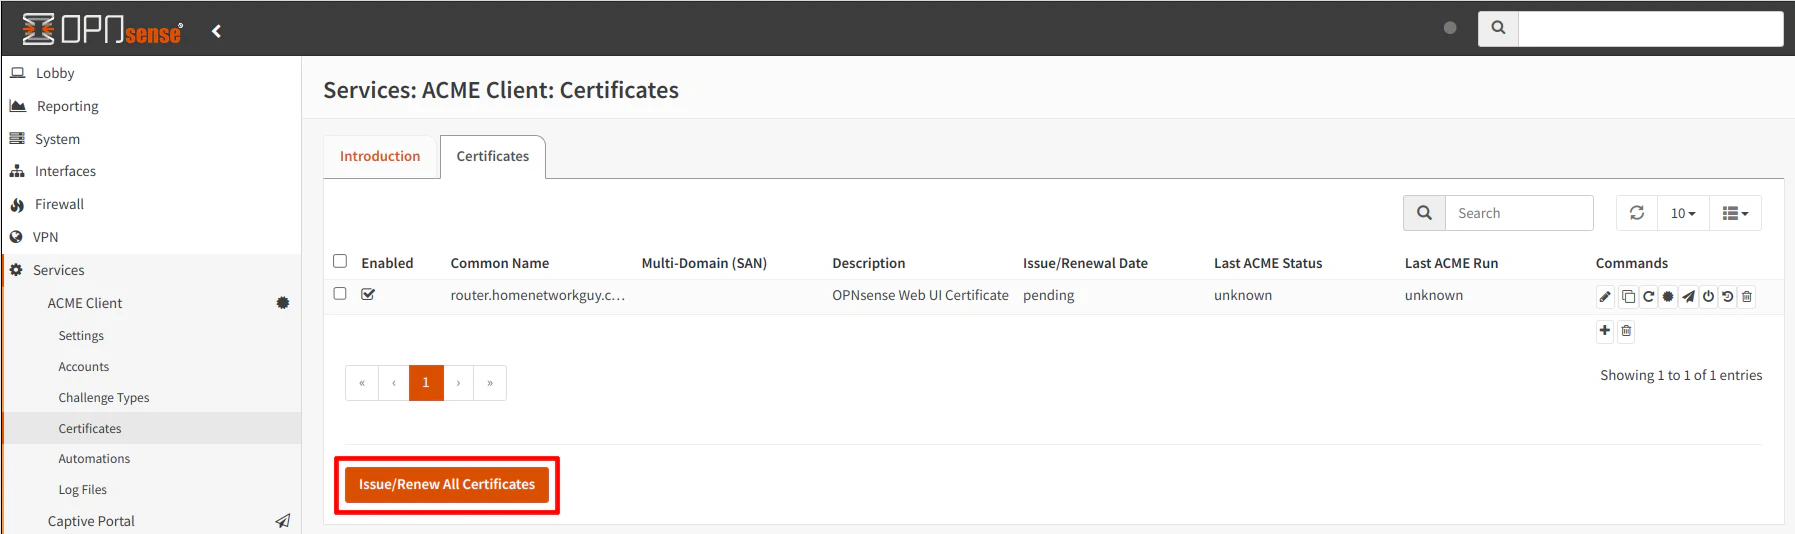
At this point you can see the certificate listed. You may try manually issuing the first certificate to verify that it can be generated properly. Click on the “Issue/Renew All Certificates” button to generate the certificate (alternatively, you may click on the third button to the right of the certificate if you only want to issue/renew a specific certificate).
Please wait a few seconds before refreshing the page.
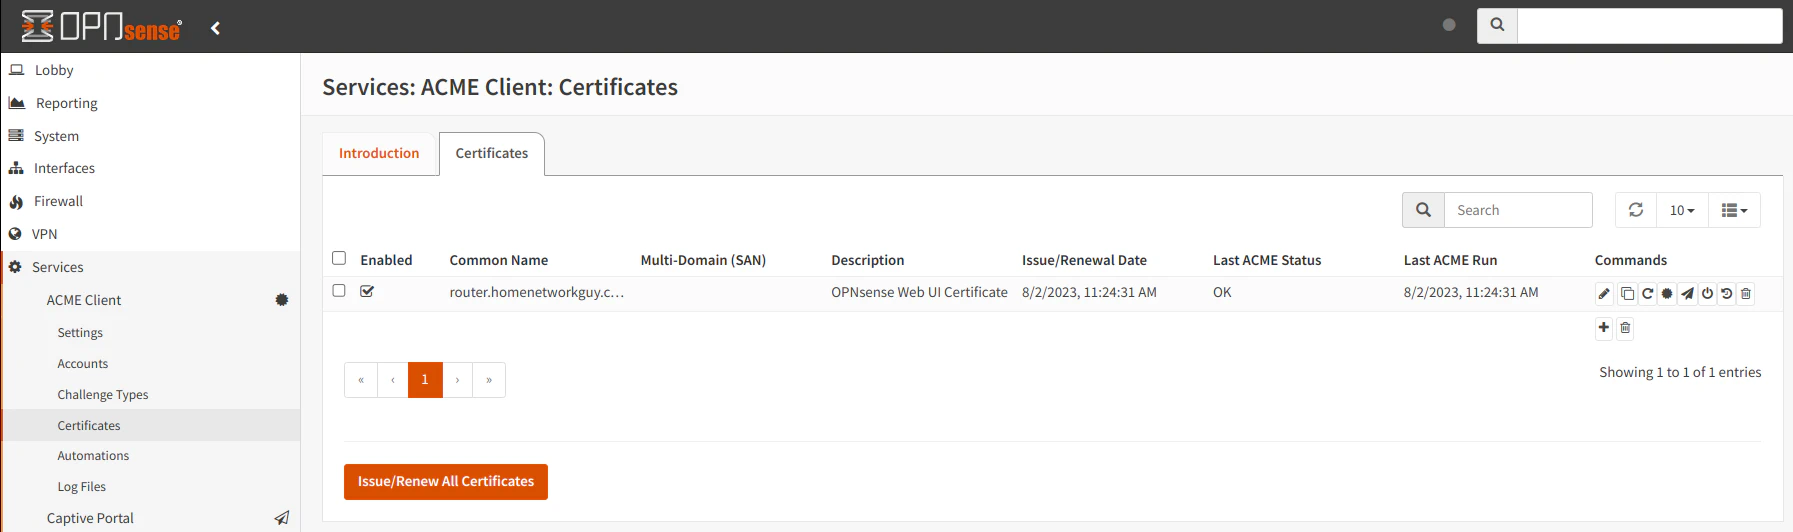
Once the certificate has been generated successfully, you will see the “Issue Date” and the “Last ACME Status” be populated with a date and “OK” for the status.
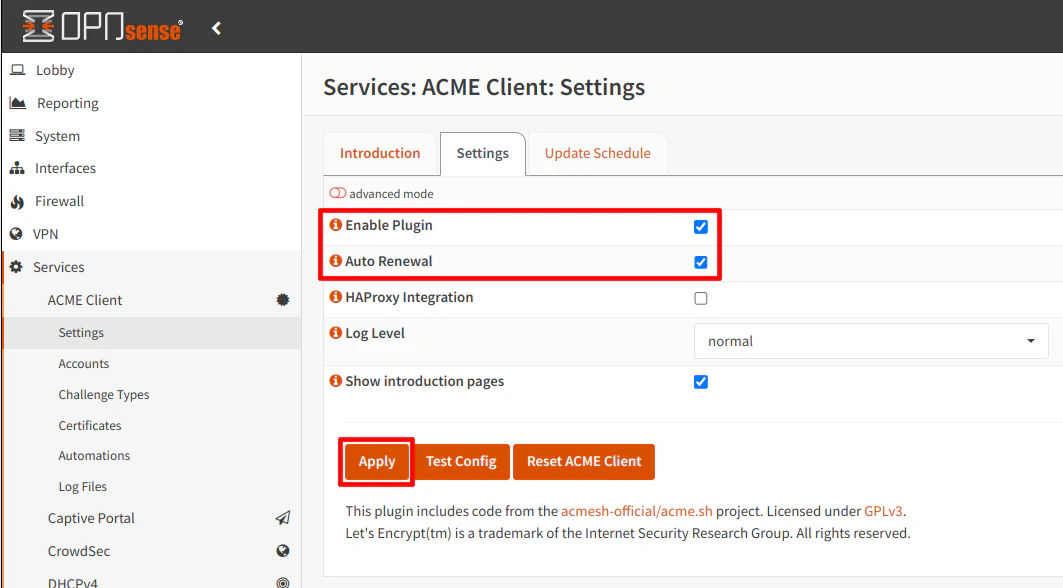
Enable the ACME Client to Auto Renew Certificate
At this point, you now have a valid certificate but it will not auto renew unless you enable the ACME client service. On the “System > ACME Client > Settings” page, click the “Enable Plugin” checkbox as well as “Auto Renewal” if it not already checked. Click on the “Apply” button.
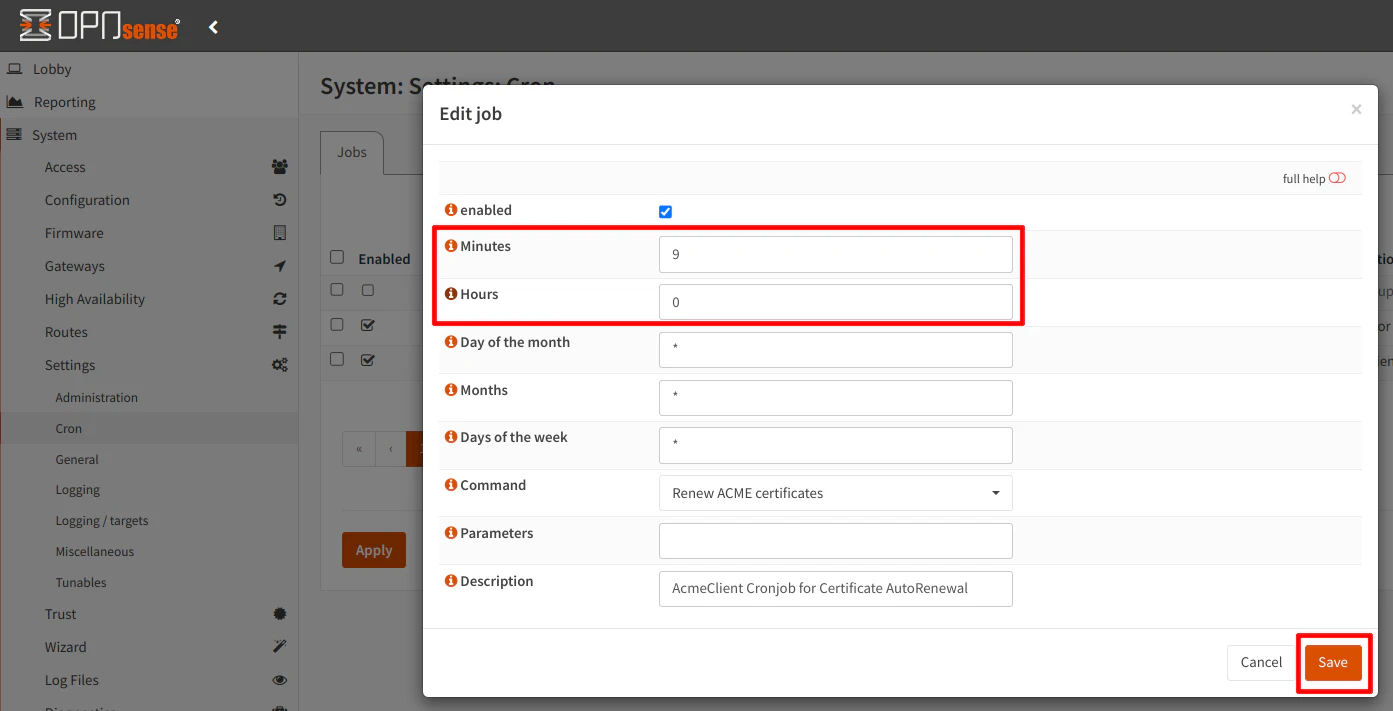
There is one last option you may wish to tweak for the ACME client. If you click on the “Update Schedule” tab on the “Settings” page, you will be presented with the cron job for updating the Let’s Encrypt certificate. This allows you to change the time when the certificates are renewed.
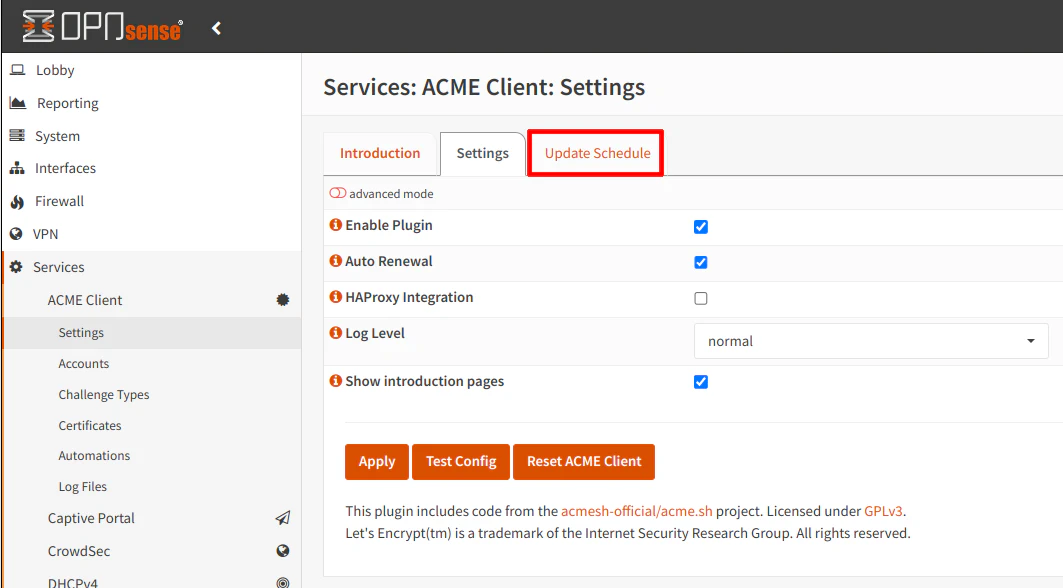
In the example below, I entered 9 in the “Minutes” textbox so it will renew at 12:09 am instead of 12:00 am.
Change the Self-Signed Certificate to Let’s Encrypt
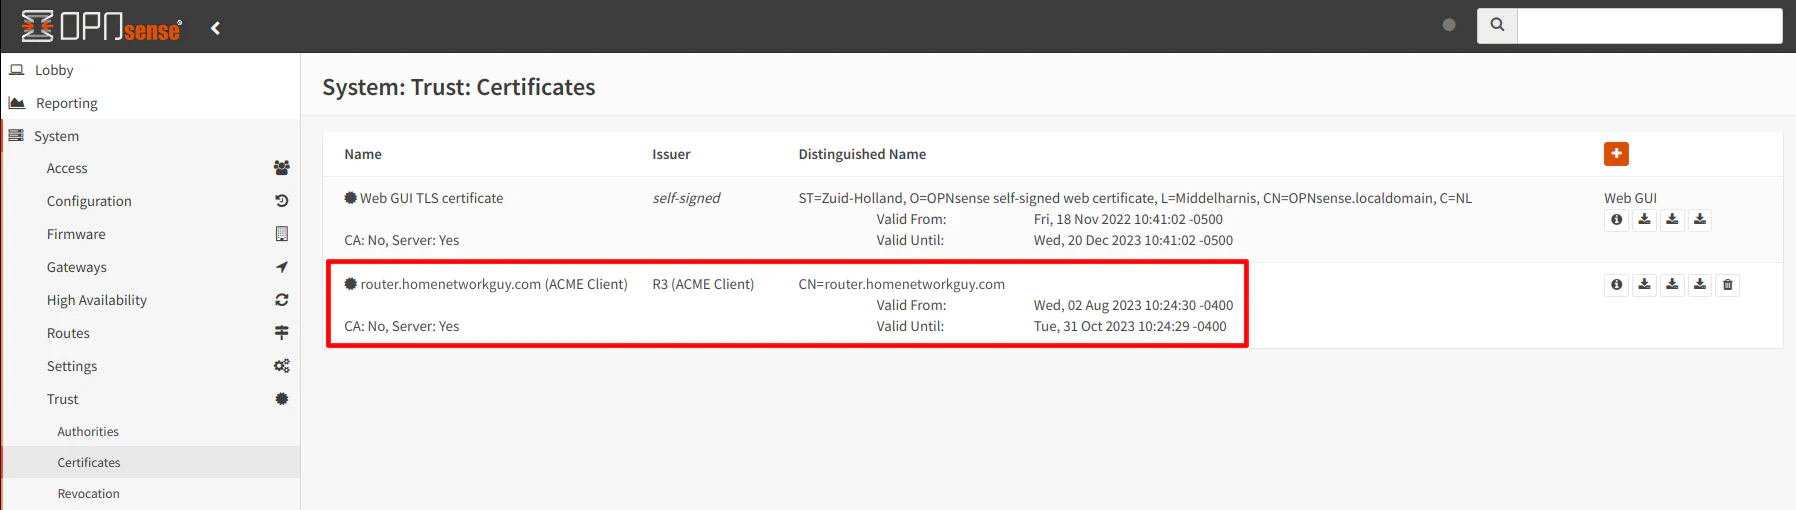
Before the new Let’s Encrypt certificate will be used for the web interface, you will need to change from the default self-signed certificate to the Let’s Encrypt certificate. If you go to the “System > Trust > Certificates” page, you will see the Let’s Encrypt certificate listed below the self-signed certificate generated by OPNsense during the installation.
Navigate to the “System > Settings > Administration” page and select the Let’s Encrypt certificate from the dropdown for the “SSL Certificate” option in the “Web GUI” section.
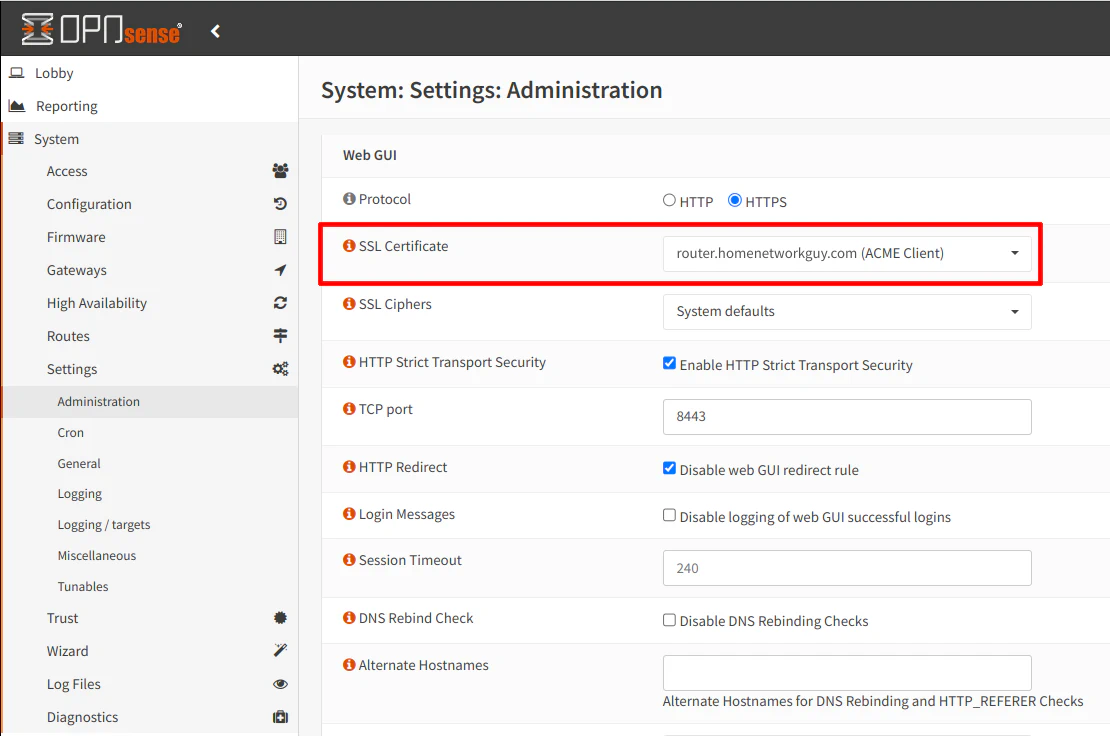
Click “Save” at the bottom of the page to persist the changes.
The configuration for replacing the self-signed certificate is now complete!
Log into OPNsense to Verify Certificate
The next time you sign into OPNsense, you can verify the new certificate is being used. You must use the hostname and domain name of your OPNsense box, which also matches the “Common Name” on the certificate. In my example, that would be router.homenetworkguy.com.
You can see in the screenshot below that my certificate is listed as valid by my web browser.

A Potential Gotcha
At one point in time, I only allowed access from my PC on the 192.168.20.x VLAN to my OPNsense web UI on the 192.168.1.1 LAN interface rather than allow access to the web UI on the 192.168.20.1 VLAN interface where my PC is located.
As I discovered, if you are trying to access the OPNsense web interface from a different network such as 192.168.20.x, accessing router.homenetworkguy.com will fail since it will try to use the local interface IP address of 192.168.20.1 instead of the LAN interface 192.168.1.1.
The hostname for the OPNsense system is associated to all interface IP addresses that are assigned in OPNsense by default.
To resolve this issue, there are a couple of options:
-
If the listen interfaces for the web UI are set to “All (recommended)” on the “System > Settings > Administration” page (which is the default value), you could create a firewall rule on the interface where your PC is located to allow access to the web UI on the interface address such as
192.168.20.1for the specific PC (or other devices) you wish to use to access the web UI. -
On the “Unbound DNS > General” settings, you could check the box “Do not register system A/AAAA records” and create an Unbound DNS override for
router.homenetworkguy.comto point to the192.168.1.1IP address. Disabling the registering of system records preventsrouter.homenetworkguy.comfrom including every interface IP address, which is the default behavior mentioned at the beginning of this section. The DNS override is required becauserouter.homenetworkguy.comwill not have any IP address associated to it after changing the configuration.

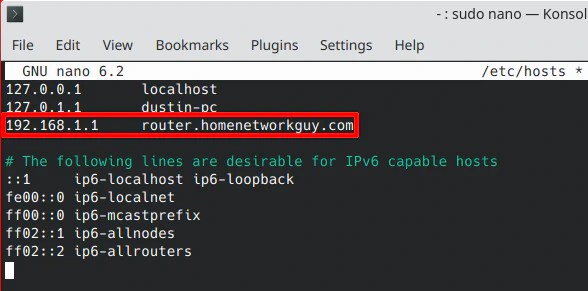
- You could edit the
hostsfile on your PC to forcerouter.homenetworkguy.comto point to the192.168.1.1IP address, for instance. On Linux this file is located at/etc/hostsand on Windows it is located atC:\Windows\System32\Drivers\etc\hosts.