EnGenius ECW130 and ECW220 Wireless Access Points
Table of Contents
EnGenius has two main product lines each aimed toward the midsize business/enterprise or the small business/home users. The products for the midsize business and enterprise are cloud managed while the small business and home users can have a local control using the EnGenius Fit network controller.
EnGenius sent me a couple of their midsize business/enterprise wireless access points to try out. This gave me the opportunity to test out their cloud management platform. I realize that many home users (including myself) prefer local management but given the context that these are designed for business to remotely manage their network infrastructure, it makes sense that this functionality can be valuable to many companies or managed service providers (MSPs).
If you prefer local control, their Fit product line offers that capability. Also, keep in mind that their midsize business/enterprise network switches have the option for local management in addition to the cloud management. I think it is interesting their midsize business/enterprise APs require the cloud for management while their midsize business/enterprise switches have the option for both local and cloud management.
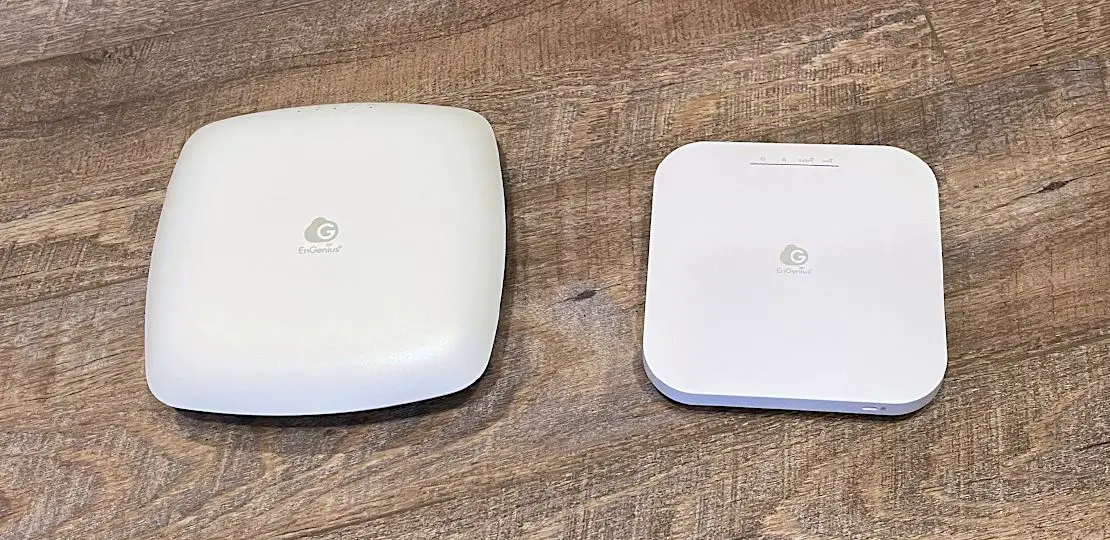
The first wireless access point EnGenius sent is the ECW130, which is a WiFi 5 4x4 unit. The second AP is the ECW220, which is a WiFi 6 2x2 unit.
Unboxing
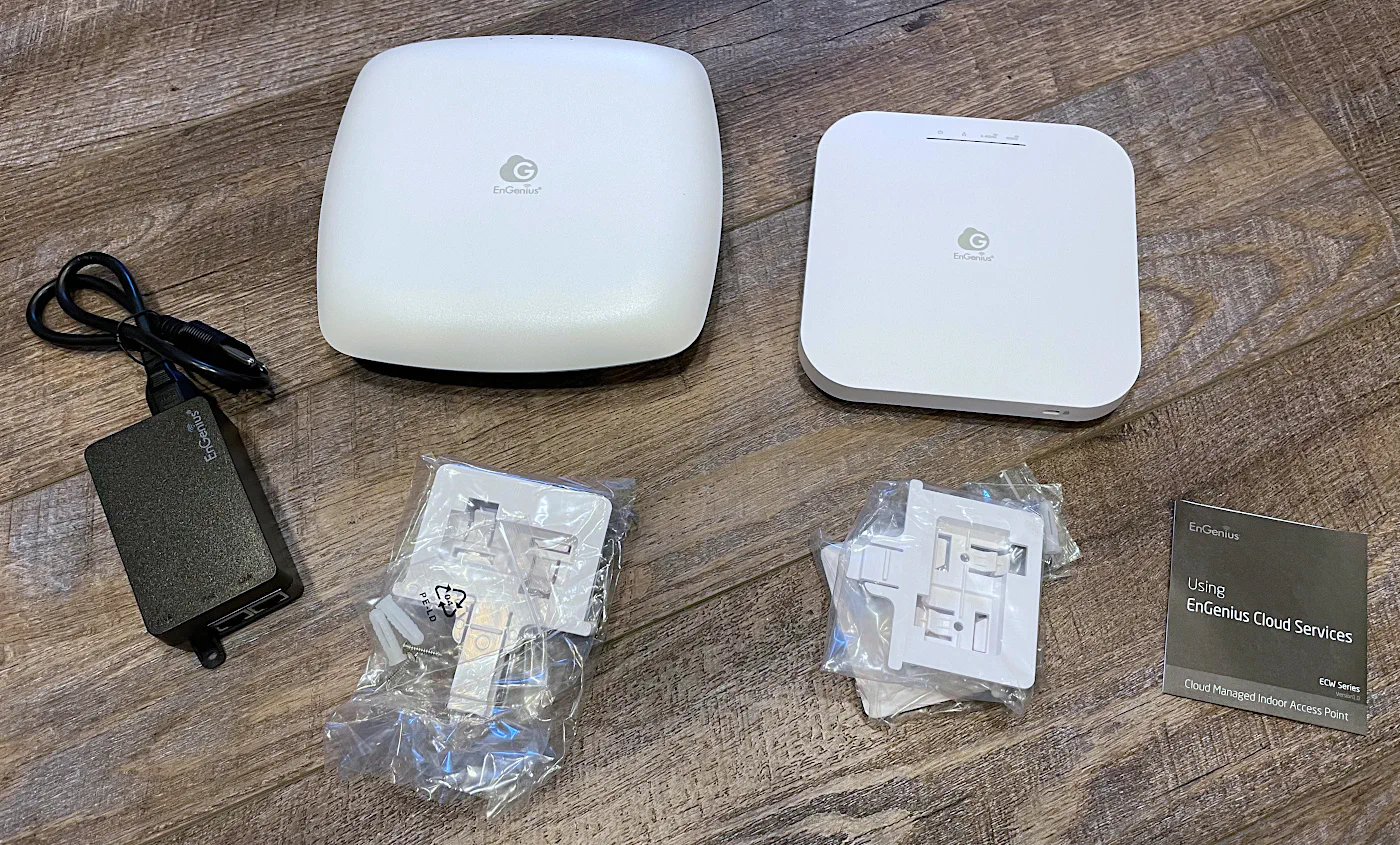
Below you will see the ECW130 and the ECW220. For each of the access points, mounting hardware is included. There is an instruction booklet as well.
Even though the APs can be powered by a PoE switch, EnGenius sent me a couple of PoE injectors for the APs so that I could try them out. One of them is pictured below. Note that the PoE injectors do not normally come with the AP.
When I did my video review, I actually made use of the PoE injector to test the AP so that I did not have to mess with swapping cables in my server rack to get PoE to my desk in the other room. That made things more convenient for me and also provided an opportunity to test out the injector.
Build Quality
The ECW130 WiFi 5 access point is much larger and bulky than the ECW220 WiFi 6 AP. The shapes of the APs are quite different as well. I personally prefer the look of the ECW220 since it seems more refined and takes up less space.
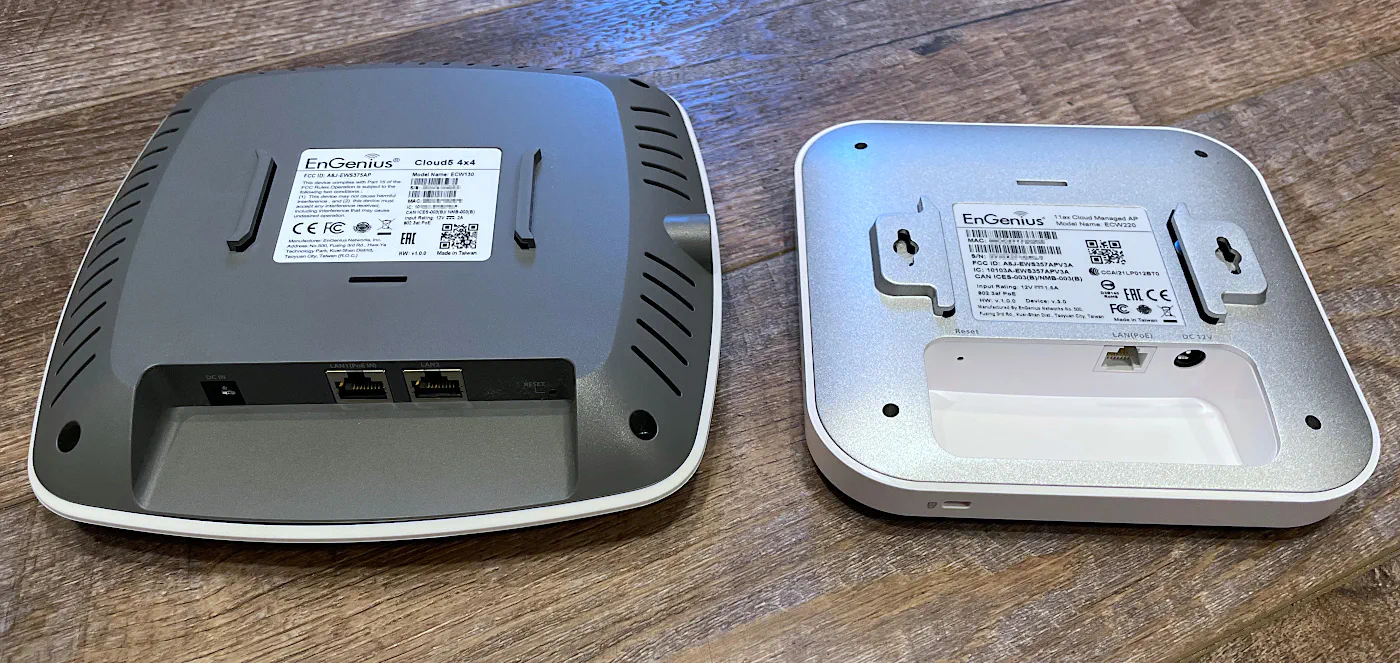
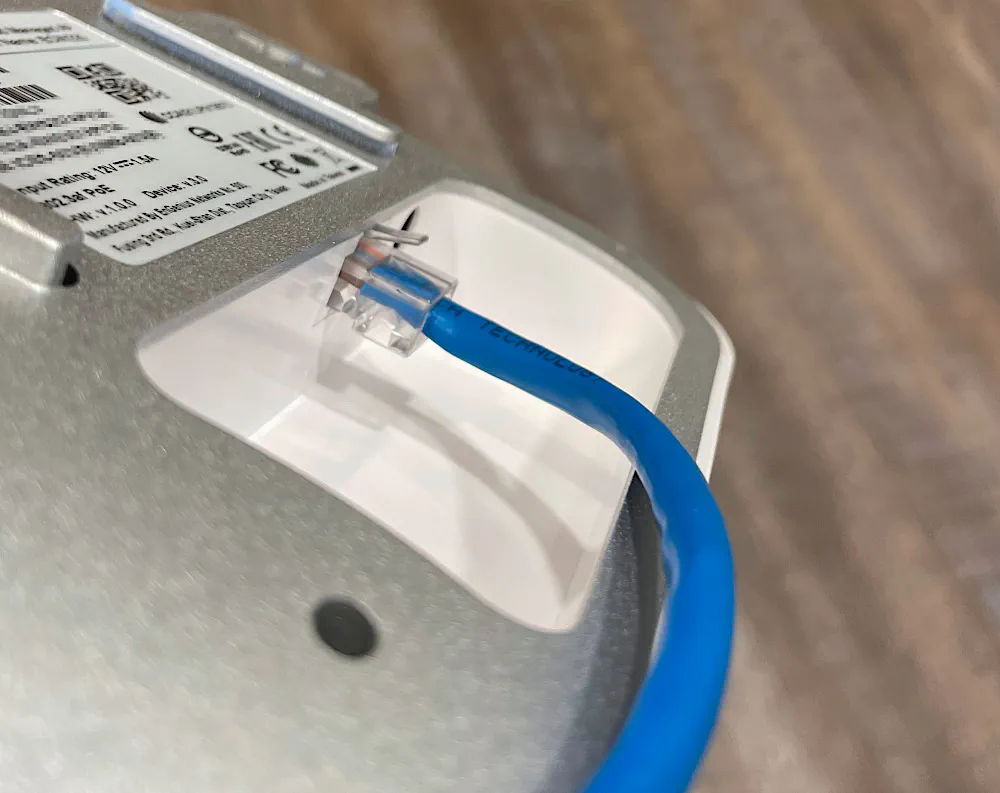
However, one minor issue that I had with the WiFi 6 AP is that the cutout for the Ethernet connection makes it a little bit difficult to plug in an Ethernet cable that has a boot on it especially when using a larger gauge Cat6 cable because they are thicker.
Since I was testing the AP with some premade cables, most of them have boots on them so there is not much clearance to plug in and/or bend the Ethernet cable.
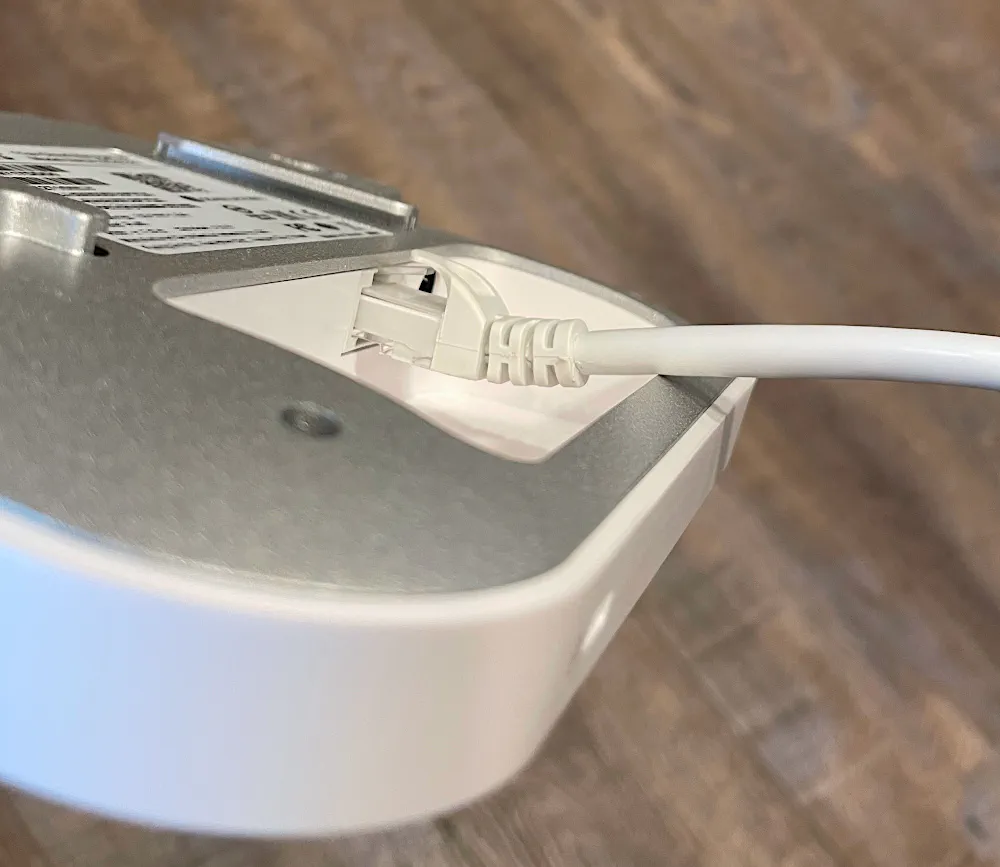
I imagine many users will not have an Ethernet cable with a boot on it especially if the AP is ceiling mounted and the RJ45 plug is crimped onto a bare wire so this may not be a huge issue for those users. You can see there is more clearance to bend the cable when there is no boot on the cable.
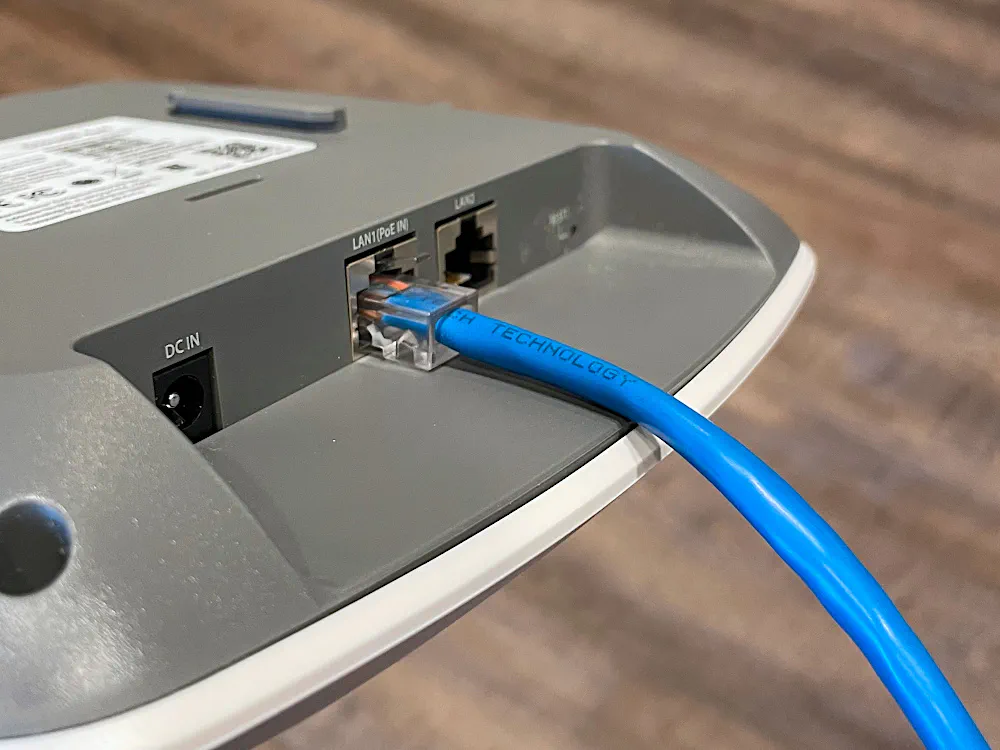
Notice on the ECW130, this is not an issue because the cutout is open on the bottom unlike the ECW220.
Performance
Since the WiFi 5 ECW130 is 4x4 MU-MIMO and the WiFi 6 ECW220 is 2x2 MU-MIMO, I expect that the WiFi 5 AP will hold its own against the WiFi 6 AP depending on the capabilities of the wireless client.
I performed some basic speed tests to find out how they compare. The APs are located in the same room near where the client is located to ensure obstructions such as walls do not play a factor in performance.
For each AP, I tested both upload and download speeds because they can actually vary a bit more than wired devices depending on the transmit and receive power, etc. Also unlike with wired interfaces, each test run can vary quite a bit so I tried running the tests a few times to get a better baseline.
Performance: ECW130
The download performance is what you might expect for a WiFi 5 access point. It is similar to the results I receive on my WiFi 5 UniFi APs.
[ ID] Interval           Transfer     Bitrate
[  5]   0.00-10.00  sec   635 MBytes   533 Mbits/sec
[  5]  10.00-20.00  sec   658 MBytes   552 Mbits/sec
[  5]  20.00-30.00  sec   675 MBytes   566 Mbits/sec
[  5]  30.00-40.00  sec   635 MBytes   533 Mbits/sec
[  5]  40.00-50.00  sec   641 MBytes   537 Mbits/sec
[  5]  50.00-60.00  sec   645 MBytes   541 Mbits/sec
- - - - - - - - - - - - - - - - - - - - - - - - -
[ ID] Interval           Transfer     Bitrate         Retr
[  5]   0.00-60.01  sec  3.80 GBytes   544 Mbits/sec  549             sender
[  5]   0.00-60.00  sec  3.80 GBytes   544 Mbits/sec                  receiver
The difference in the transmit and receive on the ECW130 WiFi 5 AP was about 120 Mbps.
[ ID] Interval           Transfer     Bitrate         Retr  Cwnd
[  5]   0.00-10.00  sec   495 MBytes   415 Mbits/sec  141    853 KBytes
[  5]  10.00-20.00  sec   500 MBytes   419 Mbits/sec   23    795 KBytes
[  5]  20.00-30.00  sec   500 MBytes   419 Mbits/sec   14    704 KBytes
[  5]  30.00-40.00  sec   489 MBytes   410 Mbits/sec   16    935 KBytes
[  5]  40.00-50.00  sec   504 MBytes   423 Mbits/sec   20    768 KBytes
[  5]  50.00-60.00  sec   504 MBytes   423 Mbits/sec    7    964 KBytes
- - - - - - - - - - - - - - - - - - - - - - - - -
[ ID] Interval           Transfer     Bitrate         Retr
[  5]   0.00-60.00  sec  2.92 GBytes   418 Mbits/sec  221             sender
[  5]   0.00-60.02  sec  2.92 GBytes   418 Mbits/sec                  receiver
Performance: ECW220
When receiving data via iperf3, I was able to get a very respectable throughput of about 760 Mbps. This is approximately 220 Mbps faster than the ECW130.
[ ID] Interval           Transfer     Bitrate
[  5]   0.00-10.00  sec   897 MBytes   752 Mbits/sec
[  5]  10.00-20.00  sec   919 MBytes   771 Mbits/sec
[  5]  20.00-30.00  sec   920 MBytes   772 Mbits/sec
[  5]  30.00-40.00  sec   909 MBytes   763 Mbits/sec
[  5]  40.00-50.00  sec   918 MBytes   770 Mbits/sec
[  5]  50.00-60.00  sec   913 MBytes   766 Mbits/sec
- - - - - - - - - - - - - - - - - - - - - - - - -
[ ID] Interval           Transfer     Bitrate         Retr
[  5]   0.00-60.00  sec  5.35 GBytes   766 Mbits/sec  1111             sender
[  5]   0.00-60.00  sec  5.35 GBytes   766 Mbits/sec                  receiver
Sending data on the ECW220 is about 200 Mbps slower than receiving data (at least on the client I used for testing). Notice that this is still about 120 Mbps greater than the throughput of the WiFi 5 AP when transmitting data on the network.
[ ID] Interval           Transfer     Bitrate         Retr  Cwnd
[  5]   0.00-10.00  sec   619 MBytes   519 Mbits/sec    0   1.44 MBytes
[  5]  10.00-20.00  sec   648 MBytes   543 Mbits/sec    0   2.40 MBytes
[  5]  20.00-30.00  sec   659 MBytes   553 Mbits/sec    0   2.40 MBytes
[  5]  30.00-40.00  sec   658 MBytes   552 Mbits/sec    0   2.40 MBytes
[  5]  40.00-50.00  sec   654 MBytes   548 Mbits/sec    0   2.40 MBytes
[  5]  50.00-60.00  sec   658 MBytes   552 Mbits/sec    0   2.40 MBytes
- - - - - - - - - - - - - - - - - - - - - - - - -
[ ID] Interval           Transfer     Bitrate         Retr
[  5]   0.00-60.00  sec  3.80 GBytes   544 Mbits/sec    0             sender
[  5]   0.00-60.00  sec  3.80 GBytes   544 Mbits/sec                  receiver
Power Consumption
Both of these wireless access points use about the same amount of power which is around 6.5 Watts. The actual power usage of course various slightly when watching the current power consumption.
Cloud Management
As mentioned earlier, you must use the cloud management for these access points. You will need to visit the EnGenius cloud portal or the EnGenius Cloud to Go mobile app to create an account.
Once you have an account, you can add your APs two different ways. On the web portal, you can enter the serial number of the APs or with the mobile app, you can scan the QR code on the bottom of the APs.
Cloud Management: Dashboard
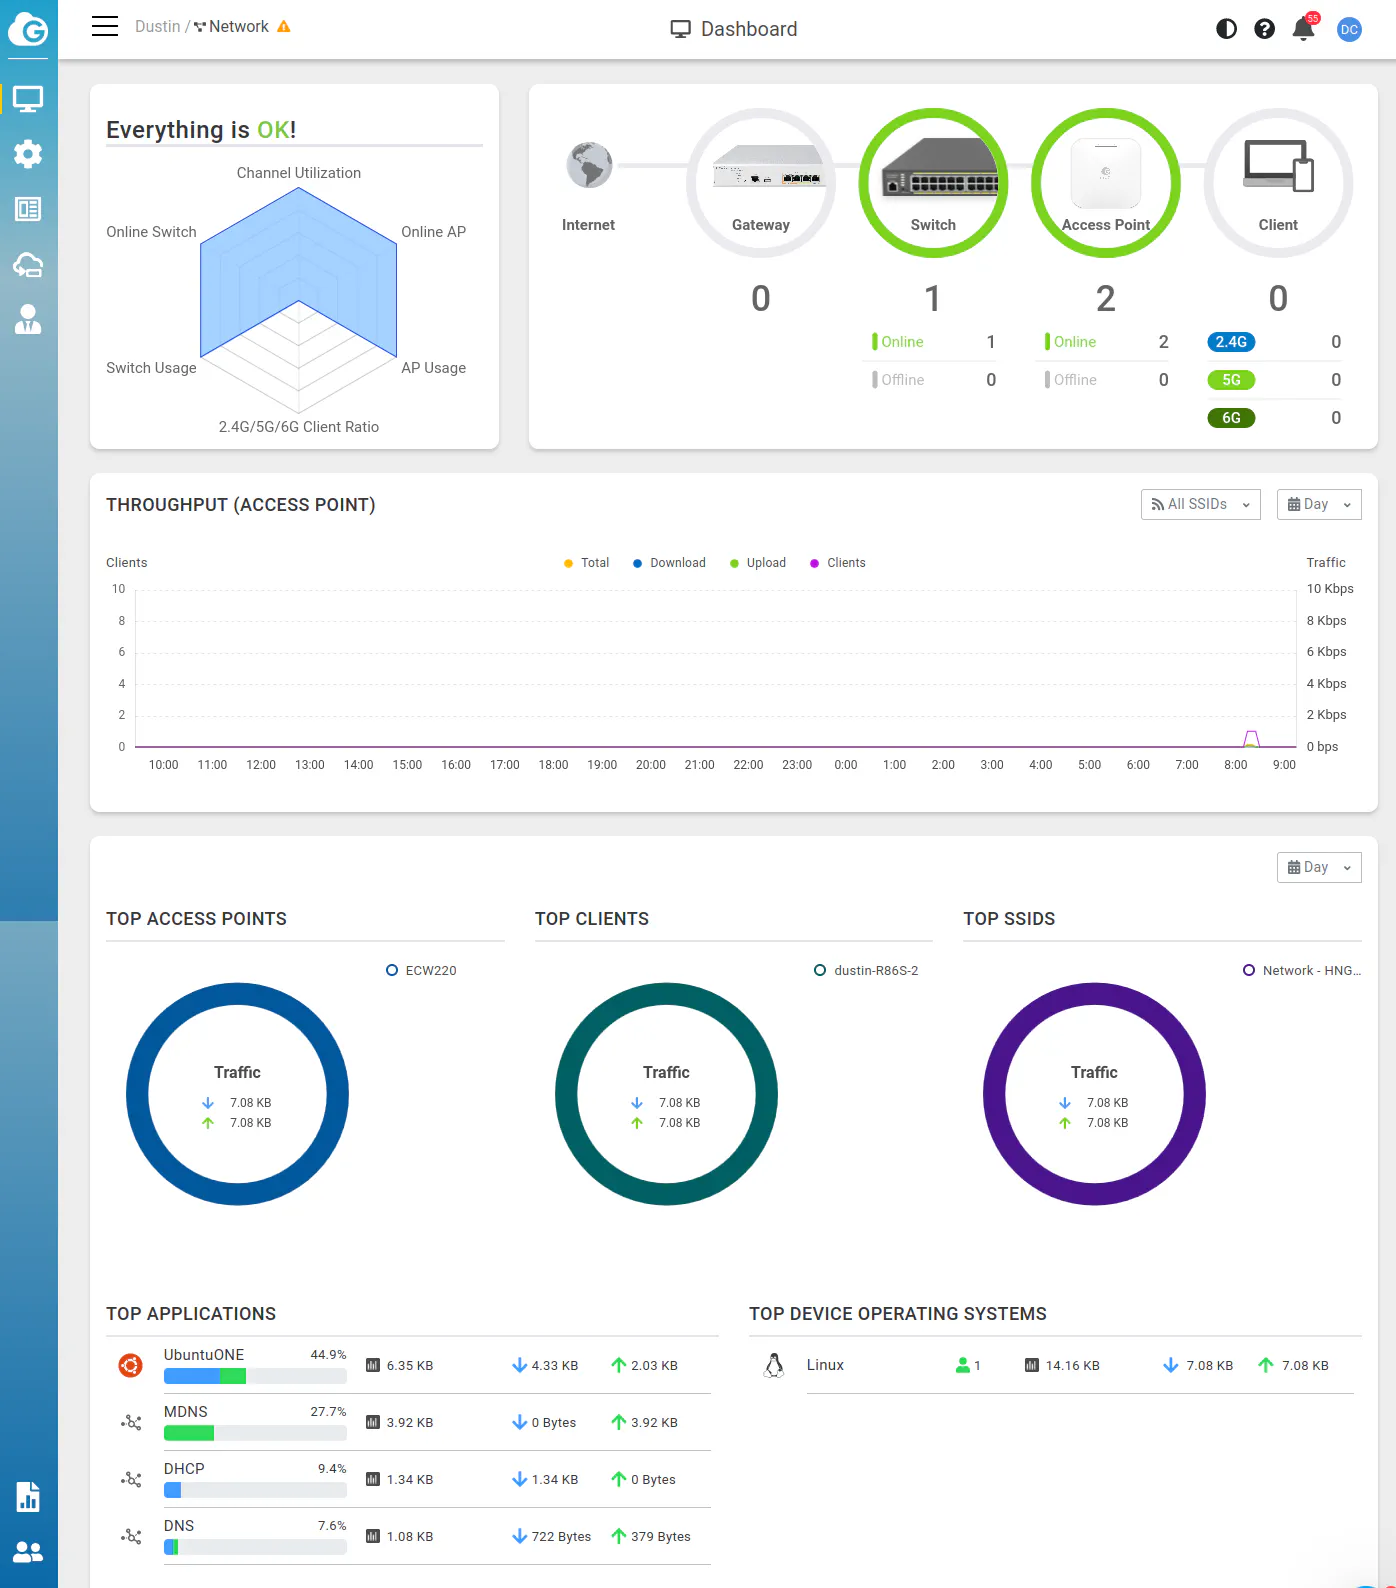
The “Dashboard” page contains a summary of the devices you have associated to the cloud account as well as a traffic statics and deep packet inspection (DPI) information.
Cloud Management: Manage > Access Points
In the “Manage” menu you can view all of the access point information.

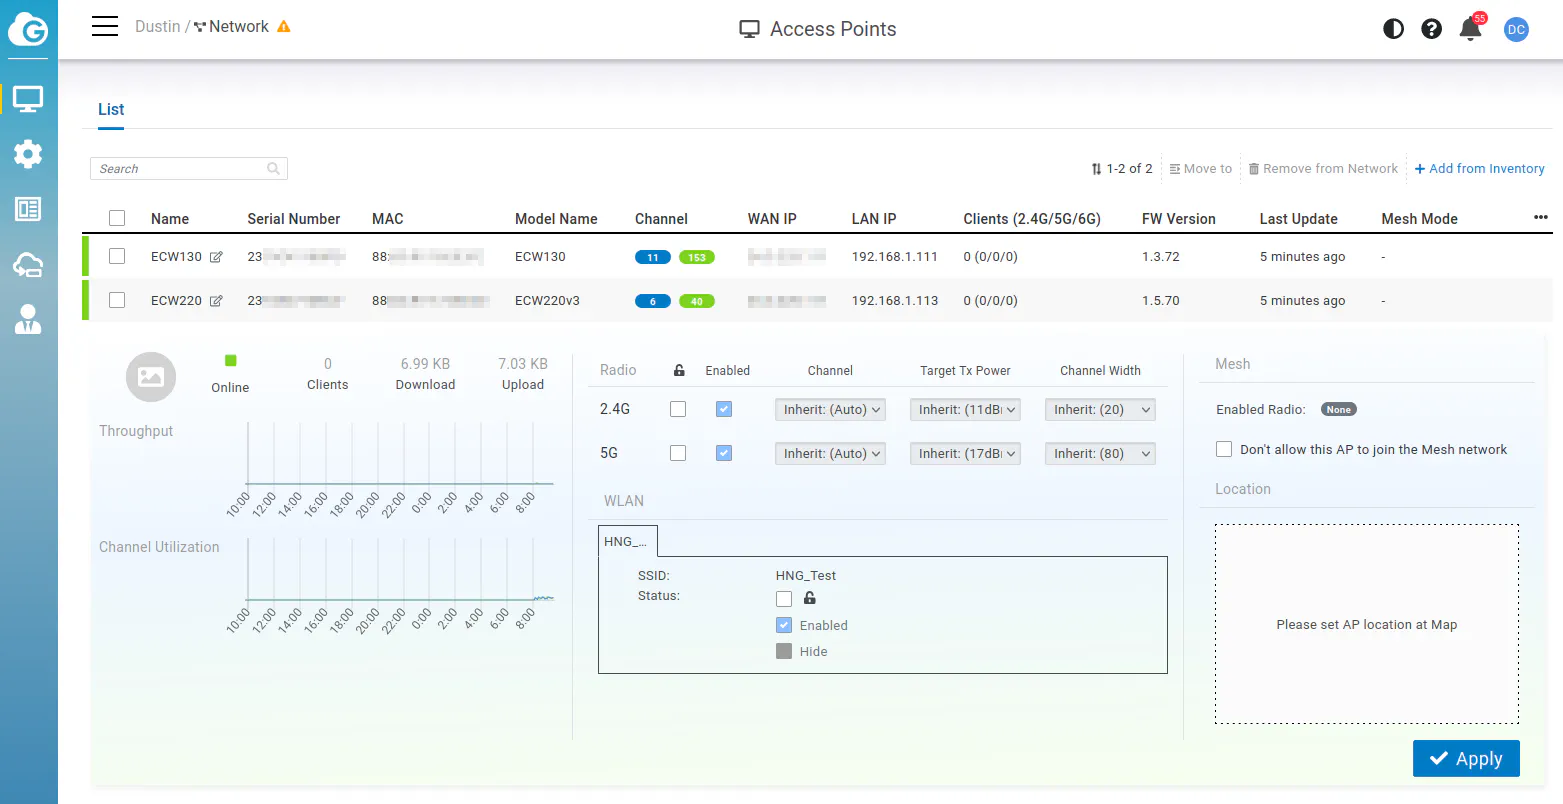
If you click on one of the access points, you can drop down an overlay which displays current throughput and channel information.
Cloud Management: Configure > Access Point
All of the wireless access point configuration will occur in the “Configure” menu. After clicking on the “Configure > Access Point” menu option, you will be brought to the “SSID List” page.
Here is where you create all of the SSIDs for your wireless network.

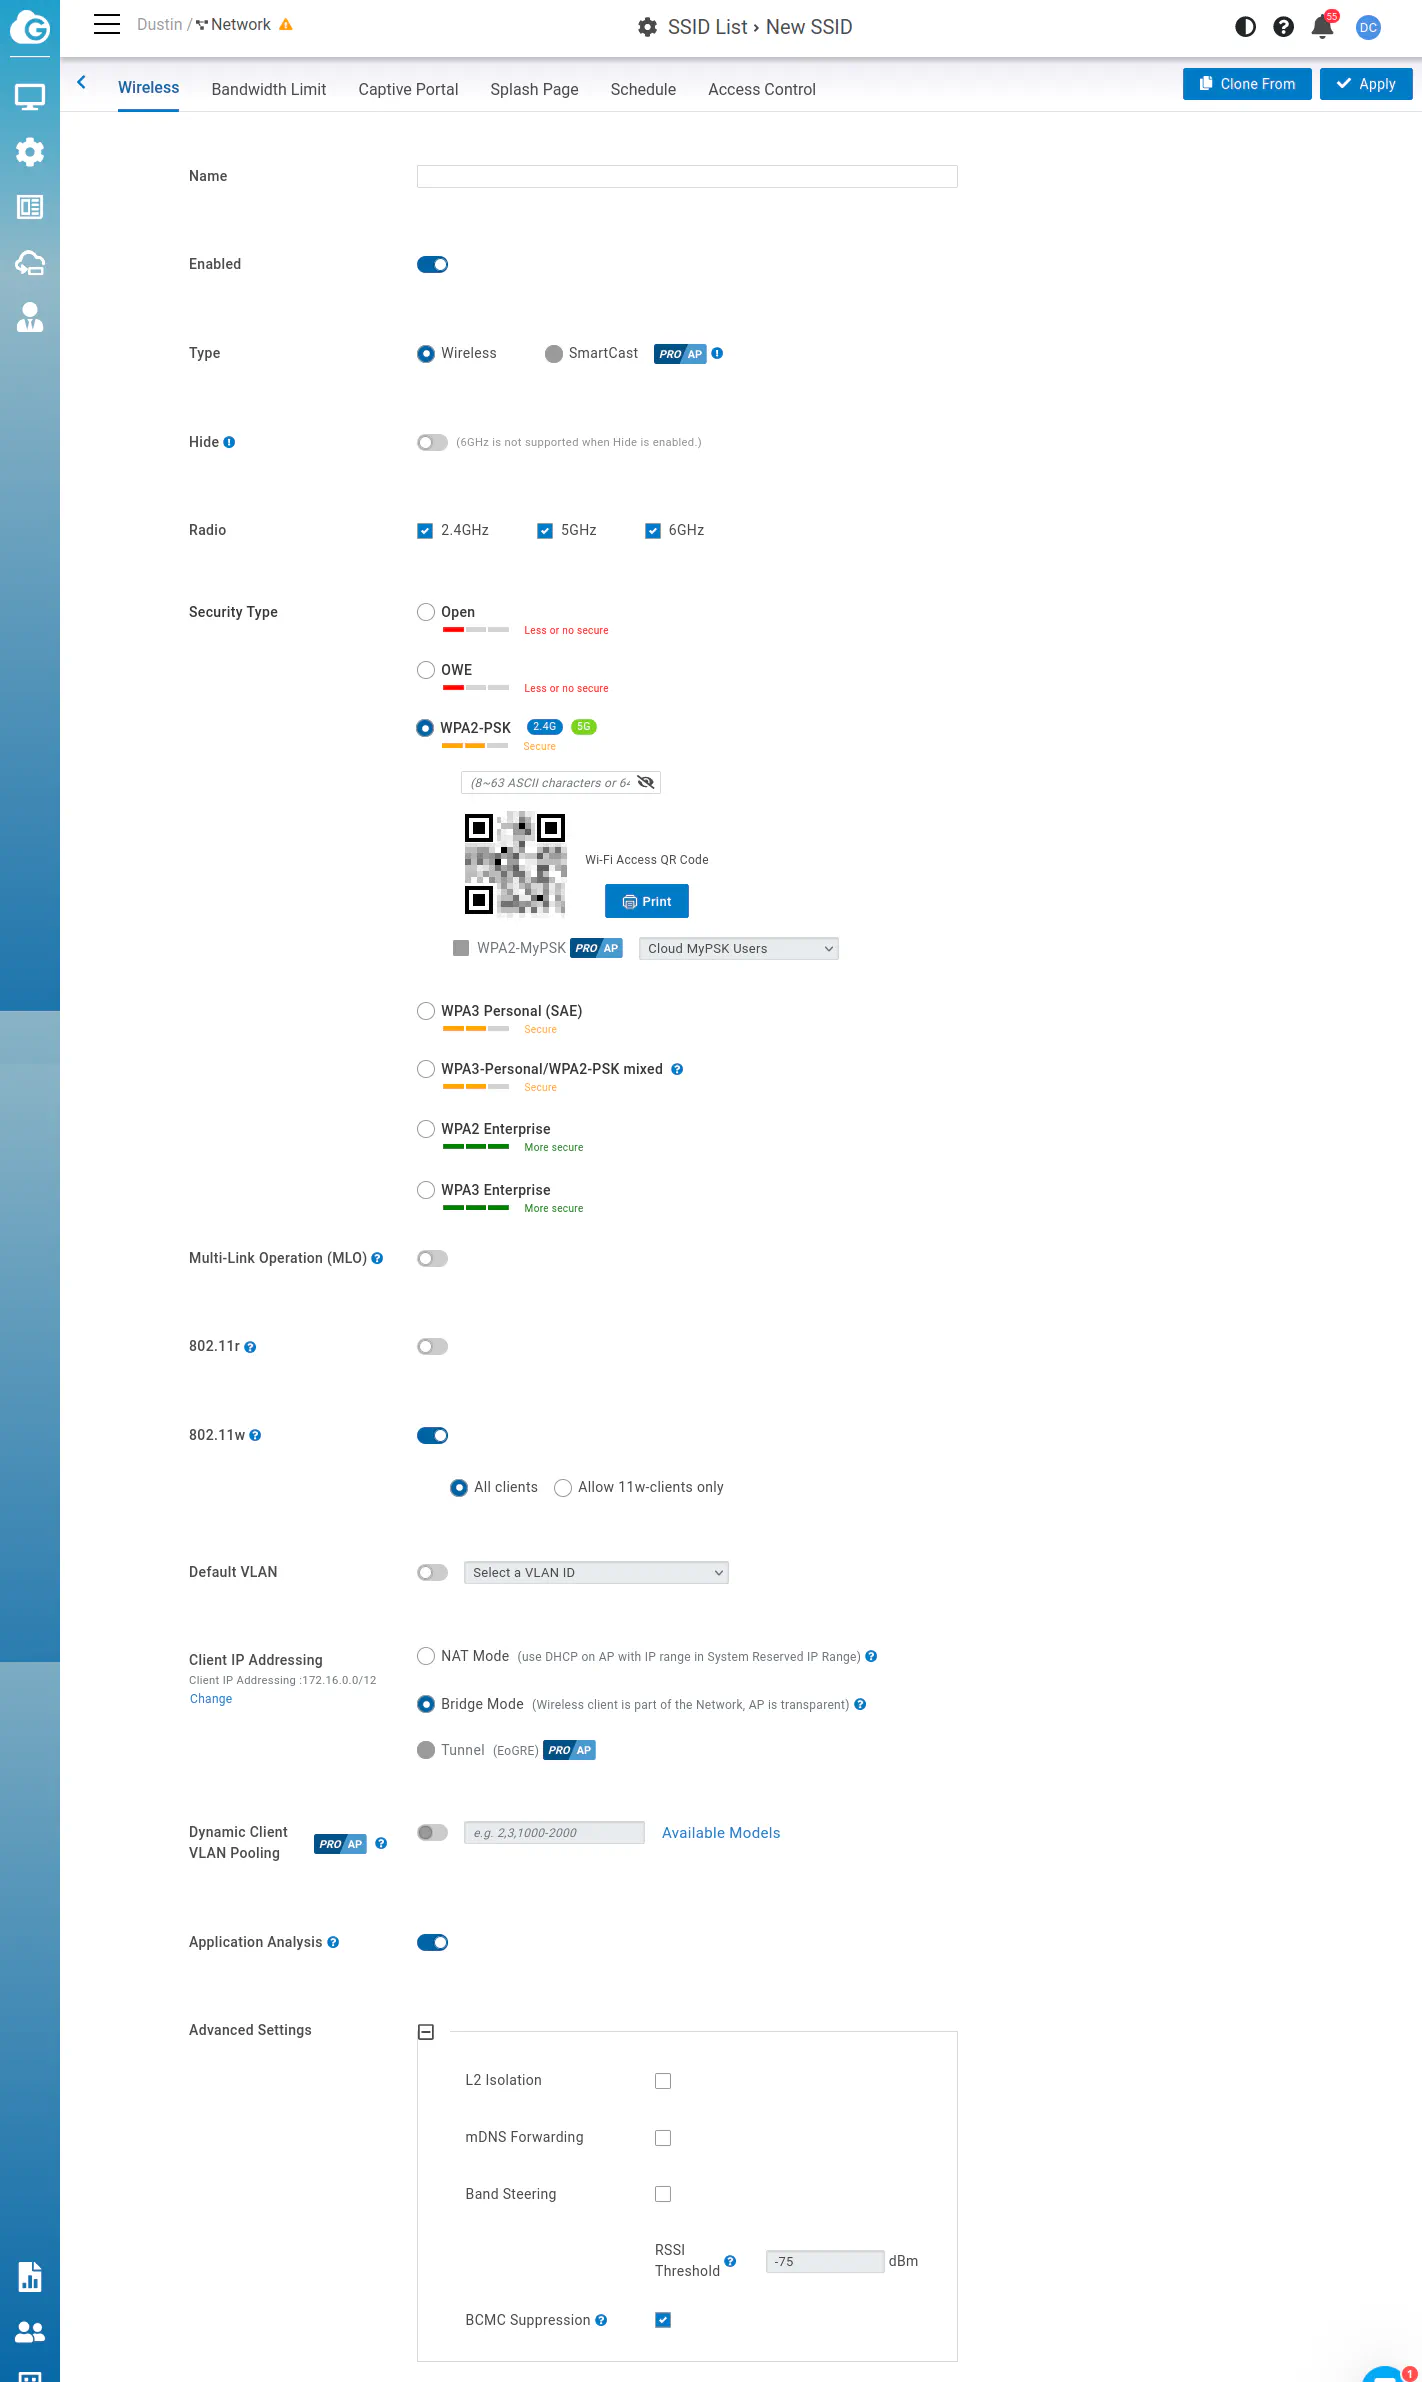
When you click on “Add SSID” in the upper right corner of the page, you will be presented with a quite a few options for the new SSID.
You are able to set the VLAN for the SSID if you wish to use different SSIDs for different networks. Nearly all dedicated wireless access points offer this capability since they are intended to be used in SOHO and business environments.
Note that you will see options for “6GHz” even if your wireless AP does not support that frequency band since the SSID options may be applied across multiple APs with varying capabilities.
I like that this page includes a QR code that you can view and print, which is convenient for adding mobile devices to your wireless network(s).
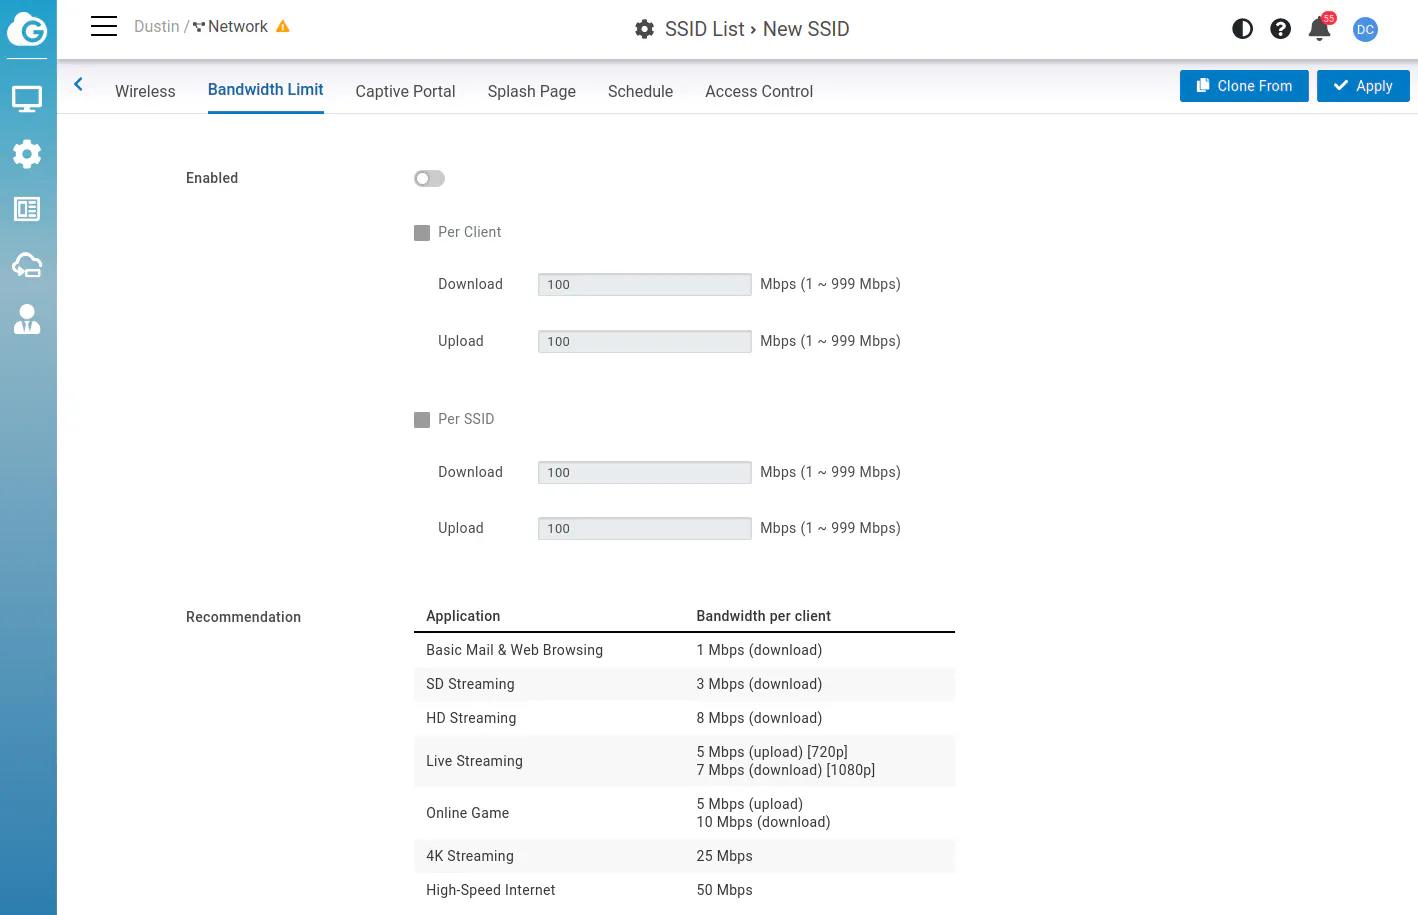
There are bandwidth controls on the “Bandwidth Limit” tab that you may wish to utilize especially for guest/public WiFi networks.
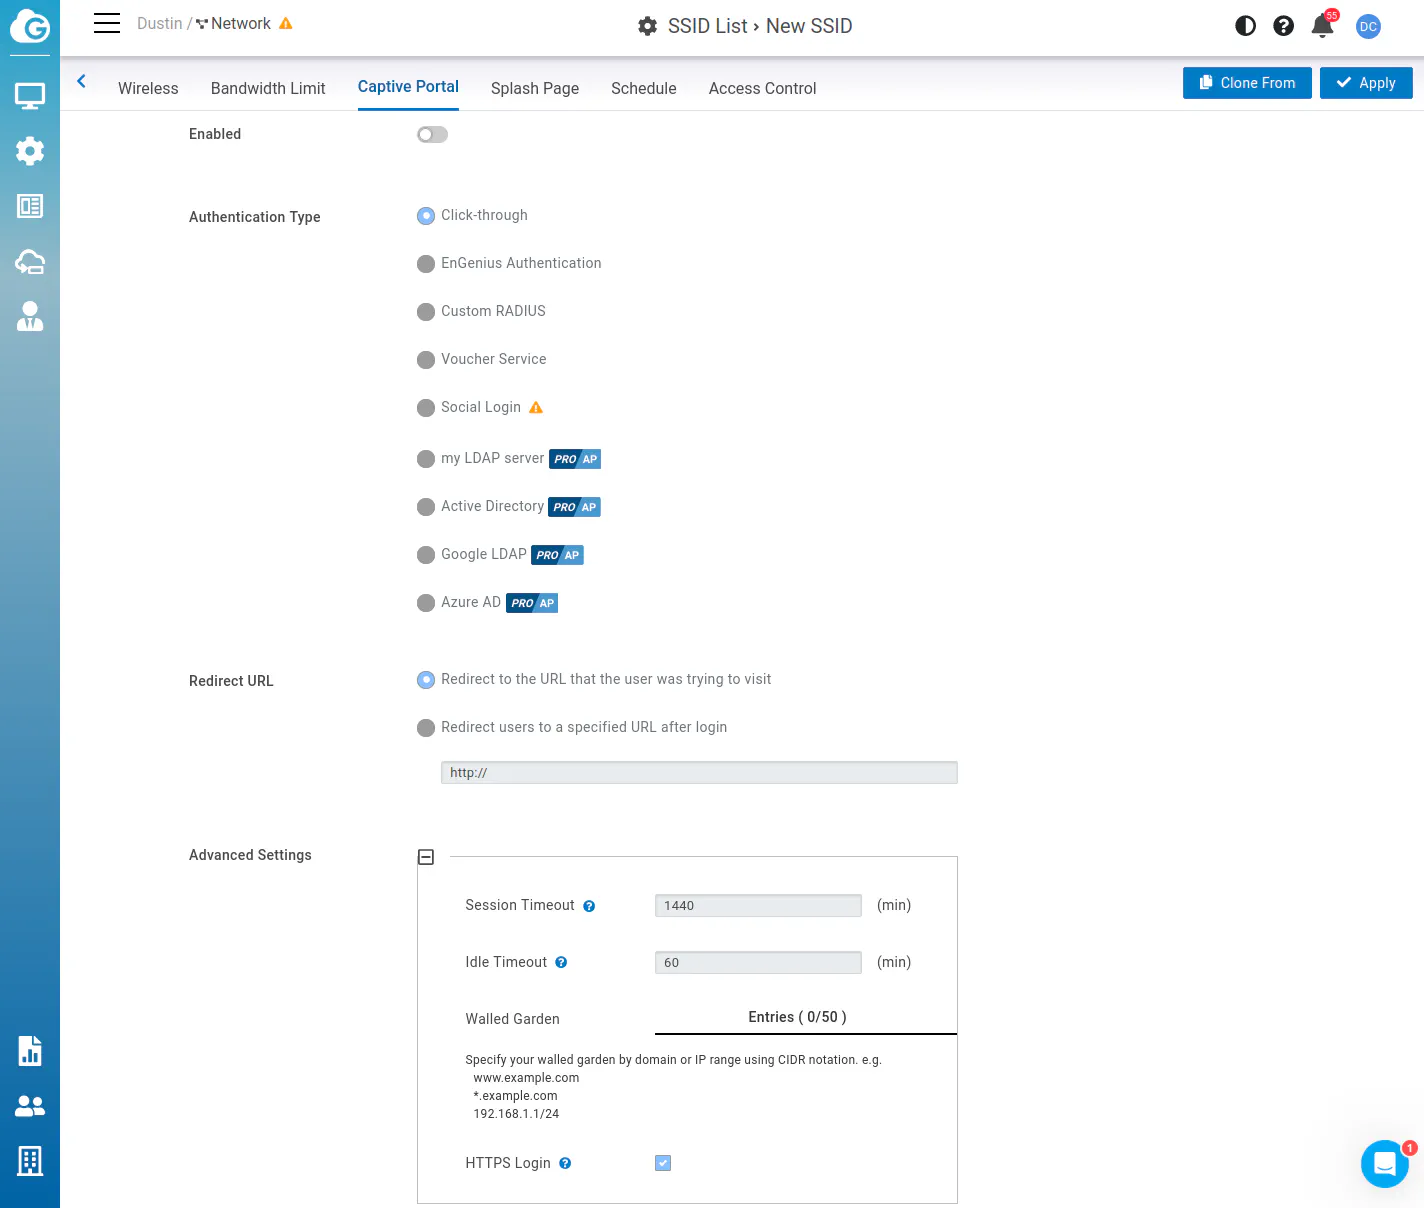
Captive portal functionality is another feature that is nice for guest/public WiFi networks.
Since this is a cloud based service, you do not need to run a local controller which is convenient, but of course if the Internet is down the captive portal will be down as well.
To be fair, if the Internet is down, nobody is going to be able to use the network anyway so it is likely not a huge issue unless you need to access local apps/services. However, you could argue if you need to have local access to apps/services regardless of the status of Internet connectivity, you may not want to be behind a captive portal in the first place.
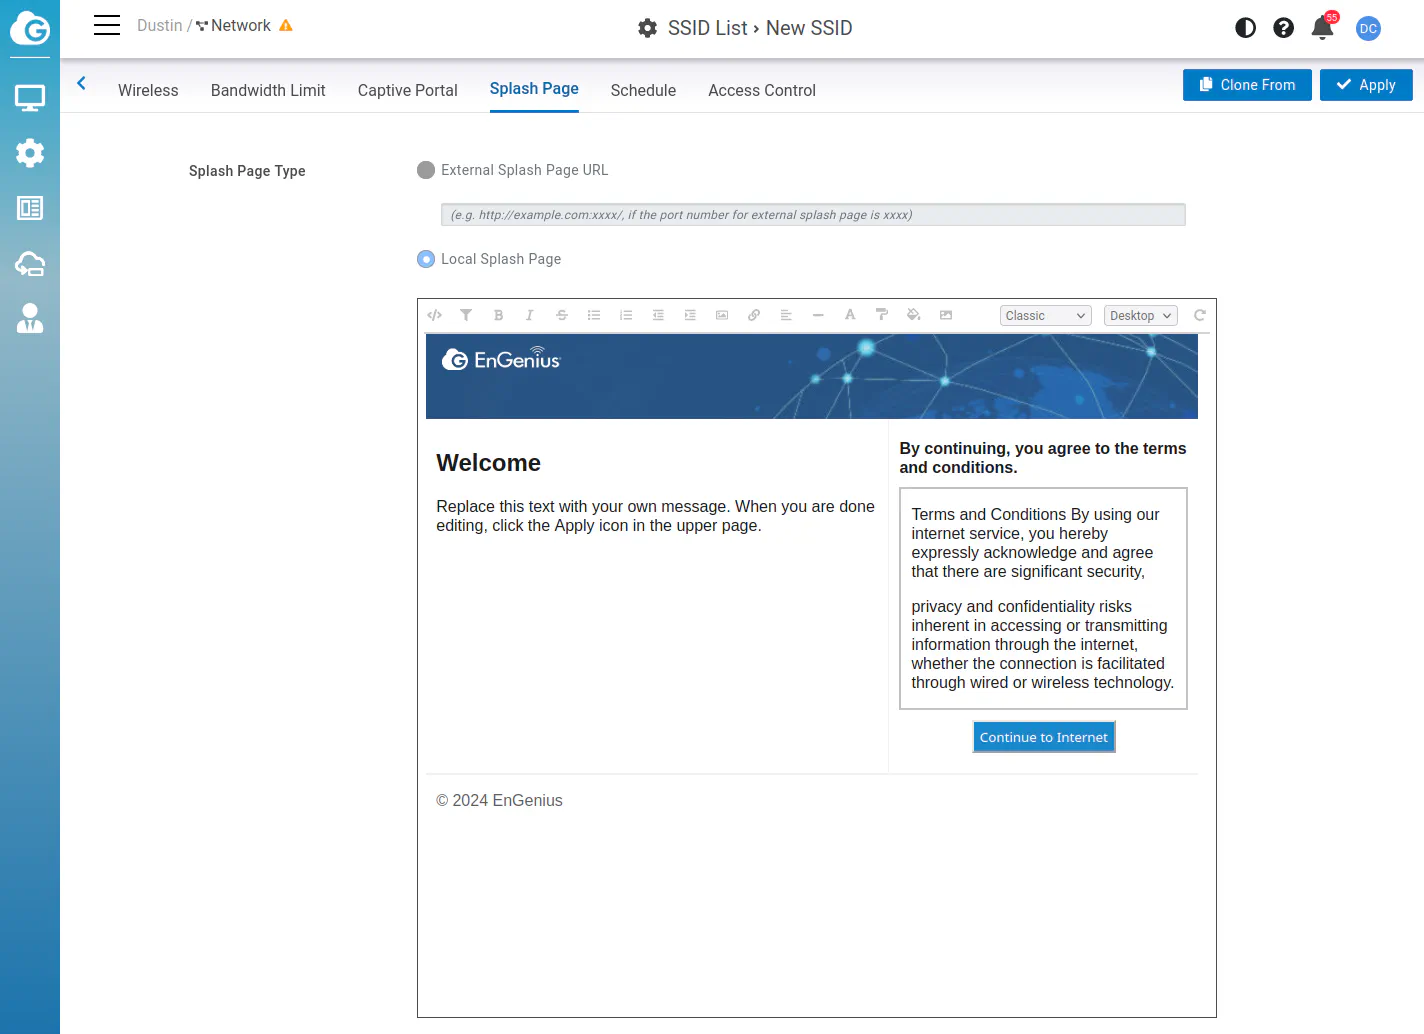
You are able to customize the page that is shown for the captive portal to add your own information and branding.
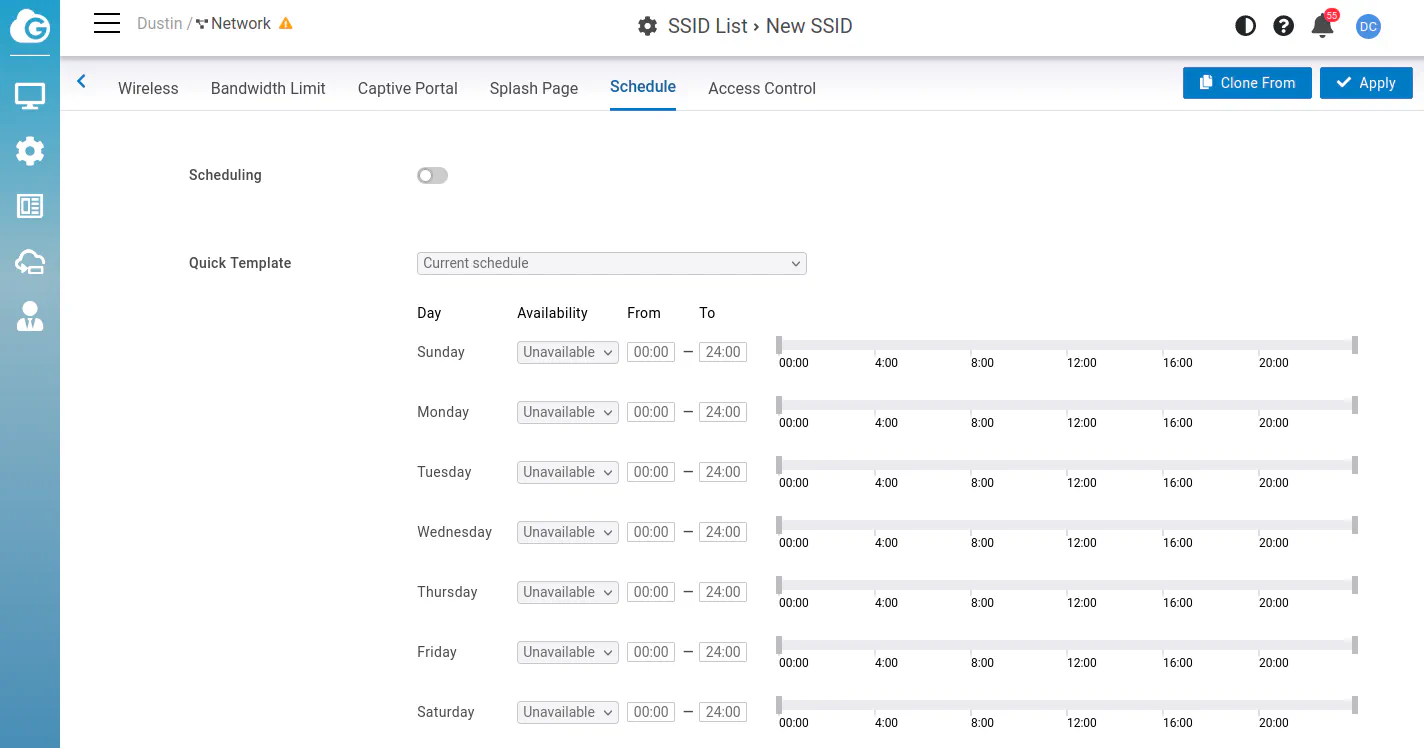
The SSID can be set to only be active during specific times. Public WiFi hotspots can be turned off after store hours or perhaps a children’s WiFi network can be shut down at night when it is bedtime.
You may limit access by MAC address with VIP or block lists.

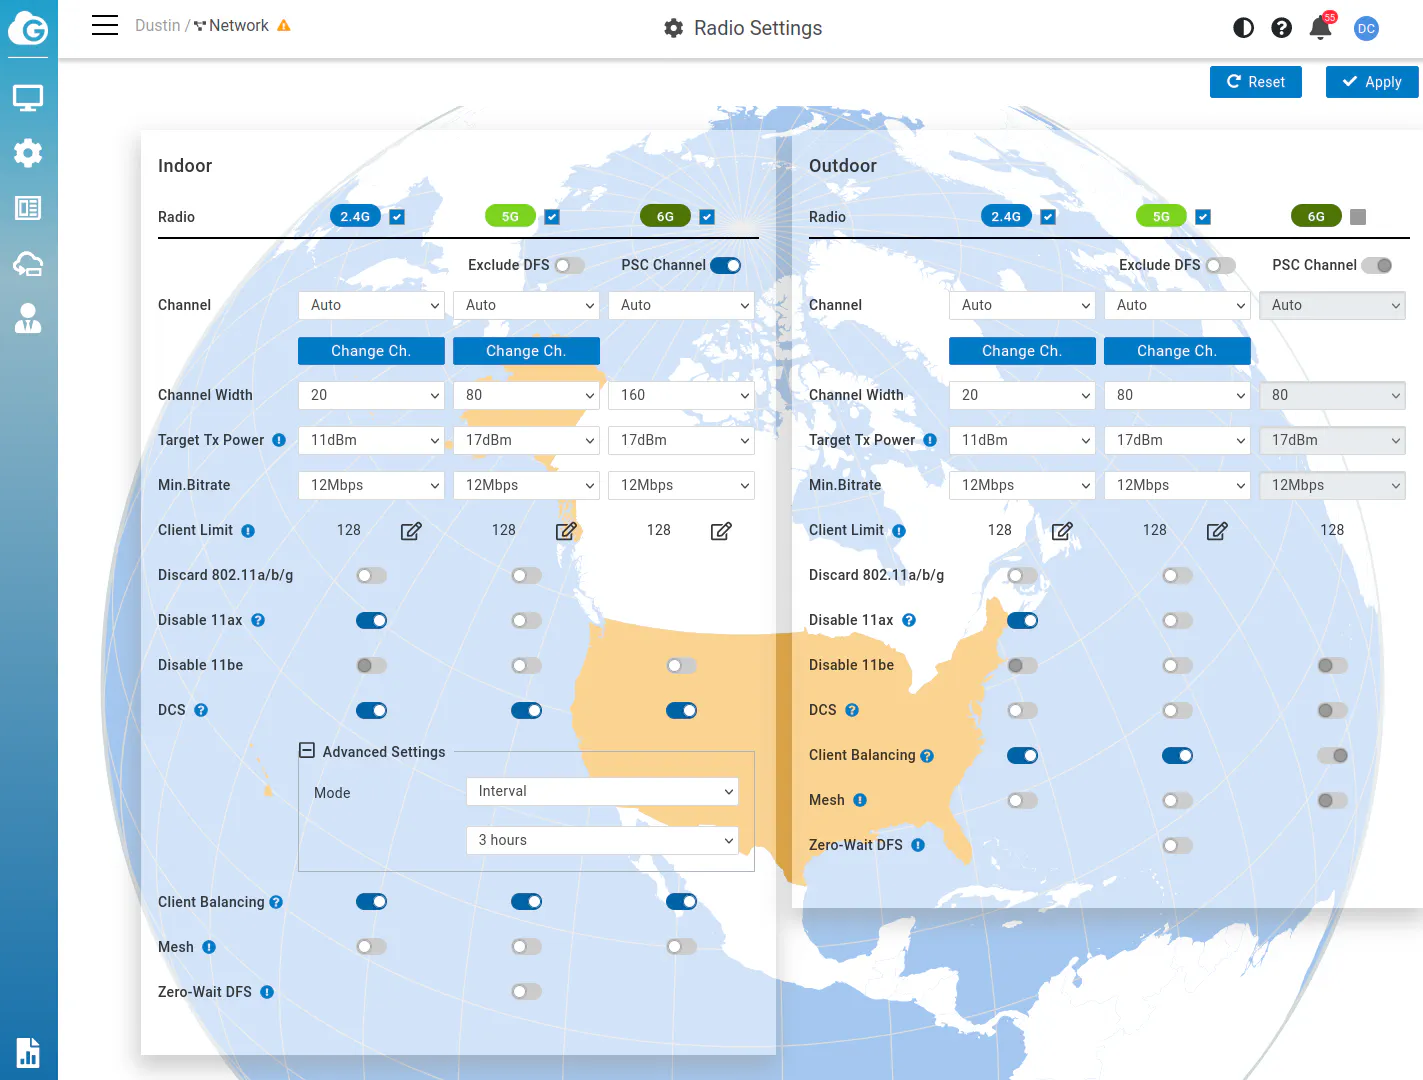
The “Configure > Access Point > Radio” page presents options for the wireless radios. These are the global configuration options for all of the wireless APs associated to your account.
I find it interesting that you can configure indoor AP settings separately from the outdoor APs. Also there seems to be a few extra options available on the indoor APs not available for the outdoor APs. I noticed that 6GHz is grayed out for the outdoor APs. I am guessing this is because they do not have any outdoor WiFi 6E APs at the time of this writing.
For the transmit power, you can actually select specific dBm values so you can fine tune the power. This is unlike other vendors which may only provide “low, medium, or high” options. That may be nice for those who like to precisely tune their WiFi for their specific operating conditions.
That covers the basics of the cloud interface in regards to managing the wireless access points.
Where to Buy?
If you would like to purpose these products, you may use my Amazon affiliate link for the EnGenius ECW130 (affiliate link) and the ECW220 (affiliate link) .
Depending on the stock at Amazon, you may also get it the ECW130 and ECW220 from their online store as well.
Thank you for continued support since it allows me to try out new products and share my findings with the homelab/network community!
