ZimaBoard 832 Fanless Mini-PC
Table of Contents
A few years ago, I saw Kickstarter project that seemed interesting: the ZimaBoard. I kept the browser tab open for a while on my phone so I could keep track of it.
I am glad that the ZimaBoard has made it to market over the last year or two since it is an affordable x86 mini-PC which offers some interesting features for those who like to tinker. The release of unique products which target homelab users is always great to see, and I hope the companies who product such products are successful.
IceWhale Tech, the creators of the ZimaBoard, approached me with the opportunity to take a look at the ZimaBoard 832, which is their flagship ZimaBoard model. Many content creators have been sponsored ZimaBoards at the time of this writing so I was honored to be included as well!
Unboxing
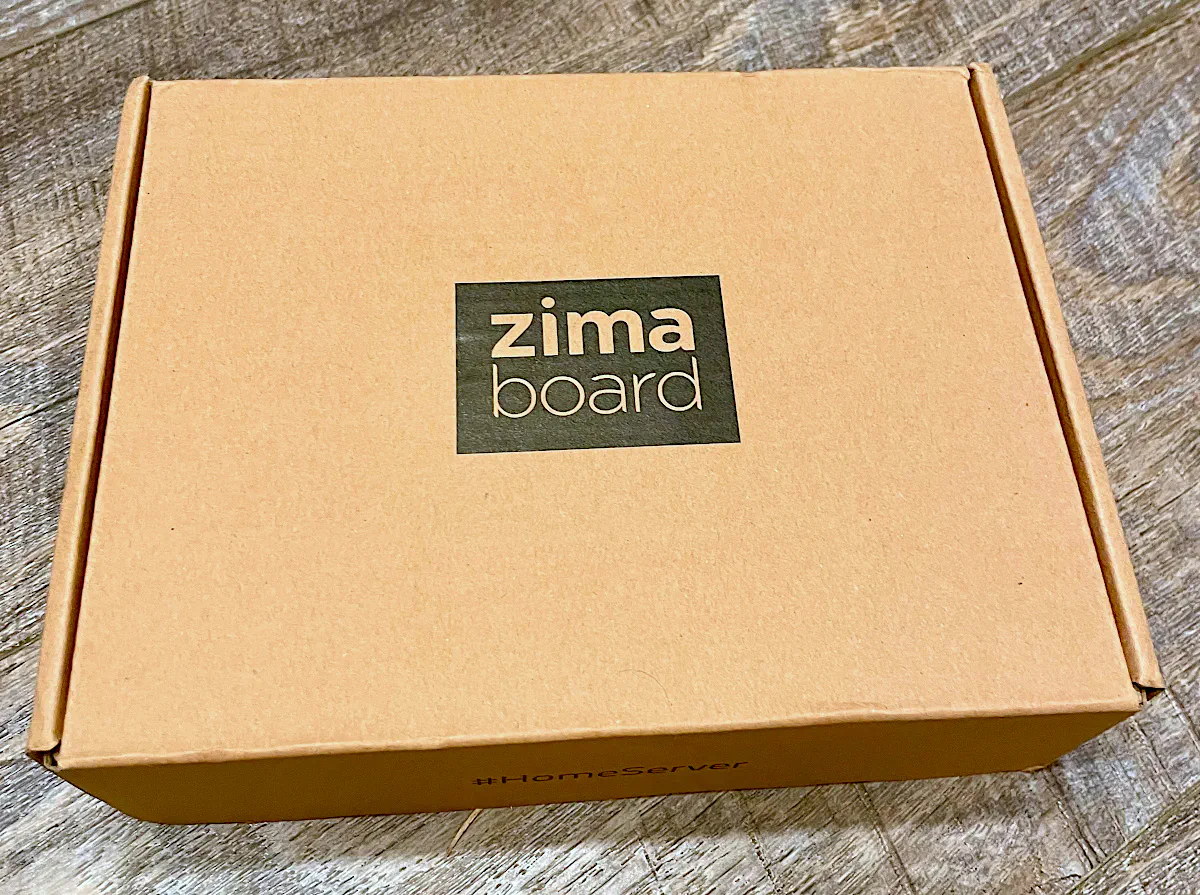
The ZimaBoard comes in a nicely packaged cardboard box. There are several layers before you get to open the ZimaBoard inside.
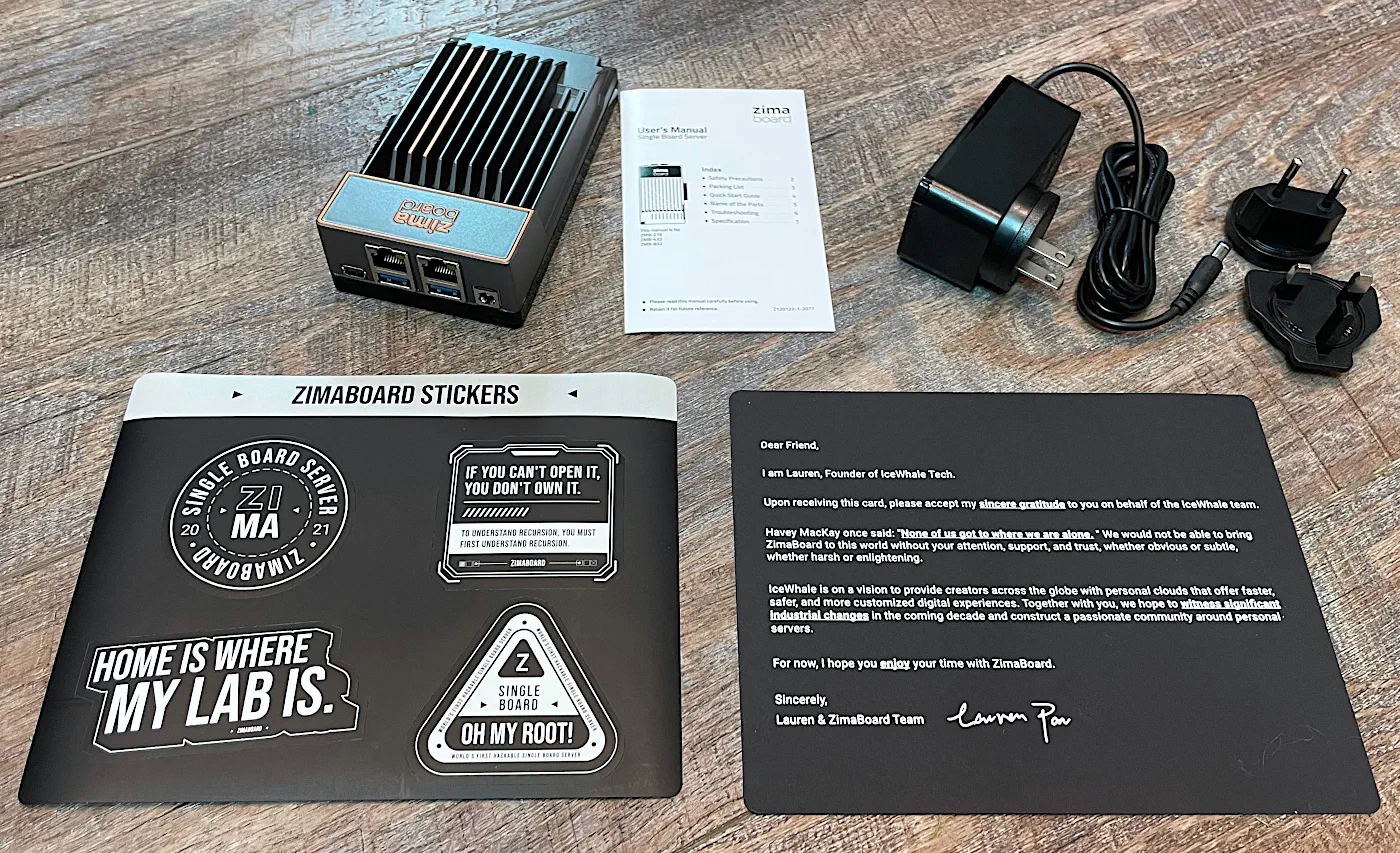
Below are the contents you will receive in the box: the ZimaBoard, the power adapter with adapters for different countries, quick start guide, a welcome letter, and some nice vinyl ZimaBoard homelab stickers.
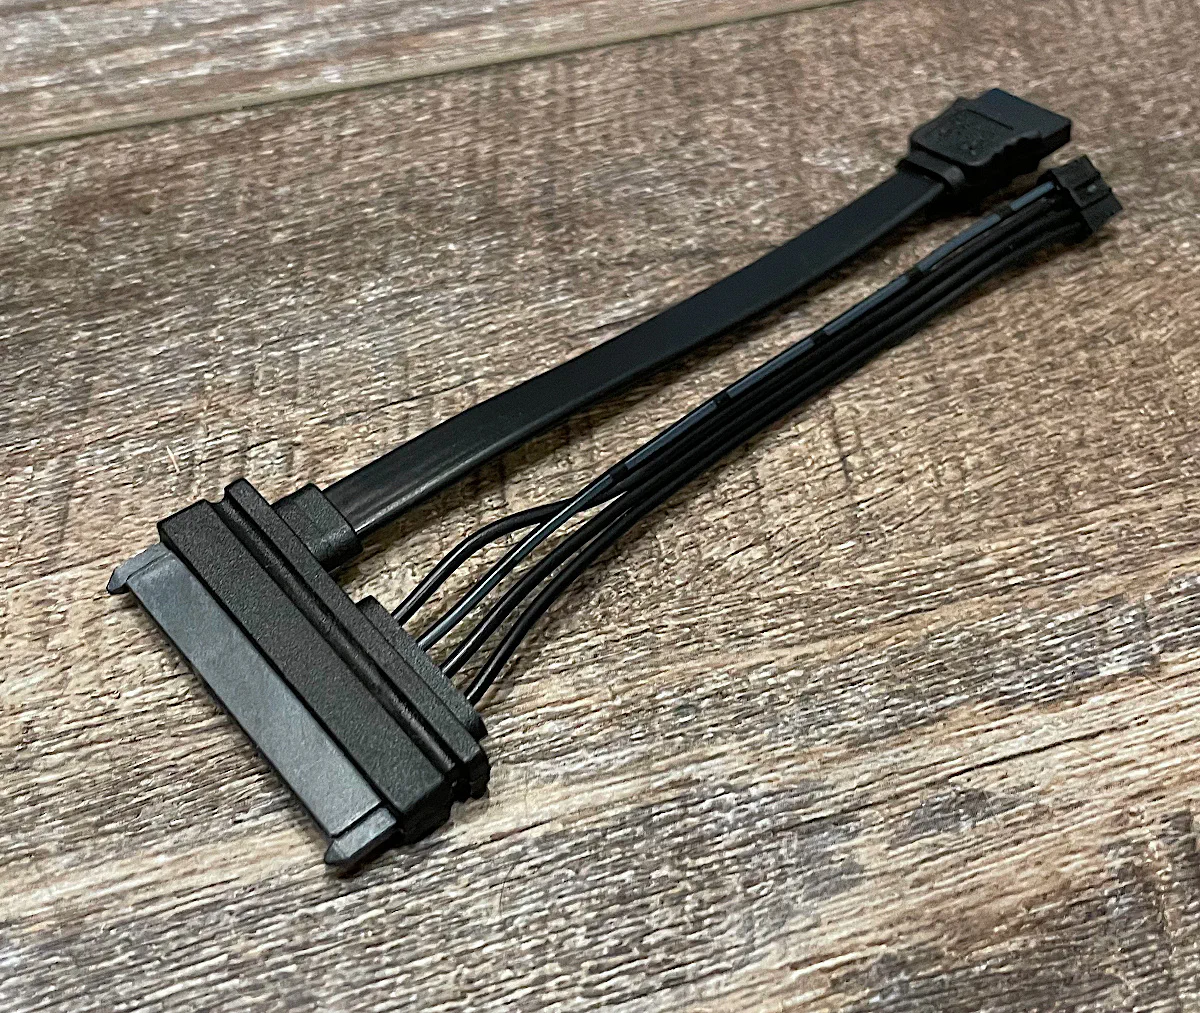
When I first opened the box, I overlooked the SATA adapter pictured below, so be sure to check underneath the bottom layer of cardboard to find this cable! There is a label on the cardboard telling you there is a SATA cable contained inside. Otherwise, you may end up tossing it accidentally which would be unfortunate.
As you can see, there is only 1 SATA data connection and 1 power connection. You have the option to buy a Y-adapter if you wish to connect 2 SATA devices to the ZimaBoard since it has 2 SATA ports as will be shown in subsequent photos.
One cable that is not provided that I wish was provided is a mini-DisplayPort cable that would adapt to either a full-size DisplayPort or HDMI. I know that there are many users who use DisplayPort, but I do not know how many happen to have a mini-DisplayPort cable.
There may even be a larger audience who still use HDMI (like myself) so I had to buy a mini-DisplayPort to HDMI cable in order to be able to connect a display to the ZimaBoard. Without such a cable, you cannot install an alternative Operating System on the ZimaBoard or reinstall the default CasaOS which comes preinstalled (since you need a display/keyboard to install the OS)!
Build Quality and Features
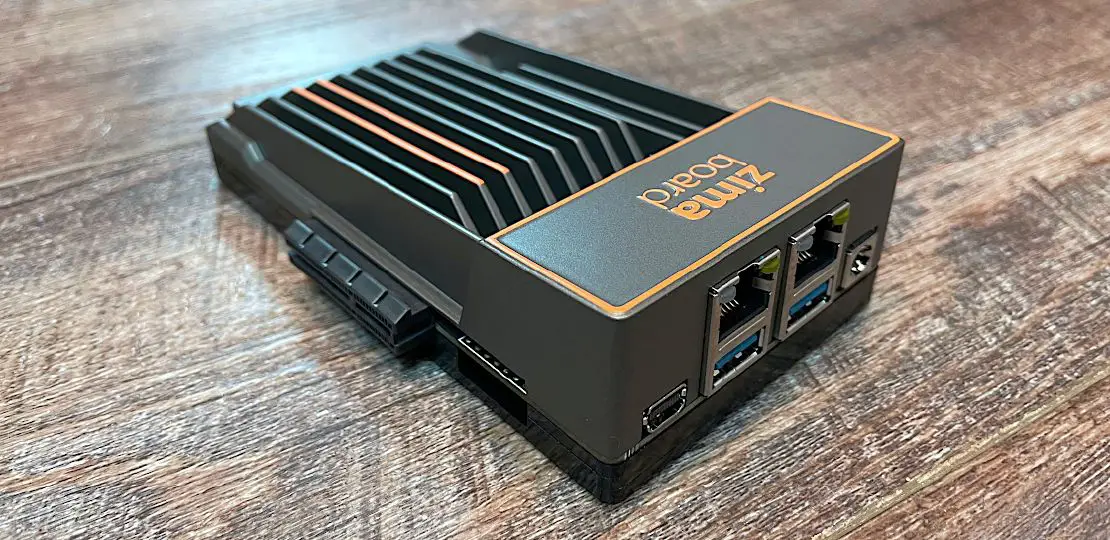
The ZimaBoard has a very sleek design, which is very aesthetically pleasing. The case itself is designed to be a giant heat sink which covers the entire board similar to many other mini-PCs. It has a nice slightly textured powder coat as well, which improves the feel of the build quality.
You can tell this mini-PC was meant to be visible rather than hidden away in a server closet (but it does makes sense to centrally locate the ZimaBoard with your other home network equipment if you plan to use the ZimaBoard as a home server).
Because of its beautiful appearance and the fact that it is silent, the ZimaBoard can certainly be placed on your desk and used as a great lightweight PC.
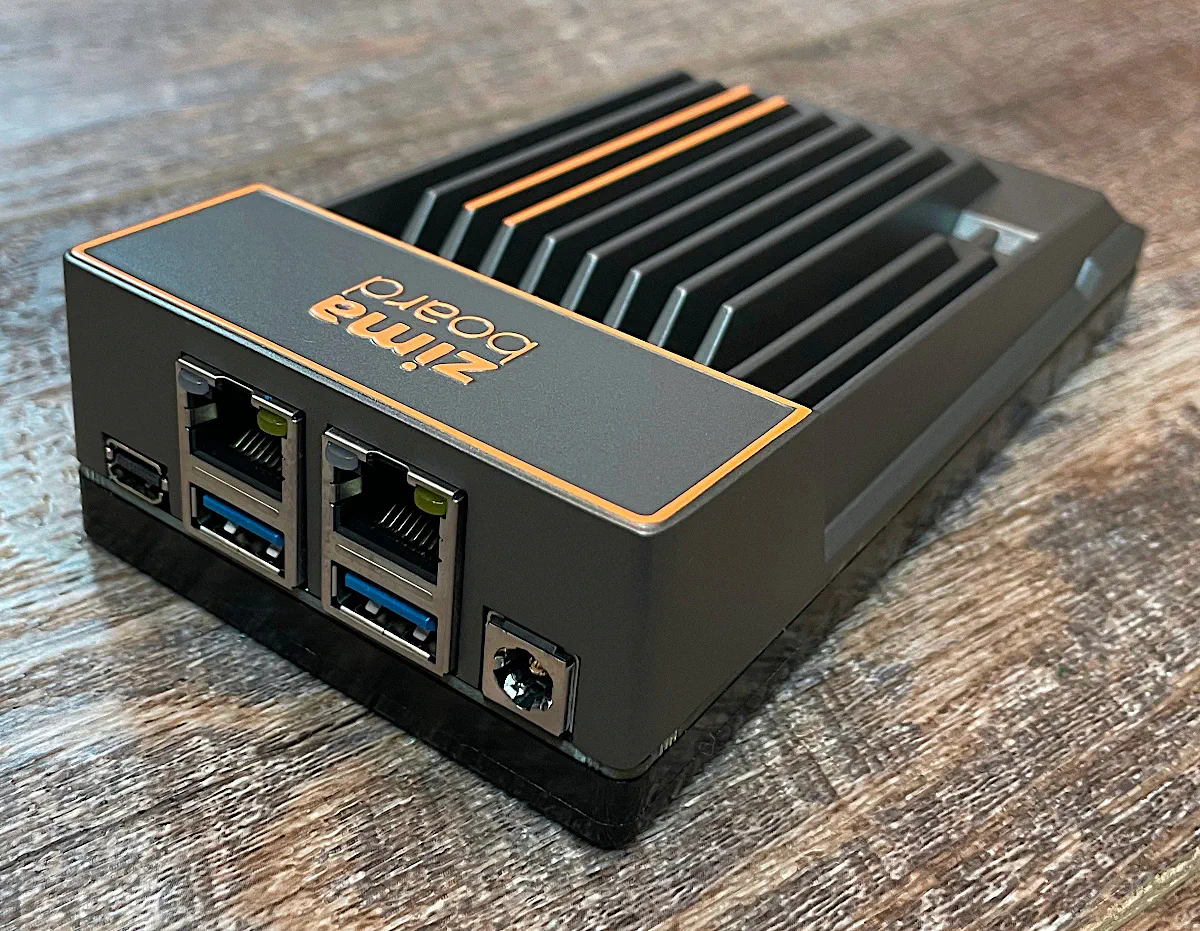
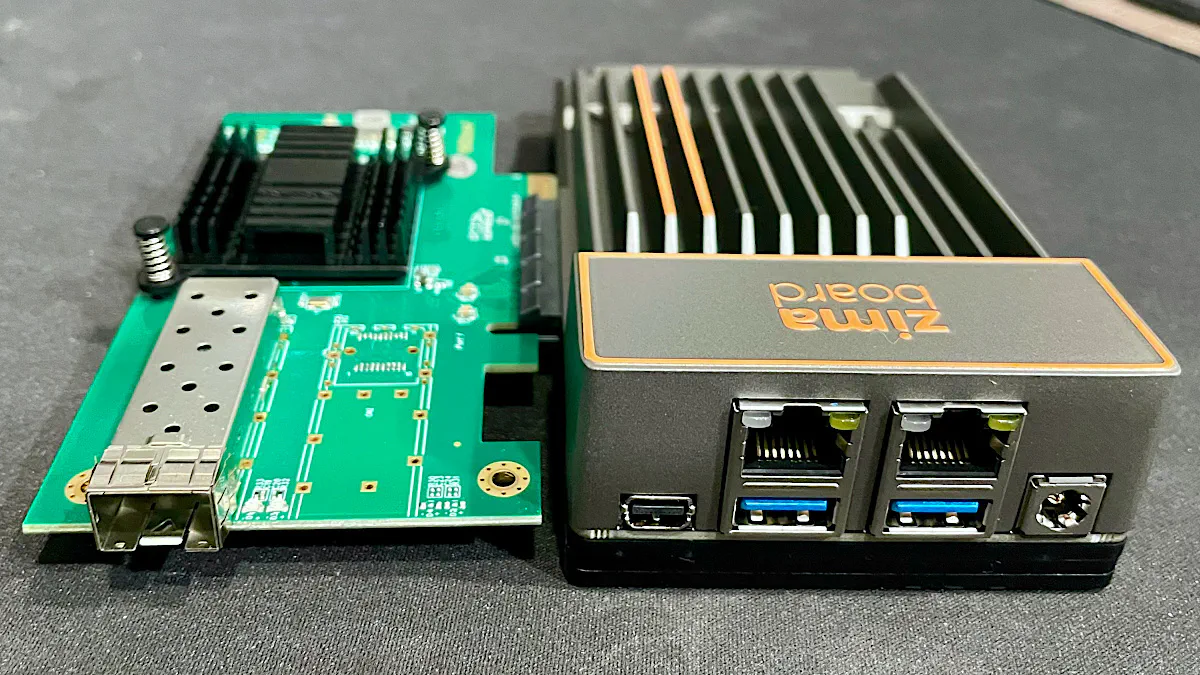
On the front you will see two 1 Gbps Ethernet interfaces, a mini-DisplayPort interface, 2 USB 3.0 ports, and a barrel jack for AC power.
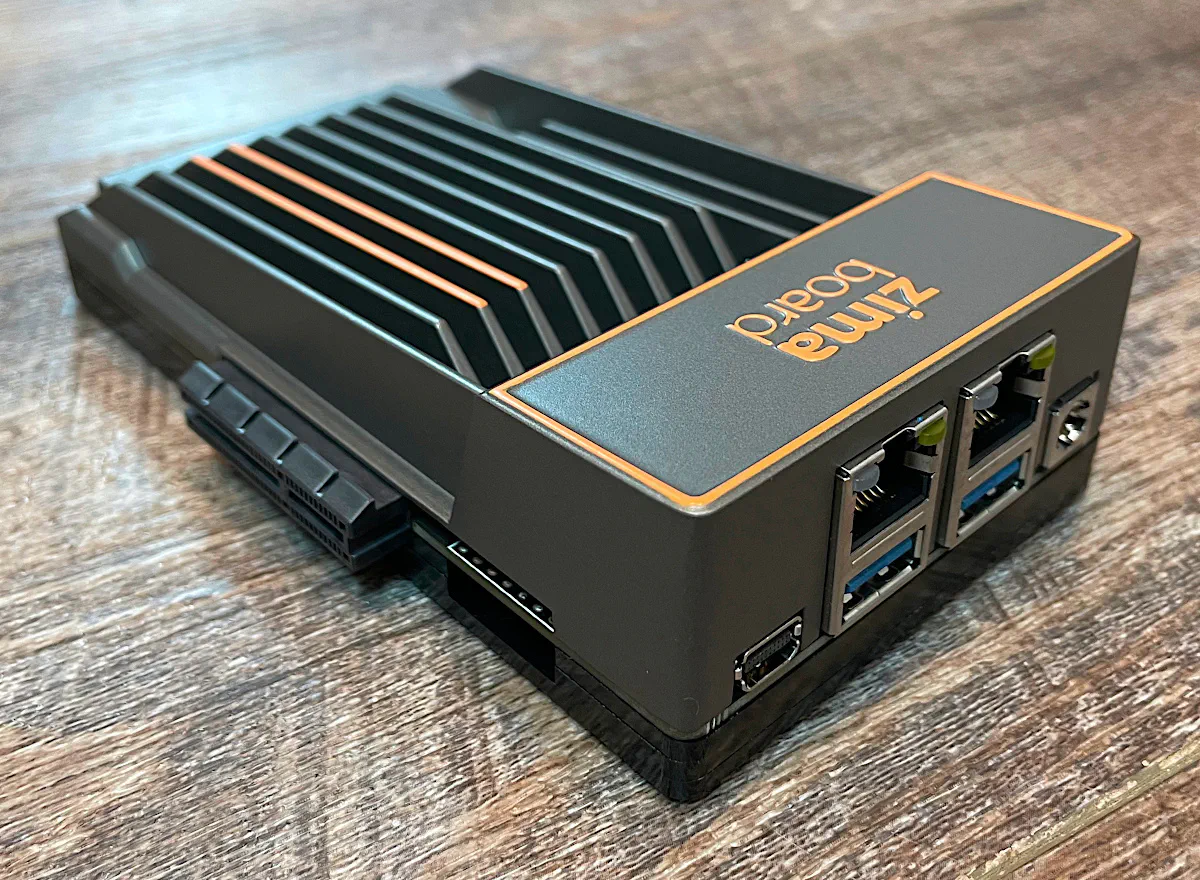
On the other side of the ZimaBoard, you will see the most distinctive feature of the ZimaBoard: the PCIe 2.0 x4 slot. You can connect pretty much any PCIe card you like into this slot.
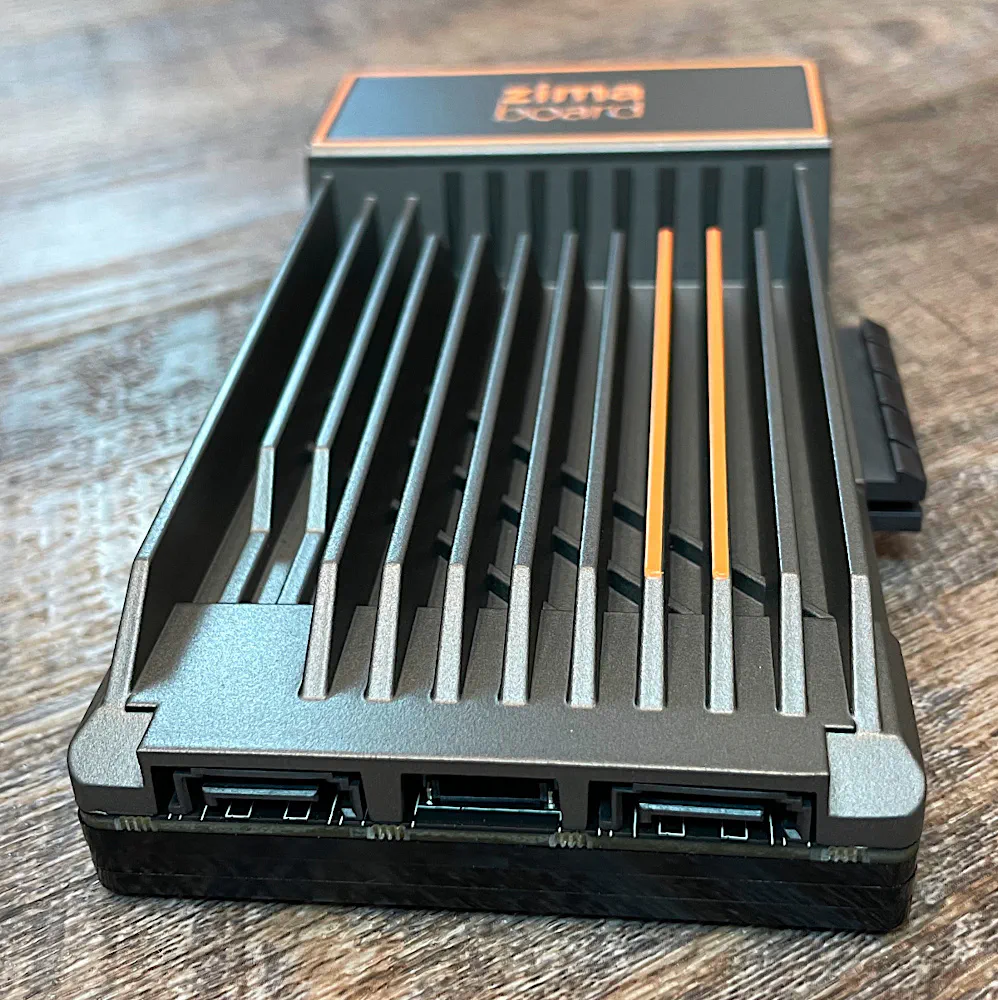
The back of the ZimaBoard contains 2 SATA interfaces and 1 power connection so you can connect SATA devices to the ZimaBoard.
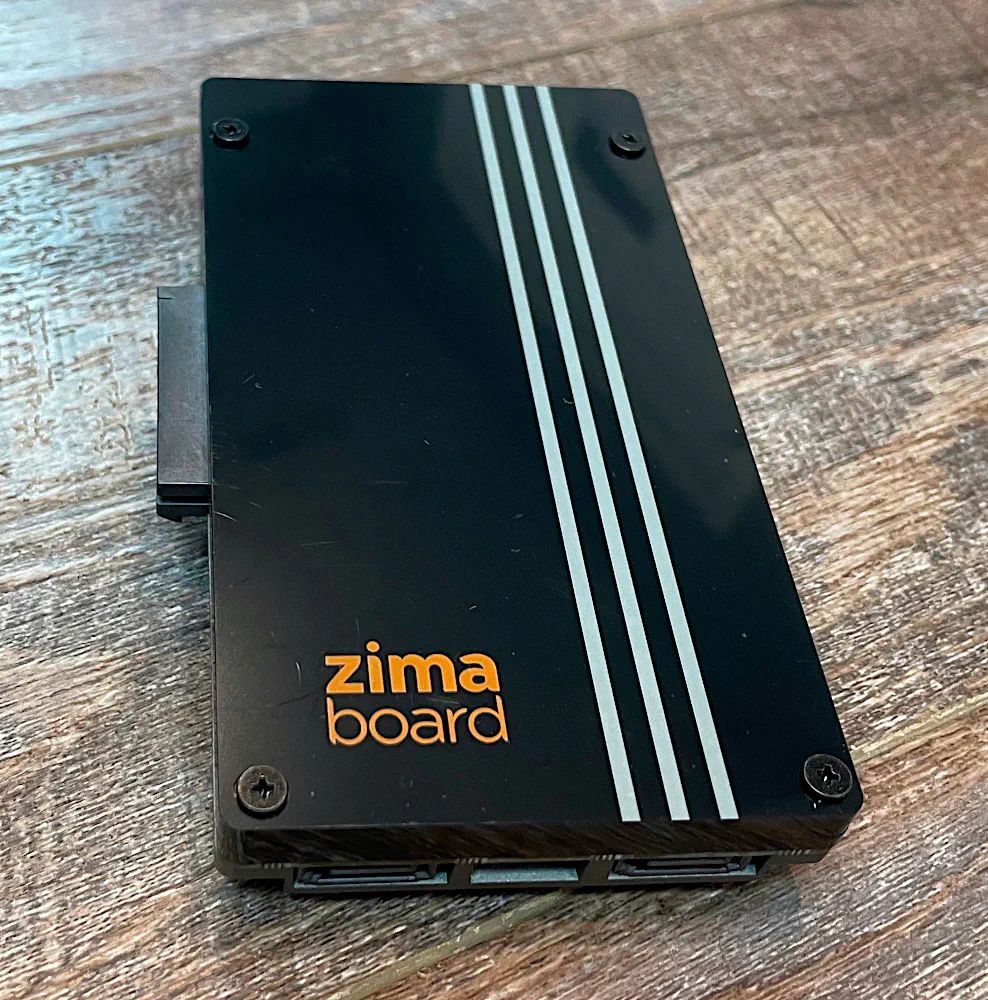
The bottom of the ZimaBoard has 2 removable plastic plates which exposes the bottom of the circuit board. You may be able to mount your 2.5" SATA disks to the bottom if you buy the mounting plate accessory.
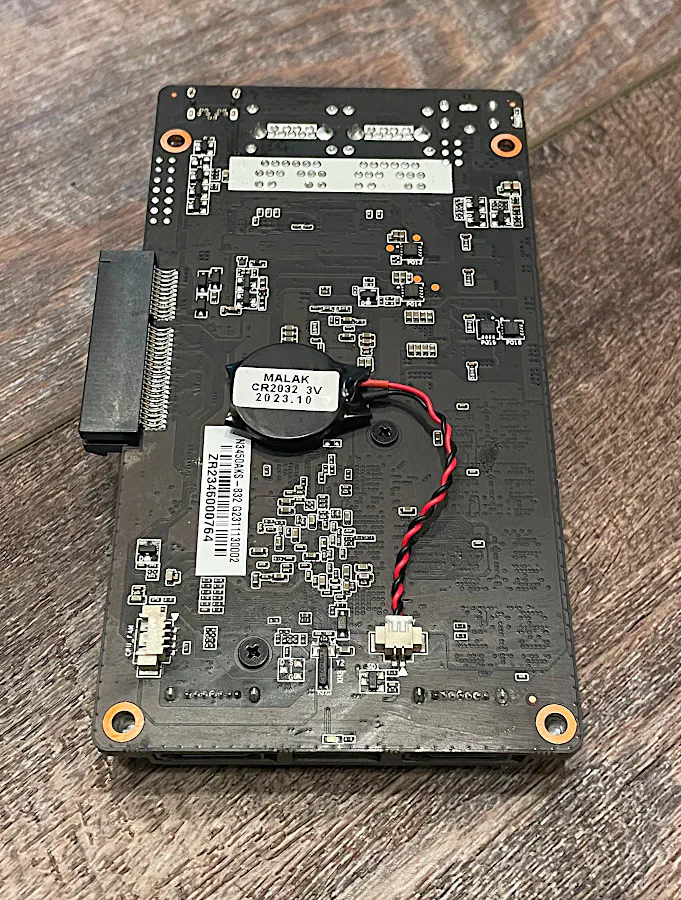
When the bottom plates are removed, you will see the CMOS battery should you need to change it. Also on the bottom corner of the board, you will see a CPU fan header, which I thought was interesting. Should you find that the ZimaBoard is getting too hot (perhaps if you are running heavier workloads or placed the device in a warmer environment), you could attach a fan to the top of the ZimaBoard using that fan header.
External PCIe Interface
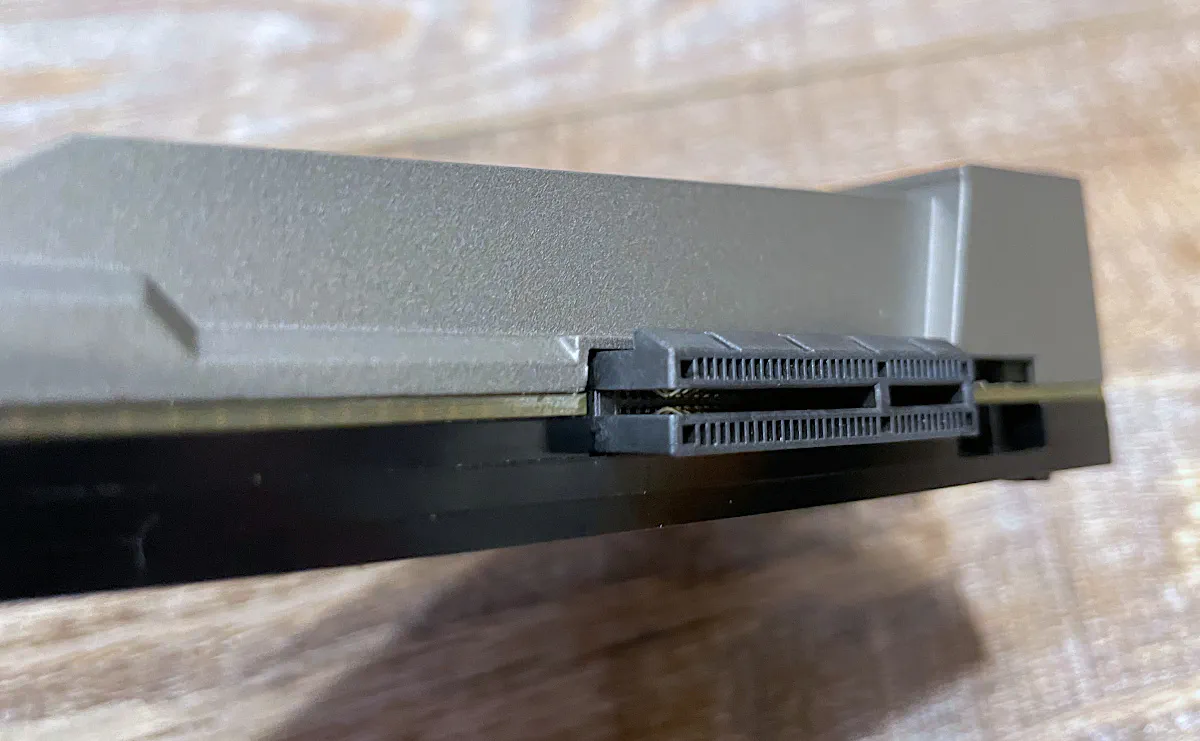
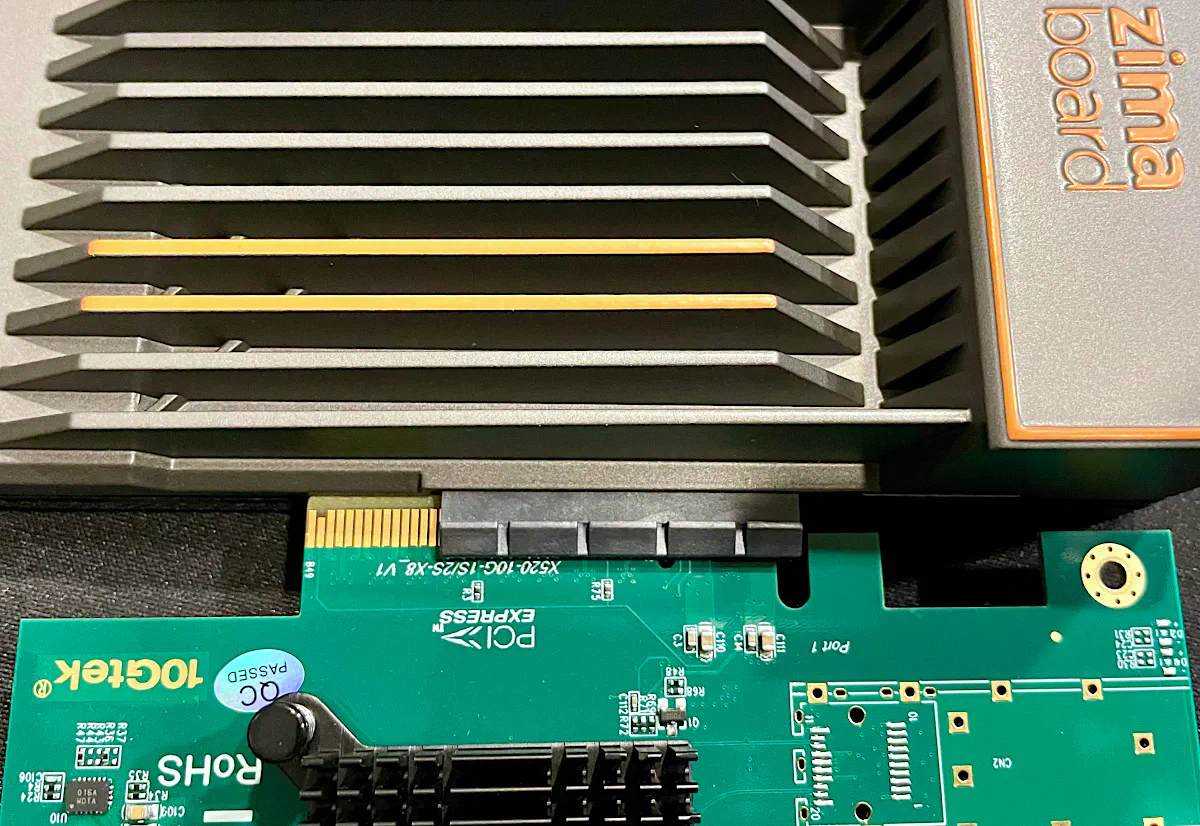
I mentioned earlier that you can connect any PCIe card to the ZimaBoard. Notice that the plastic slot is open on one end so you can actually connect x8 or x16 cards to the ZimaBoard! Of course, that means you will have reduced performance due to only being able to use 4 lanes of PCIe. However, that may not necessarily be a huge issue since the computing power of the ZimaBoard 832 is going to be limited since it is using a low power CPU.
For instance, I connected a SFP+ 10 Gbps network card to the ZimaBoard to see how well it performs in a x4 slot since it is designed to be in a x8 slot (most likely because it is easier for manufacturers to make a single and dual interface version of the network card).
In theory, PCIe 2.0 x4 should yield 2 GB/s of bandwidth and the SFP+ 10 Gbps NIC only needs 1.25 GB/s of bandwidth (remember, 10 Gbps / 8 = 1.25 GB/s).
The ZimaBoard allows this configuration to be possible because the slot is open on the side as you can see in the image below. This is perfect for those who want to tinker to see what happens!
Hardware Specifications
There are 3 versions of the ZimaBoard: 232, 432, and 832. The biggest difference between the 3 models is the CPU and the amount of RAM on the board.
| Hardware | Option |
|---|---|
| CPU | Intel N3450 (N3350 for the 232 model) |
| Memory | 8 GB RAM (2 GB for the 232 model and 4 GB for the 432 model) |
| Storage (eMMC) | 32 GB |
| Storage (SATA) | 2x SATA 3.0, 6 Gbps interfaces |
| Network | 2x Realtek GbE interfaces |
| PCIe | 1x PCIe 2.0 x4 |
| Display | 1x mini DisplayPort 1.2 |
The Intel N3350/N3450 CPU is an older/weaker CPU but the intention of the ZimaBoard was to build a low cost, expandable mini-PC to cater to a variety of needs and to have fun tinkering with different configurations. For this reason, it makes sense to use a lower cost CPU option.
Accessories
The ZimaBoard sells several accessories that you may be interested in purchasing if you purchase from ZimaBoard’s online store.
You will find various PCIe cards for network interfaces, storage interfaces, and USB interfaces as well as USB enclosures and other cables. There is a good variety of accessories to choose from their store.
I actually found that the prices of the accessories are reasonably priced in general. When manufacturers sell 3rd party accessories for their products, they often raise the prices higher than what you will typically find elsewhere.
For example, one of the cheapest 4 port Intel i225V PCIe cards (affiliate link) I could find on Amazon is about $15 more expensive than the one found on the ZimaBoard store at the time of this writing.
Performance
For performance testing, I tried 3 different scenarios to do some basic performance testing to demonstrate real world performance using various Operating Systems and applications. I tested the network performance using iperf3 and the storage performance using KDiskMark.
Kubuntu with 10G SFP+ NIC
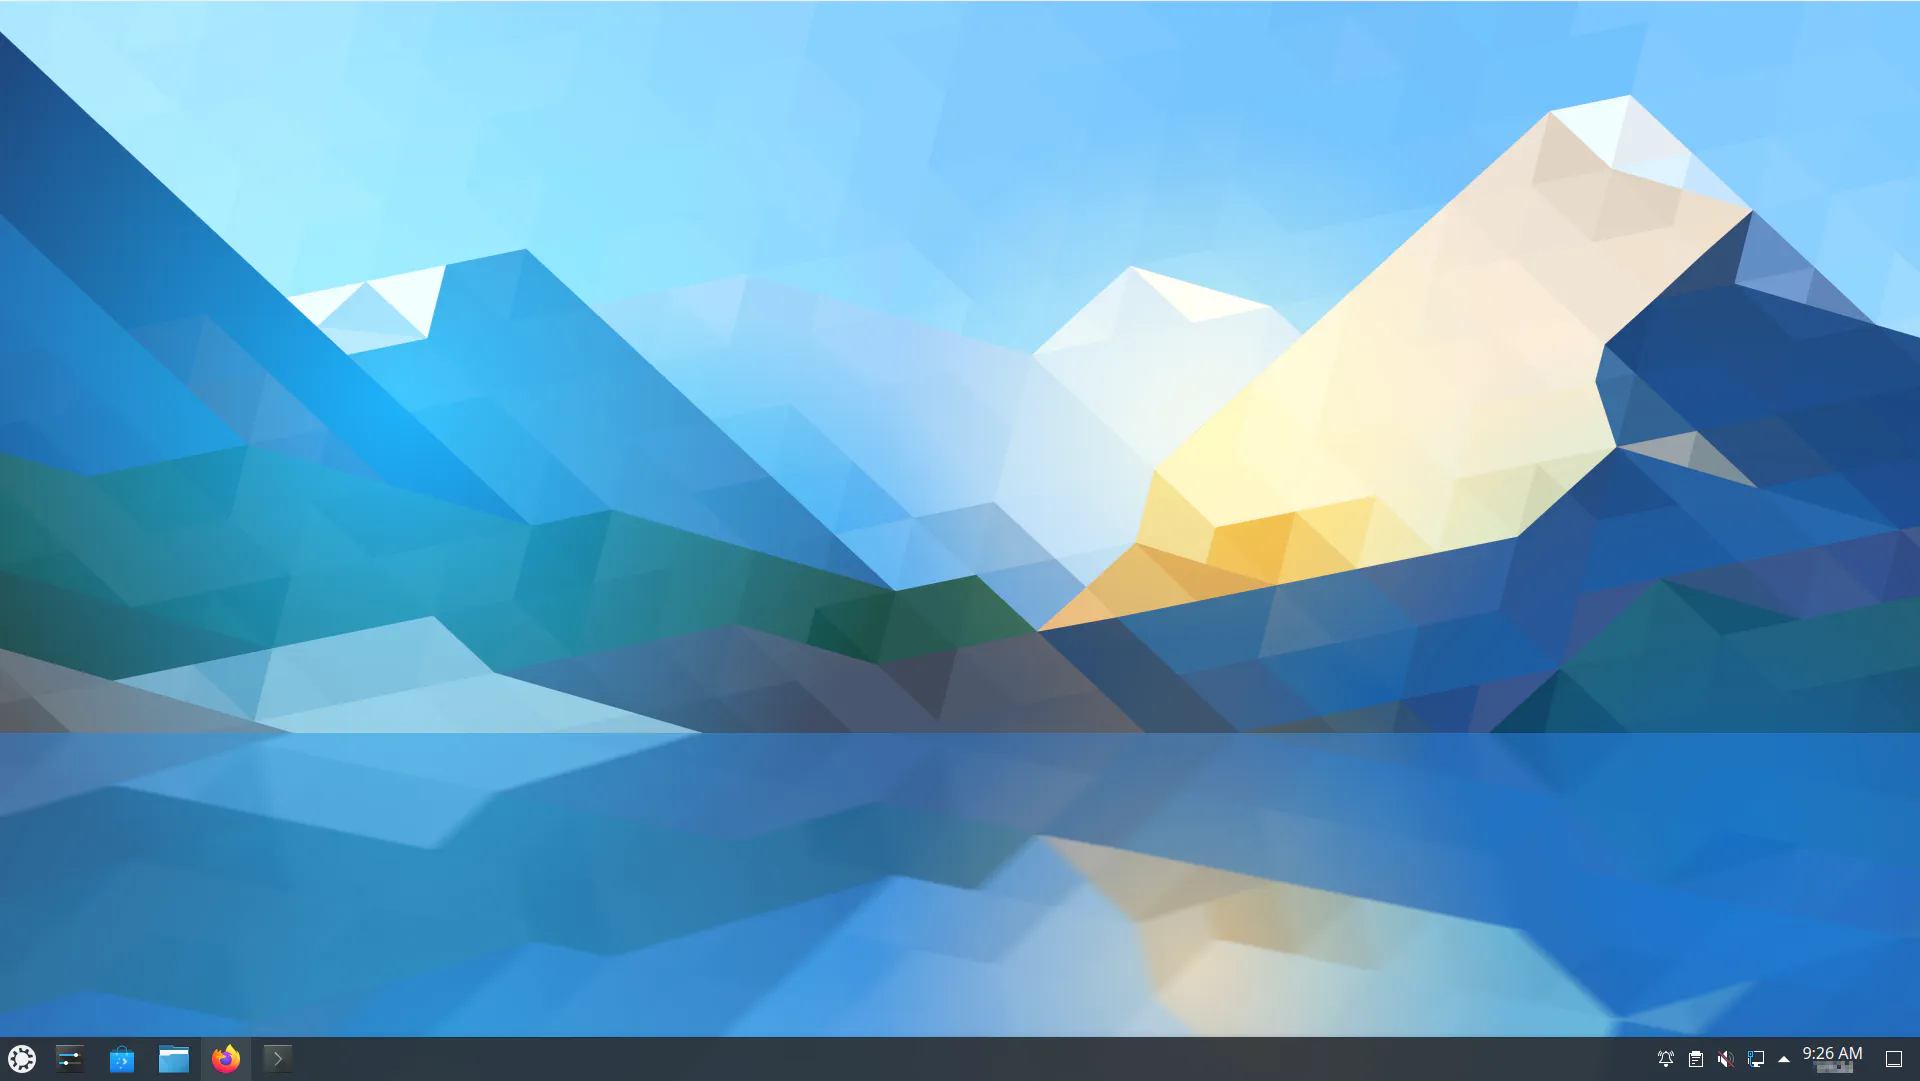
One of the fun experiments I wanted to try was installing a Linux operating system such as Kubuntu and connect a 10 Gbps network card to the PCIe interface. PCIe 2.0 x4 provides 2 GB/s of theoretical bandwidth while a 10 Gbps network interface only utilizes 1.25 GB/s of theoretical bandwidth. Even with the PCIe and network card overhead, there should be enough bandwidth to get full 10 Gbps throughput.
For the iperf3 tests below, I set the MTU to 9000 to enable jumbo frames since I connected the ZimaBoard to my 10 Gbps storage backend network where all devices have jumbo frames enabled for maximum performance.
Sending packets from my ZimaBoard to another system yielded full 10 Gbps throughput! That is very nice!
[ ID] Interval           Transfer     Bitrate         Retr  Cwnd
[  5]   0.00-10.00  sec  11.5 GBytes  9.84 Gbits/sec  357   1.76 MBytes
[  5]  10.00-20.00  sec  11.5 GBytes  9.85 Gbits/sec  261   1.80 MBytes
[  5]  20.00-30.00  sec  11.5 GBytes  9.87 Gbits/sec  196   1.80 MBytes
[  5]  30.00-40.00  sec  11.5 GBytes  9.86 Gbits/sec  339   1.99 MBytes
[  5]  40.00-50.00  sec  11.5 GBytes  9.88 Gbits/sec  544   1.29 MBytes
[  5]  50.00-60.00  sec  11.5 GBytes  9.85 Gbits/sec  430   1.85 MBytes
- - - - - - - - - - - - - - - - - - - - - - - - -
[ ID] Interval           Transfer     Bitrate         Retr
[  5]   0.00-60.00  sec  68.9 GBytes  9.86 Gbits/sec  2127             sender
[  5]   0.00-60.00  sec  68.9 GBytes  9.86 Gbits/sec                  receiver
I decided to try sending packets to the ZimaBoard from another system and the result was a bit surprising. I was able to only receive about 5.5 Gbps. The CPU seemed pegged around 25% (which is 1 of the 4 cores full utilized) so I thought that maybe there was a CPU bottleneck causing the issue.
[ ID] Interval           Transfer     Bitrate
[  5]   0.00-10.00  sec  6.96 GBytes  5.98 Gbits/sec
[  5]  10.00-20.00  sec  6.36 GBytes  5.47 Gbits/sec
[  5]  20.00-30.00  sec  6.68 GBytes  5.74 Gbits/sec
[  5]  30.00-40.00  sec  6.22 GBytes  5.34 Gbits/sec
[  5]  40.00-50.00  sec  6.32 GBytes  5.43 Gbits/sec
[  5]  50.00-60.00  sec  6.29 GBytes  5.40 Gbits/sec
- - - - - - - - - - - - - - - - - - - - - - - - -
[ ID] Interval           Transfer     Bitrate         Retr
[  5]   0.00-60.00  sec  38.8 GBytes  5.56 Gbits/sec  122             sender
[  5]   0.00-60.00  sec  38.8 GBytes  5.56 Gbits/sec                  receiver
Next I tried running 2 parallel streams to see if that helps boost performance. On fast systems on interfaces with 10 Gbps or less (I have not tested faster than 10 Gbps), I do not usually notice a difference in performance running with parallel streams because the sending and receiving systems can handle the packet processing without issues.
For this lower power CPU, running multiple streams did in fact help performance but 8.3 Gbps is shy of the full 10 Gbps throughput. Part of the reason could be due to the fact that iperf3 is not multi-threaded even when running multiple streams of data.
[ ID] Interval           Transfer     Bitrate
[  5]   0.00-10.00  sec  2.46 GBytes  2.11 Gbits/sec
[  7]   0.00-10.00  sec  2.46 GBytes  2.11 Gbits/sec
[  9]   0.00-10.00  sec  2.46 GBytes  2.11 Gbits/sec
[ 11]   0.00-10.00  sec  2.46 GBytes  2.11 Gbits/sec
[SUM]   0.00-10.00  sec  9.83 GBytes  8.44 Gbits/sec
- - - - - - - - - - - - - - - - - - - - - - - - -
[  5]  10.00-20.00  sec  2.50 GBytes  2.15 Gbits/sec
[  7]  10.00-20.00  sec  2.50 GBytes  2.15 Gbits/sec
[  9]  10.00-20.00  sec  2.50 GBytes  2.15 Gbits/sec
[ 11]  10.00-20.00  sec  2.50 GBytes  2.15 Gbits/sec
[SUM]  10.00-20.00  sec  10.0 GBytes  8.60 Gbits/sec
- - - - - - - - - - - - - - - - - - - - - - - - -
[  5]  20.00-30.00  sec  2.18 GBytes  1.87 Gbits/sec
[  7]  20.00-30.00  sec  2.18 GBytes  1.88 Gbits/sec
[  9]  20.00-30.00  sec  2.04 GBytes  1.75 Gbits/sec
[ 11]  20.00-30.00  sec  2.18 GBytes  1.87 Gbits/sec
[SUM]  20.00-30.00  sec  8.58 GBytes  7.37 Gbits/sec
- - - - - - - - - - - - - - - - - - - - - - - - -
[  5]  30.00-40.00  sec  2.31 GBytes  1.98 Gbits/sec
[  7]  30.00-40.00  sec  2.37 GBytes  2.04 Gbits/sec
[  9]  30.00-40.00  sec  2.37 GBytes  2.04 Gbits/sec
[ 11]  30.00-40.00  sec  2.37 GBytes  2.04 Gbits/sec
[SUM]  30.00-40.00  sec  9.42 GBytes  8.09 Gbits/sec
- - - - - - - - - - - - - - - - - - - - - - - - -
[  5]  40.00-50.00  sec  2.52 GBytes  2.17 Gbits/sec
[  7]  40.00-50.00  sec  2.52 GBytes  2.17 Gbits/sec
[  9]  40.00-50.00  sec  2.52 GBytes  2.16 Gbits/sec
[ 11]  40.00-50.00  sec  2.52 GBytes  2.17 Gbits/sec
[SUM]  40.00-50.00  sec  10.1 GBytes  8.66 Gbits/sec
- - - - - - - - - - - - - - - - - - - - - - - - -
[  5]  50.00-60.00  sec  2.52 GBytes  2.17 Gbits/sec
[  7]  50.00-60.00  sec  2.52 GBytes  2.17 Gbits/sec
[  9]  50.00-60.00  sec  2.52 GBytes  2.16 Gbits/sec
[ 11]  50.00-60.00  sec  2.52 GBytes  2.16 Gbits/sec
[SUM]  50.00-60.00  sec  10.1 GBytes  8.66 Gbits/sec
- - - - - - - - - - - - - - - - - - - - - - - - -
[ ID] Interval           Transfer     Bitrate         Retr
[  5]   0.00-60.00  sec  14.5 GBytes  2.08 Gbits/sec  716             sender
[  5]   0.00-60.00  sec  14.5 GBytes  2.08 Gbits/sec                  receiver
[  7]   0.00-60.00  sec  14.6 GBytes  2.09 Gbits/sec  717             sender
[  7]   0.00-60.00  sec  14.6 GBytes  2.09 Gbits/sec                  receiver
[  9]   0.00-60.00  sec  14.4 GBytes  2.06 Gbits/sec  902             sender
[  9]   0.00-60.00  sec  14.4 GBytes  2.06 Gbits/sec                  receiver
[ 11]   0.00-60.00  sec  14.6 GBytes  2.08 Gbits/sec  757             sender
[ 11]   0.00-60.00  sec  14.5 GBytes  2.08 Gbits/sec                  receiver
[SUM]   0.00-60.00  sec  58.0 GBytes  8.31 Gbits/sec  3092             sender
[SUM]   0.00-60.00  sec  58.0 GBytes  8.31 Gbits/sec                  receiver
Is it possible to get that last 1.5 Gbps of bandwidth when sending data to the ZimaBoard? To find out, I ran 2 separate terminal windows with iperf3 from 2 separate machines to see if I could fully saturate the 10 Gbps interface.
As you can see in the results below, if I add up the 2 average speeds, the result is about 9.3 Gbps which is very close to fully saturating 10 Gbps. Perhaps to get to 9.8-9.9 Gbps like when sending data from the ZimaBoard I would need a third data stream.
However, I think this test demonstrates that it is indeed possible to get very close to saturating 10 Gbps of incoming data if there are 2 different systems sending data at the same time. Otherwise, only about half of the 10 Gbps will be possible likely due to the weak CPU not being able to handle processing all of the incoming data packets.
[ ID] Interval           Transfer     Bitrate
[  5]   0.00-10.00  sec  5.32 GBytes  4.57 Gbits/sec
[  5]  10.00-20.00  sec  5.49 GBytes  4.72 Gbits/sec
[  5]  20.00-30.00  sec  5.53 GBytes  4.75 Gbits/sec
[  5]  30.00-40.00  sec  5.41 GBytes  4.64 Gbits/sec
[  5]  40.00-50.00  sec  5.27 GBytes  4.53 Gbits/sec
[  5]  50.00-60.00  sec  5.63 GBytes  4.83 Gbits/sec
- - - - - - - - - - - - - - - - - - - - - - - - -
[ ID] Interval           Transfer     Bitrate         Retr
[  5]   0.00-60.04  sec  32.7 GBytes  4.67 Gbits/sec  30806             sender
[  5]   0.00-60.00  sec  32.7 GBytes  4.67 Gbits/sec                  receiver

---

[ ID] Interval           Transfer     Bitrate
[  5]   0.00-10.00  sec  5.66 GBytes  4.86 Gbits/sec
[  5]  10.00-20.00  sec  5.44 GBytes  4.68 Gbits/sec
[  5]  20.00-30.00  sec  5.21 GBytes  4.48 Gbits/sec
[  5]  30.00-40.00  sec  5.35 GBytes  4.59 Gbits/sec
[  5]  40.00-50.00  sec  5.49 GBytes  4.72 Gbits/sec
[  5]  50.00-60.00  sec  5.30 GBytes  4.55 Gbits/sec
- - - - - - - - - - - - - - - - - - - - - - - - -
[ ID] Interval           Transfer     Bitrate         Retr
[  5]   0.00-60.00  sec  32.5 GBytes  4.65 Gbits/sec  30661             sender
[  5]   0.00-60.00  sec  32.4 GBytes  4.65 Gbits/sec                  receiver
OPNsense
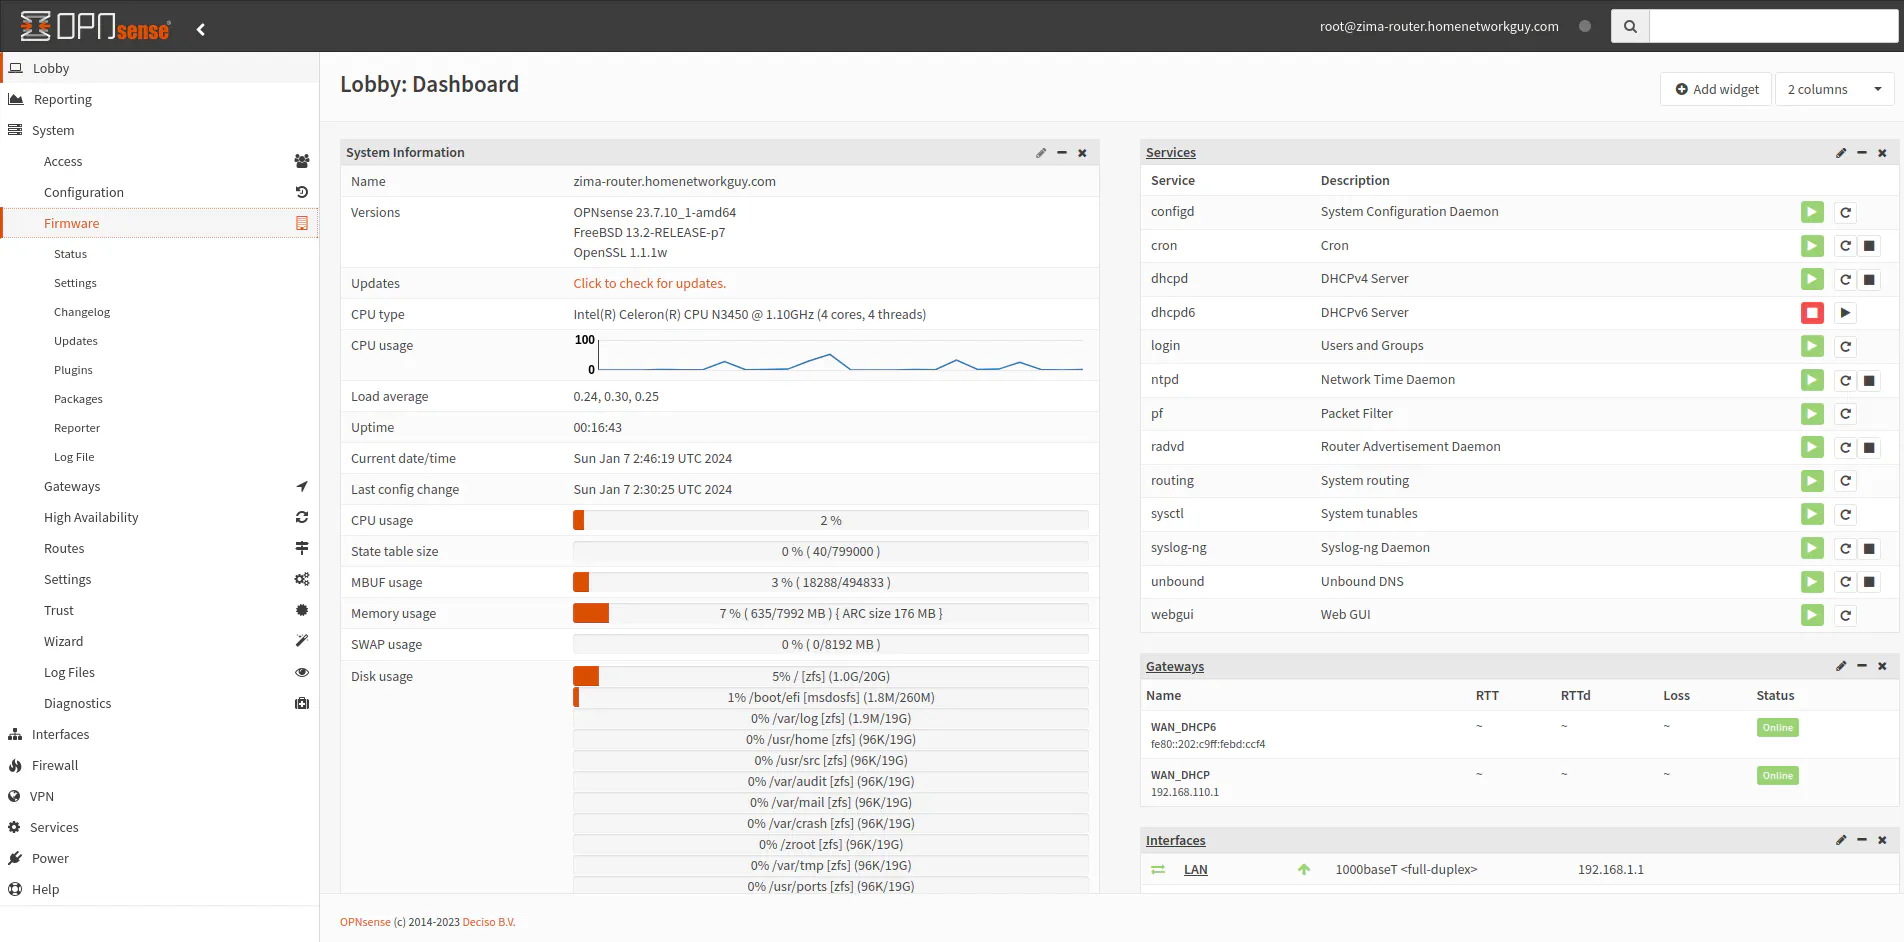
Since I wanted to try the ZimaBoard in a variety of different scenarios, I did not do as much performance testing with OPNsense as I normally do for my other mini-PCs.
Part of the reason is to constrain the length of the review, but another reason is that I feel this board should not be used for OPNsense if you wish to run IDS/IPS since this CPU is pretty weak for that purpose. Even with 1 Gbps interface, IDS/IPS will likely reduce throughput significantly.
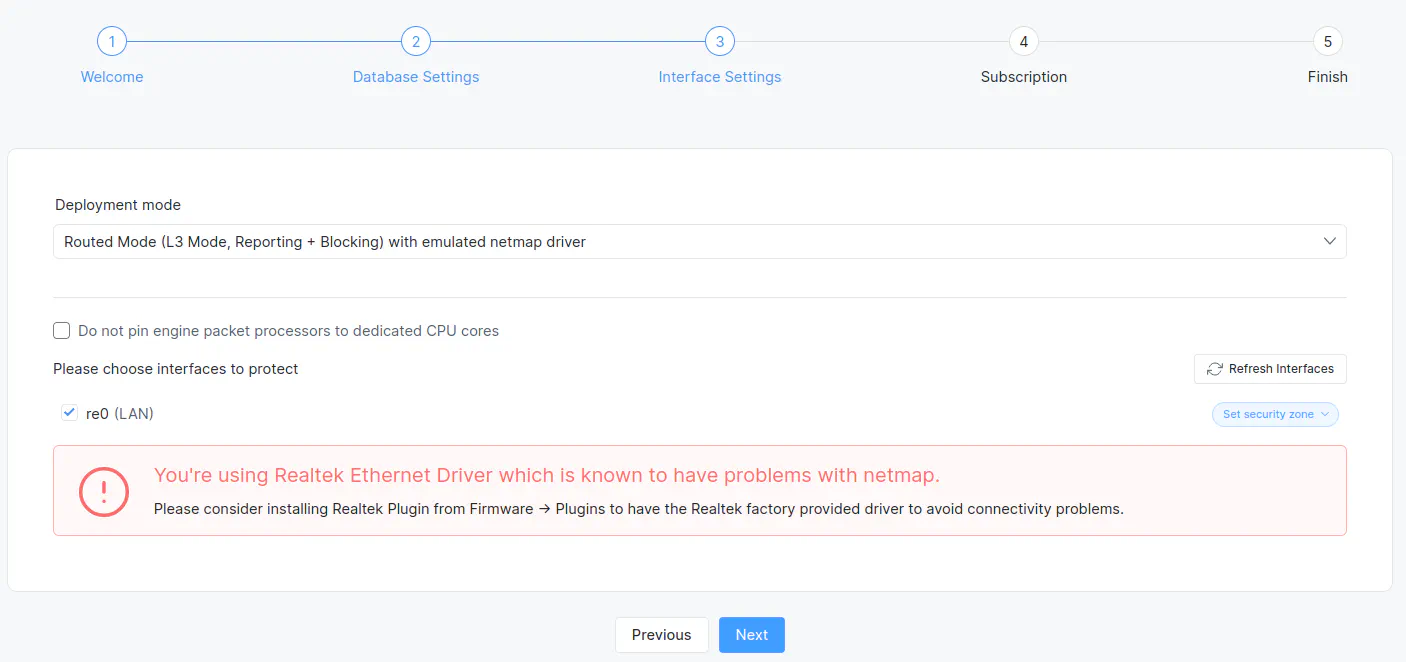
A 3rd reason is that the built-in network interfaces are using a Realtek chipset which is known for not having good driver support in FreeBSD. You can download the Realtek drivers, but it is generally recommended to avoid using Realtek hardware. However, I did not notice any issues with limited testing on my internal network with the base install of OPNsense.
If you wish to attempt IDS/IPS (Suricata or Zenarmor), you may run into issues unless you install the Realtek drivers because Zenarmor displays this warning message:
Below is an iperf3 test I ran from a device connected to the ZimaBoard to another device that was located on the same network as the WAN interface. This tests the performance of traversing the NAT firewall and NAT translation. The ZimaBoard handles full 1 Gbps throughput without any issues. This is a basic installation of OPNsense with no additional security and other heavy weight services running.
[ ID] Interval           Transfer     Bitrate
[  5]   0.00-10.00  sec  1.09 GBytes   937 Mbits/sec
[  5]  10.00-20.00  sec  1.10 GBytes   941 Mbits/sec
[  5]  20.00-30.00  sec  1.10 GBytes   941 Mbits/sec
[  5]  30.00-40.00  sec  1.10 GBytes   941 Mbits/sec
[  5]  40.00-50.00  sec  1.10 GBytes   941 Mbits/sec
[  5]  50.00-60.00  sec  1.10 GBytes   941 Mbits/sec
[  5]  60.00-60.05  sec  5.43 MBytes   941 Mbits/sec
- - - - - - - - - - - - - - - - - - - - - - - - -
[ ID] Interval           Transfer     Bitrate
[  5]   0.00-60.05  sec  6.58 GBytes   941 Mbits/sec                  receiver
For the fun of it, I tried Zenarmor to see how doing the same iperf3 test will perform. It does not appear that it is possible to saturate 1 Gbps on the ZimaBoard with Zenarmor enabled, which is what I suspected due to the weaker N3450 CPU.
[ ID] Interval           Transfer     Bitrate         Retr  Cwnd
[  5]   0.00-20.00  sec  1.00 GBytes   430 Mbits/sec    1   3.11 MBytes
[  5]  20.00-40.00  sec  1.77 GBytes   758 Mbits/sec  1135   2.30 MBytes
[  5]  40.00-60.00  sec  1.36 GBytes   582 Mbits/sec    0   3.01 MBytes
[  5]  60.00-80.00  sec  1.20 GBytes   517 Mbits/sec    0   3.01 MBytes
[  5]  80.00-100.00 sec  1.30 GBytes   558 Mbits/sec  195   2.39 MBytes
[  5] 100.00-120.00 sec  1.31 GBytes   563 Mbits/sec  128   2.54 MBytes
- - - - - - - - - - - - - - - - - - - - - - - - -
[ ID] Interval           Transfer     Bitrate         Retr
[  5]   0.00-120.00 sec  7.94 GBytes   568 Mbits/sec  1459             sender
[  5]   0.00-120.06 sec  7.94 GBytes   568 Mbits/sec                  receiver
Storage
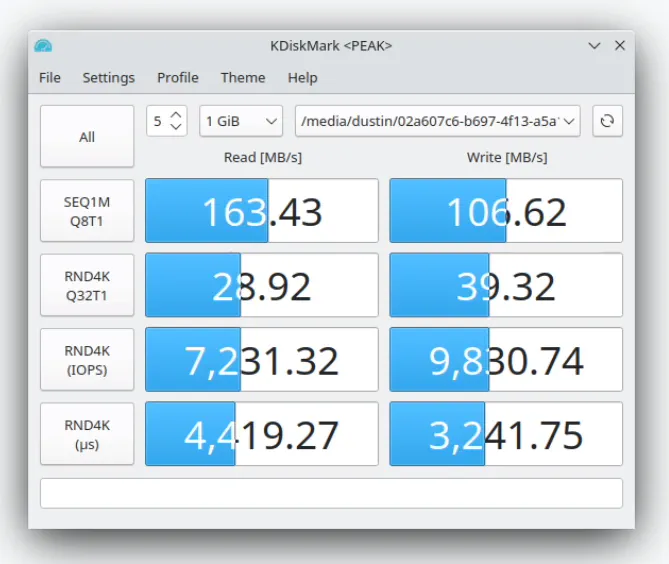
The ZimaBoard comes equipped with 32 GB of eMMC built-in storage as well as 2 SATA interfaces. I tested the performance of those storage options below.
Unfortunately, I did not have a PCIe card with an NVMe adapter and a spare NVMe drive to test the performance of NVMe drives. You must consider that the PCIe 2.0 x4 will yield much lower performance than PCIe 3.0 x4 or faster interfaces so you will get speeds slower than the rated speeds for gen 3 NVMe drives.
eMMC
I think it is nice when mini-PCs come equipped with some built-in storage since it can be helpful to run basic Operating Systems or when you would rather save the other storage interfaces for bulk storage such as when using the system for virtualization or a NAS.
32 GB is the minimum size I prefer to have for built-in storage. It is just enough storage for many Linux/FreeBSD based Operating Systems.
Some mini-PCs like the Gowin R86S have 128 GB of eMMC storage while other mini-PCs like Protectli only come equipped with 8 GB of storage (which is less useful for Operating Systems but you could save configuration backups or other data on that storage).
SATA
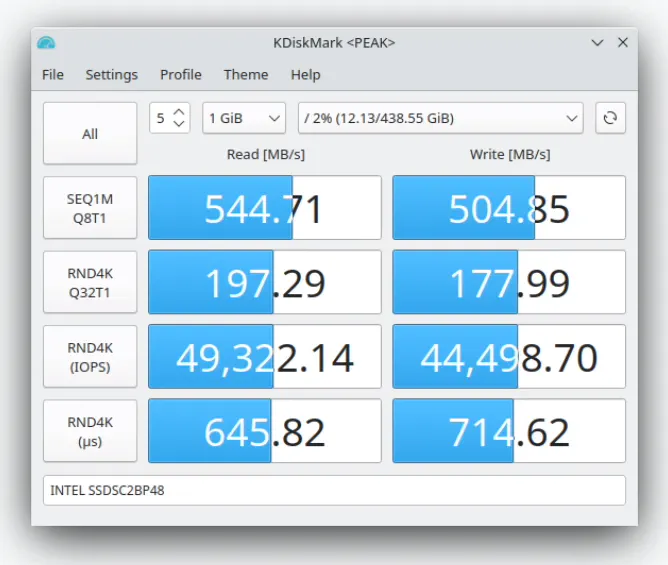
For the SATA SSD, I used an old Intel 730 Series SSD (affiliate link) that I bought in 2014 (yes, it is still alive and well nearly 10 years later!). When running the benchmark, full SATA speeds are realized with the ZimaBoard (these days it does not take a lot of hardware resources to saturate the SATA interface).
Intel states the drive is capable of 550 MB/s sustained read and 470 MB/s sustained write speeds. The benchmark confirms that the SSD is reaching its full potential.
TrueNAS
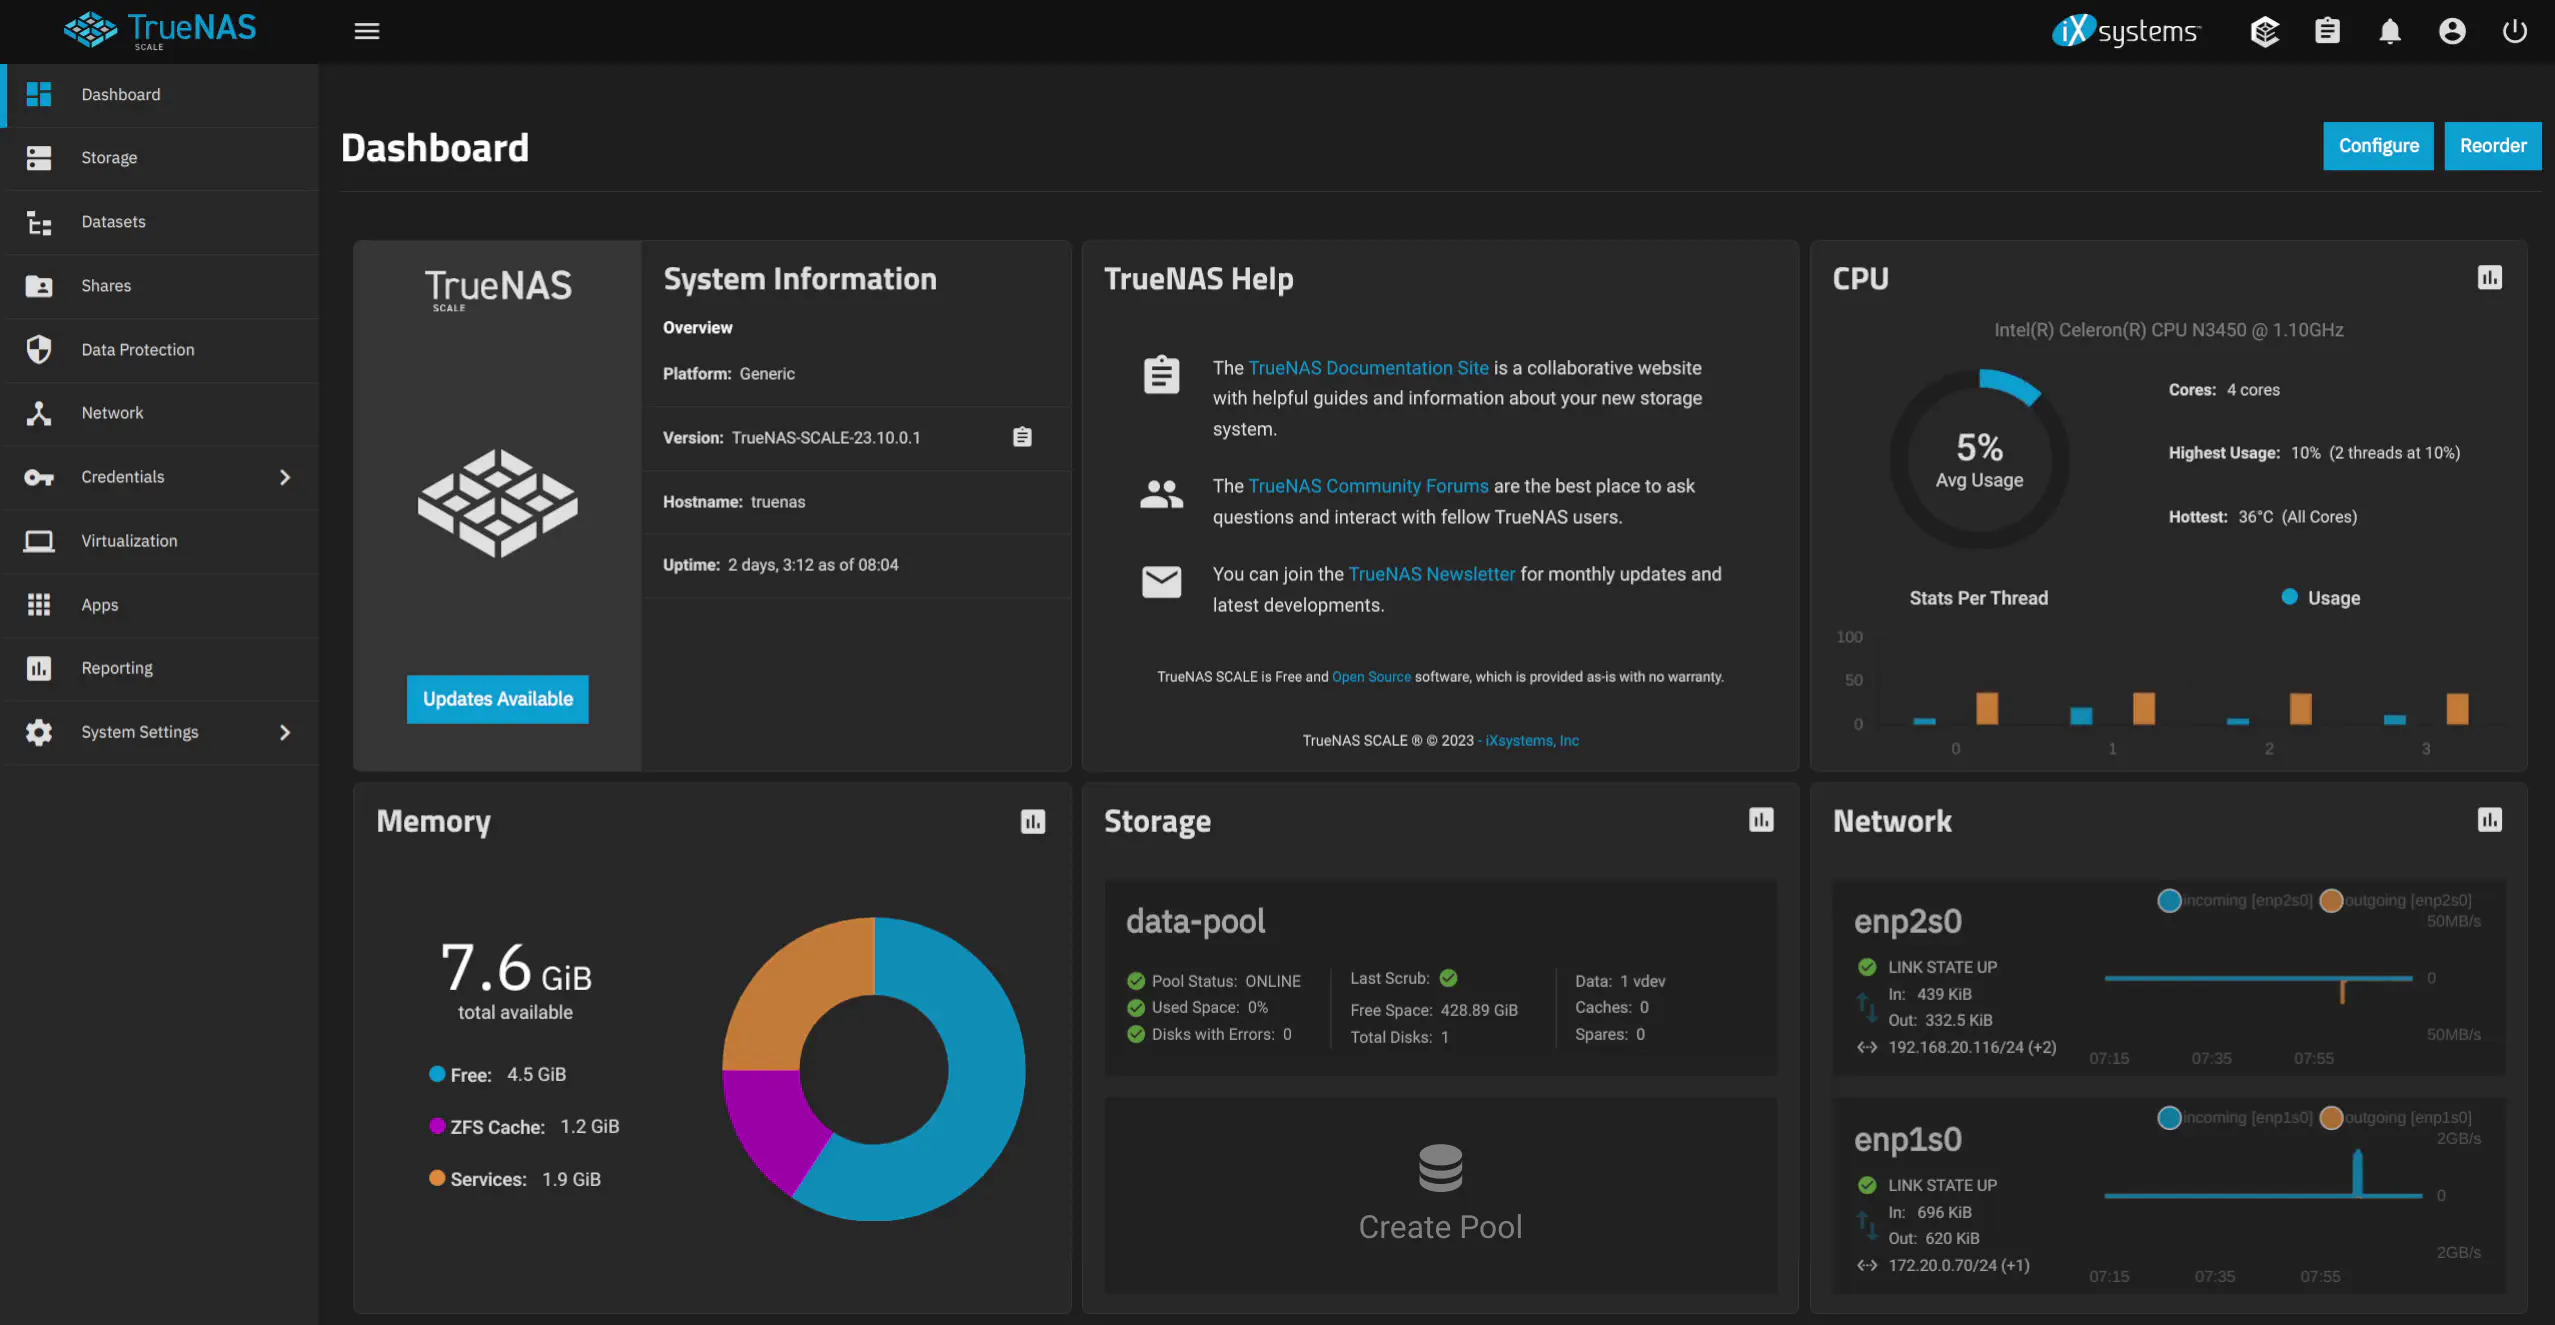
I decided to try out TrueNAS even though I only had one extra SSD to use as storage and I did not have the dual SATA adapter for the ZimaBoard. Using a single drive for storage in TrueNAS is less than ideal of course and should not really be done in the real world.
Using a single drive should at least yield the worst-case performance. If you use a mirror for your storage pool, I would expect performance to be better.
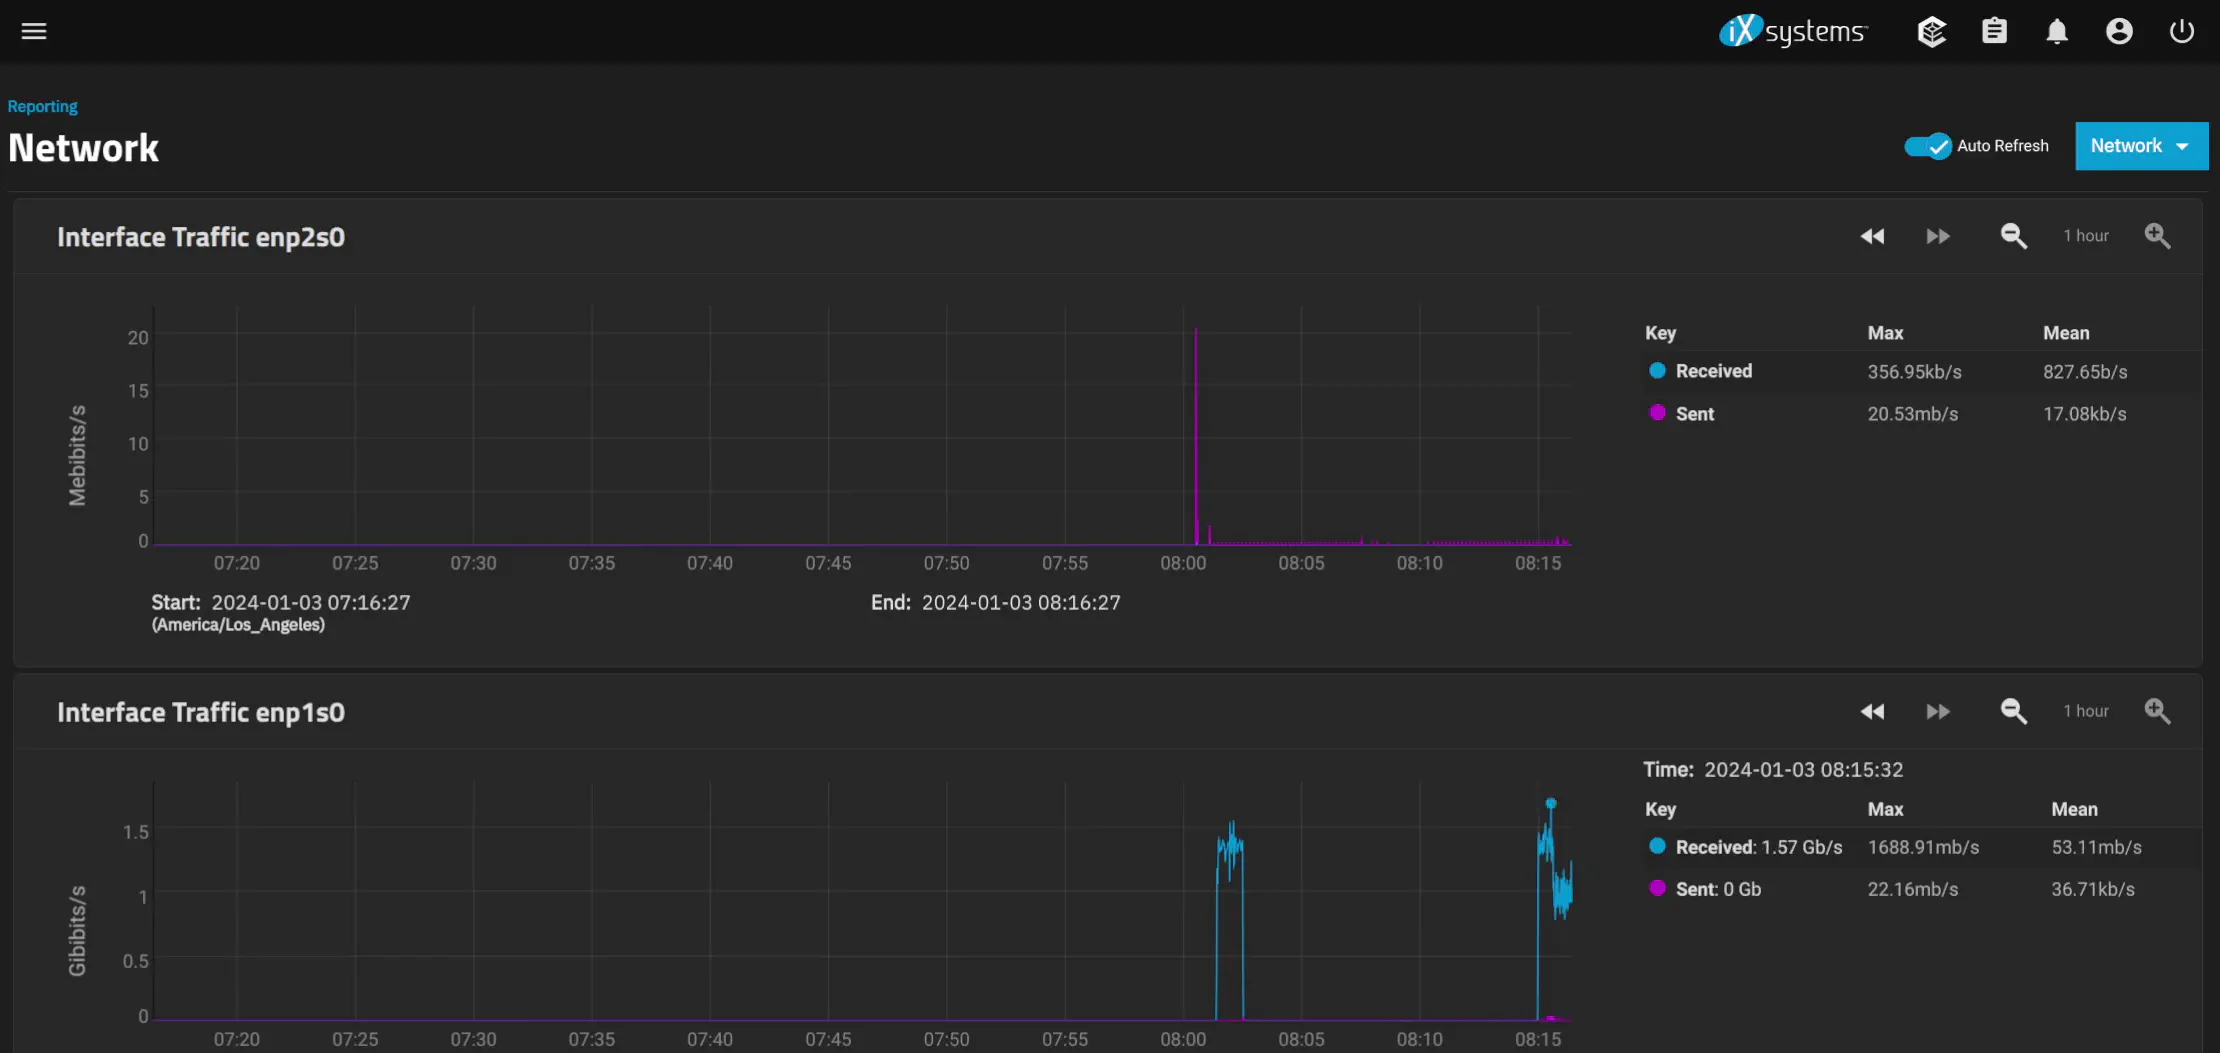
Looking at the report in TrueNAS (which is measured in bits and not bytes), the performance of transferring data was only about 200 MB/s even though the SSD is capable of ~500 MB/s write speed. I am curious if the slower speeds is due to CPU limitations with calculating checksums or perhaps due to only having 8 GB of RAM (since ZFS utilizes a lot of RAM but more so if you enable deduplication).
Or is there another reason perhaps since we are using a less than optimal storage pool? I would love to see how this performs in comparison with a mirrored storage pool.
Also note that even though the transfer rate was about 200 MB/s, there is a benefit of using at least a 2.5 Gbps network interface with the ZimaBoard since 200 MB/s is still greater than the 125 MB/s theoretical maximum for a 1 Gbps network interface.
Power Consumption
At idle with no additional devices attached to the SATA/PCIe interfaces, the ZimaBoard seemed to idle between 3.7-3.9 Watts according to my smart plug energy monitor. When installing OS and booting the OS, I would see between 5.5-6.6 Watts of power, which is not bad at all for an x86-based system. The TDP of the N3450 is 6 Watts so it seems to be running well in that range.
I had both 1 Gbps Ethernet interfaces plugged in using OPNsense when watching the power usage.
Once you start connecting USB peripherals, a PCIe card, and SATA drives to the ZimaBoard, power consumption will start to increase so the power levels I measured are the bare minimum levels you should expect to see with the ZimaBoard.
Temperature
According to the temperature sensors on the CPU when monitoring them in OPNsense, the idle temperature is around 35-36C. That is located in my server closet where it is typically a few degrees above room temperature.
When I put a heavier load by running Zenarmor on the LAN interface and doing an iperf3 test, the CPU utilization would jump between 50% and 100% and I would see the temperatures rise to 38-40C, which is not a huge jump. It is possible pegging the CPU at 100% for longer periods of time may possibly push the temps higher but it seemed to hold pretty steady.
Since I did not notice a huge spike in power consumption with doing heavier workloads on the device, the temperature did not increase drastically either as a result. That is one benefit for using a lower wattage CPU.
Wishlist
If IceWhale Tech should produce a newer ZimaBoard “2.0” model, below is my wishlist of some improvements that would be nice to see.
2.5 GbE Interfaces
Over the last 1-2 years (at the time of this writing), 2.5 GbE networking has become more common. I have noticed with my affiliate link purchases that 2.5 GbE hardware is being purchased more frequently.
The prices of such technology has decreased significantly and in fact, a vendor mentioned to me a while ago that 2.5 GbE interfaces were nearly the same price as 1 GbE interfaces especially during chip shortages caused by the Covid-19 pandemic.
In my opinion, it makes sense to include 2.5 GbE interfaces especially since even the current ZimaBoard model can handle that bandwidth without any issues since I was able to push 10 Gbps through the ZimaBoard (the incoming data transfers require multiple simultaneous transfers to max out the throughput).
Faster CPU
Because there are a few newer CPU generations that have been released since when the ZimaBoard was first designed and produced, there are likely newer options that are still cost effective but perform much better.
I know the goal of the ZimaBoard is not to be the fastest compact mini-PC, but a stronger CPU would make it more in line with other mini-PC options that are near the same price range (especially when considering models on Aliexpress). A faster CPU would allow more heavier weight applications to be run which would be helpful especially if you are using it as a virtualization server.
Increased RAM Options
At a minimum, it would be great to have a 16 GB of RAM option since the RAM is one thing you cannot upgrade on the board since it is soldered on. Having models with larger amounts of RAM would help especially if you wish to use the ZimaBoard as a lightweight virtualization server.
More app/services can be served on the ZimaBoard when more RAM is available even if the services themselves do not use a lot of CPU. In certain cases, it may be more important to have extra RAM than extra CPU performance (but having more cores is definitely helpful when running many apps/services on a virtualization server).
Dual SATA Cable
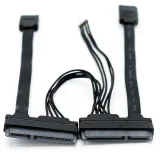
The ZimaBoard comes with a SATA cable which has a single power connection, but they have a SATA Y-cable accessory (affiliate link) that has 2 SATA cables with the single power connection. This accessory would be great to have included with the ZimaBoard because out of the box you will be able to have a mirrored SATA configuration for a lightweight NAS or mirrored OS boot drives.
If you did not realize the ZimaBoard only comes with the adapter for a single SATA disk, you may be disappointed to have to purchase and wait for the accessory to be shipped before being able to set up 2 disks on the ZimaBoard.
Included Mini DisplayPort Cable
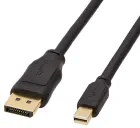
There are no display cables included but since the ZimaBoard has a mini DisplayPort interface, it would be nice to have an adapter from a mini to a full-sized DisplayPort (affiliate link) or a mini to full-sized HDMI interface included with the ZimaBoard.
I am not sure how many users have a mini DisplayPort adapter lying around. All of my devices are HDMI so I had to buy a mini DisplayPort to HDMI adapter before I could even install a different operating system on the ZimaBoard.
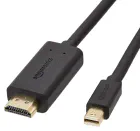
I think it would be frustrating for excited users to not be able to do anything with the ZimaBoard except for the default CasaOS experience when they first open the ZimaBoard if they did not realize they do not have the proper display cable available.
Including additional cables would reduce the profit margin on each device sold, but I think it would increase the value of the product with those nice added touches that make it more convenient to use the product immediately after unboxing.
Where to Purchase?
You may purchase the ZimaBoard 832 on their official store page or on Amazon (affiliate link) if you wish to use my affiliate link to support my efforts.
