How to Flash the Coreboot Firmware on the Protectli VP2420

Table of Contents
When the Protectli VP2420 was initially released, the coreboot firmware for the VP2420 was not quite ready so it was shipped with the default AMI firmware. Since coreboot was released for the VP2420, it now available for everyone to flash their firmware to gain the benefits of coreboot.
This guide is roughly based upon the official documentation on flashing the firmware for any Protectli device, but I am focusing the instructions on just the VP2420. The benefit of focusing on a specific model is that instructions that apply to other devices can be excluded. Since I am evaluating the VP2420 and had to upgrade to coreboot after receiving the device, I wanted to document the process in case it may also be helpful for those of you who purchased the VP2420.
Before You Get Started
For the upgrade process, you will need to plug in a display, keyboard, and mouse since you cannot do the firmware upgrade via the USB serial console. The reason for this is that you need to boot up a graphical Operating System such as Ubuntu, which will not work properly with the serial console.
If you have a KVM, that may be a convenient option so you do not have to unplug a display, etc. from your existing system in order to plug them into the Protectli.
Alternatively, if you have a KVM over IP solution such as the PiKVM or a TinyPilot (which I have reviewed, albeit an older version), you can access the Protectli’s display over the network as though you are sitting in front of the screen, which is very cool. IP over KVM allows you to have your device located anywhere on your network so you do not have to clutter your desk, for instance.
One of advantage of using either a traditional KVM or KVM over IP is that you typically only need to plug one USB cable into the device you want to control, which frees up one USB port for the USB drive. The Protectli only has 2 USB ports which is a problem if you are trying to plug a USB keyboard, a USB mouse, and a USB drive into the Protectli. You would have to use a USB hub if you are not using a KVM.
Prepare an Ubuntu USB Image
As suggested in the official documentation, I am going to use a live image of Ubuntu since it is the most convenient way to upgrade the firmware because you do not need to do a full OS installation. I find this especially convenient since I already had OPNsense installed on the hard drive and did not want to destroy that installation.
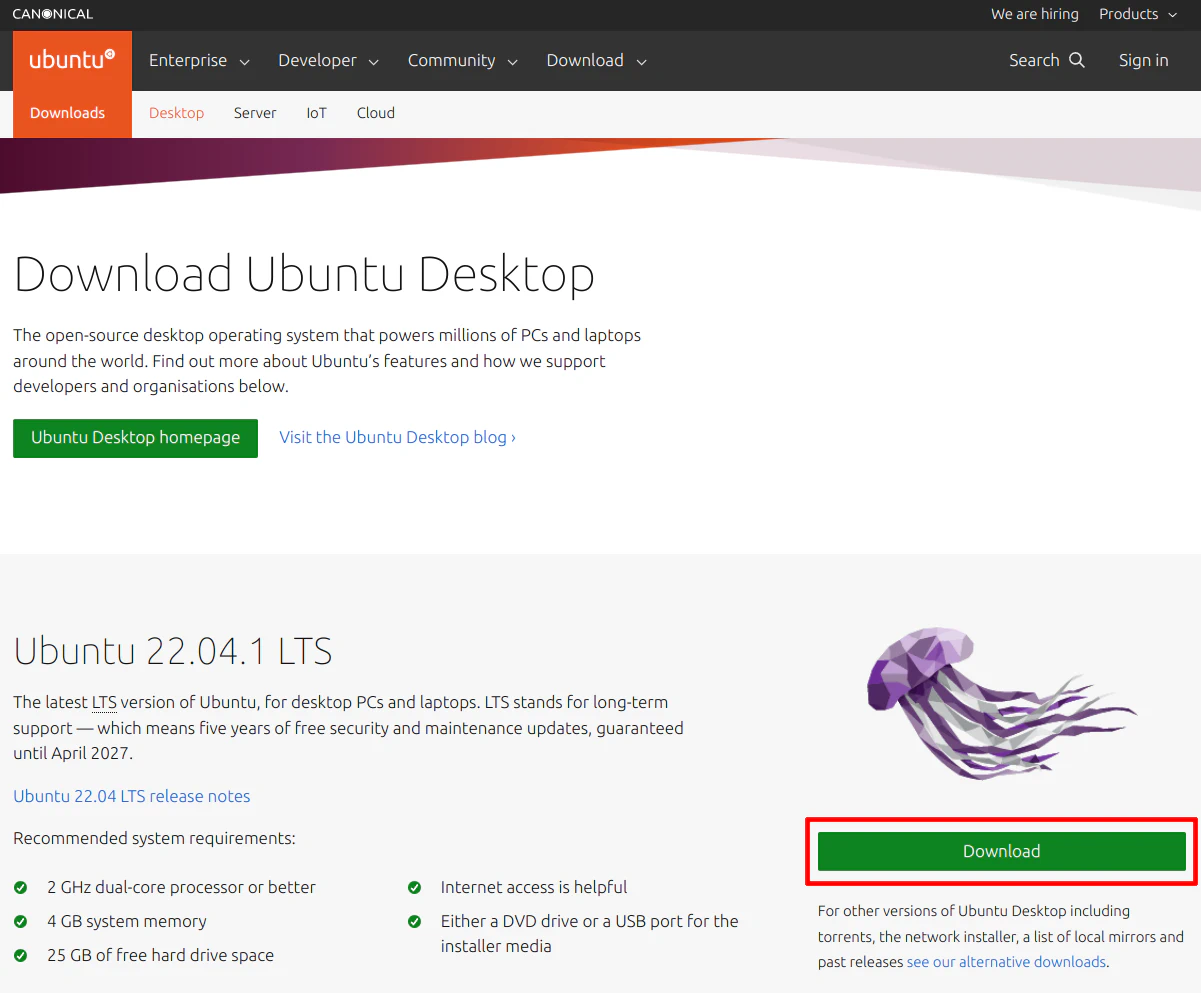
The first step is to prepare a USB image of Ubuntu by downloading Ubuntu from their website. Click “Download” on the latest Ubuntu version. An ISO file will be downloaded.
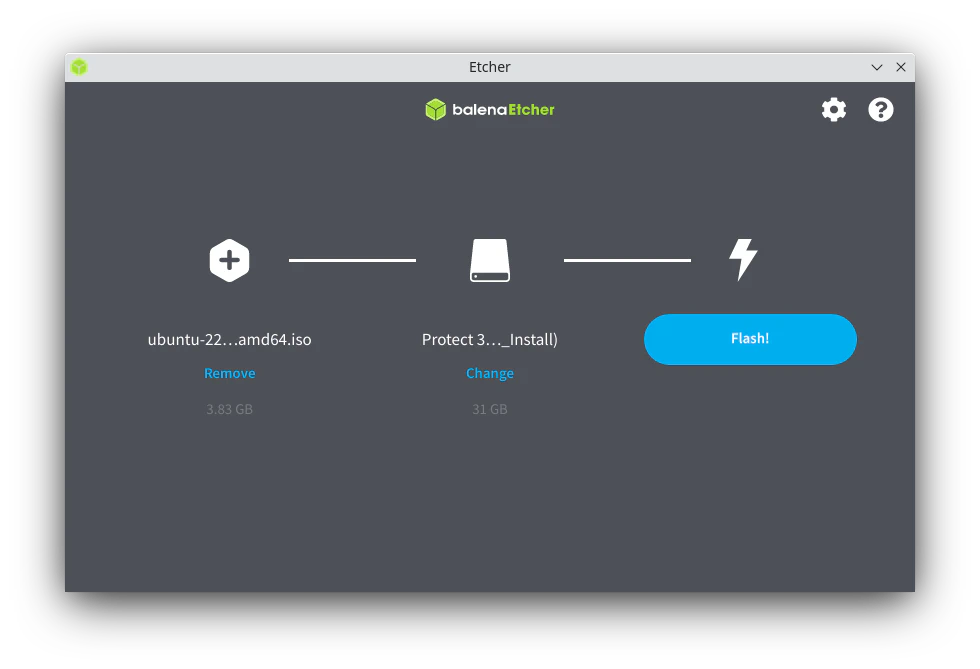
Using Etcher, you can image the Ubuntu ISO image to a USB drive. Simply click “Flash from file” and select the ISO file you just downloaded. Then choose your USB drive where you want to install the Ubuntu image. Finally, click “Flash!” to complete the process.
Boot Up Ubuntu on the VP2420
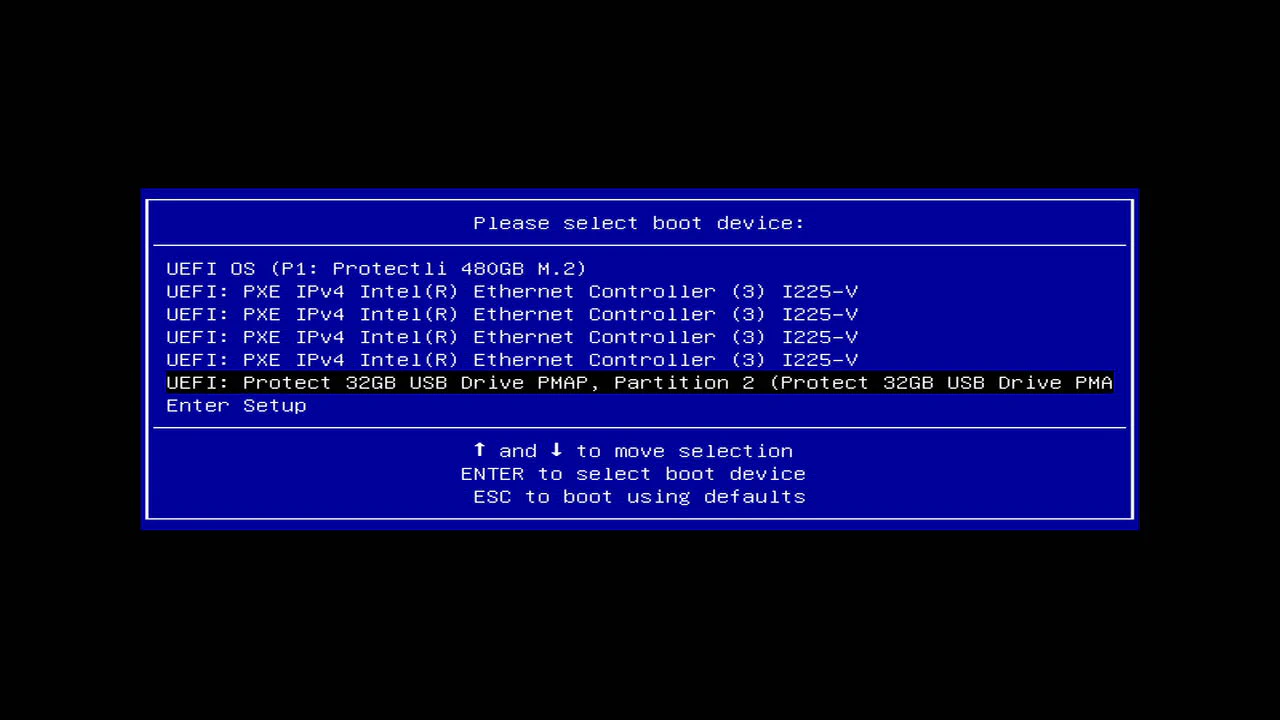
Plug in the USB drive containing the Ubuntu image into the VP2420 before booting it up. You will notice the Protectli logo when you first turn it on. Press “F11” to select the boot device.

Select the USB drive from the boot menu. It may be listed near the bottom like it was for me. The name of the drive will depend on the brand you are using. Since I am using Protectli branded USB drives, mine is called “Protect 32GB USB Drive”.
Note
The instructions on Protectli’s site says you need to boot Ubuntu in legacy BIOS mode instead of UEFI mode except for the VP2410 since it only has UEFI mode.
When I flashed my BIOS firmware, I assumed that this also applied to the VP2420 because I could not find any options to set it to legacy BIOS mode when looking through the AMI BIOS settings. Even the boot menu below only has “UEFI” options when selecting the boot device.
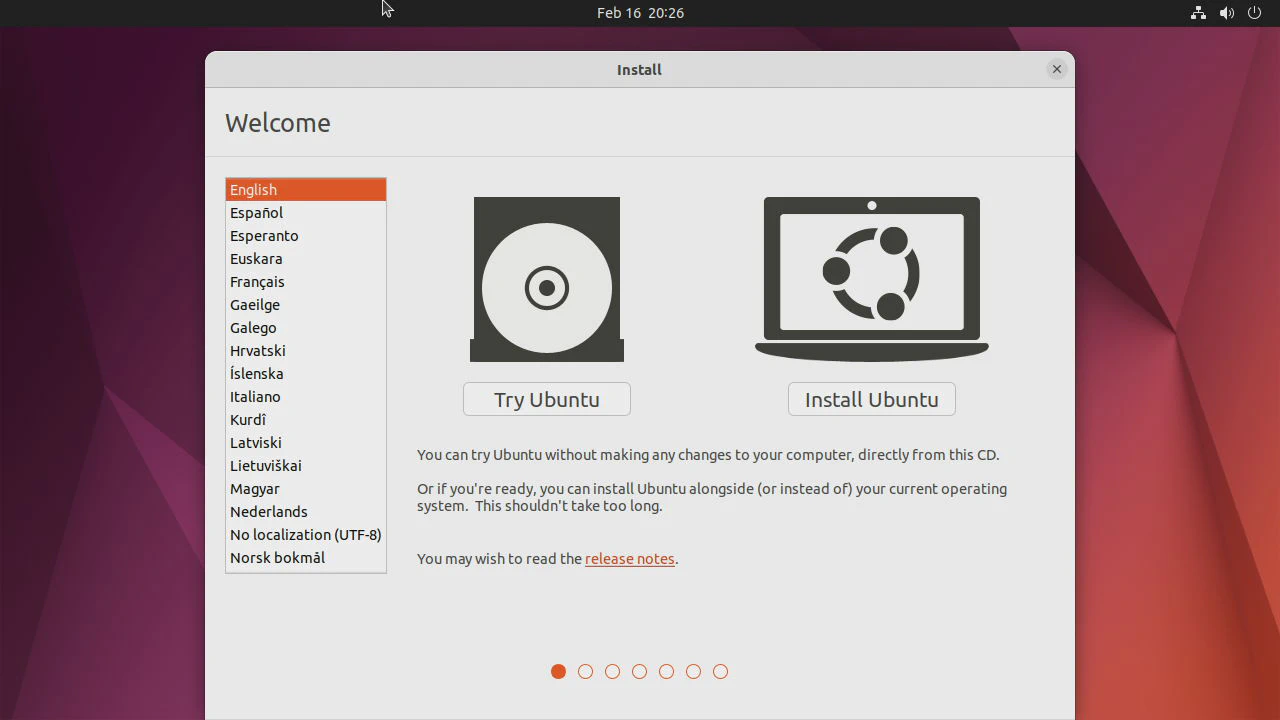
Press “Enter” on the first option that says “Try or Install Ubuntu”.
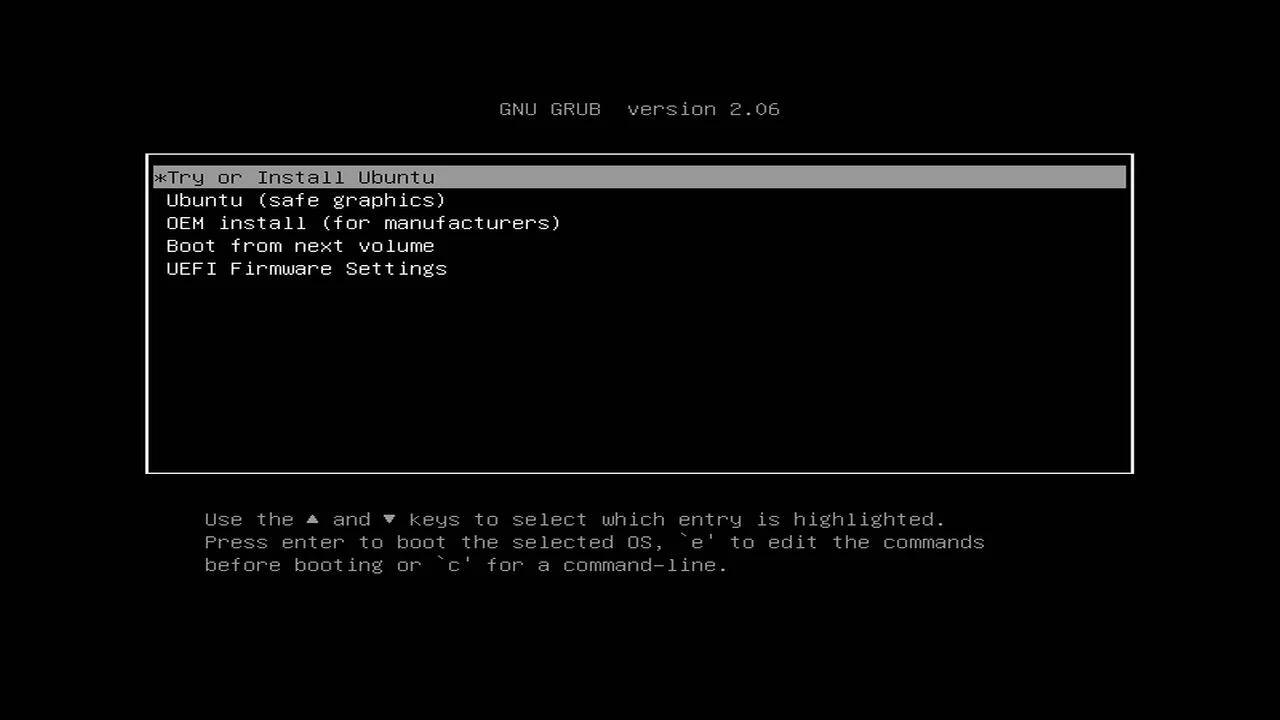
Click the “Try Ubuntu” button so that it does not destroy any Operating System that is installed on your main drive. This is convenient if you have an existing installation that you do not want to destroy. You can upgrade the firmware without needing to reinstall your Operating System. I tested this with an existing OPNsense installation and it still booted after flashing my BIOS without issue.
Flash Coreboot
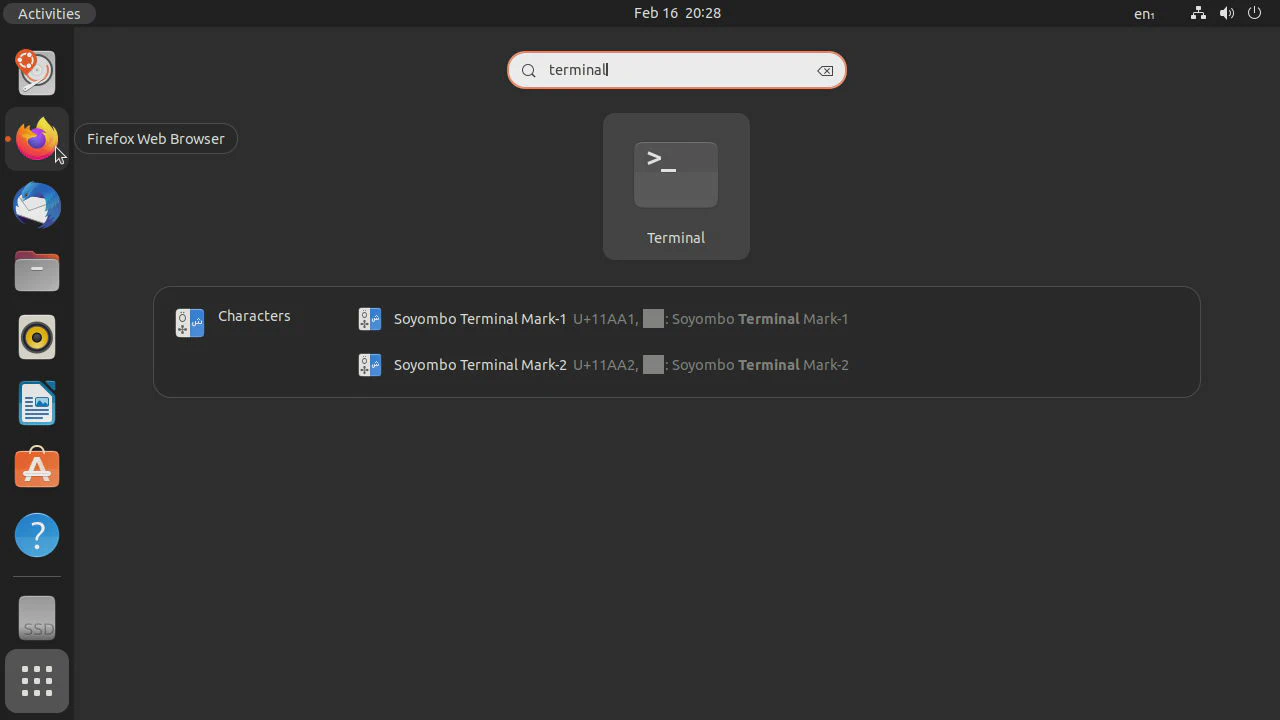
Once Ubuntu has finished loading, click on the Applications menu (bottom left corner) and search for “Terminal” to open a terminal window. I will be using the command line by using the instructions on Protectli’s GitHub page for their firmware upgrade tool called Flashli.
You will need to go to that GitHub page and replace the commands below with the latest version because the version numbers of the Flashli tool will change over time as they update the tool.
Once the terminal is open, enter the following commands. The first command is long and is on 2 separate lines below so be careful when you copy/paste the commands:
wget https://github.com/protectli-root/protectli-firmware-updater/releases/download/v1.1.32/flashli.tar.gz
tar -zxvf flashli.tar.gz
cd protectli-firmware-updater-1.1.32/
sudo ./flashbios
In the screenshot below you can see the first command being executed.

The next screenshot shows the last command that you need to run to start the firmware upgrade process.

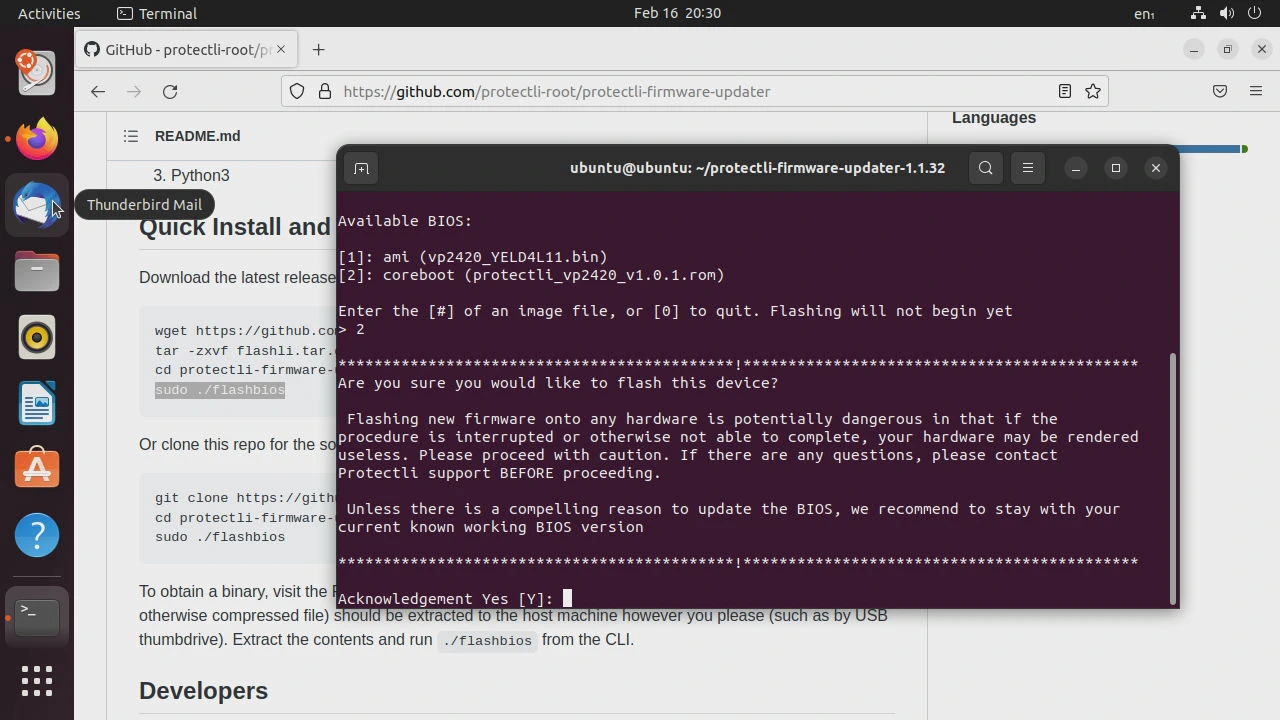
You will be presented with a menu with two options. The first option is likely what you already have but it allows you to go from coreboot back to the AMI BIOS, but you will want the second option to switch from the AMI BIOS to the coreboot BIOS. Enter the number 2. Press “Enter”.

Press “Y” to acknowledge the potential dangers of updating firmware. There is always the potential for bricking a device. It sounds scary but the main thing is to make sure you do not lose power to the device during the upgrade. Plugging the device into a UPS is recommended.
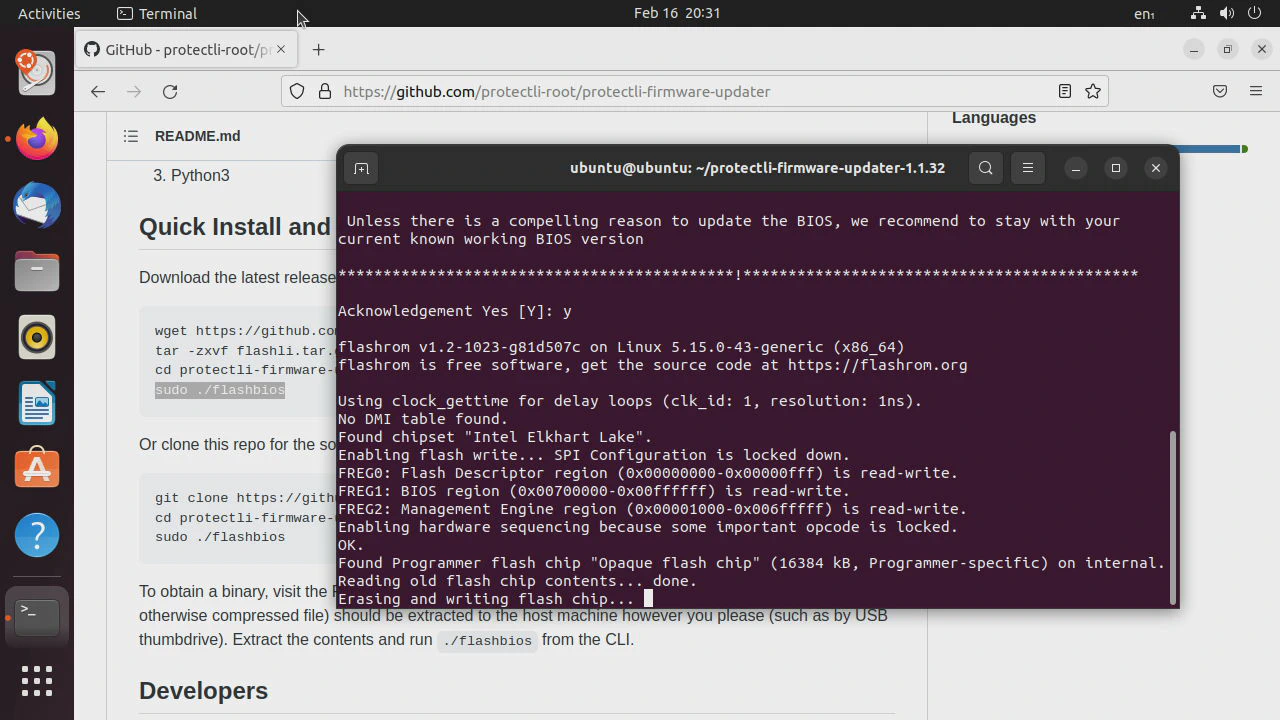
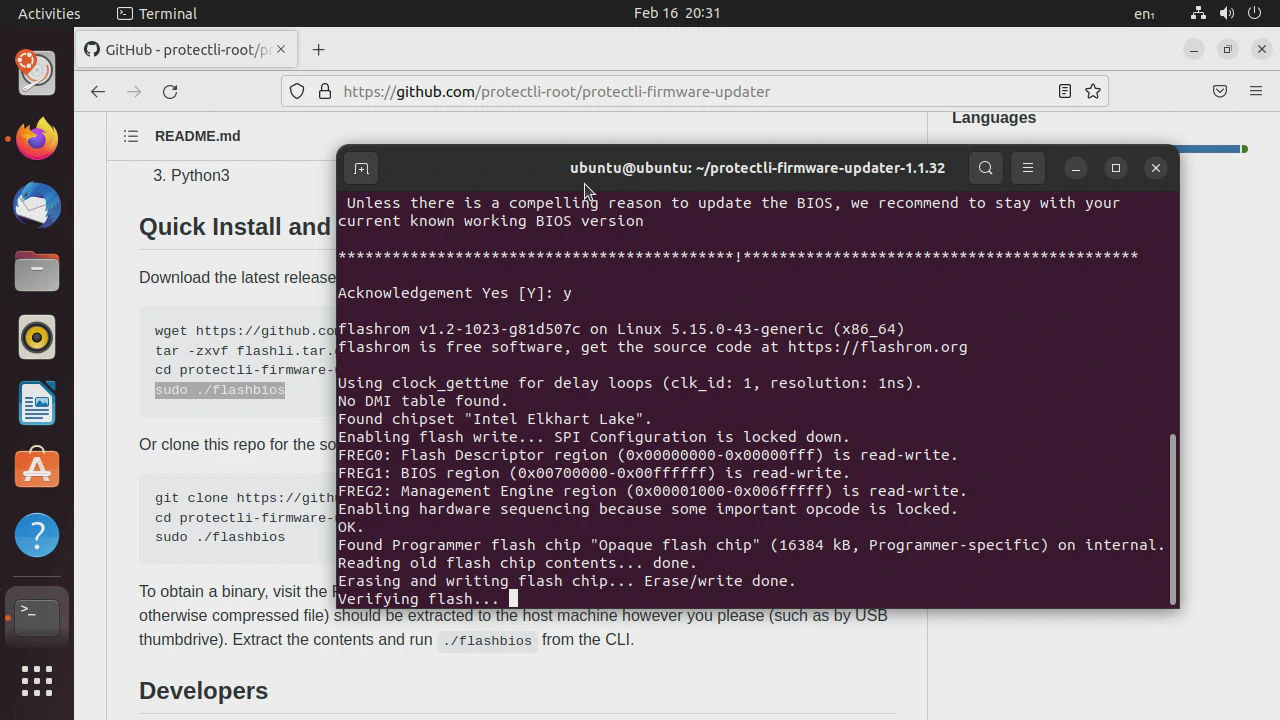
The contents of the flash chip is being read.

Now the flash chip is being updated.
The process verifies a successful flash update.
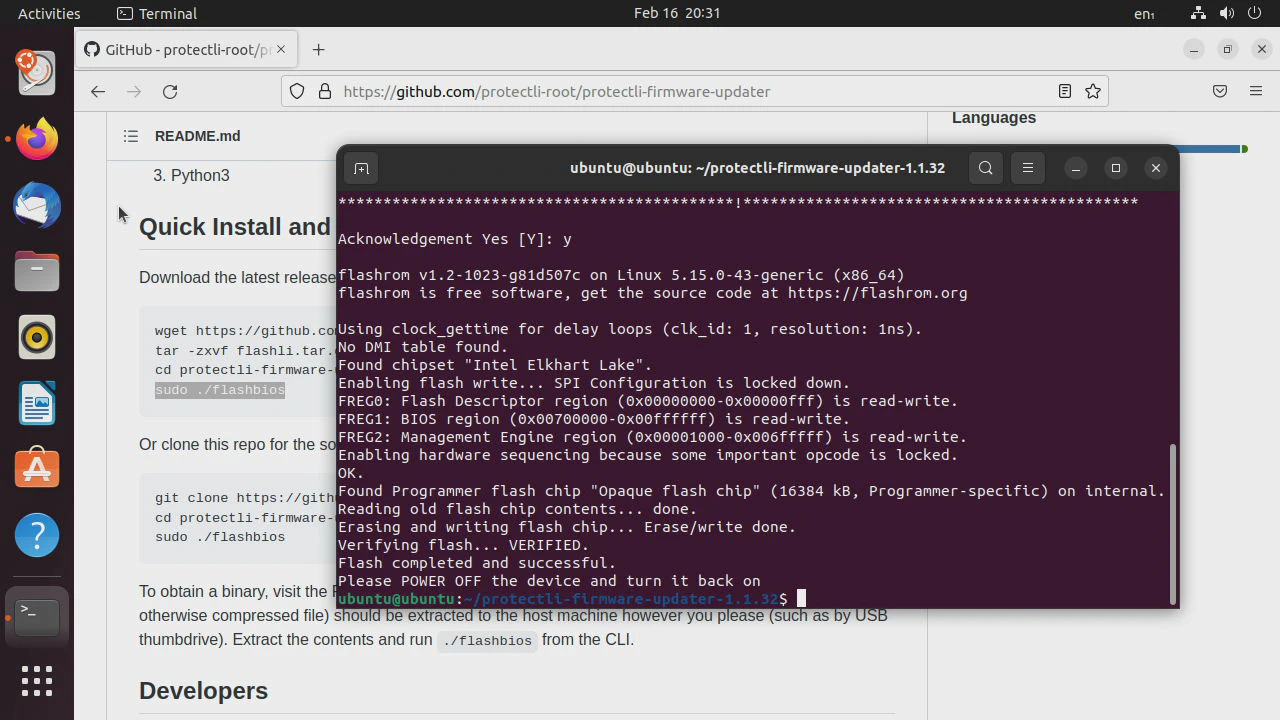
If all goes well, you will be presented with a message stating that everything was successful.
Warning
When reading Protectli’s instructions, they state that you should not power off the device if the firmware update was unsuccessful and that you should try again. I do not know happens if you still cannot get the coreboot flash to work since I am not able to easily test the failure scenario. Perhaps you need to select the AMI BIOS and try to get back to the original BIOS before turning off your device so your device is not bricked. Hopefully, you still have a working AMI BIOS before shutting down your device. At that point, I would contact Protectli for support.
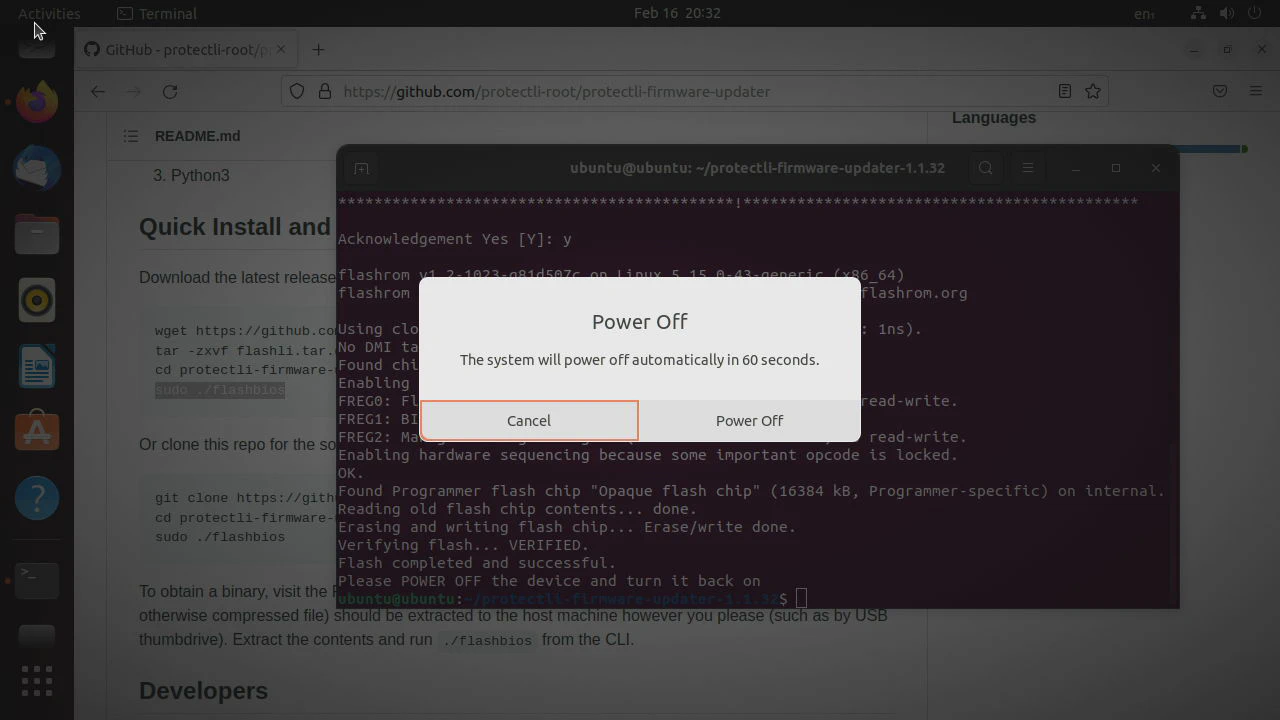
Finally, you can click the “Power off” button in Ubuntu and shut down your system.
One thing you should note is when you first boot up your system again, it seemed like to me that there was a little bit of a longer than normal boot up time, which is likely a normal process. I wanted to mention that so you do not panic that nothing seems to be happening at first.
I hope you found these instructions helpful to have your firmware switched to coreboot to take advantage of all the great security features, which in my opinion is very important when you are using your Protectli device on the edge of your network as your primary router/firewall to maximize security.