How to Implement a Captive Portal in OPNsense

Photo by leolintang from iStock
Table of Contents
Captive portals are generally used to allow users temporary access to a network. The most common use of a captive portal is public WiFi hotspots of restaurants, hotels, and rental properties. However, you may make use of a captive portal on your home network for a guest network, for instance.
OPNsense has built-in functionality for captive portals, which is convenient especially if do not have or do not want to set up captive portals via network controller software hosted on your network (or the cloud) such as the UniFi Controller.
Choose an Authentication Method
When configuring the captive portal service, you have the option to use a number of authentication servers so you will need to pick one or more methods that will work the best for your needs.
I will cover how to set up a couple different methods in this guide. In the future, I may update this guide to include additional methods.
Vouchers
Using vouchers is commonly used by restaurants, hotels, and other similar organizations that want users to have temporary, controlled access to their guest WiFi networks. Vouchers can be generated on the fly via the OPNsense web interface.
In a home network environment, vouchers may make less sense because you would have to manually generate codes to hand out to guests using your network. However, you may want to use vouchers if you operate an Airbnb, for example, for guests who are staying.
Local Database
A local database is the database used by OPNsense for local user accounts on the OPNsense system. Whenever you create a new user in the local database, they may be used as a login to the captive portal.
For home networks with a small number of users, this option may be the easiest to implement since you do not need to set up a more complex authentication server on OPNsense via the FreeRadius plugin or on a server running OpenLDAP.
Configure Authentication Server
The first thing you will need to do is configure the authentication server you will be using to authenticate users. I described the methods in the previous section so you will just need to only follow the steps of your preferred authentication server.
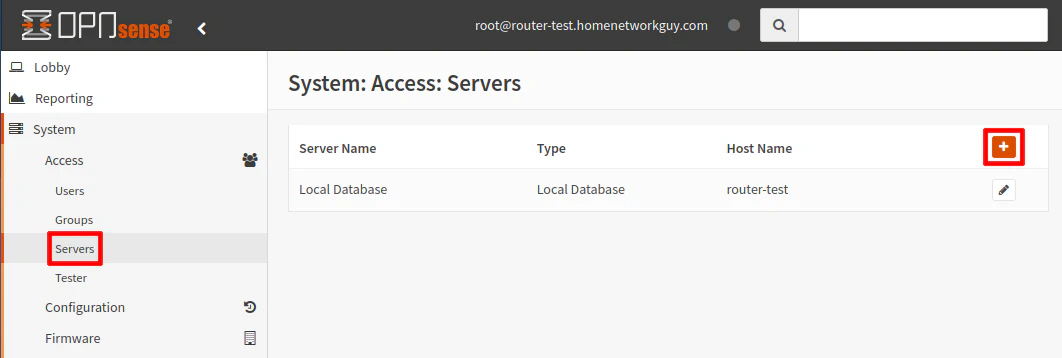
All of the authentications used by the captive portal will be configured on the “System > Access > Servers” page.
Configure Vouchers
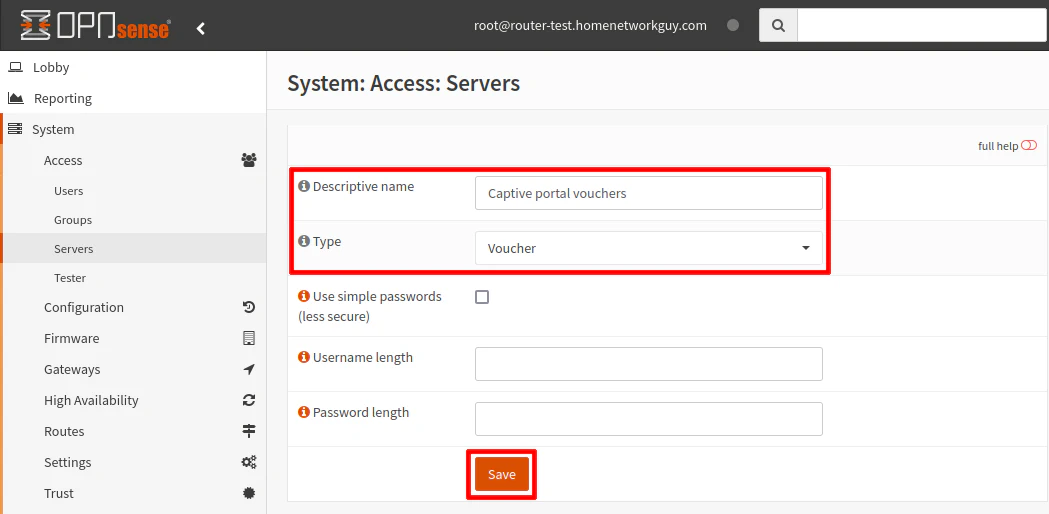
After clicking on the “+” button, select the “Type” of Voucher so that the options are displayed for vouchers. Enter a “Descriptive name” such as Captive portal vouchers.
You may change the options for simple passwords for a home use if you feel comfortable with using less complex passwords. The same goes with the remaining options. You can decide how long the usernames/passwords are for the vouchers. Changing these options will make it easier for guests to enter at the expense of having less secure (temporary) credentials for the vouchers.
Click the “Save” button to create the voucher server.
Configure Local Database
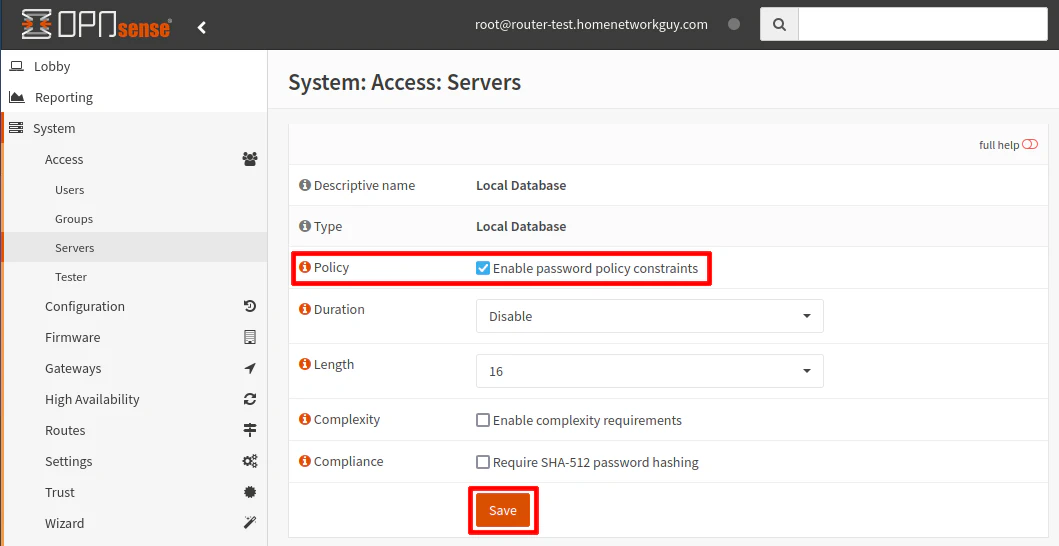
The local database will already be created since you will have at a minimum the root administrator user that was created when installing OPNsense so you do not have to add a local database.
However, if you click on the edit button (pencil icon), you can set the password policy for local users:
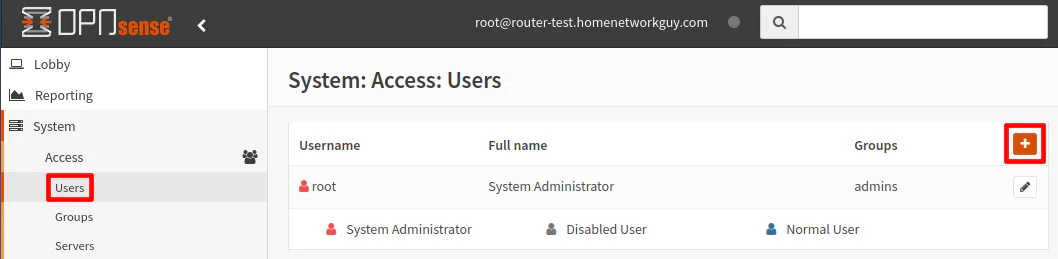
If you wish to use local user accounts, you will need to create the users you want to login via the captive portal (rather than generating vouchers).
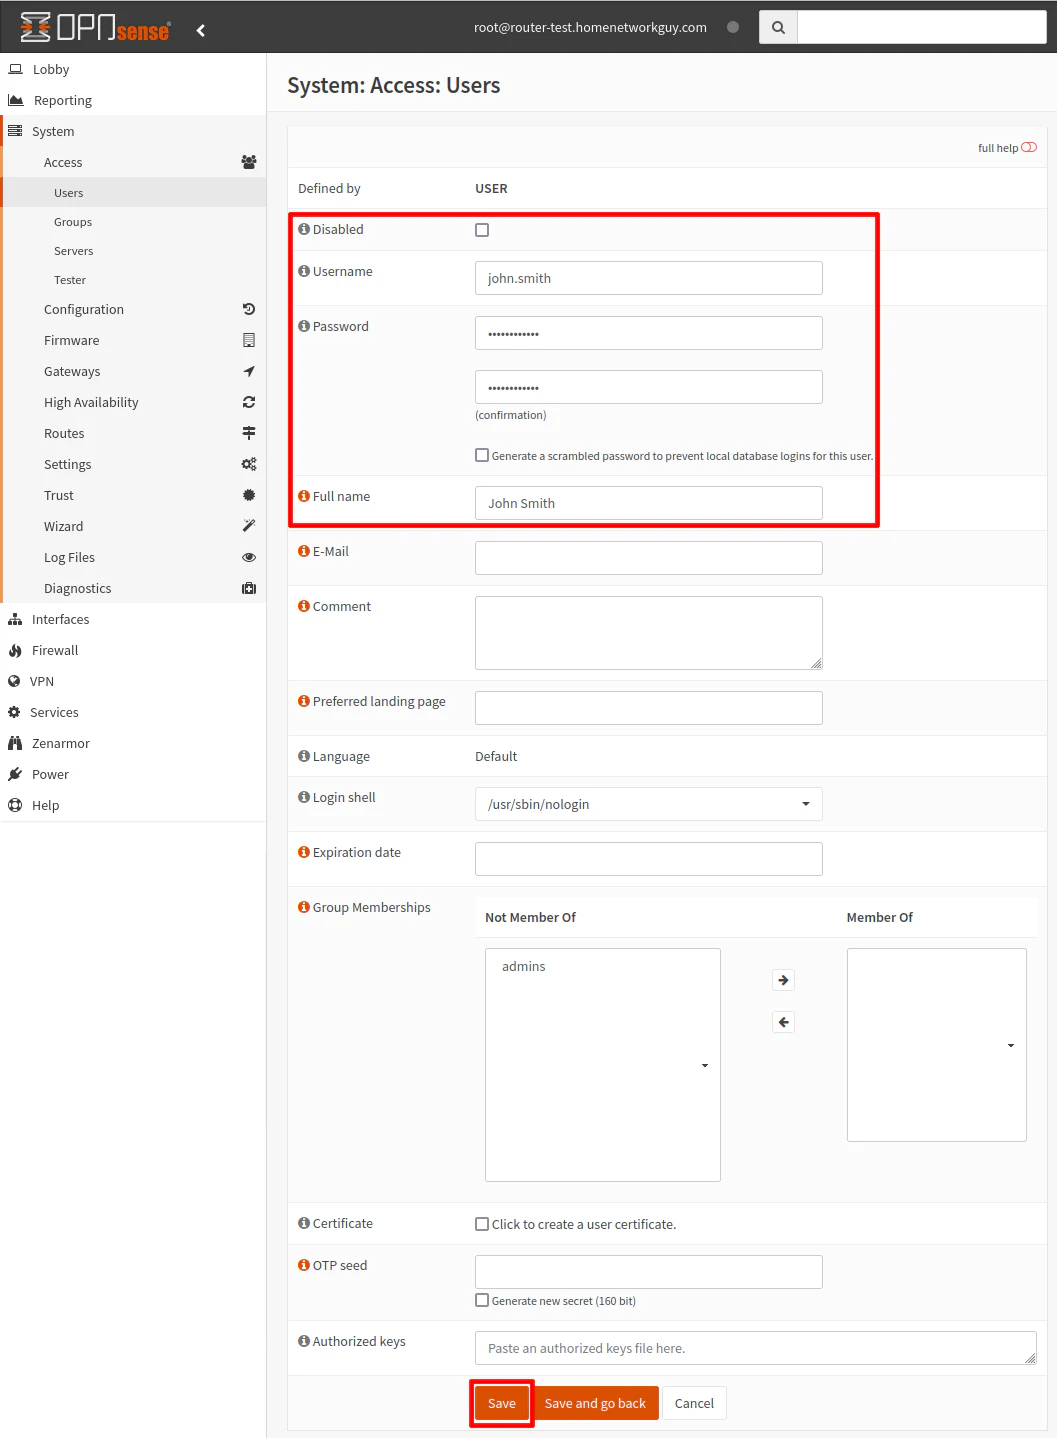
On the “System > Access > Users” page, click on the “+” button to add a new user account.
Enter the “Username”, “Password”, and other information such as the “Full name”. If you wish you keep adding users, you can click the “Save” button. If you click the “Save and go back” button, you will go back to the page listing the local database users.
Edit the Default Page Template for the Captive Portal (Optional)
If you like, you can add custom branding or wording to your captive portal page. This step is completely optional but you may want to edit the template to provide instructions to your guests since the default template is a very basic login page.
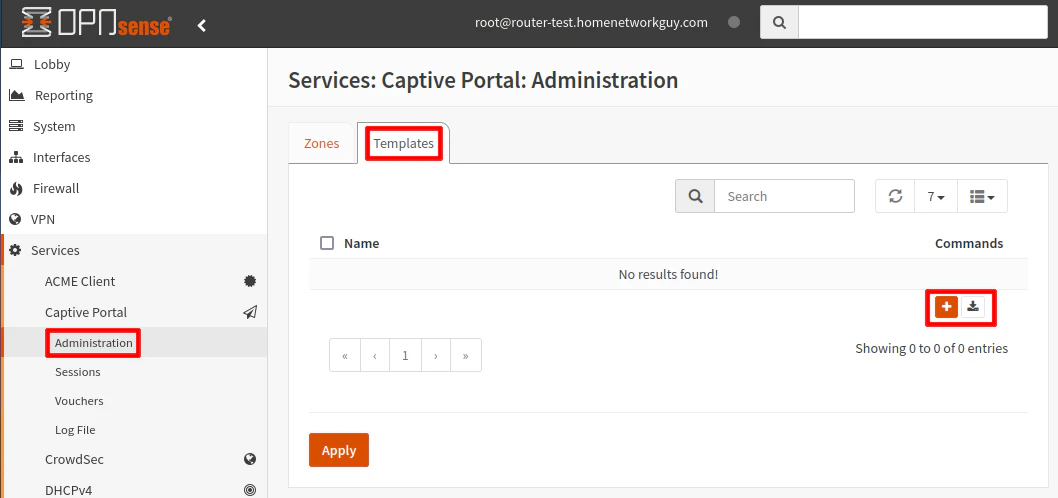
On the “Services > Captive Portal > Administration” page, click on the “Templates” tab. You may download the template using the download icon next to the “+” button.
When you download and unzip the file, you will see a set of files to produce the webpage template. If you are familiar with editing HTML, you can open the index.html file to add in information as shown below. I hid most of the text with ellipses to show some example text you may add.
<!doctype html>
<html>
    ...
    <body>
        ...
        <main class="page-content col-sm-6 col-sm-push-3">
          <h1>Welcome to our home network!</h1>
          <p>Please enter your voucher username/password to gain access to the Internet.</p>
          ...
        </main>
        ...
    </body>
</html>
Once you are finished, you will need to zip all of the files and then upload it on the “Templates” page by clicking on the “+” button. A dialog box will be presented where you can enter a description for the template and select the file to upload.

Configure the Captive Portal Zone
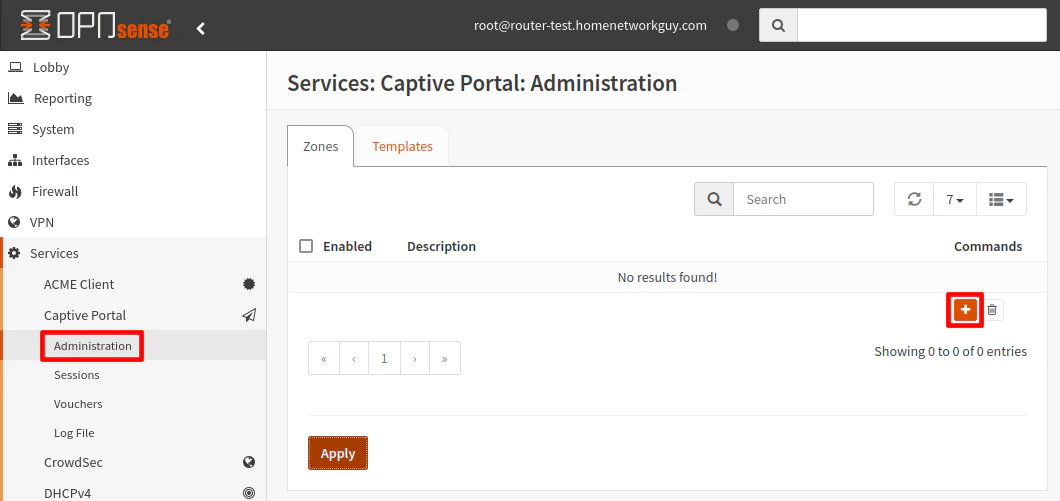
The captive portal can be configured by visiting the “Services > Captive Portal > Administration” page. By default you will be on the “Zones” tab. Click on the “+” button to create a new captive portal zone.
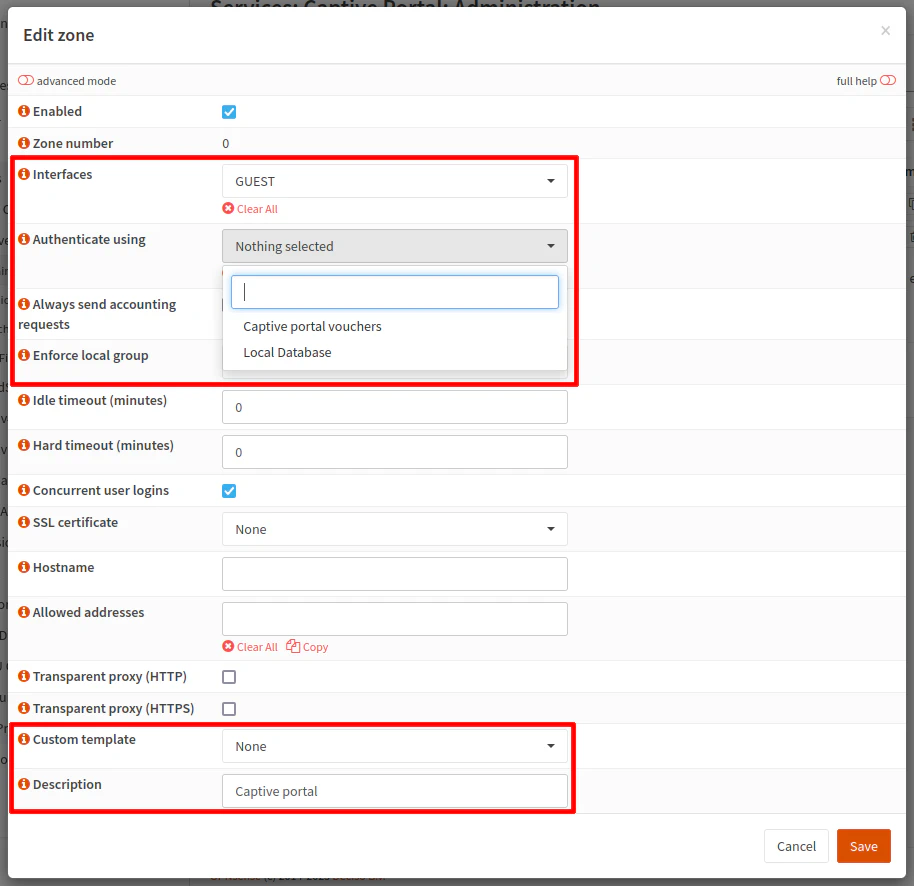
You will need to select the “Interfaces” where you wish to the captive portal to be active. In my example, I use the GUEST VLAN since it is intended to be used by guests on the network. You can choose more than one interface if you desire.
Next choose the “Authenticate using” option for the authentication method(s) you wish to use. Note that you can actually use more than one method such as the local database and vouchers. It is nice that you can use multiple authentication servers since that means you could use a local database for your users who are on the network frequently and vouchers for one time or infrequent guests.
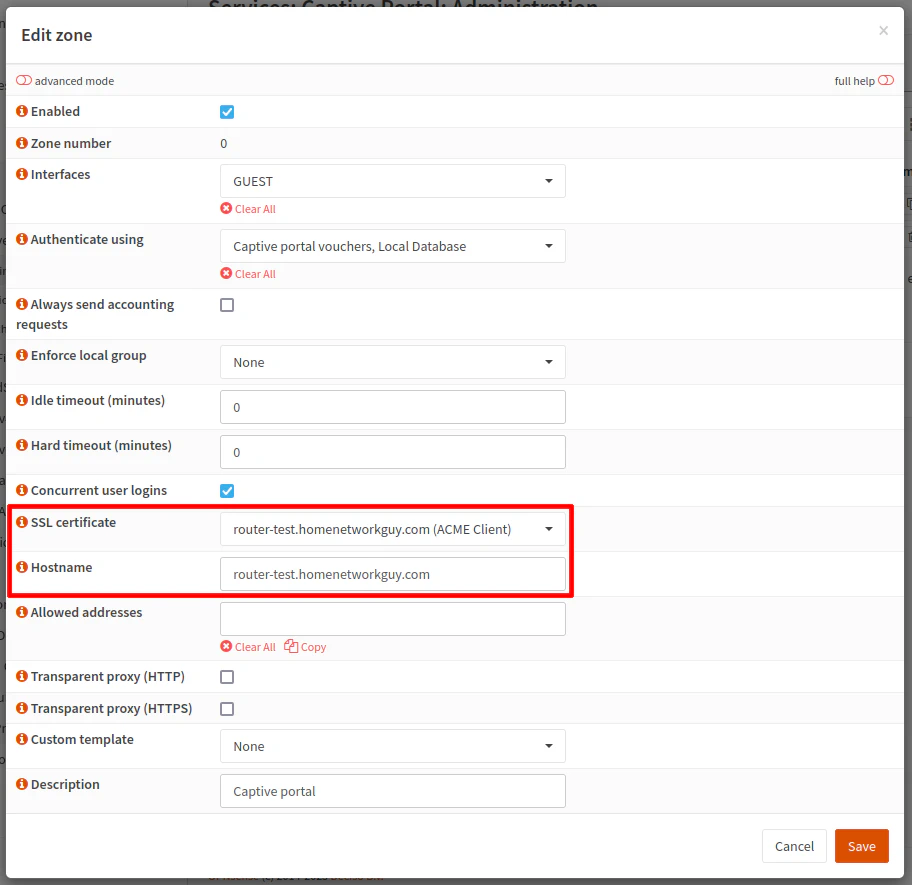
If you created a custom template, you may select it using the “Custom template” option near the bottom of the dialog box. A “Description” is actually required which is interesting since often descriptions are optional in OPNsense. I recommend using descriptions in general since it can be helpful to provide additional context that you may forget over time.
When using the above options, the captive portal page will be served via HTTP which is not the most secure way to serve a login page. For home networks for casual use, perhaps that is ok. You have to weigh the risks. Many of you are security conscience users, so you will likely want to use HTTPS for your captive portal login page.
To set up the captive portal login page to use HTTPS/SSL, you need to select a certificate when configuring the captive portal zone. You may use the default “Web GUI TLS Certificate” or a Let’s Encrypt certificate if you have created one for the OPNsense web UI as I have in my example below.
You will want to enter the “Hostname” which is used for the certificate since it needs to match.
Add Firewall Rule for the Captive Portal
In order for the captive portal to be displayed properly when trying to access the network, you will need to ensure clients on the guest network(s) can access the proper ports on the guest network interface. Just like with any other services listening on interfaces, you will need to allow access to the ports for the service to be reached.
There are a number of ways to create firewall rules so I will assume you have all ports blocked on each of the interfaces except for critical network services such as DNS. I typically have 2 rules to isolate networks: allow DNS on the interface and allow any IPs that are not private IPs access to the Internet (therefore blocking access to other private networks).
In this scenario, you will need to create an additional rule to allow access to the appropriate ports on the GUEST interface. The port range shown as the example in the OPNsense documentation is from 8000-10000:
| Option | Value |
|---|---|
| Action | Pass |
| Interface | GUEST |
| Protocol | TCP |
| Source | GUEST net |
| Source Port | any |
| Destination | GUEST address |
| Destination Port | 8000 to 10000 |
| Description | Allow access to captive portal login |
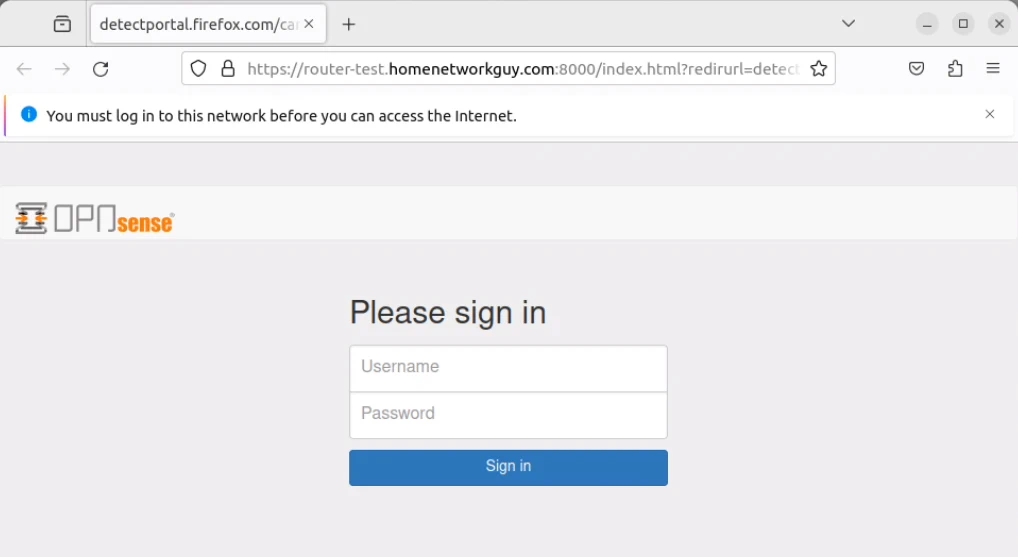
Test Captive Portal Login
All you need to do once you finish setting up the captive portal is to try to access the Internet from a device on your guest network. You should receive a popup with the captive portal login when you connect to the network or you will be redirected to the captive portal login in the browser.
Simply enter the username/password from the local database or a voucher which you have created.
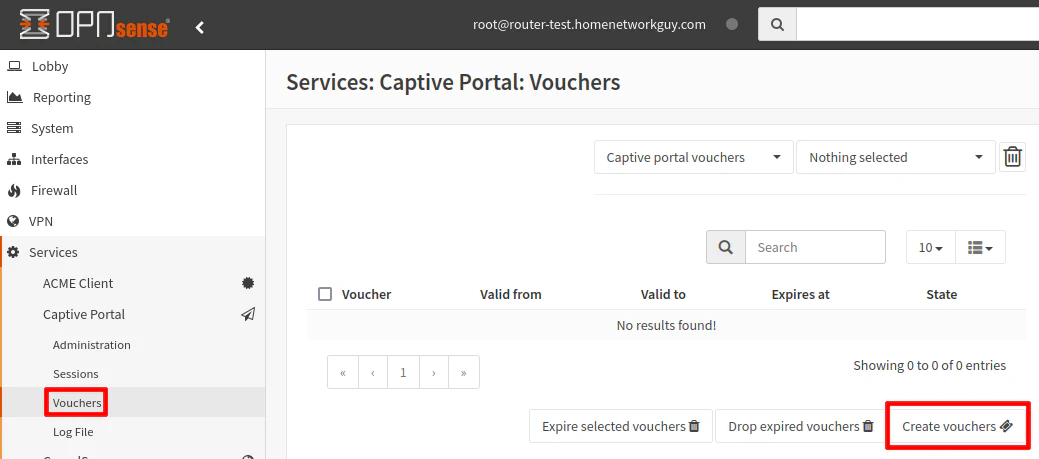
Create Vouchers for Testing
If you are using vouchers, you need to create a few vouchers to test on the “Services > Captive Portal > Vouchers” page and clicking on “Create vouchers”.
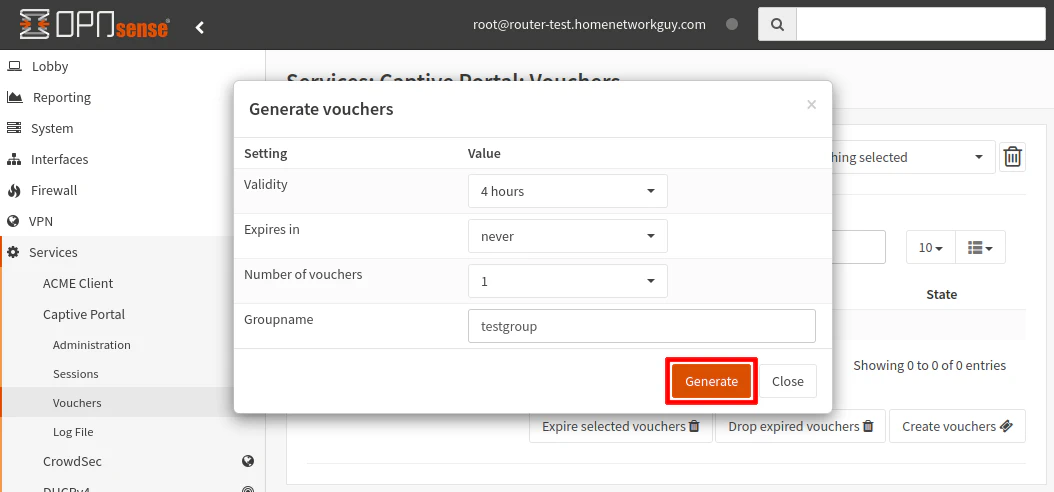
You may choose a value for the “Validity” option to set how long a user has access to the network. The clock does not start ticking until the user has logged in. An expiration may be set as well for the vouchers. 1 or more vouchers can be created at the same time. A “Groupname” may be entered to identify the vouchers more easily.
Click “Generate” once you set the desired options.
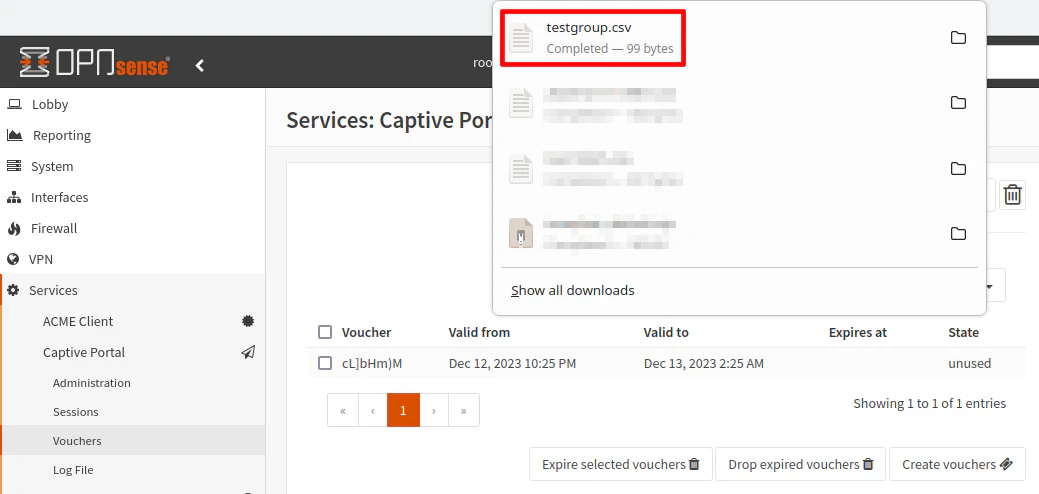
A CSV file will be downloaded. It contains the usernames/passwords for all of the vouchers you just generated. You may use that file to import into some other tool or template which may be distributed to your guests.
Keep in mind that the plain text passwords are not stored on the firewall for security reasons so you will only have them in the downloaded file. If you lose or delete the file, you will need to recreate the vouchers.
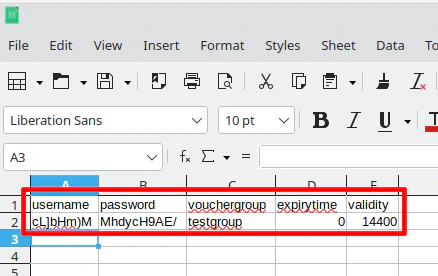
An example of what you will see in the CSV file:
Conclusion
That is all there is to implementing a captive portal in OPNsense! The process is not very difficult especially if you use authentication servers such as the local database and vouchers.
With other authentication servers such as Radius and LDAP, additional configuration will be required to set up the users. However, the configuration of the captive portal will remain nearly the same regardless of the authentication servers that are used.