Remote Control a PC or Server with the TinyPilot Voyager 2a

Table of Contents
Nearly two years ago, I had the opportunity to review the TinyPilot Voyager after I was approached by Michael Lynch, TinyPilot’s (affiliate link) founder. Since the last review, TinyPilot has released a new model, the Voyager 2a, which includes several improvements over the original model.
When Michael offered me the opportunity to review the new version of the TinyPilot, I was excited to check out the new improvements. The 2a model has two different variations: one with Power over Ethernet (PoE) and one without PoE. Since I find using one cable for both data and power to be more convenient and cleaner, I chose the PoE version to review.
Rather than repeat the features which have remained the same, I will focus more on the improvements over the original model. You may take a look at my original TinyPilot review to see more details about all of the software options that are available such as the virtual media feature and how to use that awesome capability.
Unboxing
When you unbox the TinyPilot, you will see the TinyPilot Voyager 2a, a USB-C cable, and a USB-C power cord.
The microSD card should be inserted already, but I took it out so you could see that it is included as well. The TinyPilot Pro software comes preinstalled on the microSD card. I noticed they even branded the microSD card with the TinyPilot logo. Such attention to detail adds more polish to the 2a model.

You will also see a TinyPilot sticker as well as a quick start instruction card.

Speaking of adding more polish to the 2a, the most striking difference with the new model is that the case is now metal rather than 3D printed plastic. This makes the TinyPilot feel much more like a finished professional product (even though the previous version functioned quite well as it was designed).
Rather than have a fan on the top of the case, it is now located on the side as you can see below. Since the PoE version of the TinyPilot will have a PoE HAT in addition to the HDMI capture board, having the cooling blowing from the sides likely has the advantage of cooling all of the layers of this device.

On the other side, you can see the usual Raspberry Pi USB/Ethernet interfaces. You can also see some air vents on the side of the case to help dissipate heat.

The overall footprint is quite a bit larger than the previous model, but I am assuming this may help with cooling and provide more room to include both a PoE HAT as well as the HDMI capture board for the PoE version of the TinyPilot.

On the inside of the TinyPilot, the Raspberry Pi board is located on the bottom. Above that, you will see the PoE HAT for the PoE version of the TinyPilot. In comparison, I do not know what the non-PoE version looks like inside. You will see connections for the fan as well as the HDMI capture board.

The HDMI capture board is mounted underneath the top of the case. I did not want to remove the display ribbon cable to get a better picture because the ribbon cable is so short. I was afraid that I would struggle to get my finger inside the case to hold down the ribbon cable while I insert the black plastic piece to hold the cable in place.

Connecting the TinyPilot to the Remote System
Connecting the TinyPilot Voyager 2a to the system you wish to control remotely has become a bit cleaner than the original model. Less cabling is always a welcome improvement in my opinion.
In the image below, you can see the original TinyPilot and all its cabling. Notice that there is a small splitter with a power switch connected to the USB-C port of the TinyPilot. The splitter is used to separate the data and power cables. The data cable is connected to the PC you wish to control (the Gowin R86S in my example).

If you have the PoE version of the new TinyPilot, the cabling difference is much more pronounced. There is no need for the splitter box because there are now two separate USB-C ports built into the case of the TinyPilot. Also, there is no need for the power cable.
Only three cables are required: the USB-C and HDMI cable connected to the device you wish to control and the Ethernet cable. That is all. The cabling is much cleaner overall, which is especially important if you have a full server rack with a lots of cables running everywhere (like I do).

Otherwise, if you have the non-PoE version, you will need one more cable for power. Overall, it is still cleaner than the original but not as clean as having PoE, of course.

Logging into the TinyPilot
By default the hostname of the TinyPilot is tinypilot so you should be able to navigate to https://tinypilot to access the web interface.
Software Improvements
Besides the physical design improvements of the TinyPilot, there have been several noteworthy software improvements since the initial release.
On-Screen Keyboard
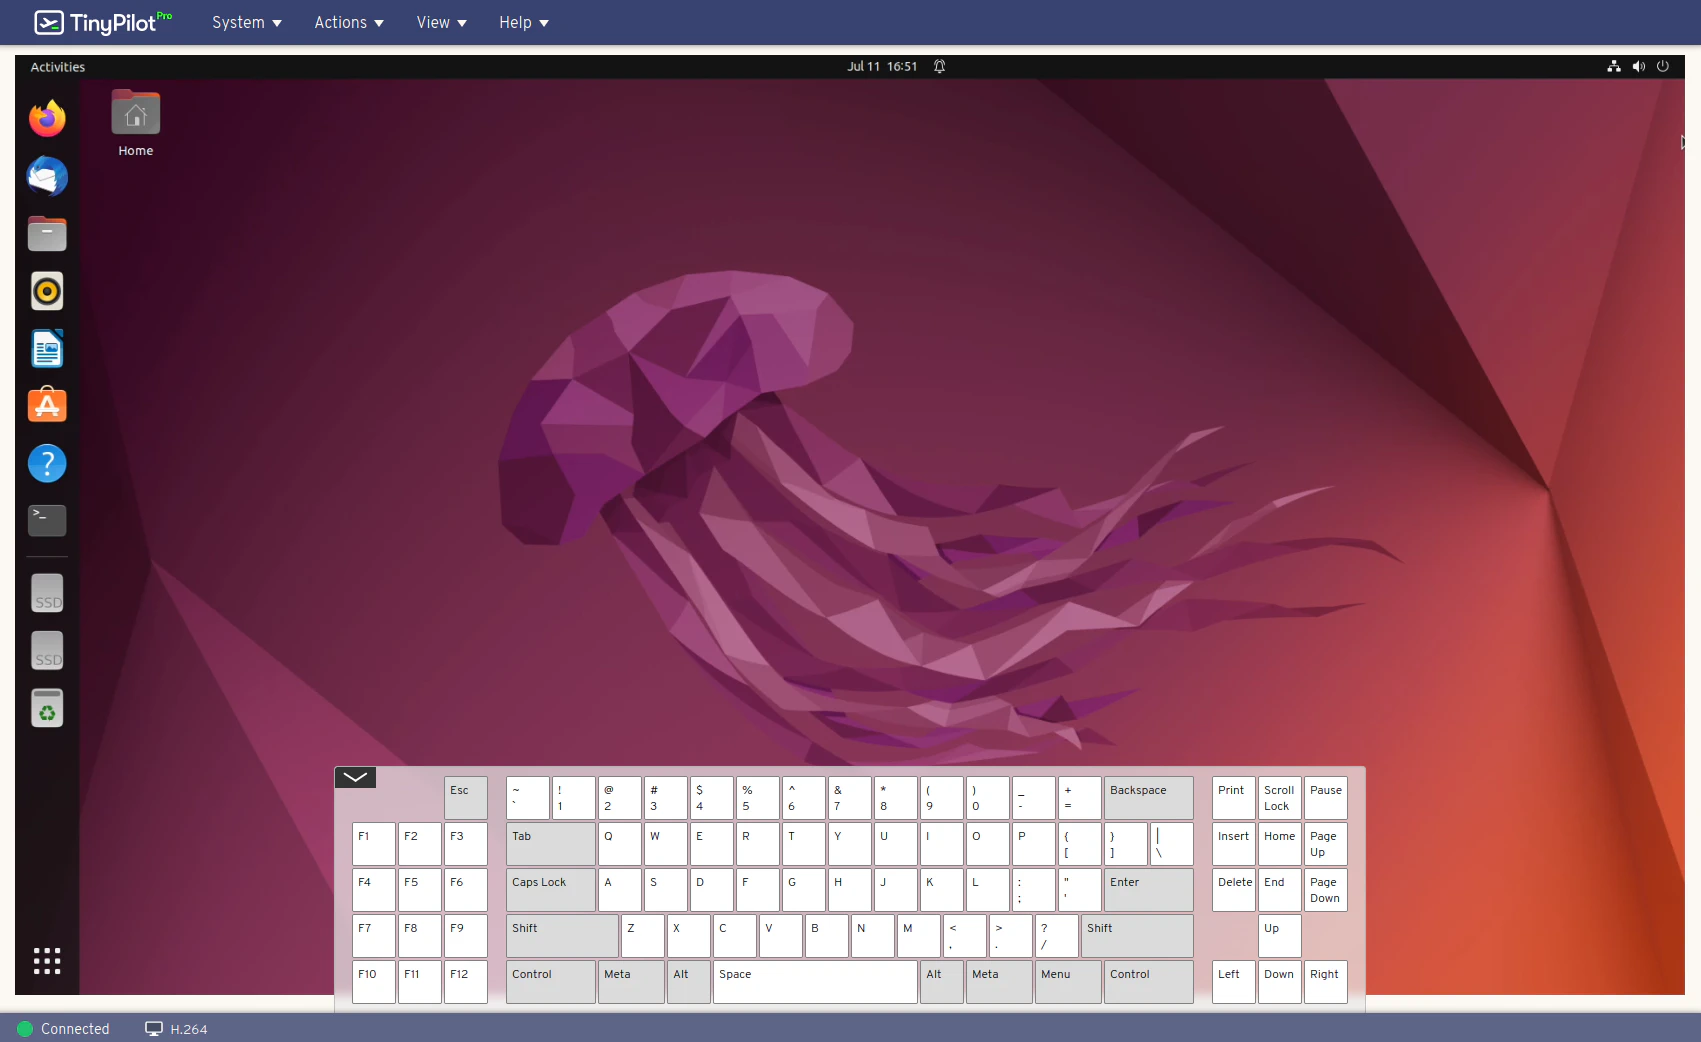
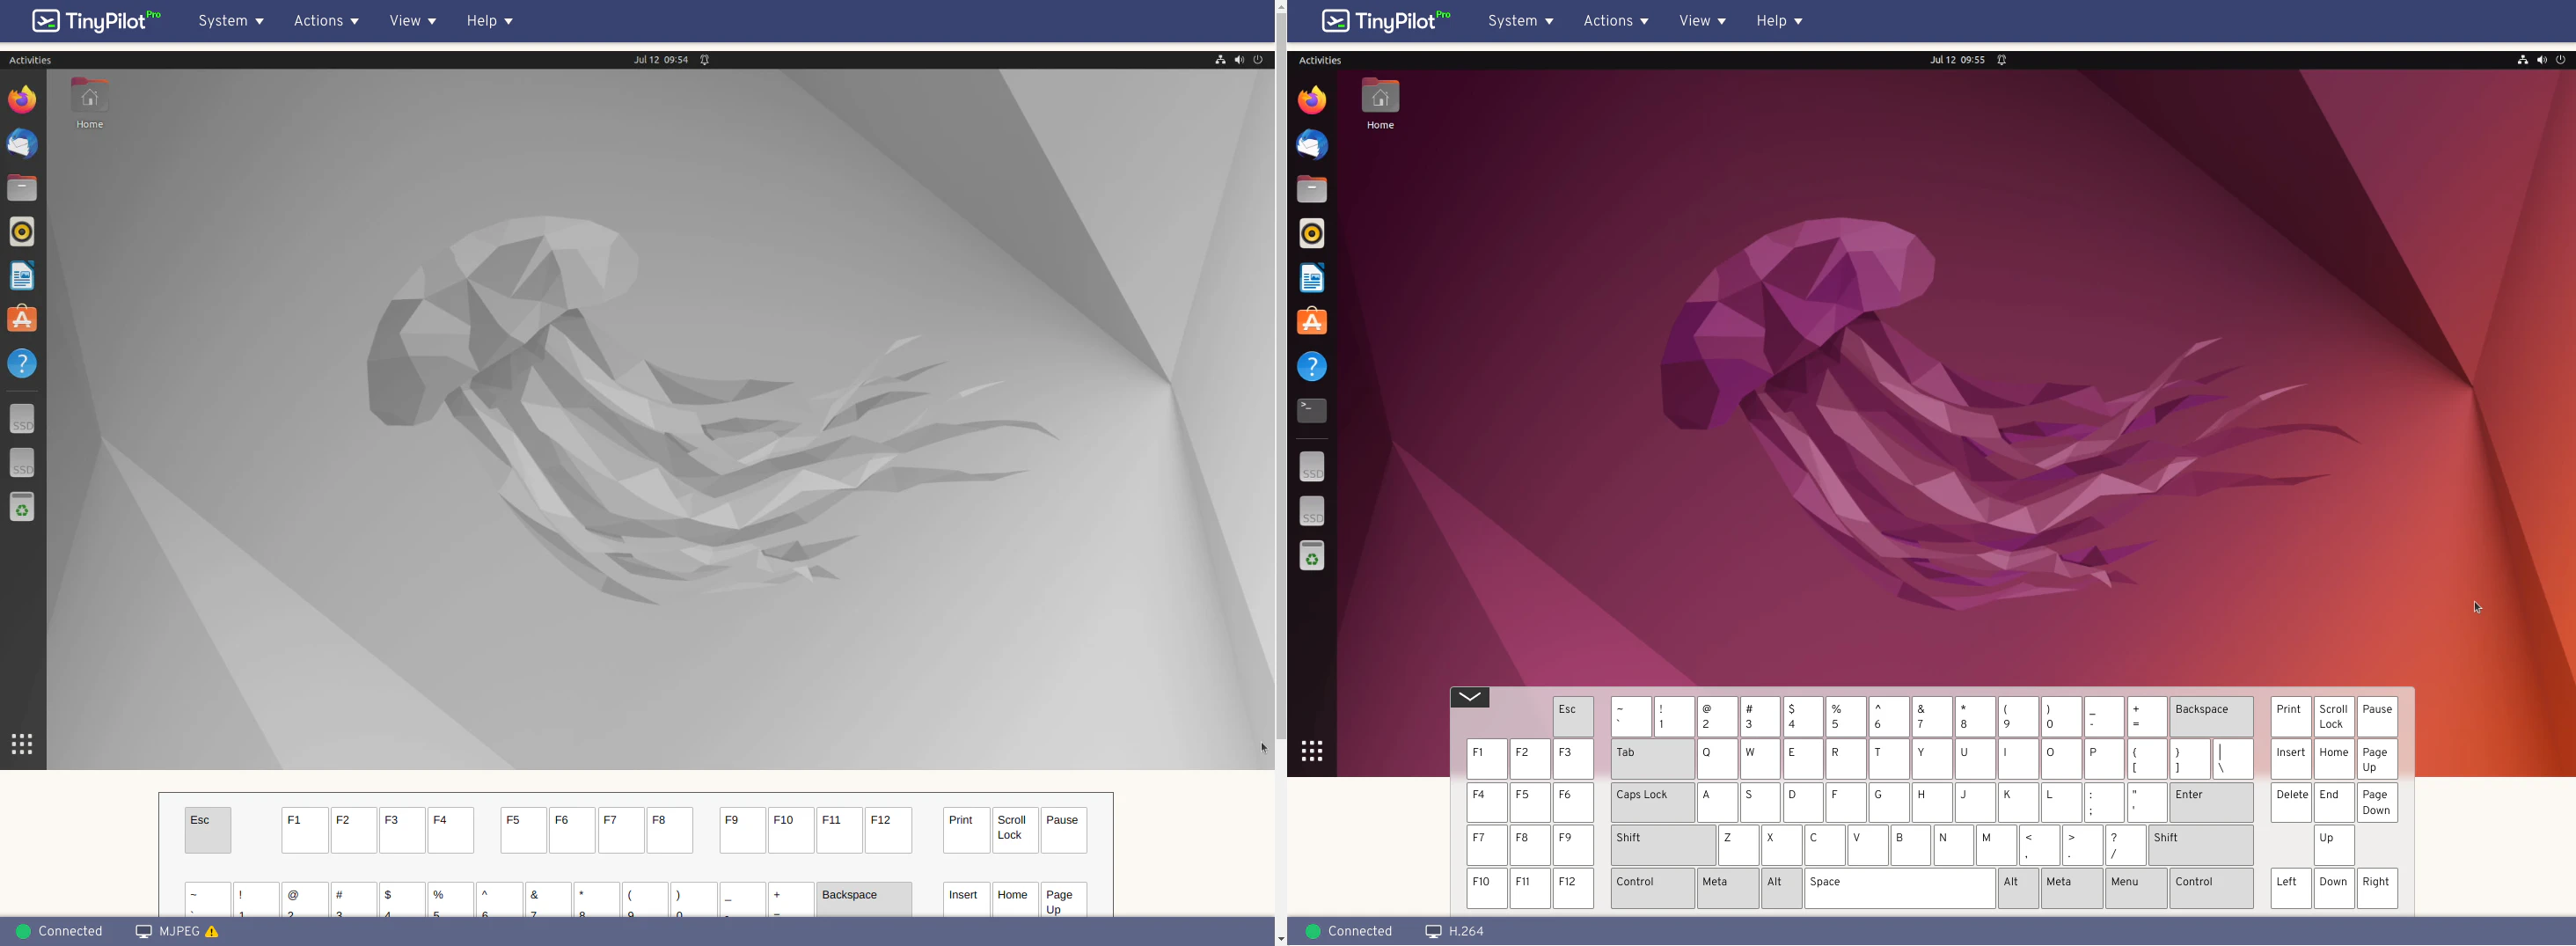
One of the software improvements is the on-screen keyboard. In the older software versions, the keyboard was displayed below the screen output so you had to scroll down the webpage to see the keyboard as you can see in the screenshot below.
With the new version, the on-screen keyboard stays at the bottom of the screen so you do not have to scroll. It does mean it can block some of the screen (unless you have a higher resolution monitor). Fortunately, you can hide the keyboard when you are not using it.
However, I do wish that there was some sort of button that can be clicked to bring back the keyboard because you have to scroll up to the “View” menu to click the “Show Keyboard” option to bring back the keyboard, which is not as convenient as it could be.
Audio Streaming
Audio streaming is a great addition to the Voyager 2a. This feature update is not only a software update, but it requires the hardware that is included in the 2a model. The original version of the TinyPilot is not capable of capturing audio, unfortunately.
For system administration, audio may not be most important feature, but it may be nice if you are either using the TinyPilot as a remote desktop alternative or perhaps you just want to watch a YouTube video on the remote system (perhaps a how-to video, haha).
Note
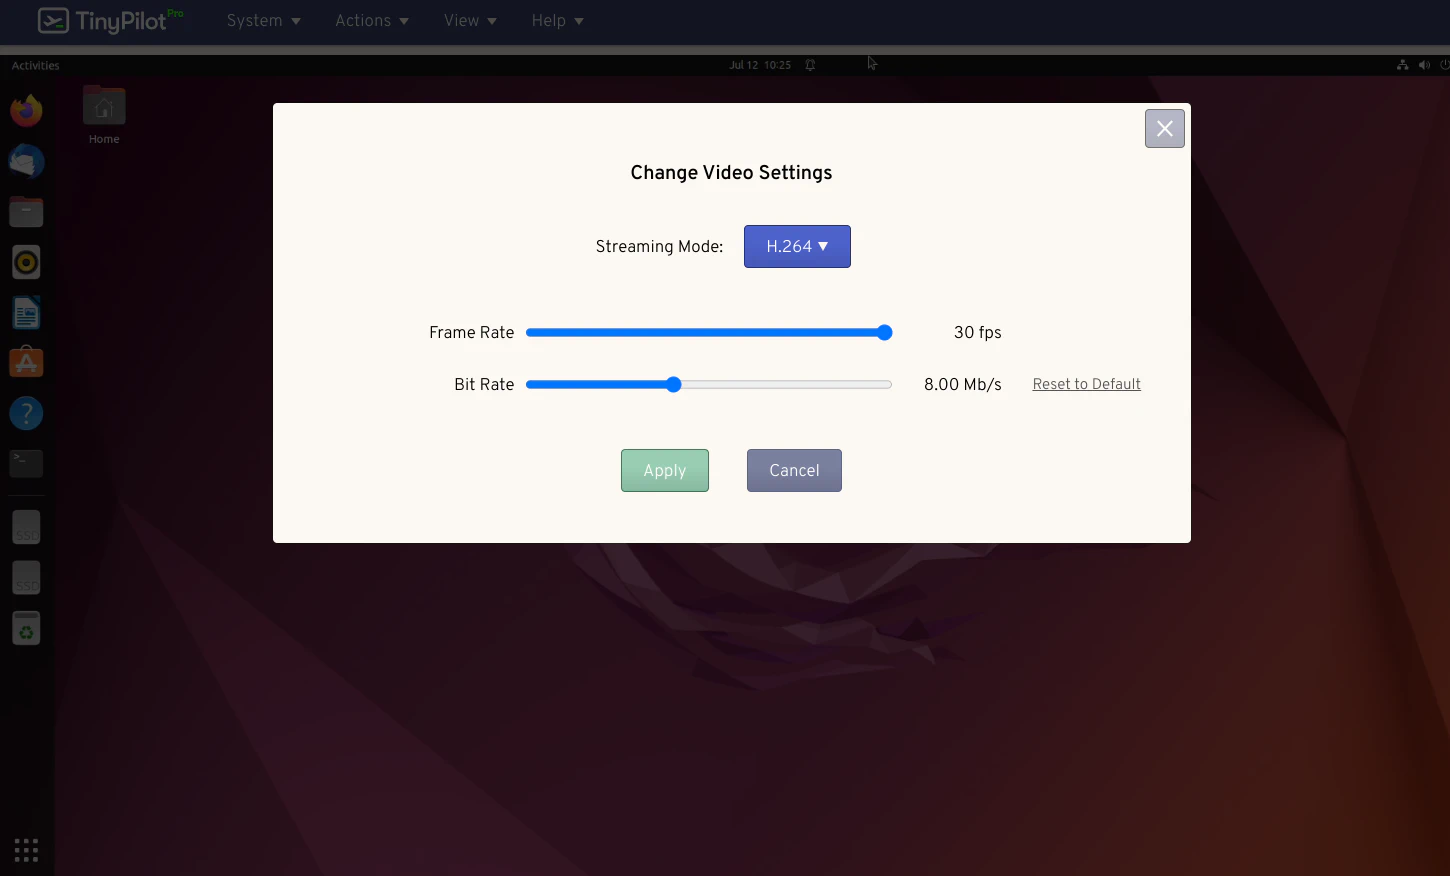
The audio streaming feature requires you to use H.264 encoding for the video streaming mode under the “Video Settings” options.
Faster Update Process
As mentioned on the TinyPilot’s blog post, the update process has been optimized to be smaller and faster. Since the Raspberry Pi uses microSD cards for storage, the performance is not the best for disk reads and writes.
A more streamlined update process means a very noticeable impact to the update times. The blog post stated the update time used to be around 8 minutes but now it is 40-45% faster so For businesses that may be using many TinyPilot devices, that is likely even more important to minimize downtimes due to updates.
Reduced Disk Writes
The TinyPilot team has also worked to reduce the number of writes to the microSD card which is important to extend the life of the card. MicroSD cards are notorious for dying if too much data is written to them. They were not designed for longevity like with solid state storage like SSDs or NVMe drives.
Nearly a 50% reduction in writes is impressive and should go a long way to ensure the microSD cards last a lot longer before needing replaced. Fortunately,
Where to Buy?
If you are interested in purchasing the TinyPilot Voyager 2a, you may visit the TinyPilotKVM website to purchase the TinyPilot Voyager 2a (affiliate link) . I appreciate the support since it helps me to keep me going!